
Smoked Trout Dip
On November 7, 2023 by Christy LarsenOne evening this summer Mike and I found ourselves in a fancy hotel bar hungry and slightly bent on strong cocktails. We had hit the bar too early for supper and too late for lunch. The bartender offered to wrangle up some smoked swordfish dip from the restaurant next door. Hazy and hungry we thought it a capital idea.
One year, well before the millennium, I spent some months working and living in a beach community in North Carolina. It seemed every restaurant had an award winning crab dip recipe they were eager to highlight. I fell for it every time but never was all that impressed. With that in the back of my mind, I was pretty sure, the fancy bar swordfish dip was going to be more of the same heavy on the mayo, scorched under the grill, molten cheese fonduta. Not complaining, but low expectations.
I was wrong. Dead wrong. It was delicious and haven’t stopped thinking about it yet. Fast forward a few months and I was presented with a similar made with smoked trout. Light on the mayo, served chilled with salty crackers it rang a bit different than the swordfish, but just as delicious. At the New Year I thought it time to crack on with coming up with my own version of a smoked fish dip.
What I like about this dip is that it isn’t “dippy”. The fish is the star of the show and keeping it in larger chunks with a light hand on the “dressing” keeps this on the lighter (and dare I say) healthier side. Measurements are approximate. Guide yourself on your personal taste…and in order to do that, you need to taste as you go. Be warned, smoked fish can be very salty…keep that in mind as you add ingredients that may also be salty. The creme fraiche in this recipe will help tame the brine, but if you taste as you go you can help mitigate having to play the balance game.
If you use a tinned fish packed in oil, draw off as much of the oil as possible, but don’t worry about blotting the fish. Some oil is fine and will add a nice touch to your dip. If you are using refrigerated fish, make sure, when you pick it, that you discard any of the pin bones and skin.
Smoked Trout Dip
8 oz smoked trout–picked through and left in nice-sized pieces
1/4 cup celery–minced
1/4 cup green onions (white and light green parts)–minced
1/8 cup finely chopped parsley
2 Tbs chopped chives
zest from 1/2 lemon
For Dressing
2 Tbs prepared horseradish
1/4 cup mayo
1/4 cup creme fraiche
2 Tbs pickle juice
1/2 tsp garlic powder
1/2 tsp onion powder
1/4 tsp paprika
1/4 tsp white pepper
3-4 shakes green tabasco (more to serve)
Pick through the trout discarding skin and any pin bones you may find. Drop into a bowl. Add the celery, green onion, parsley, chives, and lemon zest. Lightly stir to not “mush” up the fish. In another bowl, whisk the horseradish, mayo, creme fraiche, pickle juice, garlic powder, onion powder, paprika, and white pepper. Taste. Add a couple of shakes of the green Tabasco. Taste and adjust. Being prudent, add to the fish in increments. You only want enough dressing to coat the ingredients well, not drench them. If you have dressing left, it makes a nice sandwich spread (more on that in a minute).
Pop in the refrigerator for the flavors to meld and chill. Best eaten on the day it is made and tastes delicious on simple saltine crackers. Serve with (green) Tabasco.
Will last another day or two in the refrigerator.
If you like a hot melty sandwich, any leftovers of this will do right by you. Use any leftover dressing as a sandwich spread. If you don’t have any left, a good dollop of mayo will do. Pile with trout dip, top with a nice melty cheese like Gruyere, pop it in the oven until it is hot, the bread is crispy, and the cheese is just threatening to roll off the mound. Sling a few shakes of the Tabasco and thank me later.
Pressing Cider
On October 13, 2023 by Christy LarsenThe small suburb of Los Angeles where I spent my youth was a bedroom community with nice plots and manicured front lawns. Children were everywhere and we all seemed to be just about the same age. Most everyone was a transplant from the East or Midwest, so to stave off suburban boredom, our moms would conspire; making plans for treks to the beach, the mountains, the desert, museums, theme parks, and everything in between. A favorite place which was annual event (including the time I had a terrible toothache and was being melodramatic in the back of the station wagon) was what we called Apple Country. It has been over 30 years, but I’ve been chasing the memories ever since.
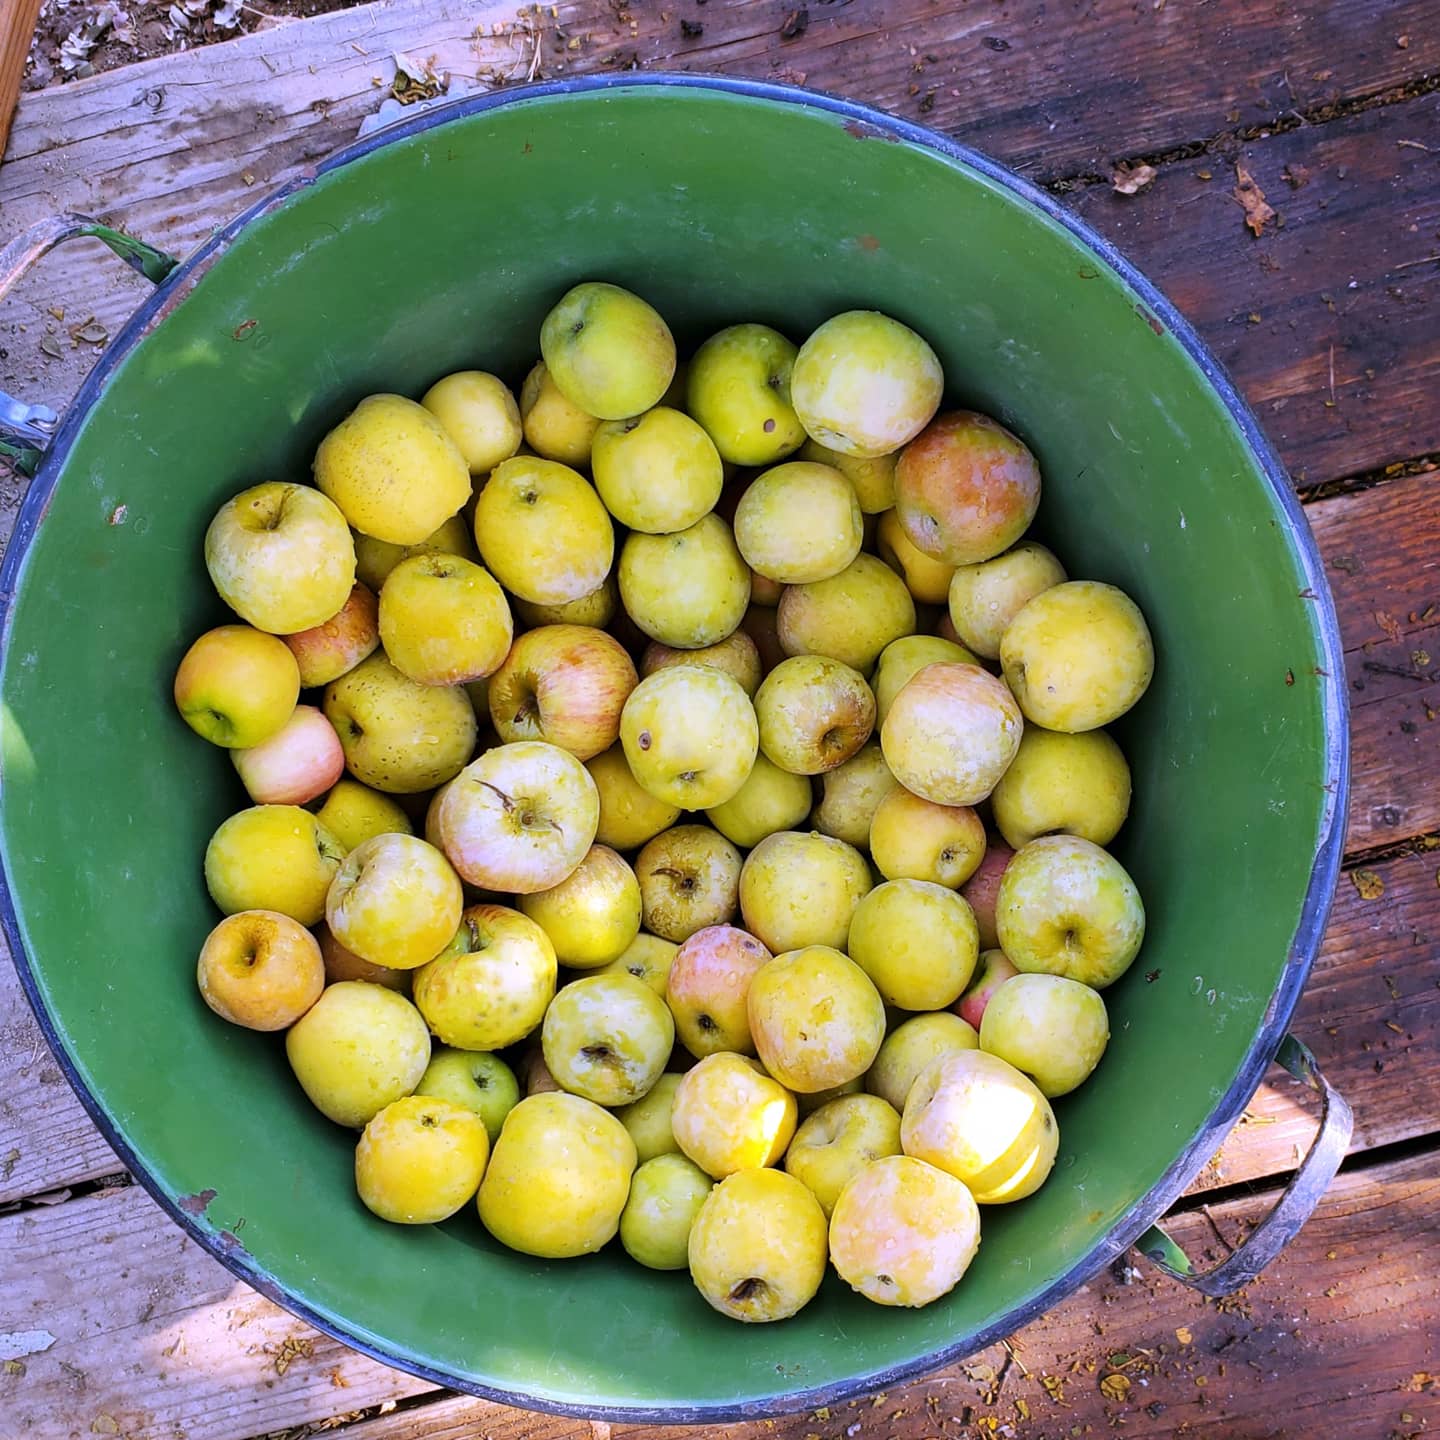
I am someone who cannot resist (and why should I?) a long country road, a farmstand, or a run-down shack with a hand-lettered sign selling ANYTHING. If it is open, I’m stopping; apple farms included. Freshly pressed cider and warm donuts made with it is a fall treat that everyone should be so lucky to come upon.
We are not an apple farm. We grow apples, but none more than to press for our use and to make the odd batch of donuts or two. Sometimes our neighbors will off load a few tons of fallen fruit for us to feed our pigs; and truth be told we skim off the mildly bruised and press those into juice as well. We have our own small press and it is a handcrafted machine that I, with just a few hours of bending, twisting, and turning, can turn a dozen pecks of apples into gallons of cider. We pull it out Mid-October, and return it to storage by Thanksgiving.
While the act of pressing cider isn’t quite as magical as an outing with neighbors eating apple pie, donuts, ice cream, butter, and cider made by someone else’s hand without any concern of calories or affect, it brings me joy. Through the course of fall, I will make all of the things and I will eat all of the same; just not in one sitting.

Old-Fashion, Old-Fashion
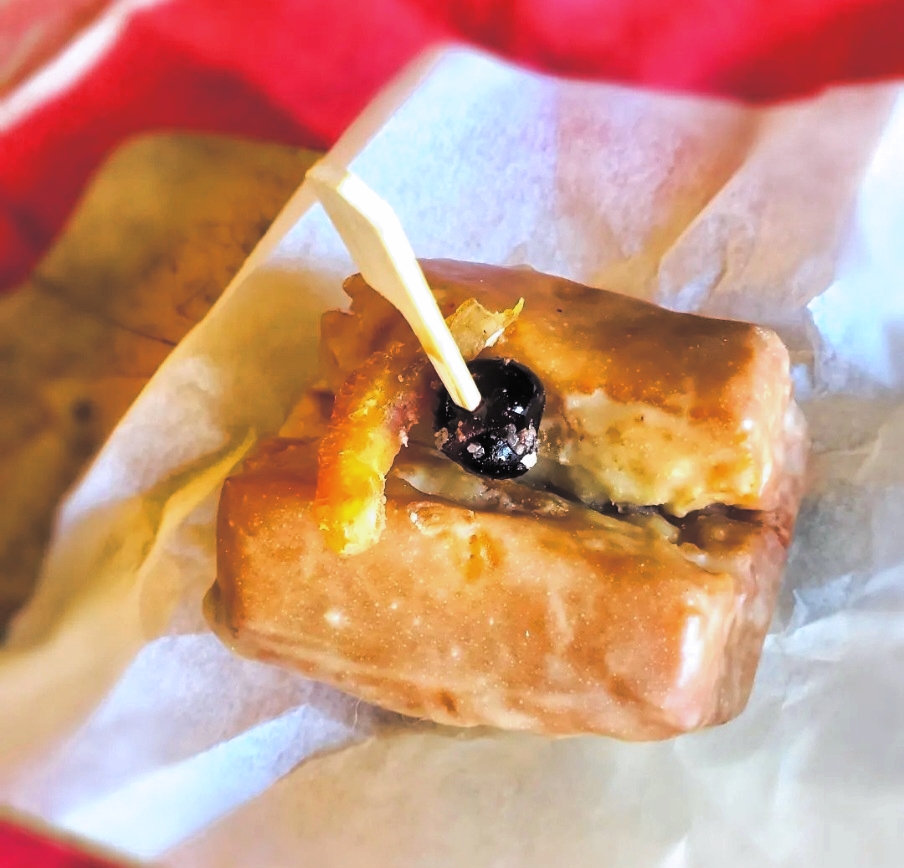
On October 11, 2023 by Christy LarsenWhere a rye old-fashioned donut meets the classic cocktail
Listen, I am a donut person. As a self-proclaimed donut person, I can, with much authority, tell you that not all donuts are equal. You can line a path with warm raised, and I could easily crawl through, nose to the ground, without even stopping for a sniff. Switch them out with buttermilk bars, glazed old-fashioneds, even a jimmie-covered cake, and I’ll have crumbs in my hair within minutes.
#noregrets
The old-fashion cocktail has been having its moment lately, and its flavor profile quite nicely translates to the sweet side. Use a nice rye and fancy cherries to up the snob factor.
Old Fashion Donut
1/2 cup pumpernickel rye flour–toasted
2 3/4 tsp baking powder
1/4 tsp baking soda
1 1/2 tsp kosher salt
3/4 tsp ground nutmeg
4 Tbs unsalted butter-melted
1/2 cup packed dark brown sugar
1/2 cup granulated sugar
2 Tbs rye syrup (see note)
1 large egg
3 large egg yolks
3/4 cup buttermilk
Mix the dry ingredients: flour, baking powder, baking soda, salt, nutmeg and set aside. In a stand mixer, using the paddle attachment, beat the butter and sugars until fully incorporated but not yet fluffy. Beat in the egg, egg yolks, and rye syrup and mix until they lighten. Add the flour and buttermilk alternately, beginning and ending with the flour. Scrape from the bowl onto a lightly floured workspace. Form into a square, wrap in plastic, and place in the refrigerator to rest for at least 1 hour or as long as overnight.
When ready to make the donuts, remove the dough from the refrigerator onto a lightly floured surface. Dust the top with flour and roll out to 3/4″. Cut into bars. Using the back of a knife or a bench scraper, make a deep line down the length of the bar, careful not to cut all the way through. Place back into the refrigerator until ready to fry.
Place enough oil in a heavy pan to at least 2″. Heat oil to 325F. Remove the dough from the refrigerator and fry in small batches, remembering that the cold dough will reduce the oil heat. Let the oil come back to temperature between batches. Fry for about 2-3 minutes on each side. The internal temperature of the donut should be 185-190F. Place on a cooling rack. Dip in the old-fashioned glaze.
Once the glaze is hardened, decorate with amarena or luxardo cherry and candied orange piece.
Rye Syrup
1 cup rye
1/4 cup (or so) candied orange peel
2 Tbs lemon-lime soda (optional)
Pour the rye and soda into a saucepan and add the candied orange peel. Heat over low heat for a minute, turn off the burner, and light the liquid on fire. Let the flame go out naturally. Remove the orange peel and place it in a dish of granulated sugar. Coat and use to decorate completed donuts. Use in donut dough and glaze.
Old Fashion Glaze
3 cups powdered sugar
1 Tbs tsp agar agar*
3 shakes of Angostura bitters
few drops of Fiori di Sicilia or a bit of orange zest
rye syrup
Place the powdered sugar and agar agar (if using) into a bowl. Add the Angostura bitters and the flavoring (and/or zest) and mix well. Add enough rye syrup to make a glaze slightly thinner than heavy cream.
*I use agar agar for my powdered sugar glazes as it hastens the hardening of the glaze. It can be an allergen, so use it with caution.
My Summer Kitchen
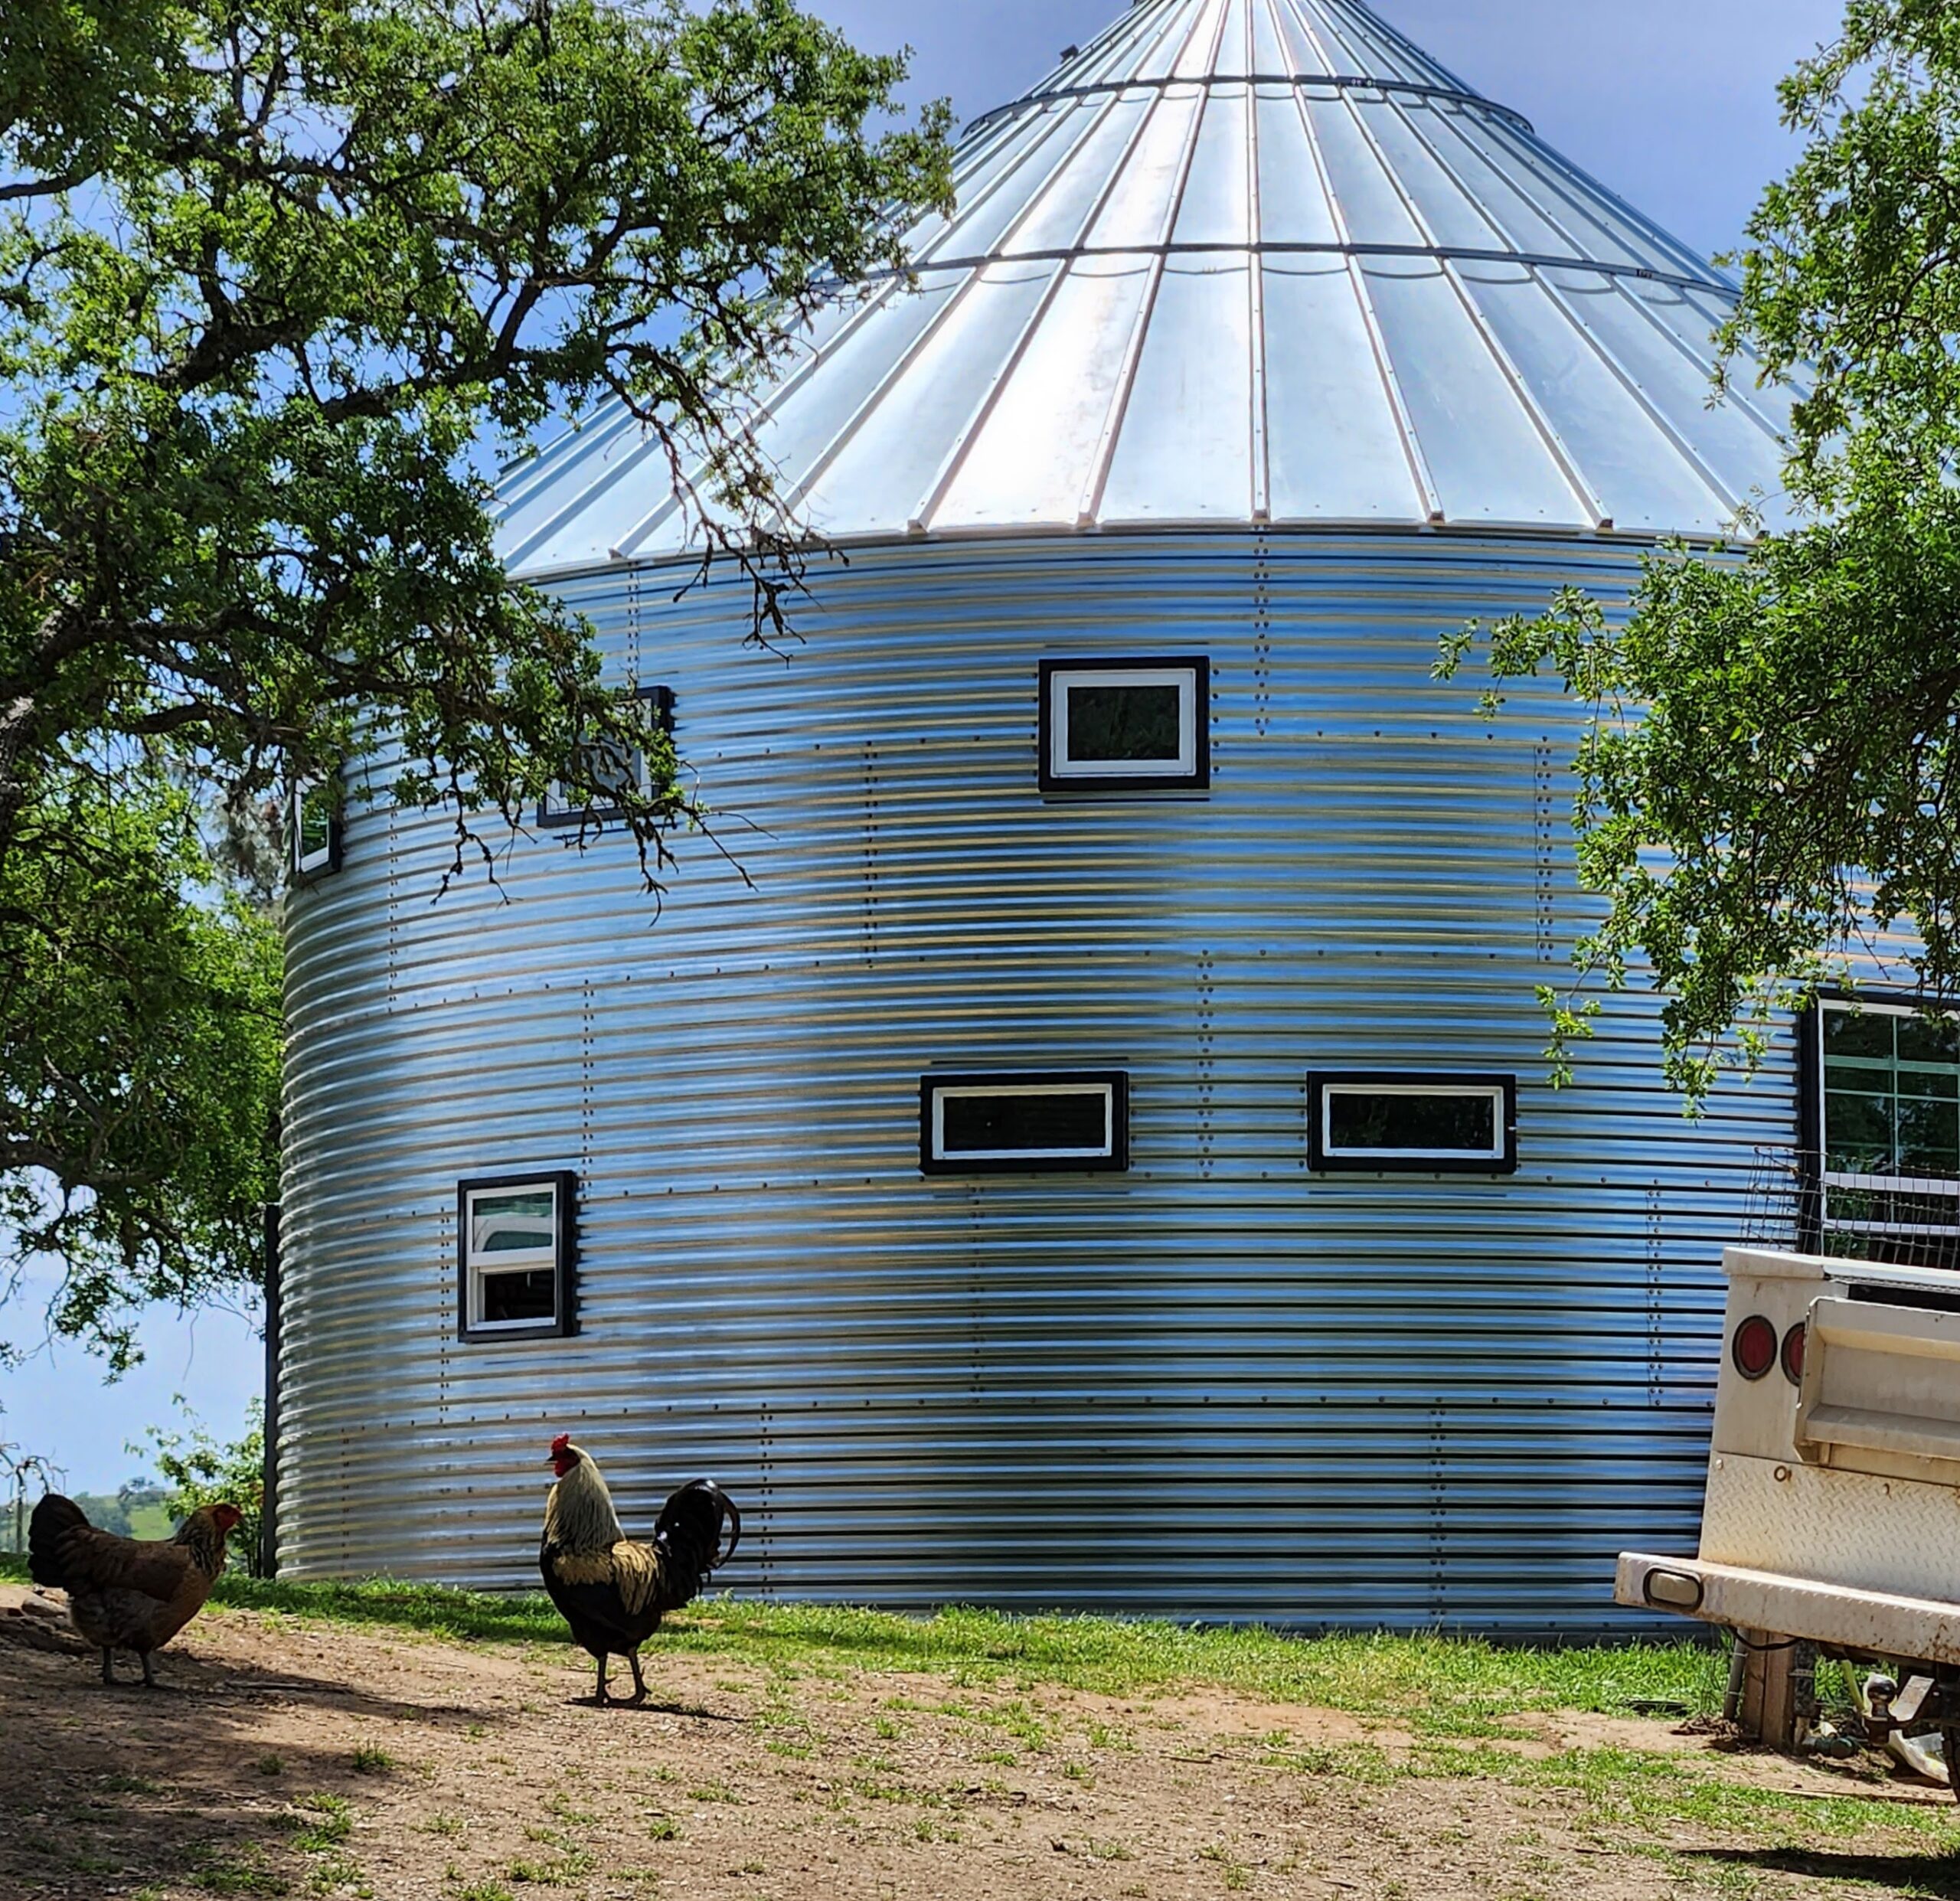
On September 12, 2023 by Christy Larsenturning our orchard silo into a creative space
I’ve long been obsessed with the idea of having a summer kitchen a place for baking, preserving, canning, and communing. Our ranch home is very small, and the kitchen is packed to the gills with ingredients and appliances. Counters and shelves are lined with fermenting crocks, pickling jars, stacked wooden bowls, and herb bundles randomly hanging from every available space. However, instead of witchy or charming, it comes off as untidy and cluttered. Instead of doing a full kitchen remodel, we’ve found the solution in a summer kitchen
In about 5 months’ time, this iconic farm staple will house a full kitchen and be my sanctuary on this beautiful property I call home.
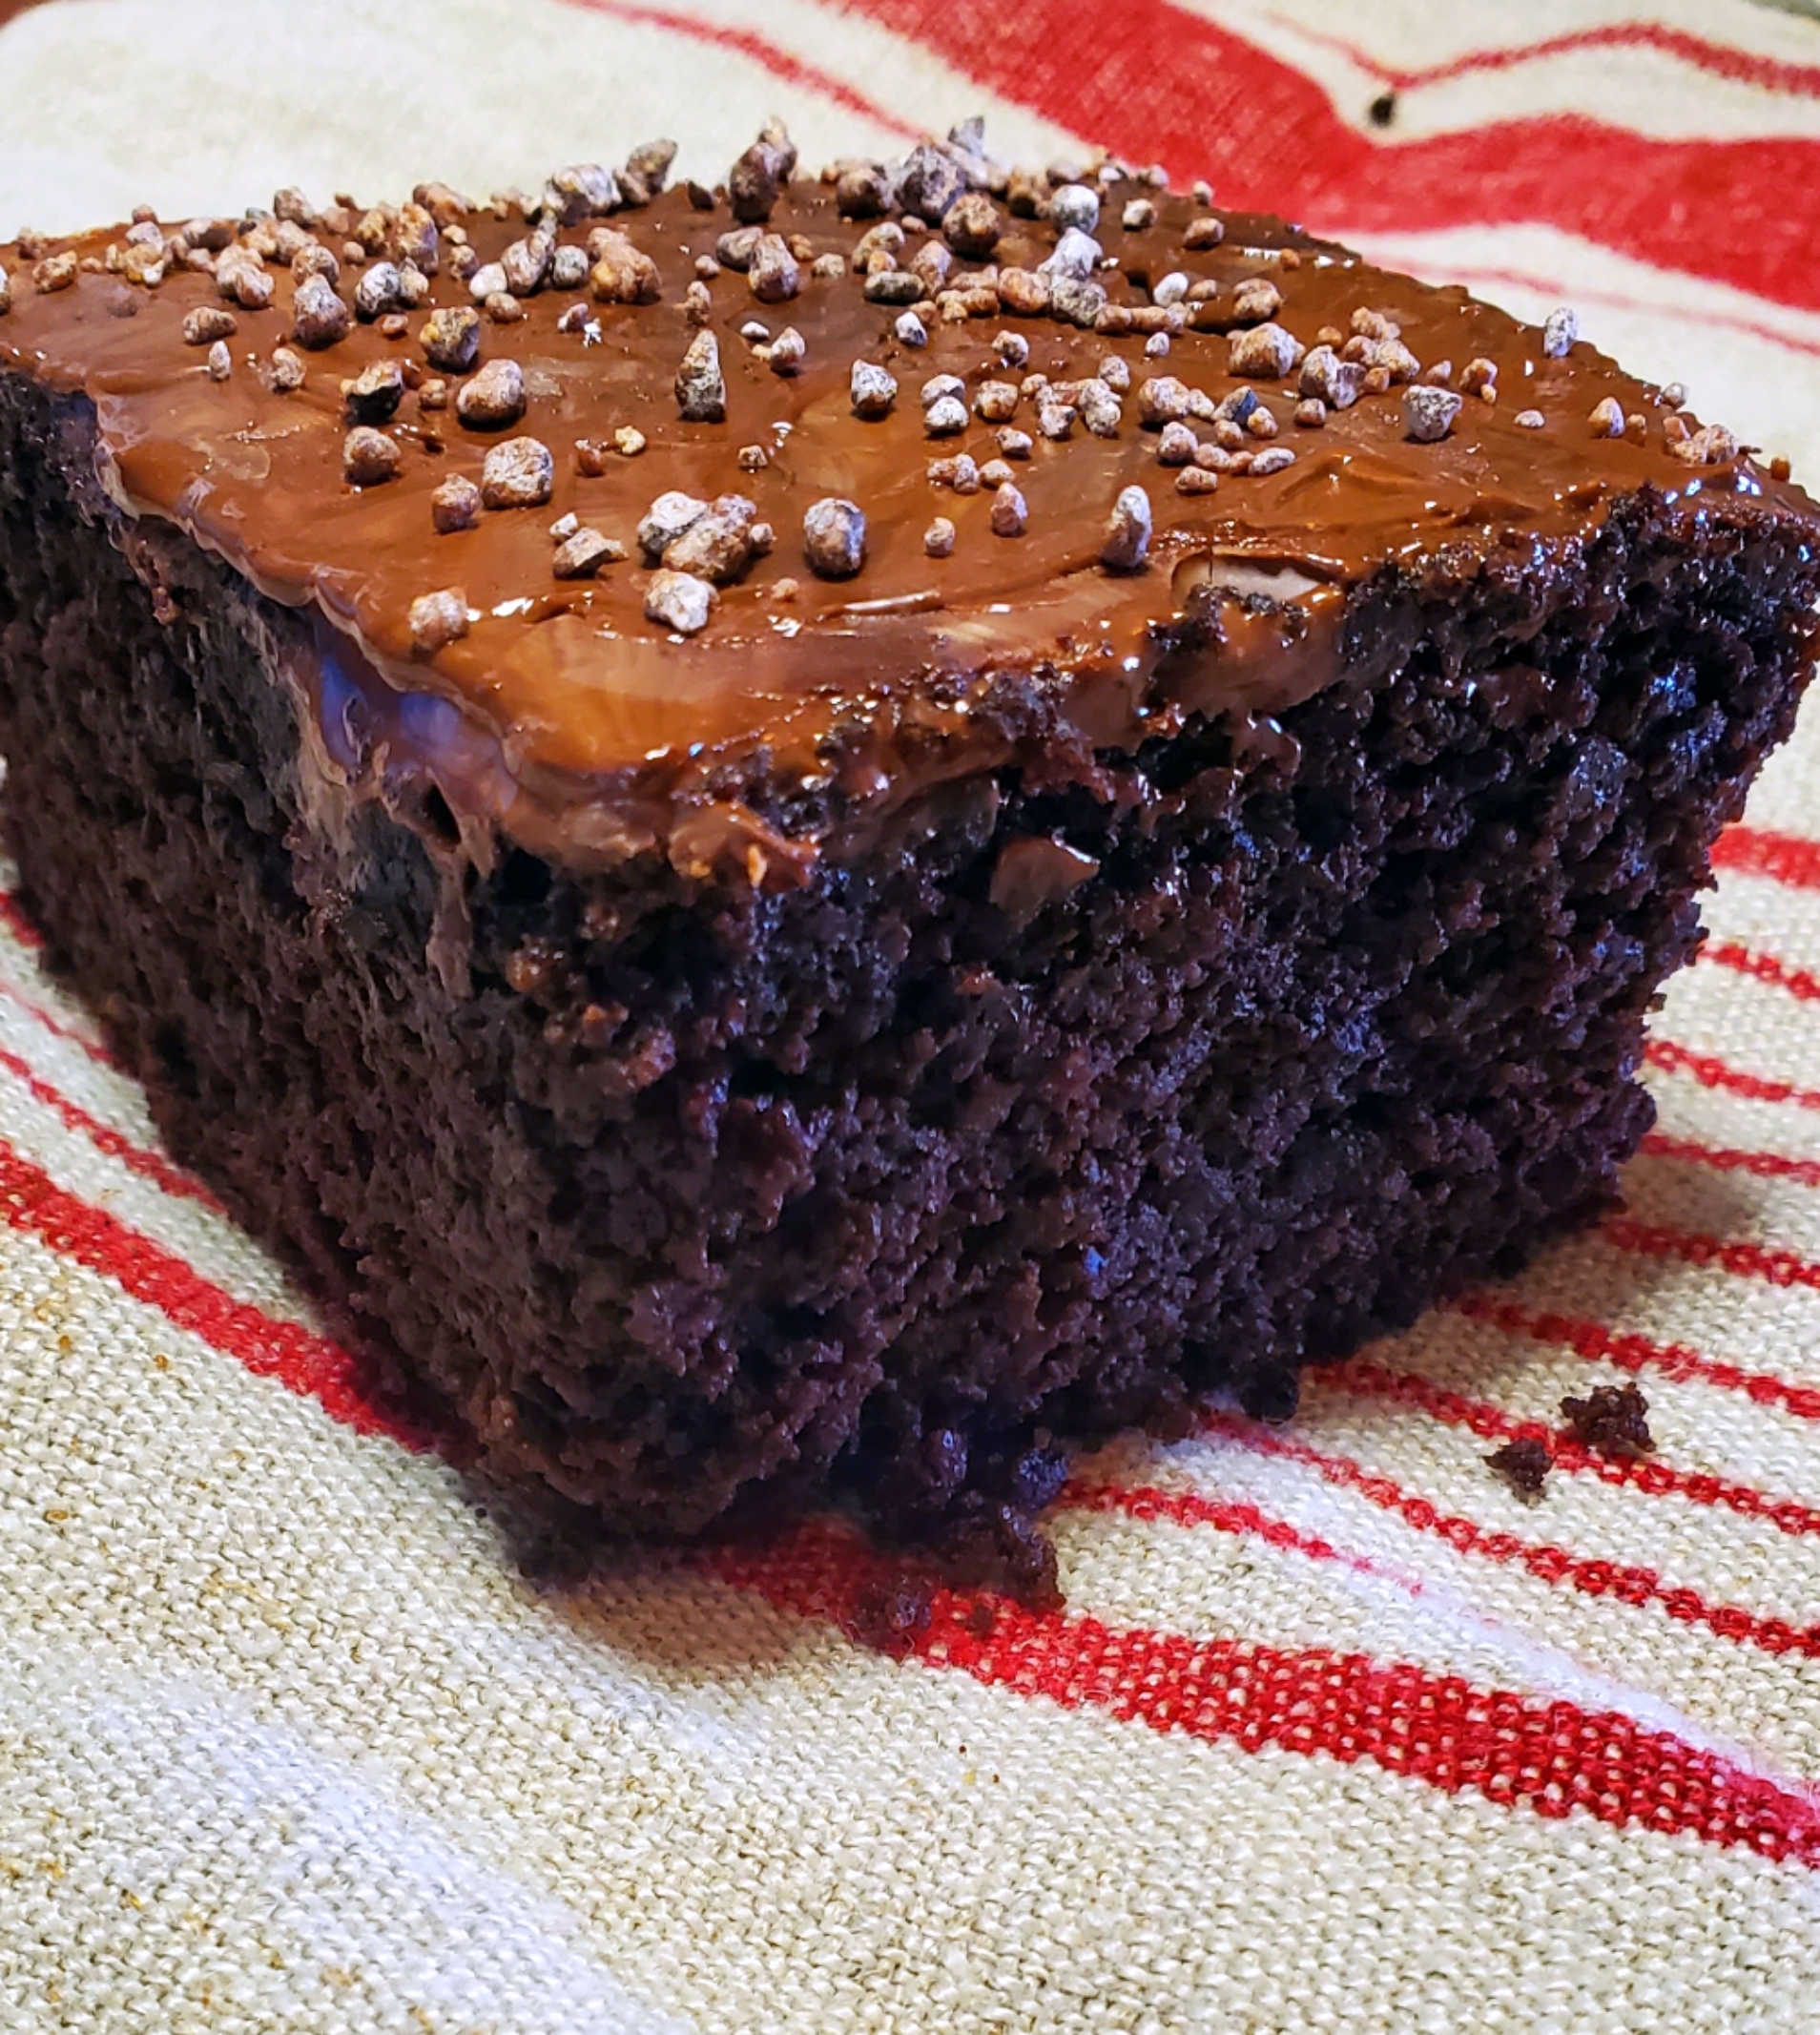
Pumpernickel-Rye Chocolate Snacking Cake
On April 3, 2022 by Christy LarsenI shouldn’t be snacking on cake. I should be snacking on 5 almonds and maybe {on my birthday} an apple with a piece of cheese. Cake? Not so much. But I am, and you can too!
As a baker and someone who loves to experiment with food, I have a lot of different types of flour in my pantry. That’s the good news. The challenging part is that flour does go bad; and the less processed, the quicker that happens. I find myself with quite a bit and varying types of rye flour right now. It makes great bread, and as it turns out, it adds incredible depth to other baked goods.
I found a simple recipe on the NY Times website by Melissa Clark for a chocolate cake with a citrus glaze. I grabbed the recipe and made very slight changes to it. I swapped the flour, exchanged full-fat yogurt for sour cream, and ignored the part where it said to use a flavorless oil…I only have lard and olive oil in my kitchen, so I used olive oil that is slightly forte. I also omitted the vanilla…mostly because I forgot, but I really didn’t miss it. Let’s make it optional.
I also changed up the icing; which I regret a wee bit. This cake would definitely shine with a bit of citrus. It would also shine with a simple dusting of powdered sugar, or a dollop of unsweetened whipped cream. Right now, as I enjoy my second slice of the day, I’m thinking a swipe of orange marmalade would be an amazing co-star. You can get nine generous {12 reasonable} slices out of this 9×9 cake, so try all adornments–ooh–what about sour cream with a bit of brown sugar stirred in and some sliced strawberries in a decidedly grown up “shortcake”.
Make this, then tell me all about it
Pumpernickel-Rye Chocolate Cake
Prepare a 9×9 cake pan by spraying with pan spray, lining with parchment, and spraying again. Set aside and preheat your oven to 350F.
1/3 cup olive oil
2 oz bittersweet (63% or higher) chocolate; chopped
6 oz hot strong coffee
2 large eggs
1 tsp vanilla (optional)
1/3 cup plain (full fat) greek yogurt
3/4 cup pumpernickel-rye flour; toasted
1/2 cup cocoa powder
heaping 1/4 tsp table salt
1/4 tsp baking powder
1/2 tsp baking soda
Pour the hot coffee over the bittersweet chocolate and stir until melted. If chocolate does not melt completely, pop into the microwave to heat it up a bit more. Pour into a mixing bowl and whisk until completely amalgamated. Let cool slightly (can still be warm, but not hot) and whisk in oil, eggs, yogurt, and vanilla if using.
*toast the flour. Place flour into a dry skillet over med-low heat. Stir continually, careful not to burn until it is slightly toasted. Do not let it brown, let it just start to turn color. Remove from heat and whisk in the cocoa powder, salt, baking powder, and baking soda.
Whisk the dry ingredients into the wet ingredients until smooth. Pour into prepared pan and bake in preheated oven for 25-35 minutes.
For chocolate bar topping:
Sprinkle milk, bittersweet, or a combination of the two chips over the top once removed from the oven. You can also just lay chocolate bars over the top and allow them to melt on top of the cake. Allow to melt, then simply spread until cake is covered. Sprinkle with caramelized cocoa nibs or sprinkles, or nothing. Let cool and enjoy
more nice ways to adorn:
-Sifted Powdered Sugar
-Sifted Cocoa Powder
-Sifted Spice Collection of powdered sugar, cinnamon, cardamom, & ginger
-Marmalade
-Ganache
-Soak in Tia Maria, Baileys, Kamora, or Amarula
-Let cool and serve along side macerated or roasted strawberries
-Whipped Cream
-Ice Cream
–on and on and on…
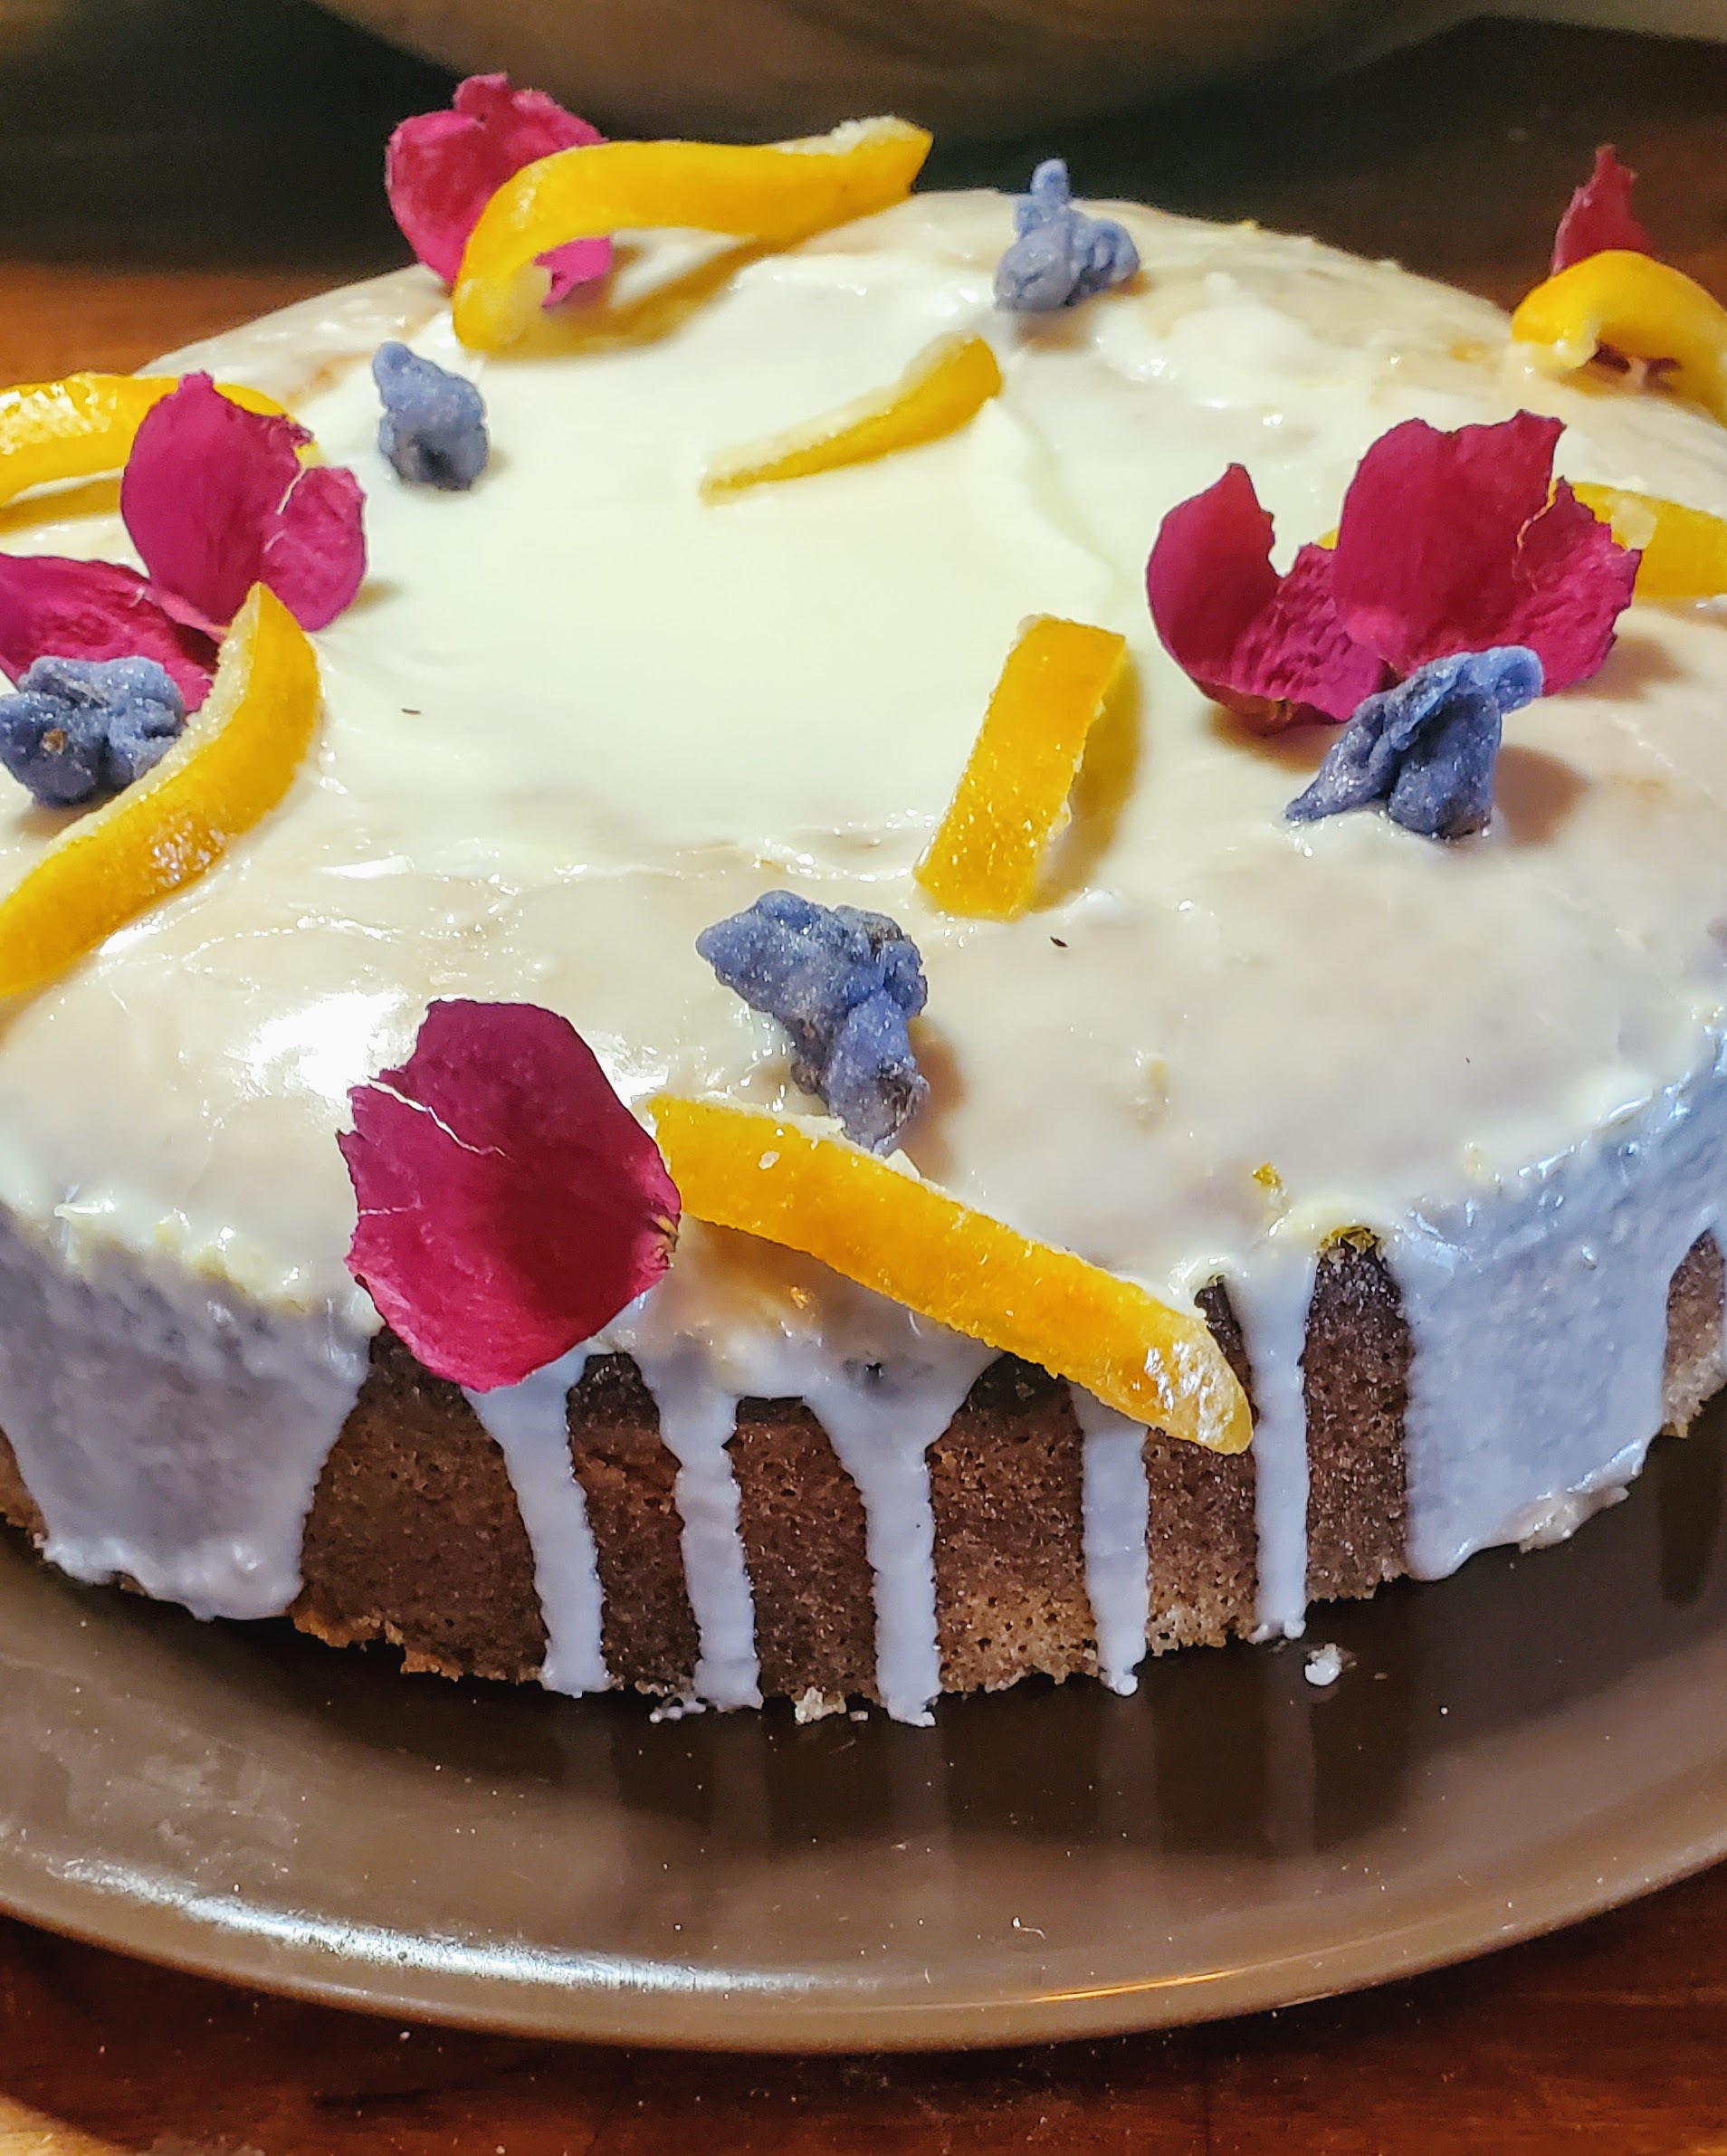
Olive Oil & Limoncello Cake
On March 22, 2022 by Christy LarsenWhen I have guests over for a meal or celebration, I am cognizant of dietary desires and restrictions. I don’t specifically design the menu around the issue, but I always make sure there are dishes served that everyone can enjoy. Dessert can be problematic, which is why I love an olive oil cake. While it doesn’t work for everyone, it is great for those with a dairy allergy. It is my go-to when I am trying to please a crowd. Best part; it can look festive and celebratory without being an elaborate layer cake. Single-layer cakes are my best friend.
Don’t let the additional components of a sop and icing deter you from trying this cake. It is a delicious addition to any celebration, or a mid-week tea and cake sesh. The addition of Limoncello (or any citrus cello) gives it a bit of an adult edge and sophistication.
for the cake:
3 extra-large eggs
1 cup + 2 Tbs granulated sugar
1 tsp kosher salt
1 Tbs lemon zest
1 1/4 cup olive oil (the less bitter, the better)
2 cups all-purpose flour; sifted
1/3 cup fine cornmeal
2 tsp baking powder
1/2 tsp baking soda
6 Tbs fresh lemon juice*
3 Tbs limoncello (or any citrus-cello)
2 tsp vanilla extract
*depending on the flavor profile you desire, you can substitute orange, grapefruit or lime (or a mixture) for the juice. Lemon packs the most punch, but you can play around. Make sure whatever you use compliments the liquor (lemon or citrus-cello).
Prepare your 9” springform cake pan by spraying with pan spray, lining the bottom with parchment, then spraying with pan spray again. Dust with granulated sugar; tapping out the excess. Preheat oven to 350.
In a stand mixer fitted with whisk attachment, beat eggs, sugar, salt, and lemon zest until they are pale yellow and reach ribbon stage (about 3-5 minutes). While whisking, slowly pour in olive oil. Whisk on medium/medium-high for another 2-3 minutes.
Meanwhile, whisk sifted flour, cornmeal, baking powder, and baking soda in a separate bowl. Measure the lemon juice, limoncello, and vanilla extract together.
With the mixer on low, alternate adding the dry ingredients (flour, cornmeal, etc) with the wet (lemon juice, limoncello, etc) beginning and ending with dry. Take care to not overmix
Pour into prepared pan and bake for approximately 50-60 minutes. It may take less, it may take more. I make a habit of checking after 45 minutes. It will brown a bit because of the sugar lining the pan; use a tester to make sure it is fully baked before removing it from the oven. The cake should be just firm to the touch.
While the cake is baking, make the sop syrup
for the sop syrup:
1/4 cup lemon juice (or other if you are changing it up)
1/2 cup granulated sugar
2 Tbs olive oil
Simmer the lemon juice and sugar over low heat until it starts to thicken to the consistency of cough syrup. Remove from heat and allow it to cool slightly. Pour 3 Tbs into a separate bowl and add the olive oil. Set aside the remaining to use in the icing. Pour the syrup/olive oil mixture evenly over the cake immediately after removing from the oven.
Make icing while the cake cools
for the icing
1 1/2-2 cups powdered sugar
1 Tbs agar-agar (optional)**
remaining sop syrup
limoncello
cream or water (if going dairy free)
**using agar-agar helps the icing firm up quicker than if you do not add it. It is an old doughnut shop trick. Be careful as sometimes it firms up so quickly that you can’t get your decorations on fast enough! Agar-agar is derived from algae and can be an allergen for some.
Stir the powdered sugar and agar-agar until fully incorporated. Add the remaining sop syrup. Use limoncello and cream (or water) to create desired consistency. Pour over slightly warm (for a less opaque glaze) or cooled (for thicker and more opaque icing) cake allowing it to over the sides. Decorate as desired.
The cake pictured is decorated with dried rose petals, candied orange peel, and candied violets.
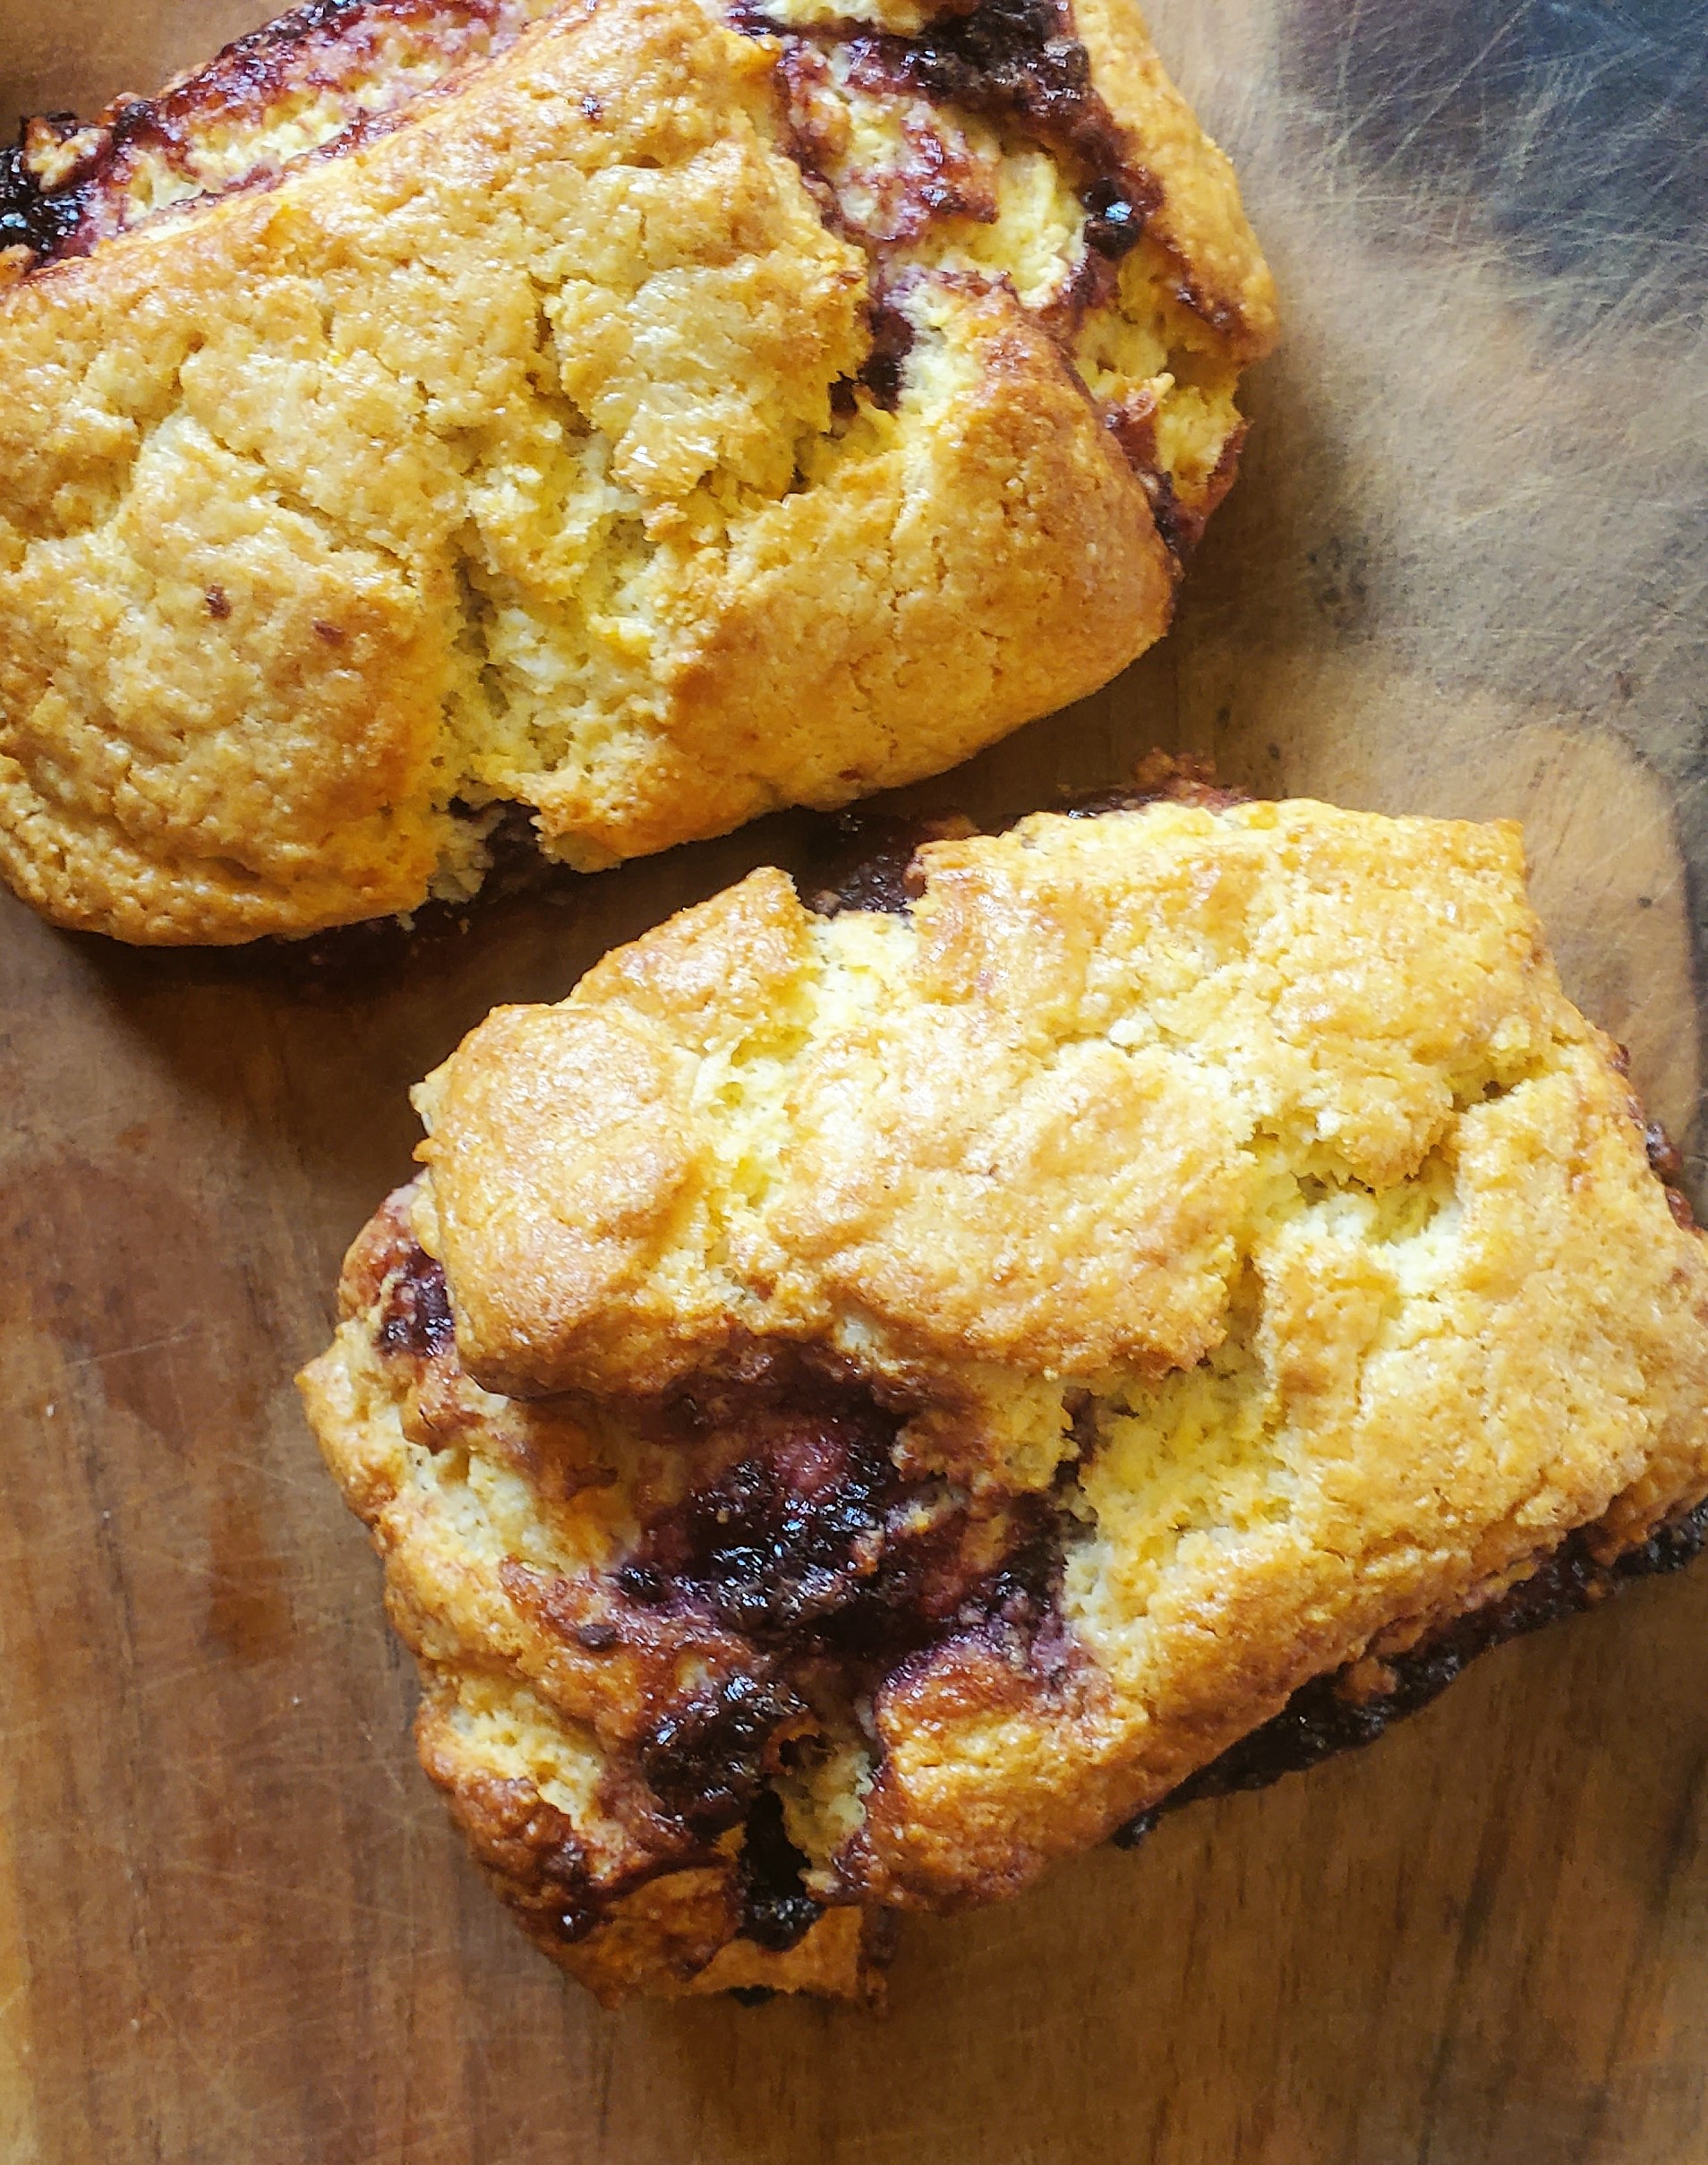
Jammy Cornmeal Scones
On November 24, 2021 by Christy Larsena not so traditional take on a tea-time treat
I started making these scones on a bit of a whim. While I still love a traditional scone with a heavy guild of clotted cream, these are a bit more rustic and perhaps more suitable for the palace staff, than the Queen. They are beautiful in an “I’d like to stuff my gullet with those” way rather than the polished silver variety. They are my go-to when I am limited in time, or jonesing for a brunchy treat. The key to these scones is a good jam. Best to have something that sits on the tart {not too sweet} side and if possible, homemade {by someone}. I’m not going to start the recipe with, first plant a bramble bush. But if that is your vibe, circle back in about a year and proceed.
Another thing to note is that you may use cornmeal of any grain size for this, but do not substitute cornstarch/cornflour.
Scone Recipe
yields 6-8
1 3/4 cups all purpose flour
1/4 cup cornmeal*
1 Tbs + 1 tsp baking powder
1/3 cup granulated sugar
1 tsp ground ginger**
3/4 tsp kosher salt
6 TBS unsalted butter–cold and cut into small pieces
3/4 cups heavy cream
1 large egg
approx 4-6 oz tasty jam
*I switch my cornmeal based on what I have available. A fine grind will give a fluffier texture, while you can get a bit more crunch from a medium grind. I have not tested a coarse grind for this recipe.
**I swap my spices based on the flavor of jam. Because I use homemade jam, I am able to enhance the flavor by using the same spices in the scone as I had in the jam. Substitute spices to your taste but try and keep it at a maximum of 1 1/2 tsp in total, otherwise, you run the risk of competing or overpowering flavors.
In a bowl whisk together the flour, cornmeal, baking powder, sugar, salt, and ginger (or preferred spice). Rub the butter in by hand until it is well distributed throughout. Measure out the cream and whisk in the egg. Make a well in the center of the flour/butter mixture and pour in about 3/4 of the cream/egg mixture. Use a fork to stir and moisten. Only use enough of the cream to bind the ingredients, you do not want a sticky dough. Occasionally when I make these, I do not use all of the cream, sometimes I have to add more. You are looking for the texture of a pie crust or rolled sugar cookie (without refrigeration).
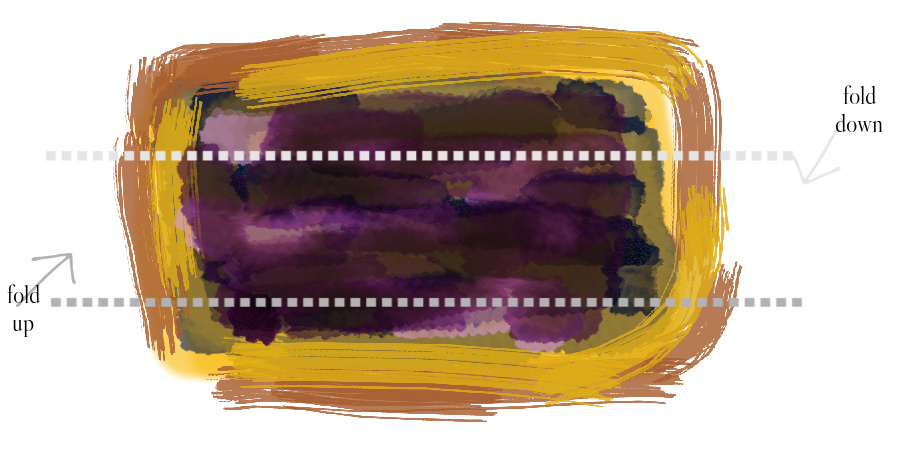
Move the dough onto a floured board and do not fuss with it too much. You don’t want to overhandle…but it isn’t as fussy as pie crust. With a floured pin, roll out to an even rectangle about 1/2″ thick.
Evenly spread your jam onto the entirety of the rectangle. Fold the rectangle into thirds on the long end a la envelope fold. Brush with any remaining cream/egg mixture (use more cream if you don’t have extra), cut into rectangles, and bake for 15-20 minutes at 400 {375 if convection} until golden on all sides (particularly bottom) and oozing jam.
what?!
here…look at this incredibly ridiculous attempt at using graphics to show you what I mean.
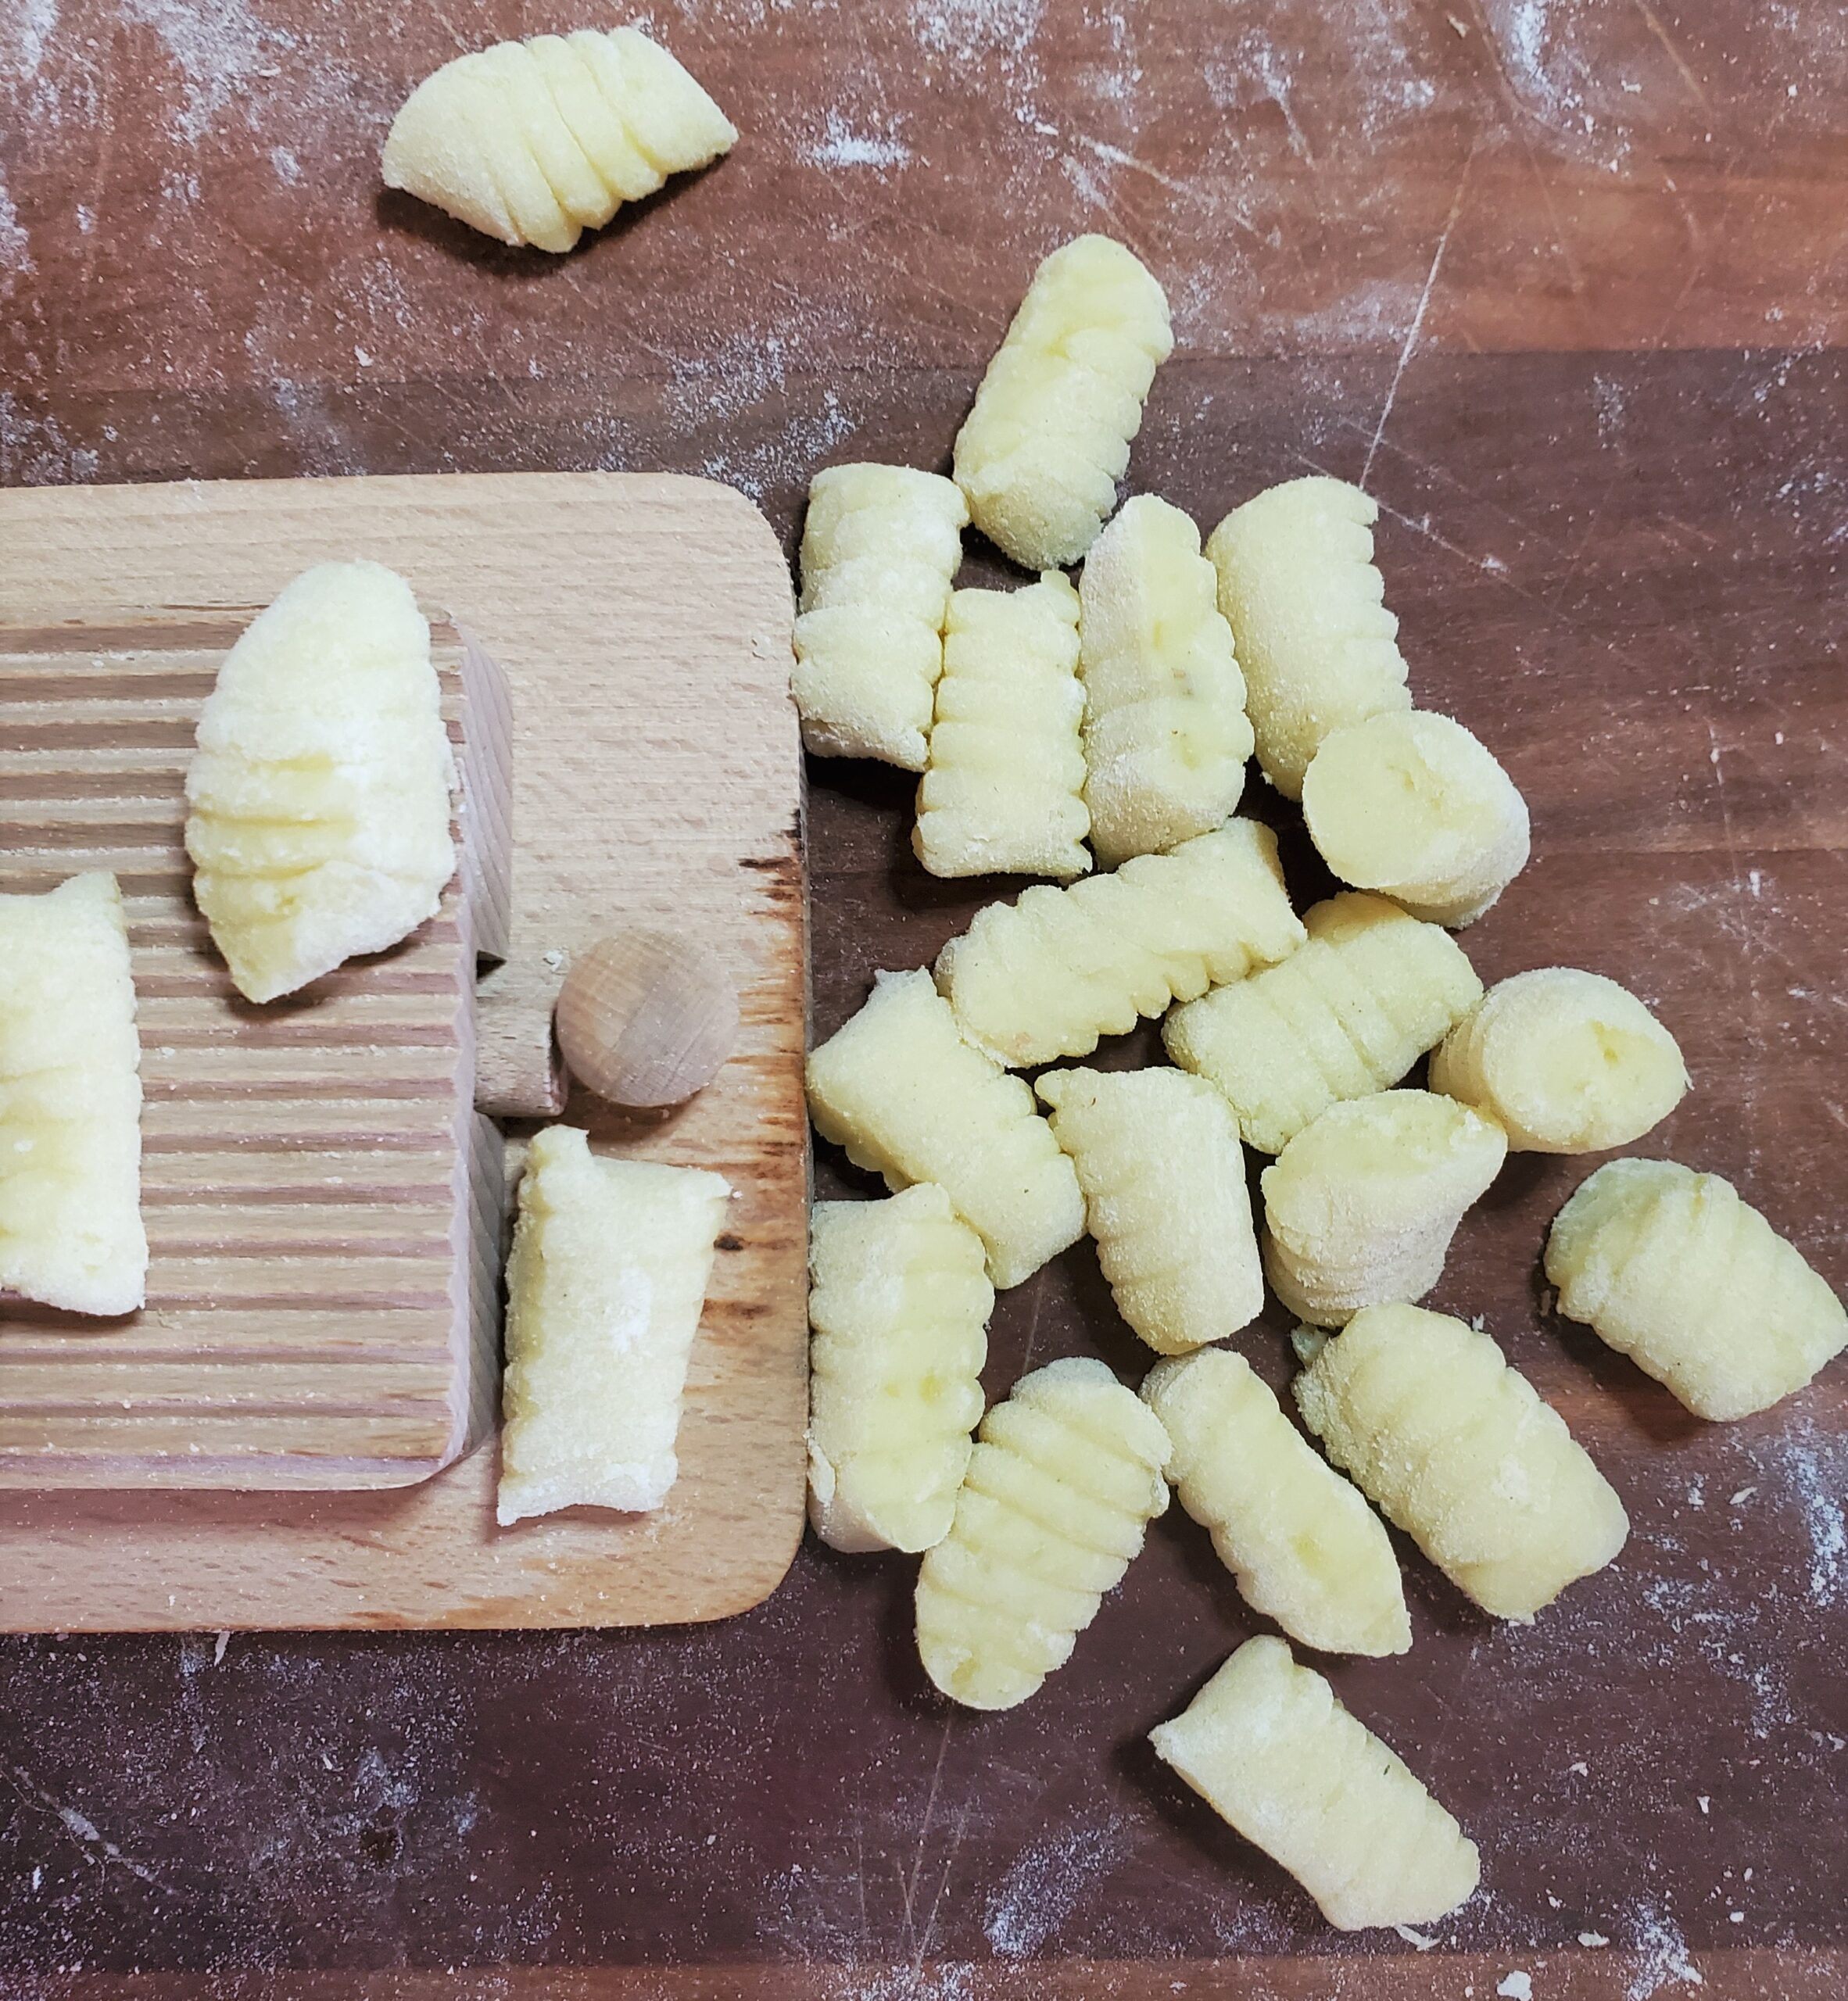
Homestyle Gnocchi
On April 29, 2021 by Christy LarsenNo big story (although there is always a story) to have to muck through to find out the deets on this one. This recipe is so simple you are going to wonder why you don’t have gnocchi every night of the week. I’m all for that, by the way! Here’s the ‘sitch—
You can scale this up and down based on how much you want to make, or how many potatoes you have in the pantry. Here is what you need to know. There are 3 ingredients to this–potatoes, 00 flour, and salt. The recipe is a ratio 10:1 + a pinch by weight. 10 parts cooked potato to 1 part 00 flour plus 1 nice pinch of kosher salt. I suggest that you make a minimum of 200 grams potato, which is nice for a giant personal batch or a starter serving for 2.
To cook the potatoes, you can peel, cut into chunks and boil in salted water…or you can peel and cut in small chunks, place in a small bowl, add a quick splash of water and a pinch of salt. Cover with plastic wrap and place in the microwave and cook for 3 minutes. Check to see if they are very soft, and if not cook one more minute at a time until the potatoes mash at the push of your thumb. While they are still hot, weigh and mash. You can use a fork for a very rustic approach, or a food mill for a more refined mash. Add 10% 00 flour (by weight) of the potato. If you have 200gr potato, you will have 20 gr 00 flour. Add another pinch of salt and mix together. Knead everything until you have a nice pliable dough.
Roll the dough into a long snake about 1/2″ thick. Cut the snake into squares and then use a fork or a ridged board to make marks into the dumplings and set aside.
Boil 4-6″ of water in a medium pot. Throw a couple of gnocchi in the hot water to test the structure and salinity. Allow the gnocchi to pop to the surface of the water, then wait a beat. Remove from water and taste to see if you need to add salt to the boiling water. Add salt if necessary.
Boil the rest in small batches, removing with a slotted spoon. Set aside while you make your favorite sauce. Reheat the gnocchi in the sauce to heat through.
You can refrigerate or freeze the leftovers–sauced or not.
Ahh….the internet
On April 24, 2021 by Christy LarsenWe have been having some challenges here with this site. It was down for quite a while because of a coding error and we couldn’t get back in to fix it. Mike (my wonder-hub) figured out a back door and was able to reboot the site and remove the offending code. However, I did lose some blog posts and photos with the reboot. I am in the process of trying to figure out what is missing, and reviewing each page to make sure there aren’t any other issues. It will take a while, as I sadly don’t have large swaths of time to devote. However, I am working on it! If you are a blog subscriber, you may receive multiple notifications of new posts, and some may seem redundant. For that I apologize in advance. Hopefully, we will soon have it all wrapped up in a pretty little bow for you again!
All the best and thanks for following along
Christy, your sixty acre baker
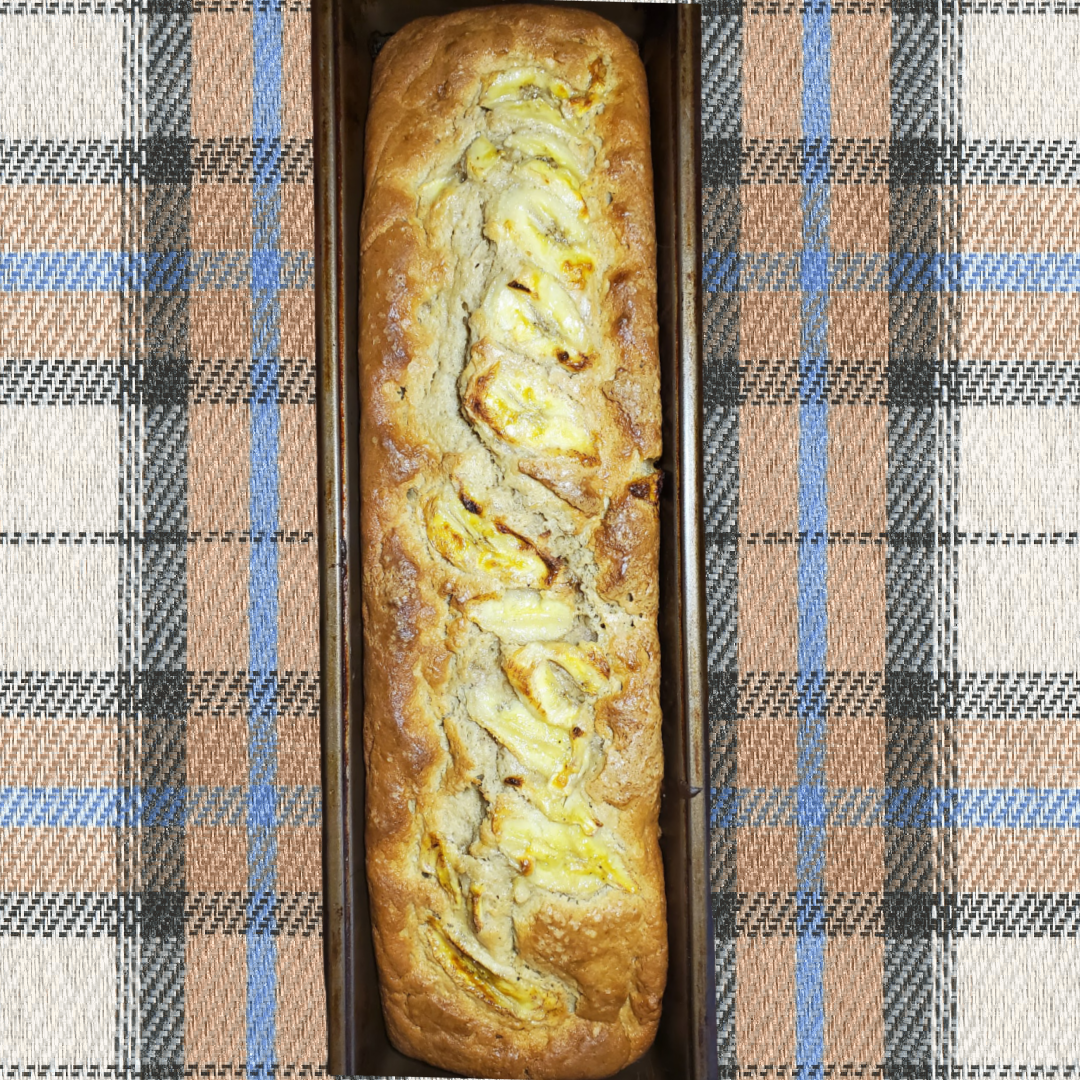
Banana Bread
On October 26, 2020 by Christy LarsenAs 2020 pandemic isolation progressed into the sweet spot between, I finally have time to make all the things, and I am so sick of cooking (and eating), everyone seemed to be making banana bread. As a contrarian, the more popular it became, the less I wanted to make it. Now that it seems to have lost its popularity, I’ve decided I want back in the game.
While traveling in Hawaii, over a decade ago, Mike and I got a real taste of what an obsession with banana bread can lead to.
On the island of Maui stretches the Road to Hana, and it is lined with banana bread. It is a picturesque and windy road dotted with roadside stands; each selling the “island’s best” banana bread. Each recipe touted as unique and handed down for generations. As we slowly took each curve and marveled at the waterfalls and dense tropics, we made a plan to stop at every roadside stall bar none. At the end of the day, we tried all the versions of banana bread, a few juices, and a sugar cane. Each bread was indeed different, and they all were tasty.
I just love the idea of taking a few ingredients and manipulating them to your specific taste. I knew upon coming home that I would be creating a banana bread recipe of my own. The beauty of a banana is that it is perfectly delicious when just yellow and still a bit starchy as a snack or embellishment to any number of other foods. As it continues to ripen (and rather quickly, I might add), it becomes soft and sweet and a much loftier version of its young self. We are so lucky to be able to follow this fruit throughout its lifecycle. I am continually stashing them in my freezer for all sorts of uses.
My version of banana bread is dense and wholesome and carries with it a bit of gravitas. It is made better by slicing, toasting, and topping with a whipped schmear of peanut butter, cream cheese, and a bit of honey which we lovingly call “the elvis”.
1/2 cup butter–room temp
1 pkg cream cheese–room temp
1 cup light brown sugar–lightly packed
1/3 cup granulated sugar
2 large eggs–room temp
1 tsp kosher salt
1 tsp vanilla
3 large over-ripe bananas (about 1 1/2 cups mashed)
1 cup sour cream
2 3/4 cup all-purpose flour
1/2 tsp ground cinnamon
1/4 tsp ground nutmeg
1 tsp baking soda
1 tsp baking powder
1 1/2 cups toasted walnuts
1 ripe banana for topping (optional)
1 Tbs granulated sugar for topping (optional)
Cream the butter and cream cheese using the paddle attachment on your mixer. Add the brown sugar, granulated sugar, and salt and beat until light and fluffy. Add the eggs and vanilla and beat until fully incorporated, about 2 minutes…you do not want it to be light and airy, as you are making a dense, moist bread. Toss in the mashed bananas and again mix for about 2 minutes. Mix together the flour, cinnamon, nutmeg, baking soda, and baking powder together in a bowl. With the mixer on low, alternately add the flour and sour cream, beginning and ending with flour, in 3 parts. Stir the walnuts in by hand. Pour into 2 loaf pans (or a double long loaf pan) that have been buttered and floured. Thinly slice the (optional) banana and place on top of the batter. Sprinkle lightly with granulated sugar. Bake in a preheated 350 oven for about 50 minutes or until a toothpick inserted in the center comes out clean.
*note: the spices of cinnamon and nutmeg are not clearly noticeable in this recipe, they just give the cake a bit of depth. if you love the taste of either one, you can increase as you see fit. I like the roundness a bit of spice gives without it overpowering the banana flavor.