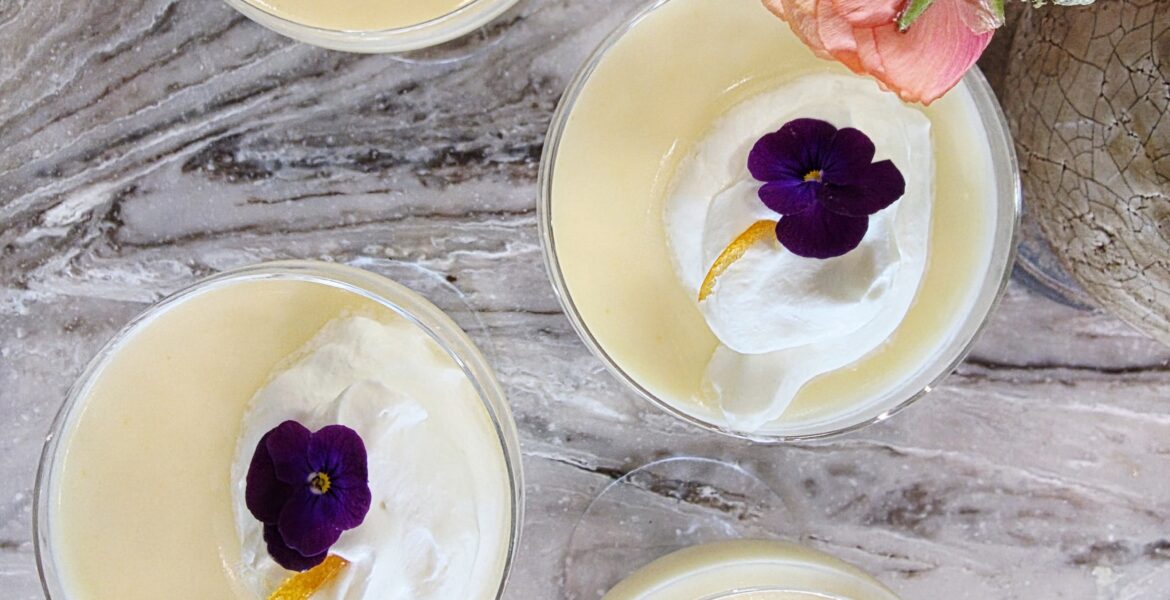
Lemon-Buttermilk Posset
On March 27, 2026 by Christy LarsenNo big story about why or how or who, but I needed a dessert by noon; at 9 am, I didn’t want to turn on the oven, and I wasn’t enthusiastic about anything ticking through my brain. We are an ingredient household, so I had options on hand. My single desire was to make something that matched the warm spring day on the horizon. When I am in a crunch like this, I must admit, I lean into the Brits….inspiration for days… when it comes to simple desserts.
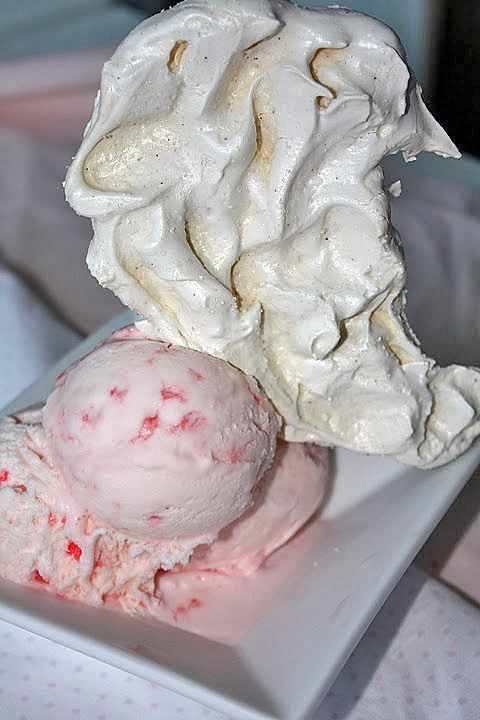
Had I meringue on hand, I would have done an Eaton Mess, but I didn’t, so I went with Posset. It had been years (almost 20) since I last made one…I won’t make that mistake again.
Several weeks ago, a neighbor gave me a bag of lemons that are nearing their useful end. A half-gallon of buttermilk is gathering dust in the fridge door; I can’t even remember why I bought it in the first place. Combining the two in this custard-like treat gave the dessert a multi-layered tartness you wouldn’t get if you used only one or the other. A note: buttermilk doesn’t have the same reaction as heavy cream with heat and lemon–I urge that you don’t exceed the ratio I have used here.
Lemon-Buttermilk Posset
makes 4-6 servings2 cups heavy cream
1 cup buttermilk
3/4 cups granulated sugar
zest of two lemons
1/4 tsp kosher salt
2/3c+1 Tbs lemon juice
In a saucepan combine cream, buttermilk, sugar, lemon zest and salt. Bring to a simmer and let it vigorously simmer for at least 10 minutes. Allow it to reduce a bit, but don’t allow to caramelize. Remove from heat when you can see space between the “fill line” when you first put the pan on the heat, and the current top of the liquid. Stir in the lemon juice.
Give it another minute or two and pour into serving vessels. I like to use a champagne coupe..or pretty small cup/glass.
Refrigerate for a few hours. This is best served on the same day it is made.
Serve with sweetened whipped cream or complimentary jam.
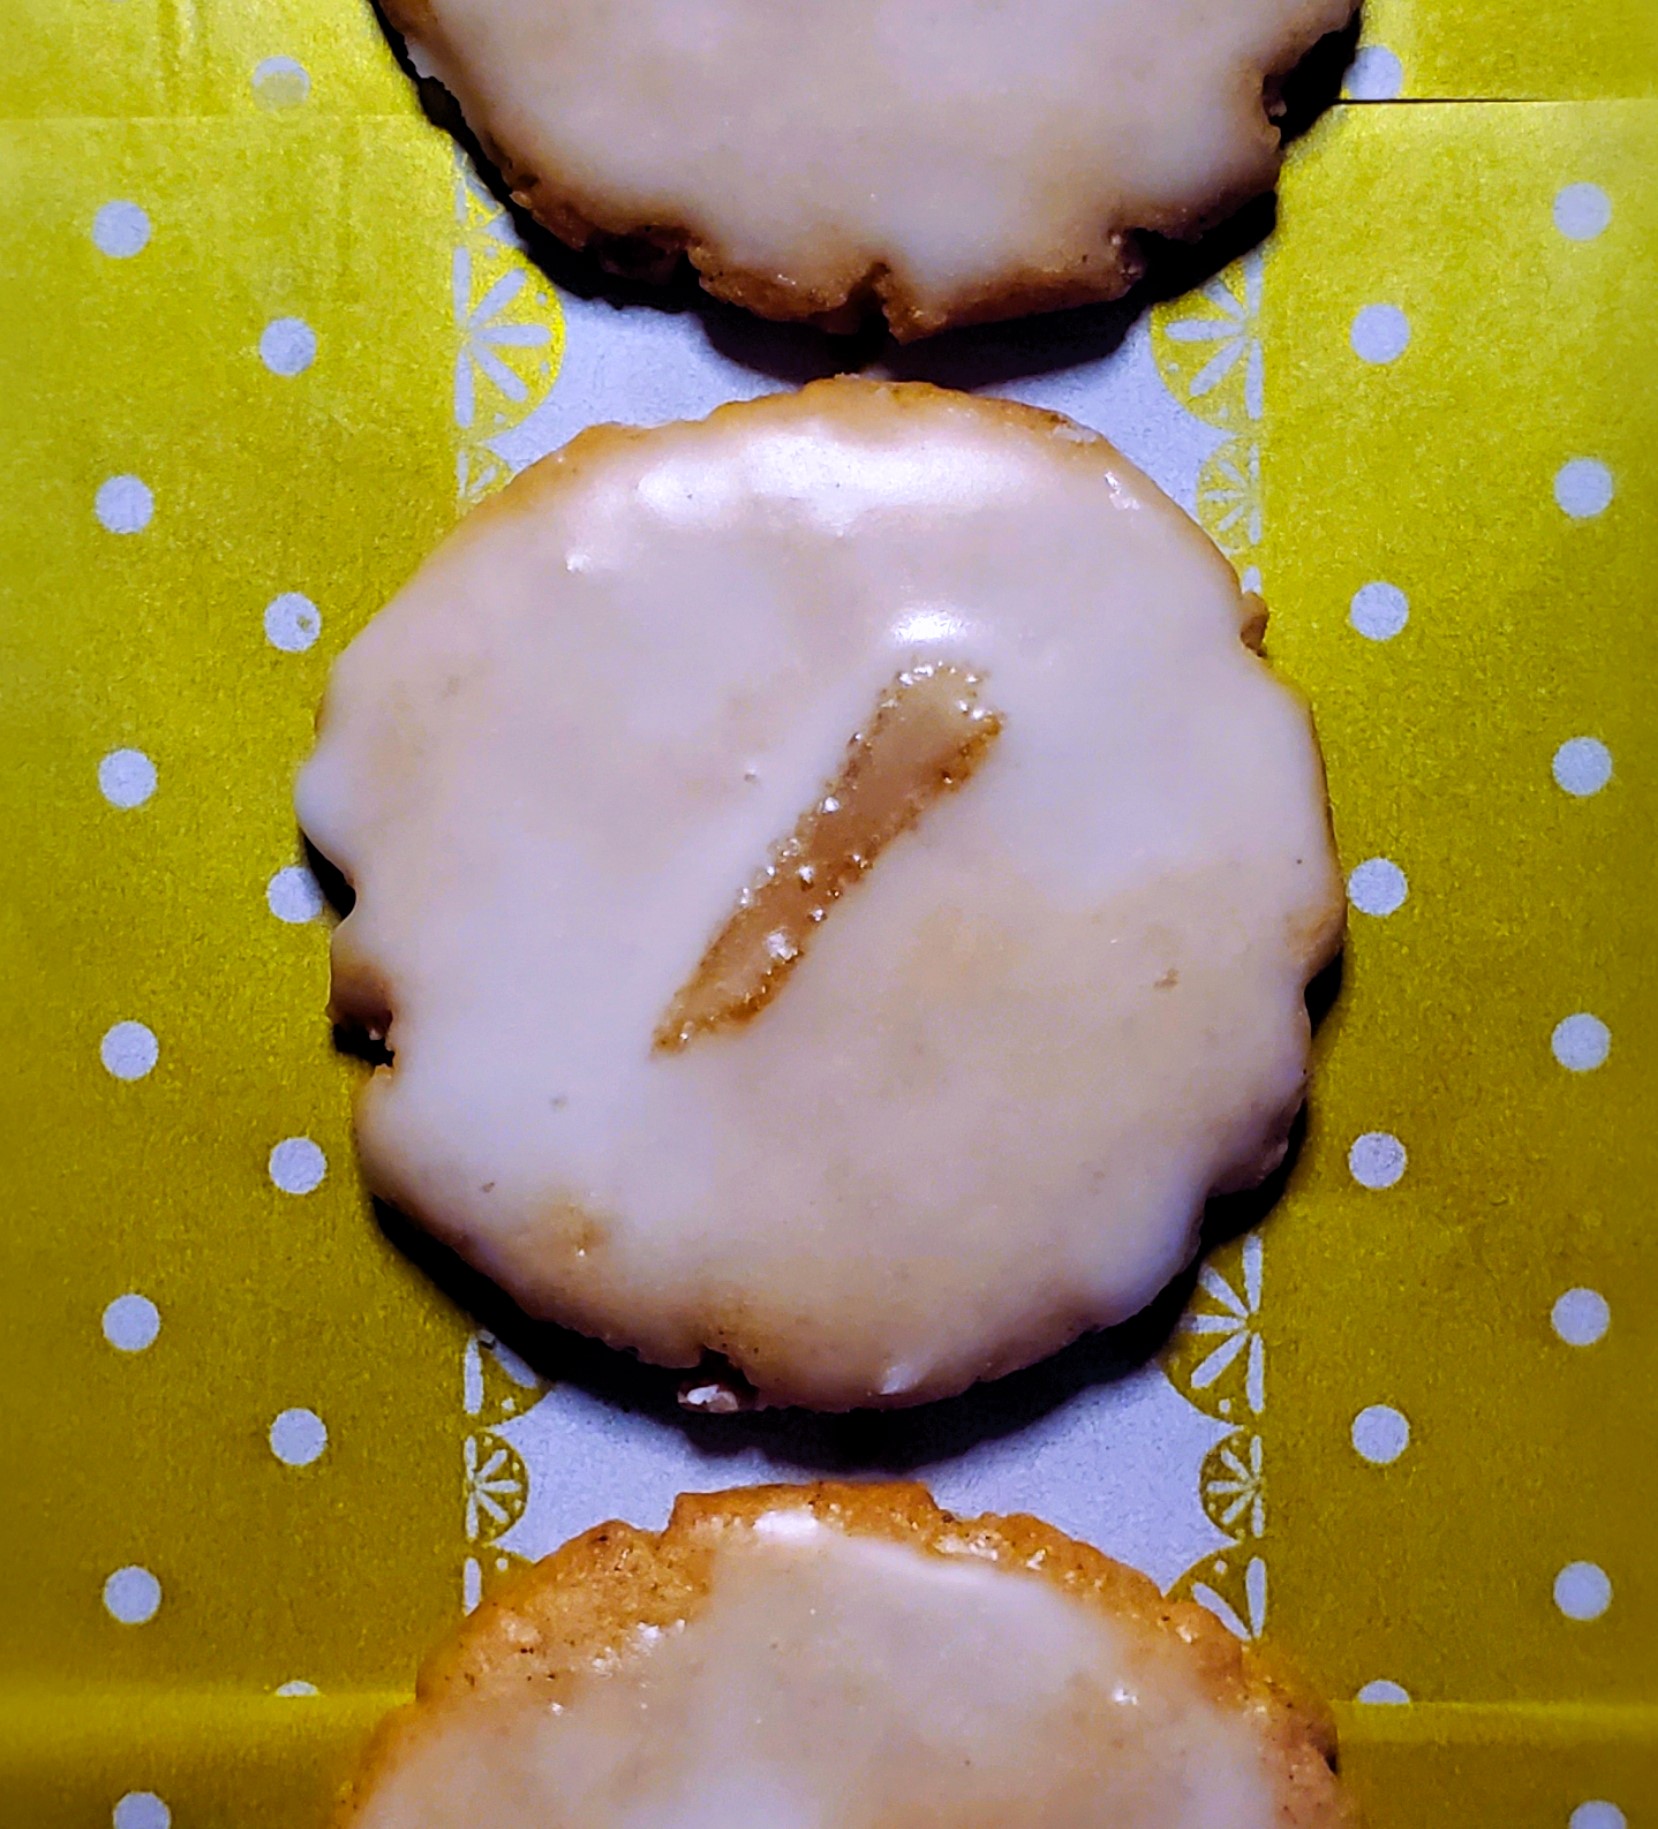
Lemon Glazed Gingersnaps
On November 21, 2024 by Christy LarsenCladia Fleming’s recipe with a little update by me
My first edition of “The Last Course” by Claudia Fleming is well-used and slightly abused. The pages are spattered and worn, and the entire book looks older than its 20 years. It is a great book; if you can find it, I suggest you grab a copy.
These little cookies are delicious, just as Claudia imagined them. As one does, I am giving them a holiday gild. The glaze gives them a few extra days of “freshness” and a distinct citrus punch. Drop them onto your holiday cookie platter, gift them with your favorite tea blend, or drop a few in your glove box for any cookie-related emergency.
Gingersnaps
1 3/4 cups firmly packed dark brown sugar
1 1/2 cups unsalted butter-softened
1 large egg
1 Tbs grated (peeled) fresh ginger
1 1/2 tsp lemon zest
3 3/4 cups all-purpose flour
2 Tbs ground ginger
1 Tbs ground cinnamon
1 1/4 tsp baking powder
1/2 tsp ground white pepper
1/4 tsp ground cloves
1/2 tsp kosher salt
Beat sugar and butter until smooth. Add egg, fresh ginger, and lemon zest and beat well. In a bowl, whisk together flour, ground ginger, cinnamon, baking powder, white pepper, cloves, and salt. Beat until well combined. Form into a large disk, wrap in plastic wrap, and chill for at least 4 hours or overnight.
Preheat oven to 350F. Scoop out 1 tsp of dough at a time and roll between palms. Flatten with the base of drinking glass dipped in flour. Bake 8-10 minutes until crisp or browned. Let cool completely before glazing
Lemon Glaze
2 cups powdered sugar
1 Tbs agar agar
1 Tbs lemon zest
1 Tbs lemon juice
candied ginger, slivered for decoration
Place sugar in a bowl, add the agar agar and lemon zest. Slowly add the lemon juice until you get to your desired consistency. If additional liquid is needed, use cream or water (your choice). If you make it too thin, add more powdered sugar. Dip each cookie into the glaze, add a tiny sliver of candied ginger, and let sit at room temperature until the glaze is set. Store in an airtight container at room temperature.
*if you make ahead, you can bake and freeze the cookies without glazing. Defrost and glaze.
**If you want to be very clever, sandwich a bit of ice cream between a glaze and an unglazed cookie and act like it “was nothing.”
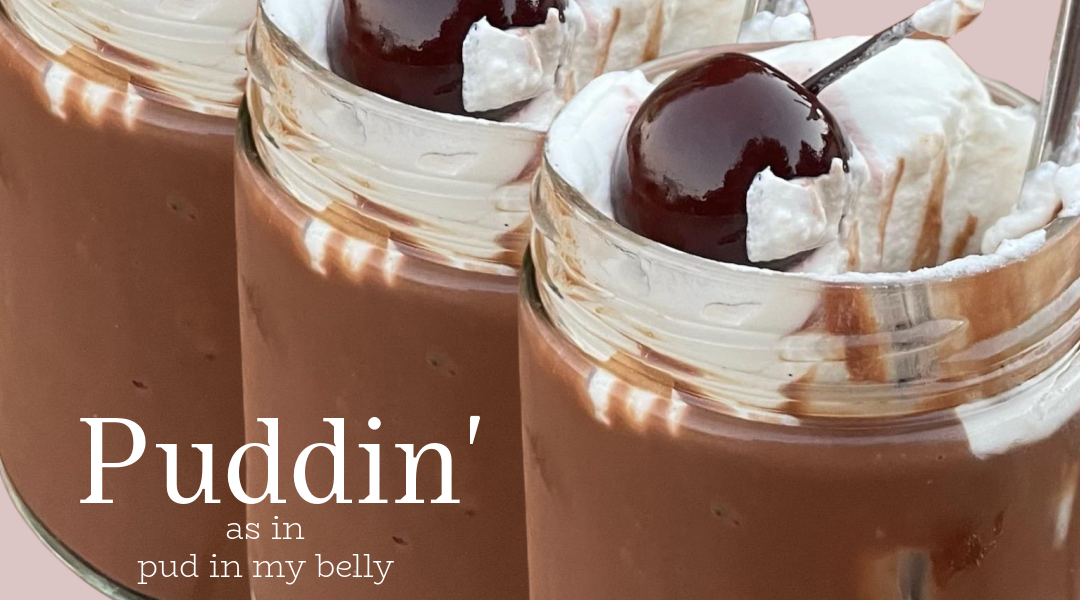
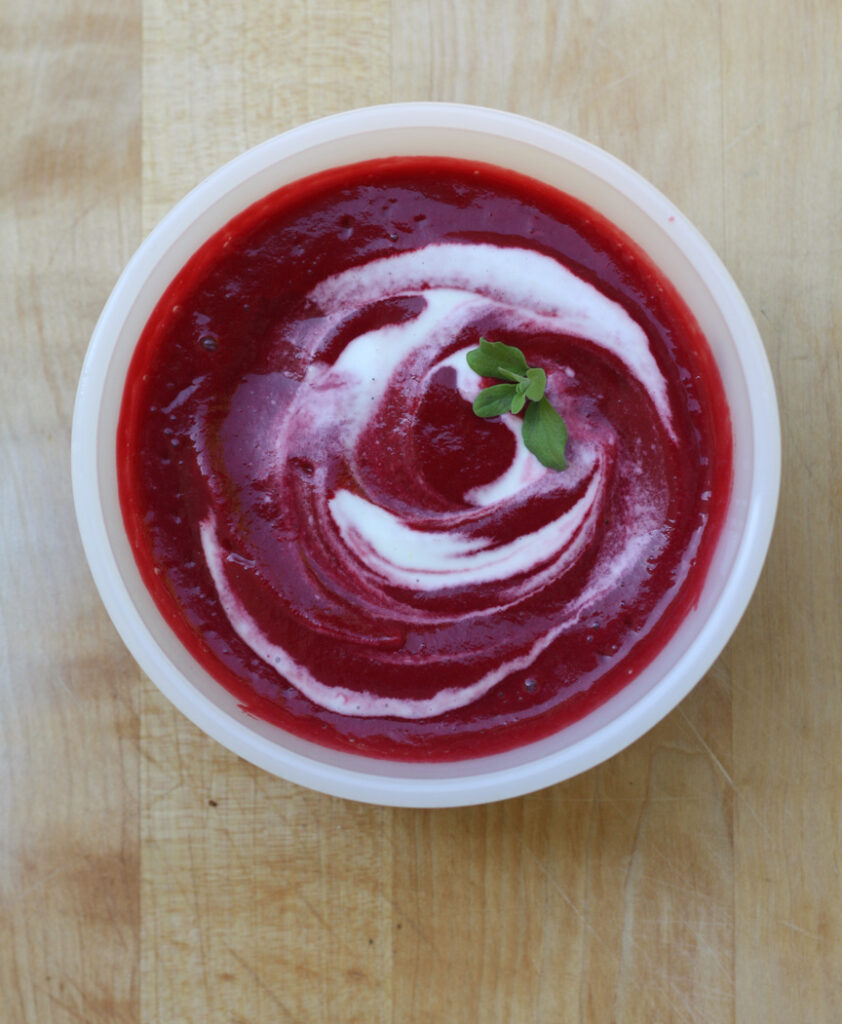
Chocolate Pastry Cream
On February 16, 2024 by Christy Larsenaka puddin’
I came a little late to the pudding game. If you have been following along for any amount of time, you know that I grew up in a only homemade, no convenience food home. Pudding stayed in its box, on the shelf of the grocery store. And…to be honest…whenever I had it a friend’s house, I kinda didn’t see the allure. Don’t even get me started on banana pudding–talk about gaslighting.
I knew pastry cream, because my mom would make it to put in her eclairs, but it took me a while to realize that pastry cream and pudding are basically the same. Except pastry cream uses whole milk enriched with egg yolks and butter, rather than only relying on cornstarch to thicken.
This recipe is very easy and will have you whipping up puddin’ on the daily. It is basically breakfast food
try and convince me otherwise
I enjoy it topped with gently whipped {unsweetened} cream or creme fraiche and a brandied or Amarena cherry for further indulgence
Ingredients
3 cups full-fat milk
3 duck egg yolks, or 5 large chicken egg yolks
1/2 cup granulated sugar
1/4 cup cornstarch
1/2 tsp kosher salt
1 tsp vanilla extract
7 oz bittersweet chocolate chips or chopped bar (63-70%)
1 oz unsalted butter at room temperature
Directions
- Whisk the egg yolks, cornstarch, and salt in a bowl until they are well incorporated
- Heat the milk with the sugar over low heat until it comes to a simmer
- Meanwhile place the chocolate, butter and vanilla in a separate bowl
- When the milk has simmered, use it to temper the eggs. This is done by slowly whisking the milk into the egg mixture to slowly warm the eggs.
- Turn the milk and egg mixture back into the saucepan and heat on low, while continually whisking, as it thickens quite a bit. Once you start to see bubbles forming, remove it from the heat
- Pour hot custard into sieve that is held over the bowl of chocolate/butter/vanilla and allow to fall over and melt the chocolate and butter. Discard any clumps of egg white remaining in the bowl of the sieve. Wait a few minutes, then whisk until butter, vanilla and chocolate are fully melted and incorporated.
- Enjoy warm with a bit of cold cream, or place bowl over a larger bowl of ice water and stir to bring temperature down to room temperature. Place a bit of plastic wrap directly on top to keep a skin from forming. If you like the skin, skip that part. Place in the refrigerator for several hours or overnight to chill completely.
- Serve cold with gobs of cream; cultured or whipped

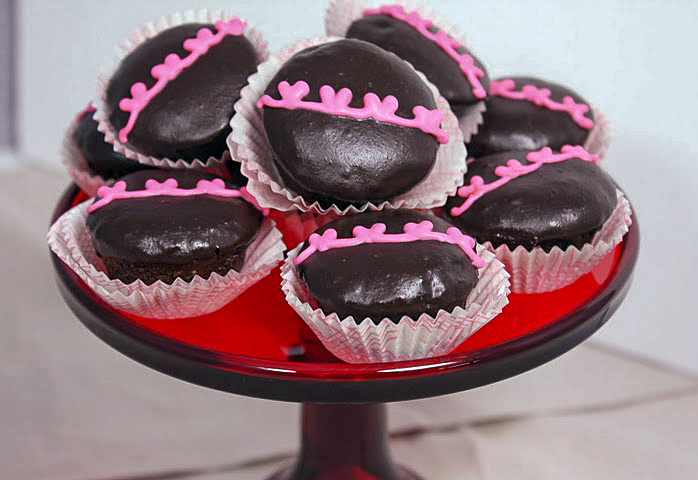
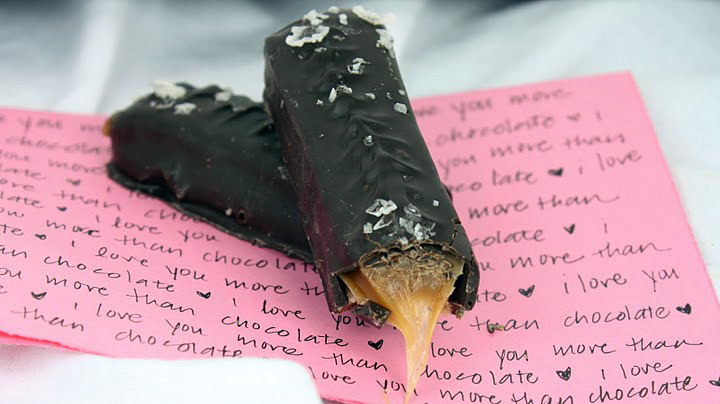
February 14th Yay or Nay?
On February 8, 2024 by Christy LarsenSo tell, me. Are we fans of Valentines, Galentines, Palentines Day?
I kind of am; in the way that it is hard for me to say yuck to pink and red and conversation hearts AND giant boxes of chocolates AND flowers AND testimonies of love.
I’m also kinda not. In the way that I don’t want anyone to feel obligated to spend money or insist there is a right way to spend the 14th of February
In this house, we celebrate with lunch. Sometimes it is a picnic, sometimes it is a restaurant, sometimes it is kraft mac n’ cheese while watching Newhart on DVD. Mike and I swap planning from year to year. Sometimes, we shift it to another day if something comes up or the restaurants get savvy to the tradition and only offer a special Valentine’s Day prix fix meal.
This year, I will be out of town on the 14th. Also, it lands on a day I observe a fasting tradition, so I planned Saturday lunch at a great little fish house in a nearby town. We make a little effort for Valentine’s. Even though we show our love for each other every day, we don’t show it like this. Sometimes, it is nice to shake off the norm and proclaim a day of love designed around commercialism instead of deep and abiding tolerance (she says with tongue firmly planted inside cheek).
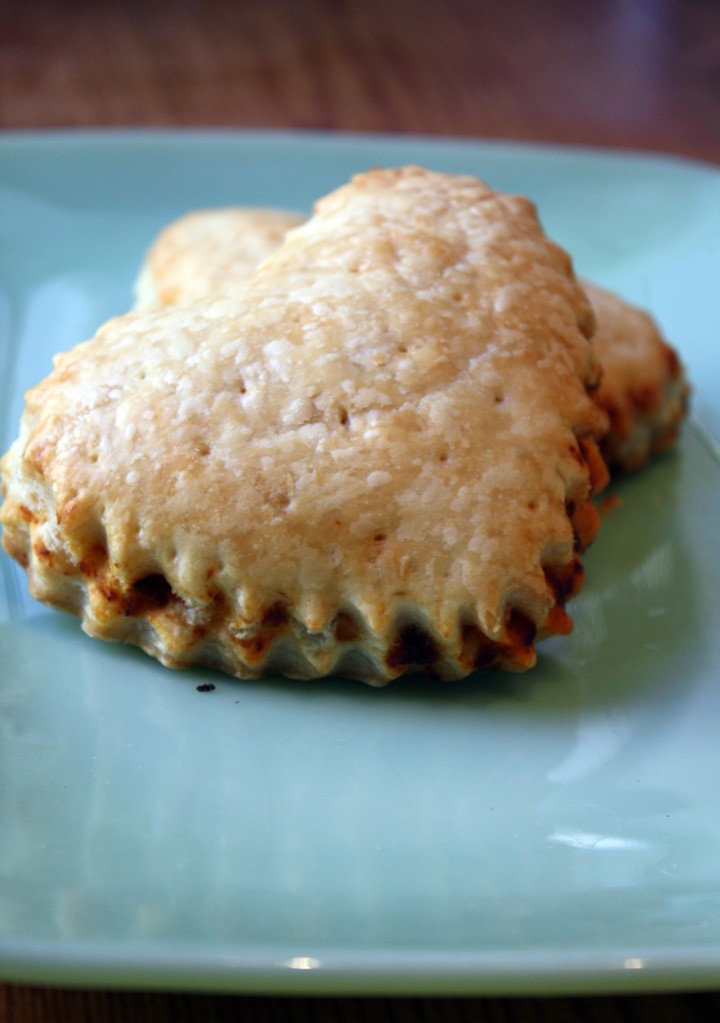
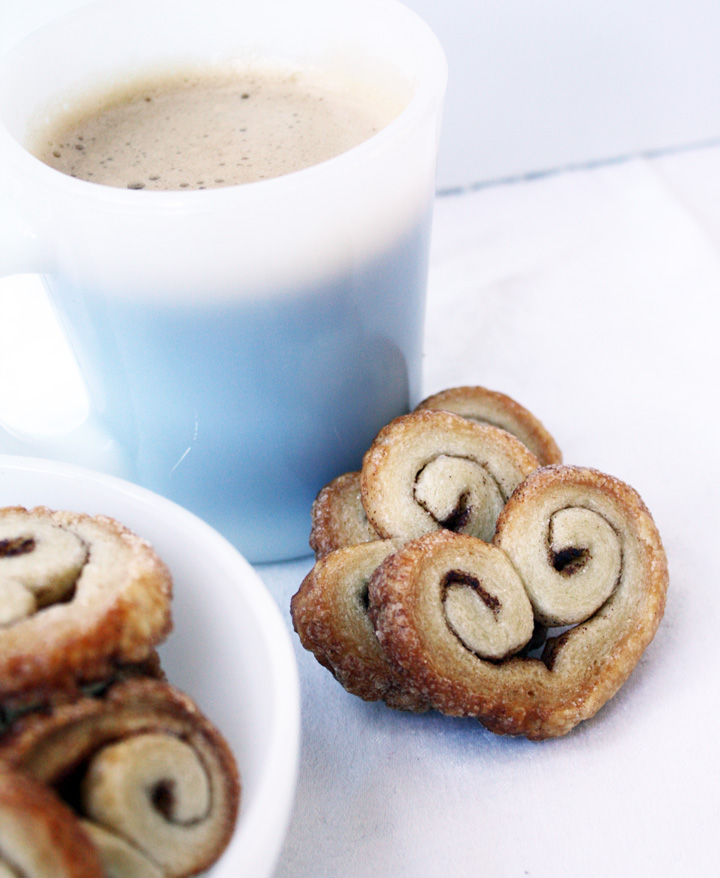
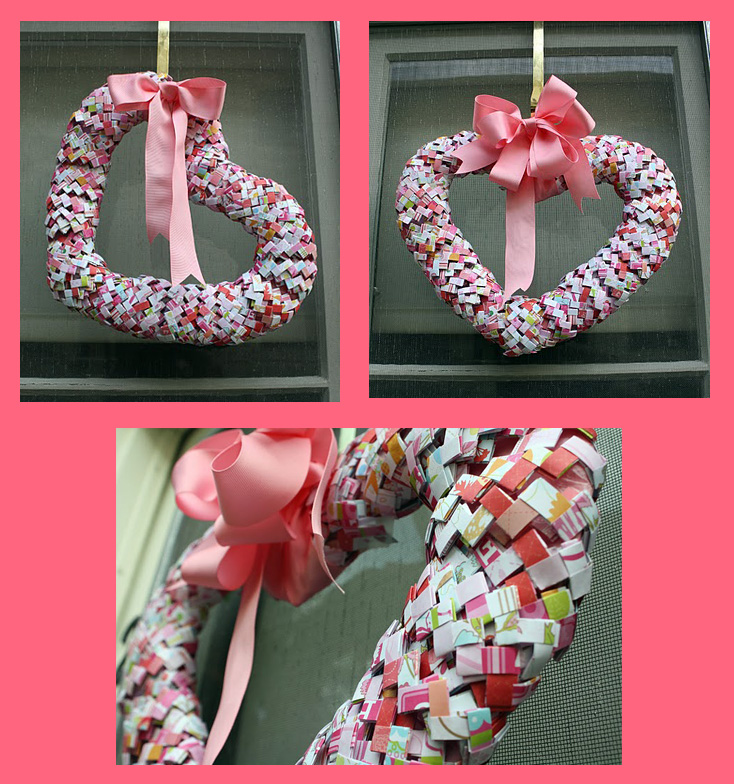
If you feel like doing something a little extra for yourself or yourself and someone else, might I suggest a few of these fun and delicious treats?

Pumpernickel-Rye Chocolate Snacking Cake
On April 3, 2022 by Christy LarsenI shouldn’t be snacking on cake. I should be snacking on 5 almonds and maybe {on my birthday} an apple with a piece of cheese. Cake? Not so much. But I am, and you can too!
As a baker and someone who loves to experiment with food, I have a lot of different types of flour in my pantry. That’s the good news. The challenging part is that flour does go bad; and the less processed, the quicker that happens. I find myself with quite a bit and varying types of rye flour right now. It makes great bread, and as it turns out, it adds incredible depth to other baked goods.
I found a simple recipe on the NY Times website by Melissa Clark for a chocolate cake with a citrus glaze. I grabbed the recipe and made very slight changes to it. I swapped the flour, exchanged full-fat yogurt for sour cream, and ignored the part where it said to use a flavorless oil…I only have lard and olive oil in my kitchen, so I used olive oil that is slightly forte. I also omitted the vanilla…mostly because I forgot, but I really didn’t miss it. Let’s make it optional.
I also changed up the icing; which I regret a wee bit. This cake would definitely shine with a bit of citrus. It would also shine with a simple dusting of powdered sugar, or a dollop of unsweetened whipped cream. Right now, as I enjoy my second slice of the day, I’m thinking a swipe of orange marmalade would be an amazing co-star. You can get nine generous {12 reasonable} slices out of this 9×9 cake, so try all adornments–ooh–what about sour cream with a bit of brown sugar stirred in and some sliced strawberries in a decidedly grown up “shortcake”.
Make this, then tell me all about it
Pumpernickel-Rye Chocolate Cake
Prepare a 9×9 cake pan by spraying with pan spray, lining with parchment, and spraying again. Set aside and preheat your oven to 350F.
1/3 cup olive oil
2 oz bittersweet (63% or higher) chocolate; chopped
6 oz hot strong coffee
2 large eggs
1 tsp vanilla (optional)
1/3 cup plain (full fat) greek yogurt
3/4 cup pumpernickel-rye flour; toasted
1/2 cup cocoa powder
heaping 1/4 tsp table salt
1/4 tsp baking powder
1/2 tsp baking soda
Pour the hot coffee over the bittersweet chocolate and stir until melted. If chocolate does not melt completely, pop into the microwave to heat it up a bit more. Pour into a mixing bowl and whisk until completely amalgamated. Let cool slightly (can still be warm, but not hot) and whisk in oil, eggs, yogurt, and vanilla if using.
*toast the flour. Place flour into a dry skillet over med-low heat. Stir continually, careful not to burn until it is slightly toasted. Do not let it brown, let it just start to turn color. Remove from heat and whisk in the cocoa powder, salt, baking powder, and baking soda.
Whisk the dry ingredients into the wet ingredients until smooth. Pour into prepared pan and bake in preheated oven for 25-35 minutes.
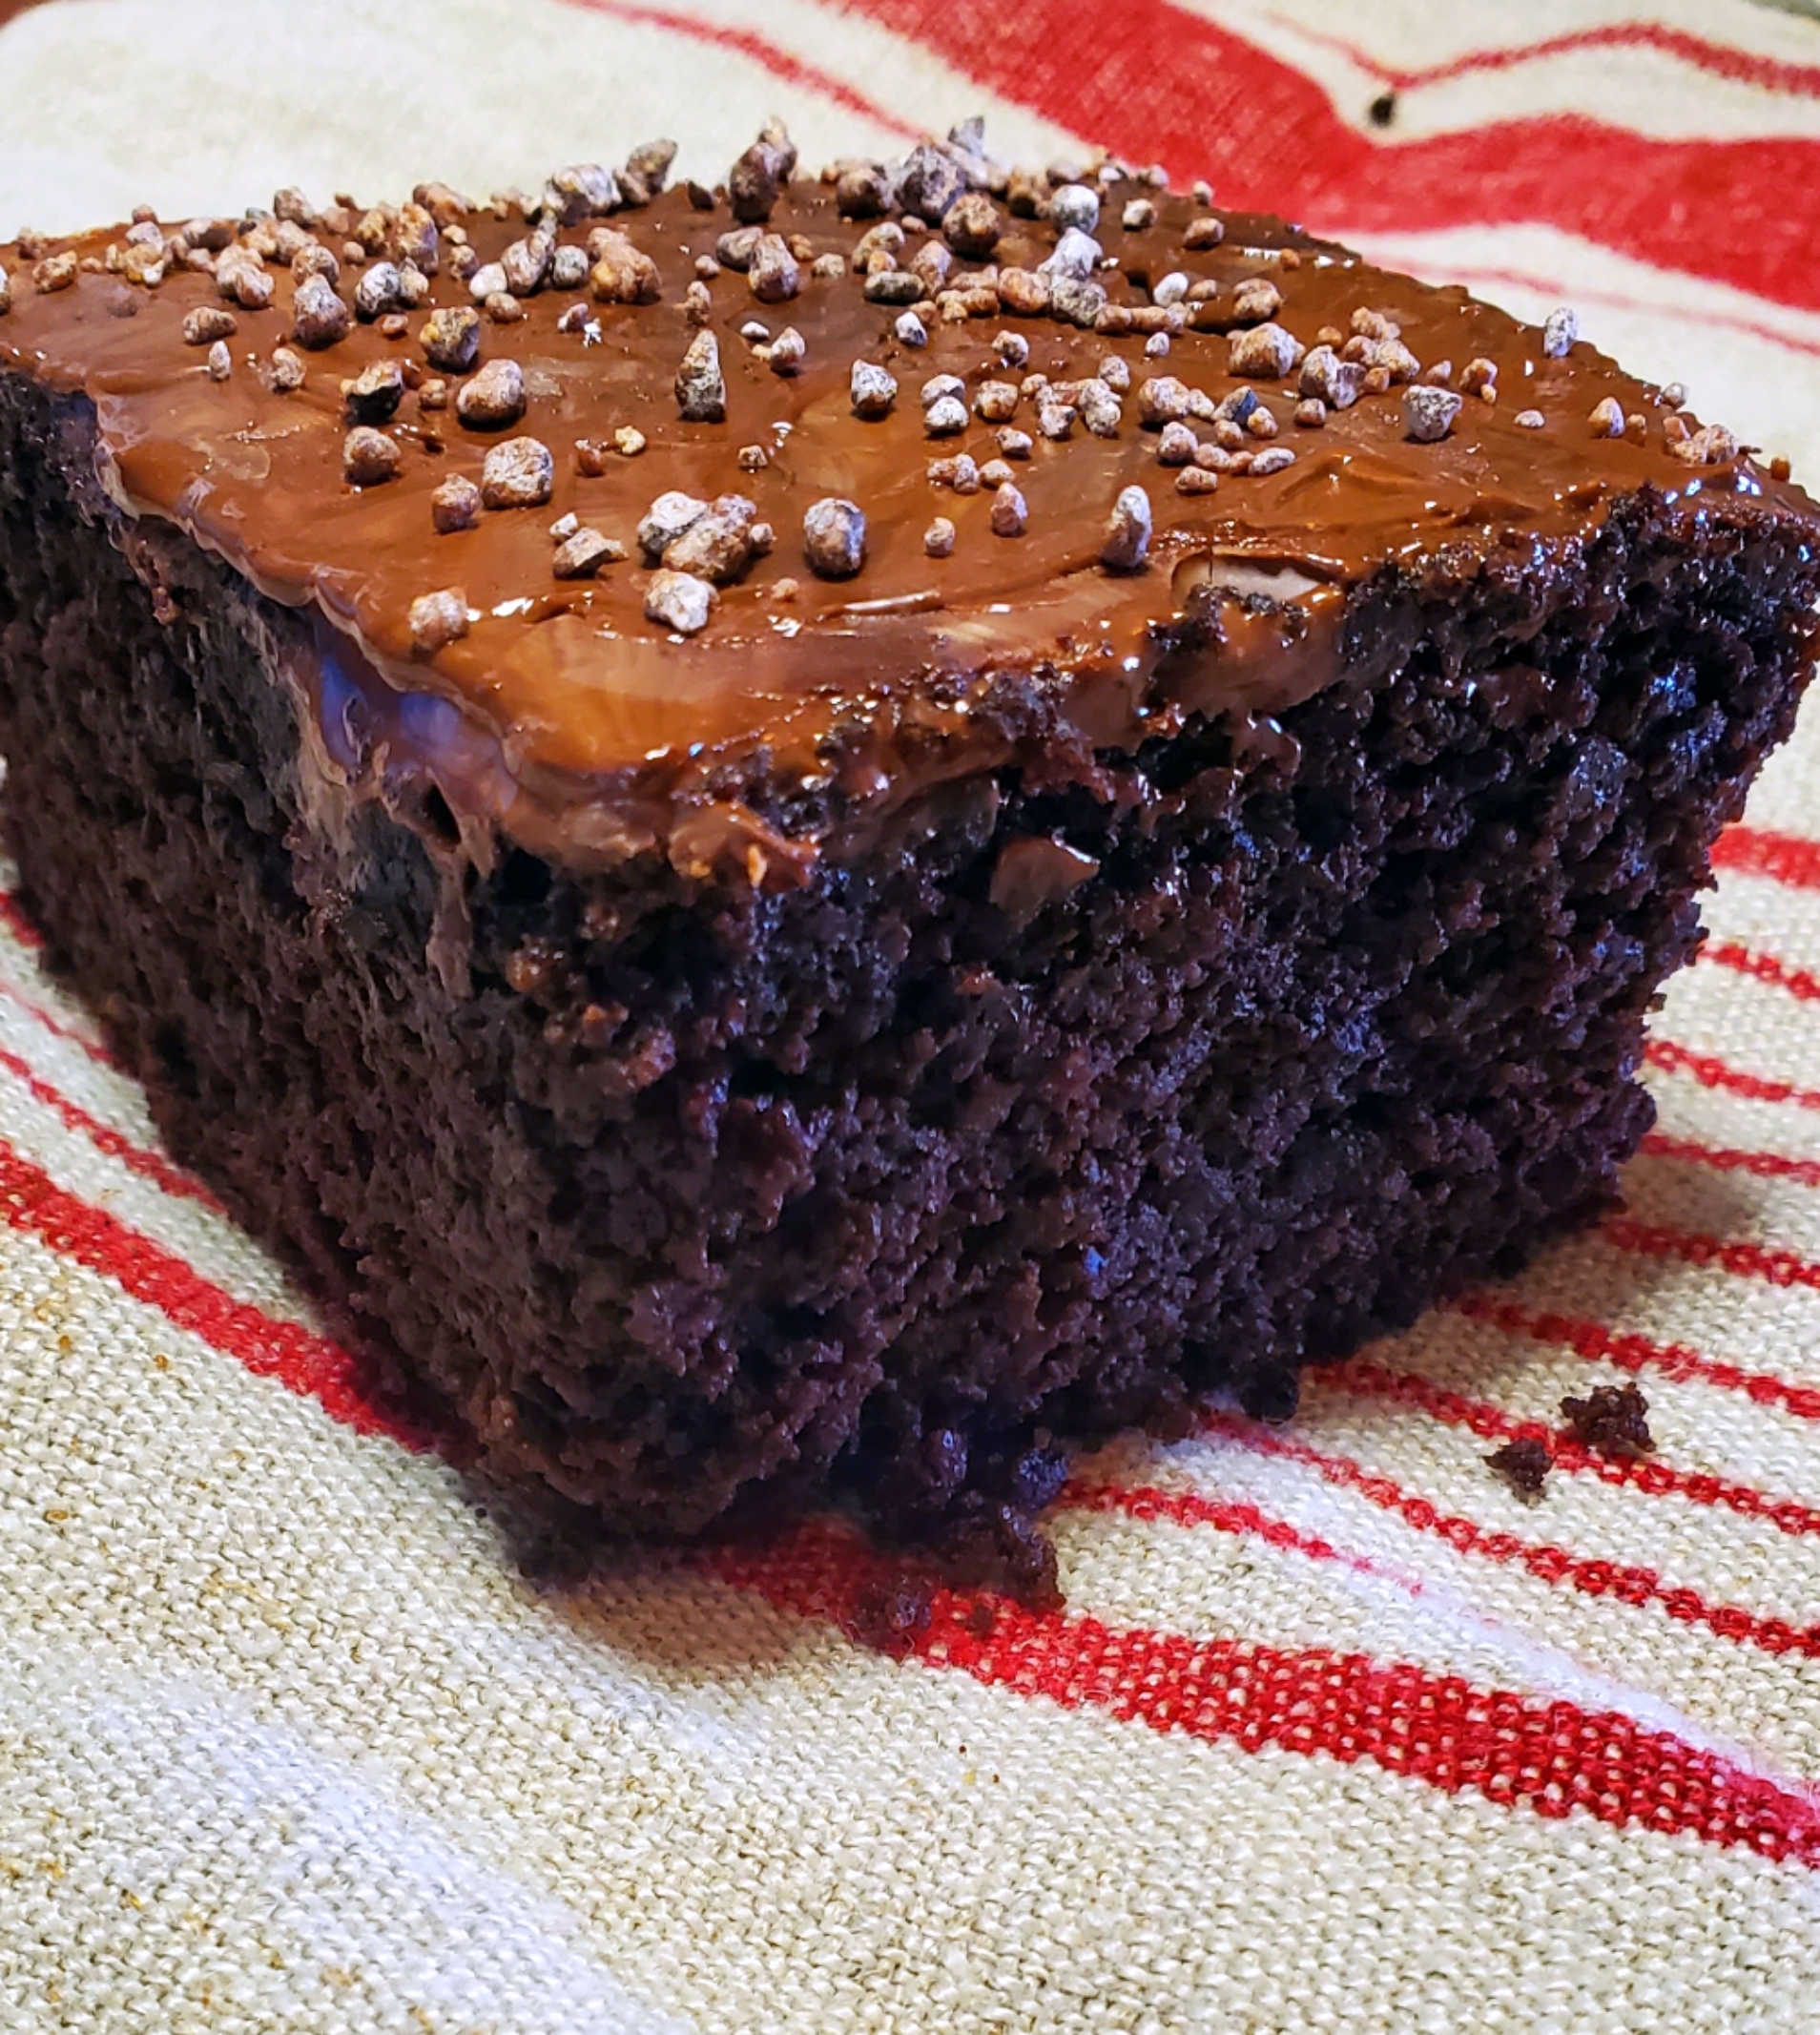
For chocolate bar topping:
Sprinkle milk, bittersweet, or a combination of the two chips over the top once removed from the oven. You can also just lay chocolate bars over the top and allow them to melt on top of the cake. Allow to melt, then simply spread until cake is covered. Sprinkle with caramelized cocoa nibs or sprinkles, or nothing. Let cool and enjoy
more nice ways to adorn:
-Sifted Powdered Sugar
-Sifted Cocoa Powder
-Sifted Spice Collection of powdered sugar, cinnamon, cardamom, & ginger
-Marmalade
-Ganache
-Soak in Tia Maria, Baileys, Kamora, or Amarula
-Let cool and serve along side macerated or roasted strawberries
-Whipped Cream
-Ice Cream
–on and on and on…
Olive Oil & Limoncello Cake
On March 22, 2022 by Christy LarsenWhen I have guests over for a meal or celebration, I am cognizant of dietary desires and restrictions. I don’t specifically design the menu around the issue, but I always make sure there are dishes served that everyone can enjoy. Dessert can be problematic, which is why I love an olive oil cake. While it doesn’t work for everyone, it is great for those with a dairy allergy. It is my go-to when I am trying to please a crowd. Best part; it can look festive and celebratory without being an elaborate layer cake. Single-layer cakes are my best friend.
Don’t let the additional components of a sop and icing deter you from trying this cake. It is a delicious addition to any celebration, or a mid-week tea and cake sesh. The addition of Limoncello (or any citrus cello) gives it a bit of an adult edge and sophistication.
for the cake:
3 extra-large eggs
1 cup + 2 Tbs granulated sugar
1 tsp kosher salt
1 Tbs lemon zest
1 1/4 cup olive oil (the less bitter, the better)
2 cups all-purpose flour; sifted
1/3 cup fine cornmeal
2 tsp baking powder
1/2 tsp baking soda
6 Tbs fresh lemon juice*
3 Tbs limoncello (or any citrus-cello)
2 tsp vanilla extract
*depending on the flavor profile you desire, you can substitute orange, grapefruit or lime (or a mixture) for the juice. Lemon packs the most punch, but you can play around. Make sure whatever you use compliments the liquor (lemon or citrus-cello).
Prepare your 9” springform cake pan by spraying with pan spray, lining the bottom with parchment, then spraying with pan spray again. Dust with granulated sugar; tapping out the excess. Preheat oven to 350.
In a stand mixer fitted with whisk attachment, beat eggs, sugar, salt, and lemon zest until they are pale yellow and reach ribbon stage (about 3-5 minutes). While whisking, slowly pour in olive oil. Whisk on medium/medium-high for another 2-3 minutes.
Meanwhile, whisk sifted flour, cornmeal, baking powder, and baking soda in a separate bowl. Measure the lemon juice, limoncello, and vanilla extract together.
With the mixer on low, alternate adding the dry ingredients (flour, cornmeal, etc) with the wet (lemon juice, limoncello, etc) beginning and ending with dry. Take care to not overmix
Pour into prepared pan and bake for approximately 50-60 minutes. It may take less, it may take more. I make a habit of checking after 45 minutes. It will brown a bit because of the sugar lining the pan; use a tester to make sure it is fully baked before removing it from the oven. The cake should be just firm to the touch.
While the cake is baking, make the sop syrup
for the sop syrup:
1/4 cup lemon juice (or other if you are changing it up)
1/2 cup granulated sugar
2 Tbs olive oil
Simmer the lemon juice and sugar over low heat until it starts to thicken to the consistency of cough syrup. Remove from heat and allow it to cool slightly. Pour 3 Tbs into a separate bowl and add the olive oil. Set aside the remaining to use in the icing. Pour the syrup/olive oil mixture evenly over the cake immediately after removing from the oven.
Make icing while the cake cools
for the icing
1 1/2-2 cups powdered sugar
1 Tbs agar-agar (optional)**
remaining sop syrup
limoncello
cream or water (if going dairy free)
**using agar-agar helps the icing firm up quicker than if you do not add it. It is an old doughnut shop trick. Be careful as sometimes it firms up so quickly that you can’t get your decorations on fast enough! Agar-agar is derived from algae and can be an allergen for some.
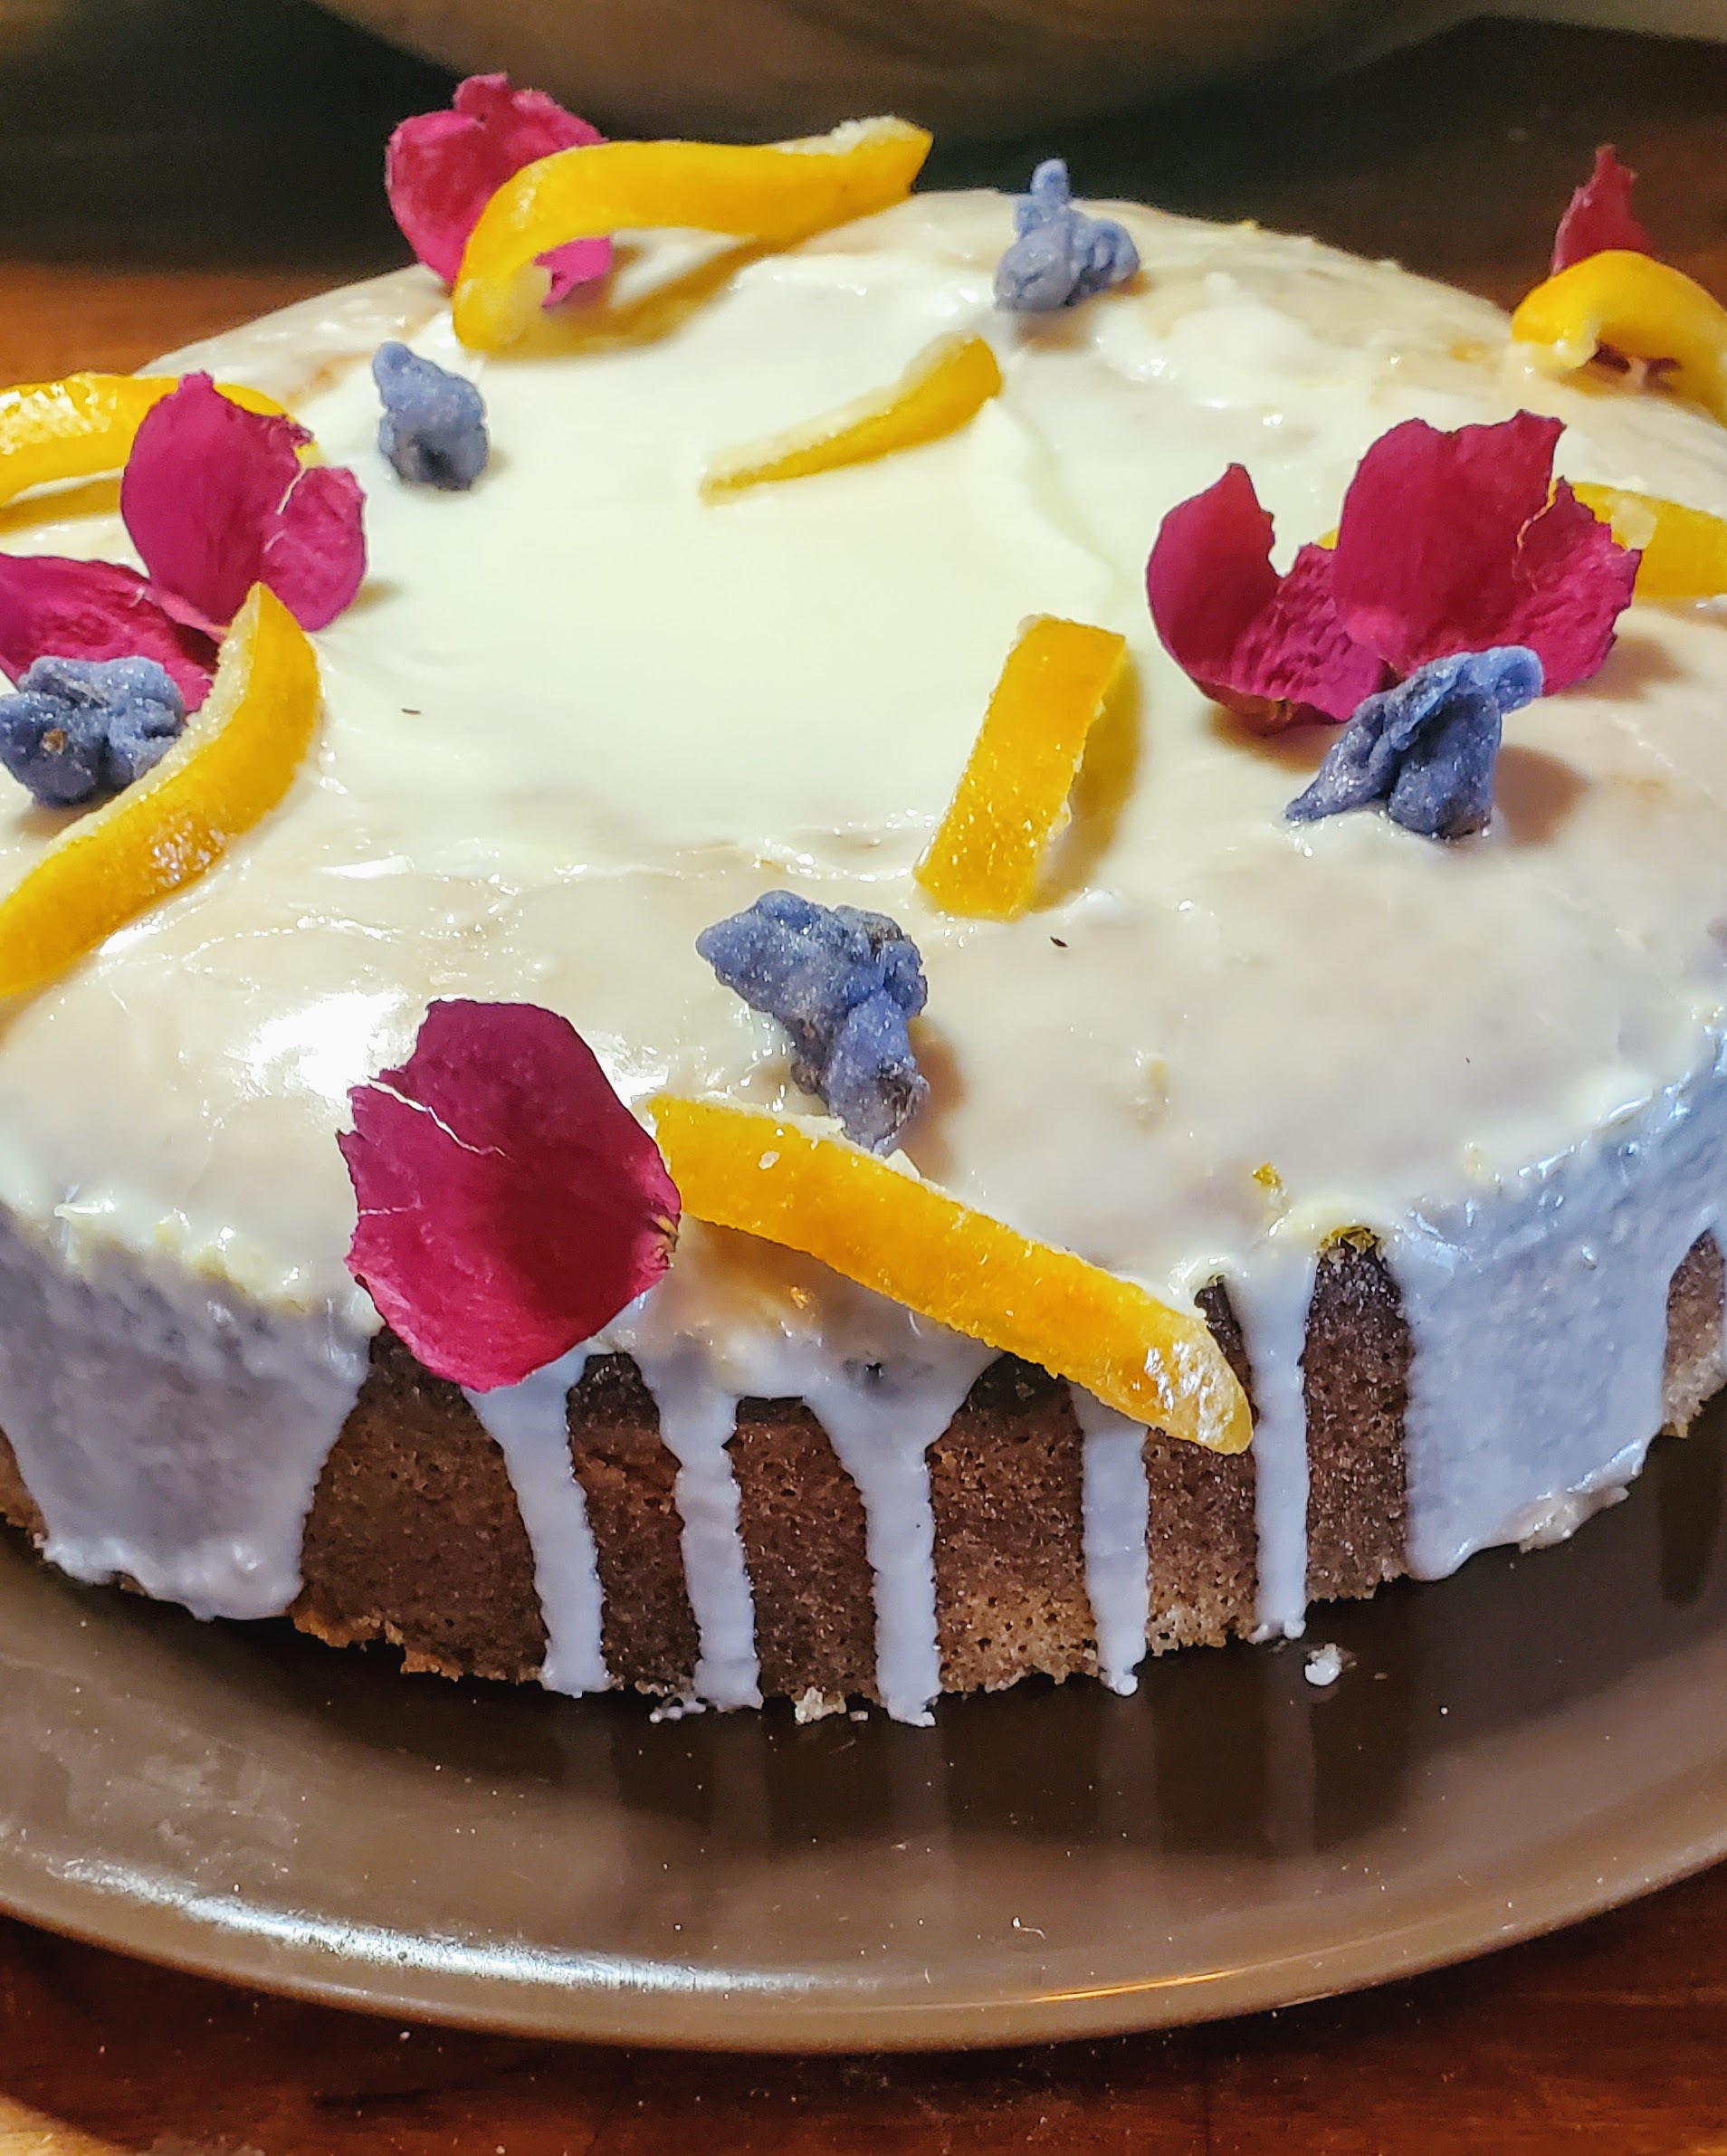
Stir the powdered sugar and agar-agar until fully incorporated. Add the remaining sop syrup. Use limoncello and cream (or water) to create desired consistency. Pour over slightly warm (for a less opaque glaze) or cooled (for thicker and more opaque icing) cake allowing it to over the sides. Decorate as desired.
The cake pictured is decorated with dried rose petals, candied orange peel, and candied violets.
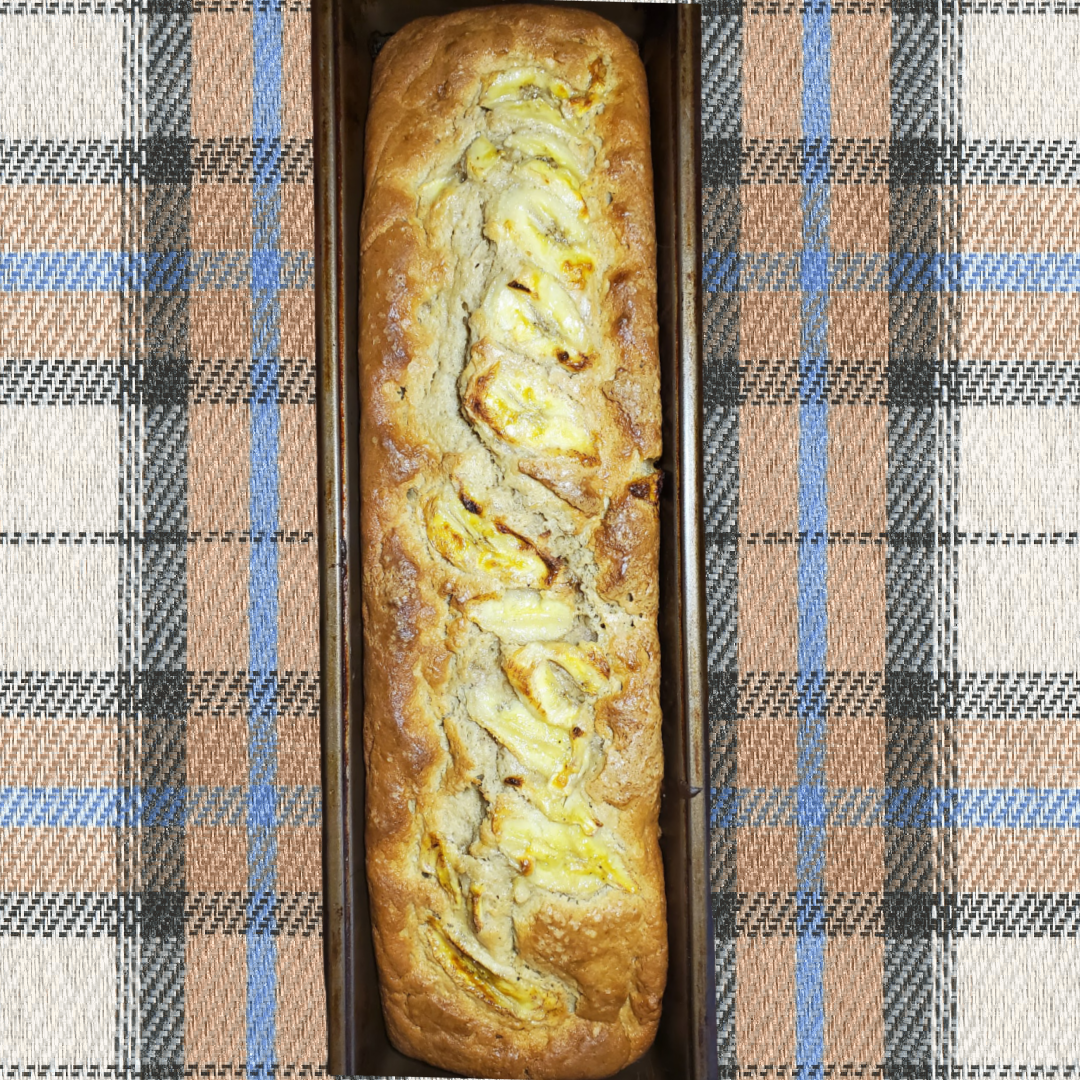
Banana Bread
On October 26, 2020 by Christy LarsenAs 2020 pandemic isolation progressed into the sweet spot between, I finally have time to make all the things, and I am so sick of cooking (and eating), everyone seemed to be making banana bread. As a contrarian, the more popular it became, the less I wanted to make it. Now that it seems to have lost its popularity, I’ve decided I want back in the game.
While traveling in Hawaii, over a decade ago, Mike and I got a real taste of what an obsession with banana bread can lead to.
On the island of Maui stretches the Road to Hana, and it is lined with banana bread. It is a picturesque and windy road dotted with roadside stands; each selling the “island’s best” banana bread. Each recipe touted as unique and handed down for generations. As we slowly took each curve and marveled at the waterfalls and dense tropics, we made a plan to stop at every roadside stall bar none. At the end of the day, we tried all the versions of banana bread, a few juices, and a sugar cane. Each bread was indeed different, and they all were tasty.
I just love the idea of taking a few ingredients and manipulating them to your specific taste. I knew upon coming home that I would be creating a banana bread recipe of my own. The beauty of a banana is that it is perfectly delicious when just yellow and still a bit starchy as a snack or embellishment to any number of other foods. As it continues to ripen (and rather quickly, I might add), it becomes soft and sweet and a much loftier version of its young self. We are so lucky to be able to follow this fruit throughout its lifecycle. I am continually stashing them in my freezer for all sorts of uses.
My version of banana bread is dense and wholesome and carries with it a bit of gravitas. It is made better by slicing, toasting, and topping with a whipped schmear of peanut butter, cream cheese, and a bit of honey which we lovingly call “the elvis”.
1/2 cup butter–room temp
1 pkg cream cheese–room temp
1 cup light brown sugar–lightly packed
1/3 cup granulated sugar
2 large eggs–room temp
1 tsp kosher salt
1 tsp vanilla
3 large over-ripe bananas (about 1 1/2 cups mashed)
1 cup sour cream
2 3/4 cup all-purpose flour
1/2 tsp ground cinnamon
1/4 tsp ground nutmeg
1 tsp baking soda
1 tsp baking powder
1 1/2 cups toasted walnuts
1 ripe banana for topping (optional)
1 Tbs granulated sugar for topping (optional)
Cream the butter and cream cheese using the paddle attachment on your mixer. Add the brown sugar, granulated sugar, and salt and beat until light and fluffy. Add the eggs and vanilla and beat until fully incorporated, about 2 minutes…you do not want it to be light and airy, as you are making a dense, moist bread. Toss in the mashed bananas and again mix for about 2 minutes. Mix together the flour, cinnamon, nutmeg, baking soda, and baking powder together in a bowl. With the mixer on low, alternately add the flour and sour cream, beginning and ending with flour, in 3 parts. Stir the walnuts in by hand. Pour into 2 loaf pans (or a double long loaf pan) that have been buttered and floured. Thinly slice the (optional) banana and place on top of the batter. Sprinkle lightly with granulated sugar. Bake in a preheated 350 oven for about 50 minutes or until a toothpick inserted in the center comes out clean.
*note: the spices of cinnamon and nutmeg are not clearly noticeable in this recipe, they just give the cake a bit of depth. if you love the taste of either one, you can increase as you see fit. I like the roundness a bit of spice gives without it overpowering the banana flavor.
Chocolate Zucchini Cake
On July 17, 2020 by Christy LarsenI must admit that the provenance of this recipe or idea of it anyway came from elsewhere. I have been making it for so many years and have futzed with it along the way, that I have no idea where it all started. It has become a favorite of ours and our farm stand guests mostly because it lives under the guise of being healthy. You know, with it being loaded with veggies and all.
We grow a ton of zucchini here. This is a story told by anyone who successfully grows zucchini. We are all trying to unload our bumper crop by mid-summer to anyone who makes eye contact. It is a prolific and delicious vegetable that is difficult to stay ahead of. Now that I grow my own, I am always amazed at the perfect (and small) grocery store versions of them. I imagine they must pay people to sleep in the field with a ruler in hand and harvest at just the right moment. Mine are always imperfect and sometimes downright giant. This cake is filled with grated zucchini. It can be a perfectly beautiful one or a monster from your garden, but I do recommend that you have more flesh than seed when grating.
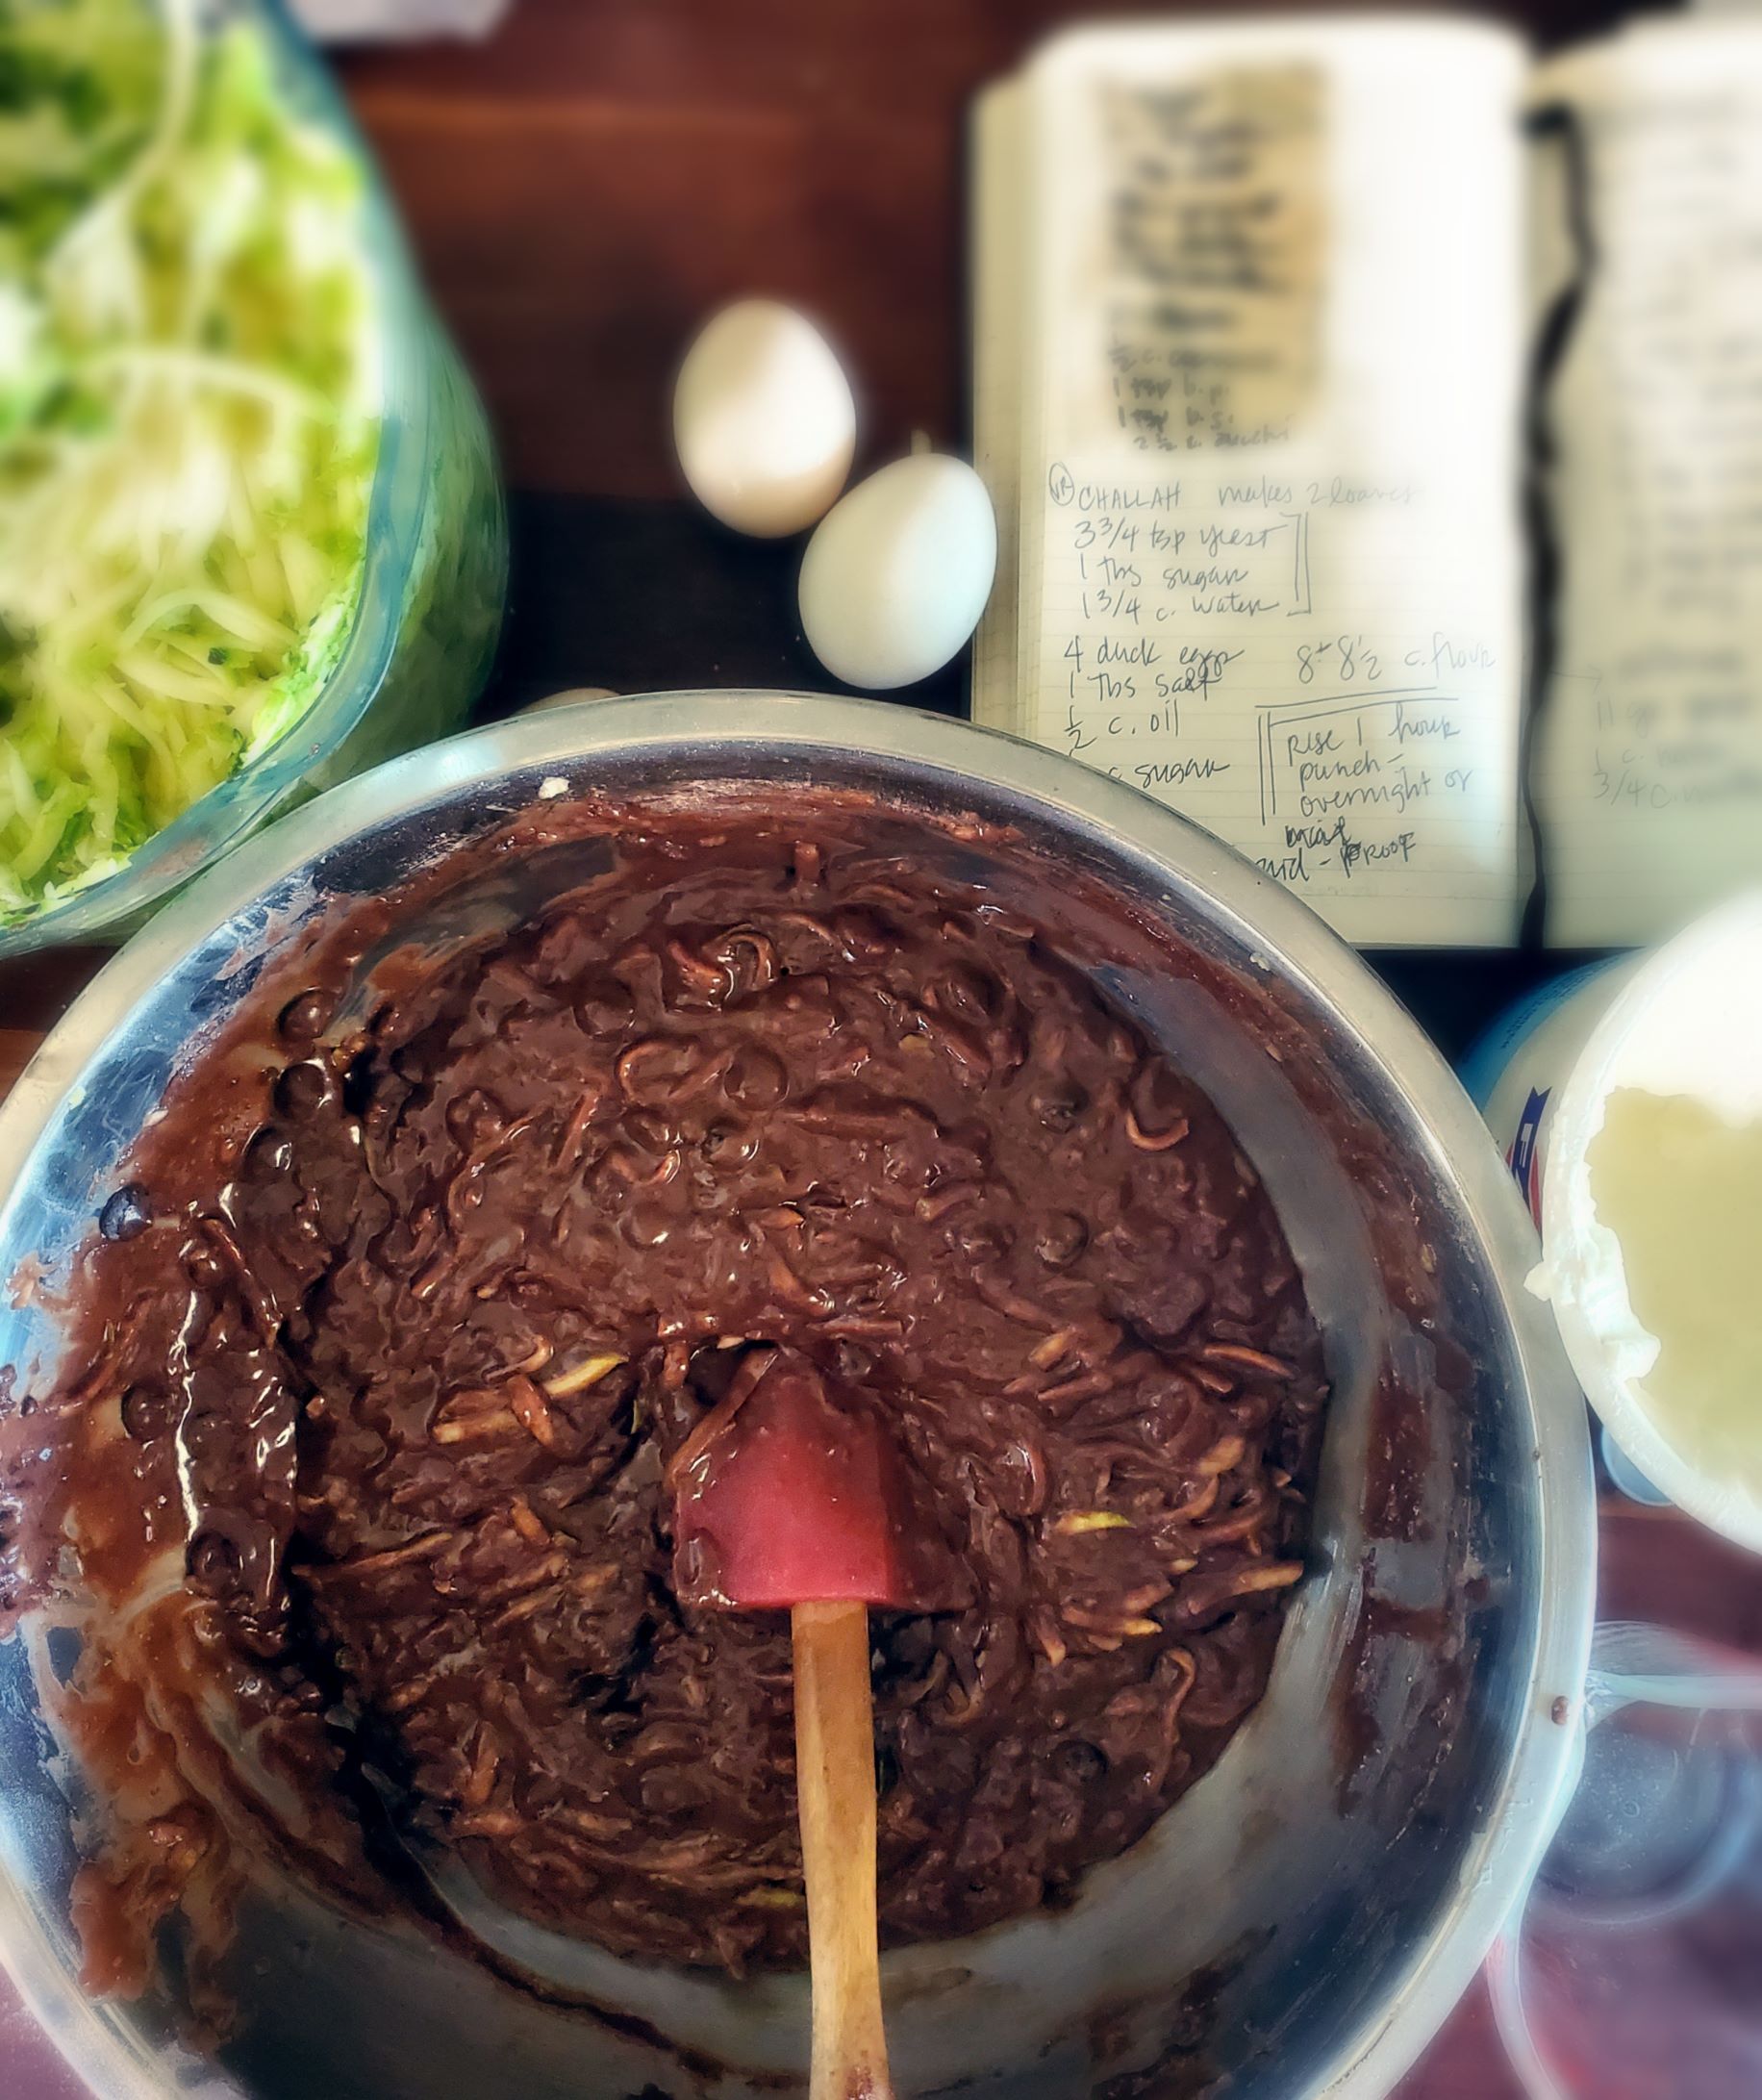
The recipe calls for oil and duck eggs. I have had success using vegetable oil, olive oil and lard. I have not made this recipe with butter, nor have I substituted apple sauce and cannot endorse either. As for eggs, I use duck in most of my baking. For this rustic cake, I would use large or extra large chicken eggs if you cannot find duck. If you cannot find large or extra large, you can use what you have. It may alter the result, but it shouldn’t ruin it. If that just won’t work for you, look up the weight (liquid weight) of a, extra large chicken egg, multiply by two and then weigh the eggs you have until you get to the number you need. If you end up needing only half of your egg–whisk it before measuring. Baking is a science, but its not a science fair.
You will want to sneak this into your lunchbox on-the-daily despite it being loaded with veggies
Chocolate Zucchini Cake
2 duck or extra large chicken eggs
2 cups granulated sugar
1/4 cup lard (melted) or oil of your choice
2 tsp vanilla extract
3/4 cup plain yogurt
1 tsp kosher salt
2 cups all-purpose flour
1/2 cup cocoa powder
1 tsp baking powder
1 tsp baking soda
2 1/2 cups grated zucchini
1 1/2 cups bittersweet chocolate chips (you can add more or less to your individual taste)
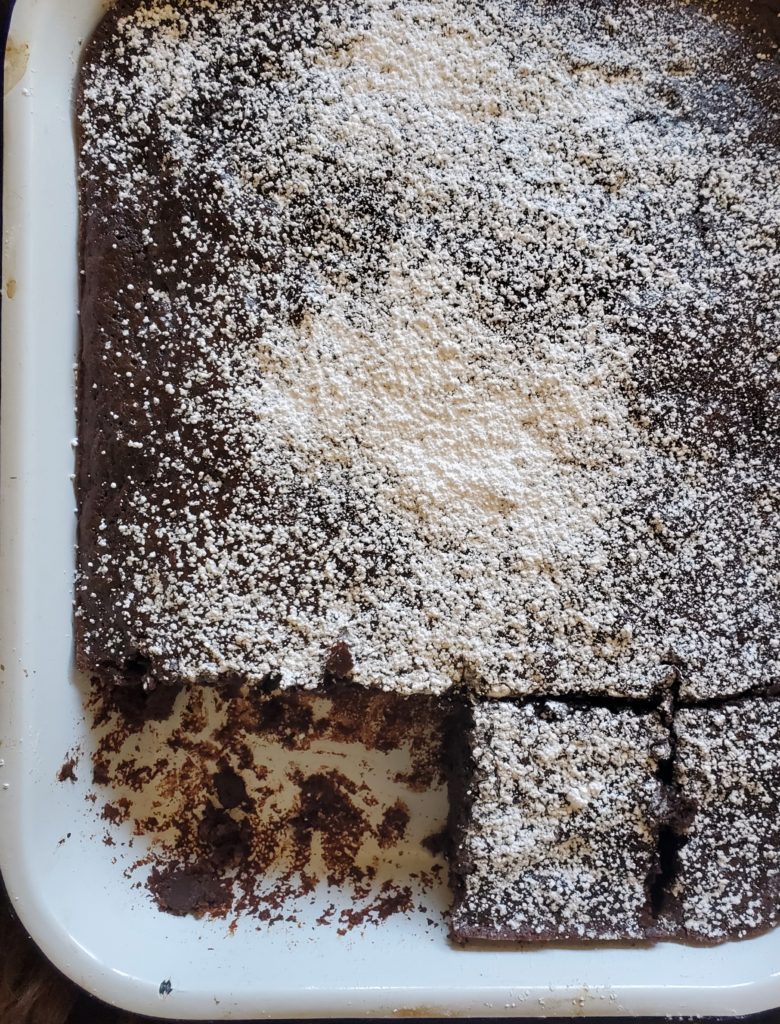
powdered sugar for decoration
Prepare an 8×13 high sided baking pan with vegetable spray or butter and preheat the oven to 350F.
In a large bowl, whisk the eggs and sugar together until they are well incorporated and they begin to lighten. Add the lard (or oil) and whisk until fully emulsified. Whisk in the yogurt and extract and give it a good 30-second workout. Switch to a wooden spoon or spatula and stir in the salt, flour, cocoa powder, baking powder, and baking soda. Do not over mix, but make sure everything is incorporated. Stir in the zucchini. If your cake mix is stiff, add up to 1/4 cup of water to help loosen. You do not want it to be runny, it should be the consistency of warm pudding. Add chocolate chips and tip into your baking tin. Bake for approximately 45-50 minutes. It is done when the top is resistant to your touch or a cake tester comes out clean. Remove from heat and allow to cool. Sift a bit of powdered sugar on top and serve straight from the pan. a
If I am to be honest, this cake gets about a 30-minute respite in our house. It is lovely served warm accompanied by a cold glass of milk
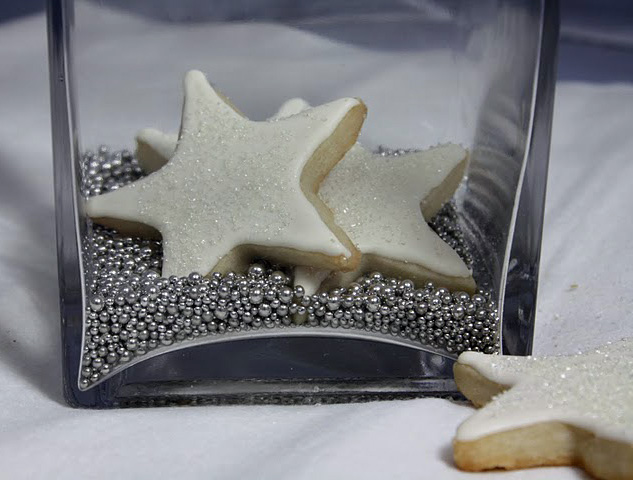
Iced and Snowy Stars
On March 15, 2020 by Christy Larsen I love this shortbread recipe and use it shamelessly whenever I can. Every Christmas my mom would bring out special cookie cutters. The ones she used for shortbread. The mystery still remains why they were shaped like playing card suits and; how”spades” and “diamonds” scream Christmas I never thought to ask
perhaps I should have
She rolled the dough out thicker than usual, slightly underbaked them and half-dipped them in chocolate. They are perfect that way and are still my favorite way of eating them
They are also delightful rolled a bit thinner and baked a bit longer. When glazed with ivory tinted royal icing, and flavored with a bit of almond they are the best accompaniment to your morning cuppa.
Shortbread Cookies
1 cup butter–room temperature
3/4 cup sifted powdered sugar
1 tsp vanilla extract
1/2 tsp salt
2 cups flour
Beat sugar and butter until completely mixed together, but not light and fluffy. Add vanilla and salt and mix until just incorporated. Slowly stir in flour and only mix until just incorporated. Divide dough in 2 portions, wrap in plastic and place in the refrigerator for a few hours or overnight. When ready to bake, roll out and bake on parchment paper. Top with sprinkles or leave plain and bake at 325 until just starting to brown on the bottom. Once cooled you can dip in tempered chocolate or glaze with royal icing (alton brown recipe here), flavored as you choose.
Just a simple tip: I glaze the cookies using a pastry bag and let them dry. I then dip a small paintbrush in a bit of Everclear or vodka (or you can use extract) and gently swipe it across the top. I then immediately sprinkle the sugar on top. the liquid will evaporate almost immediately–but it will allow your sugar to stick without sinking into the icing.
Parsnip Spice Cake
On March 4, 2020 by Christy LarsenLiving in California affords us a “winter garden.” All my favorite roots and brassicas are thriving in our cold, but not bitter-cold, temperatures. The other day, I found myself with dirty nails and an armload of parsnips.
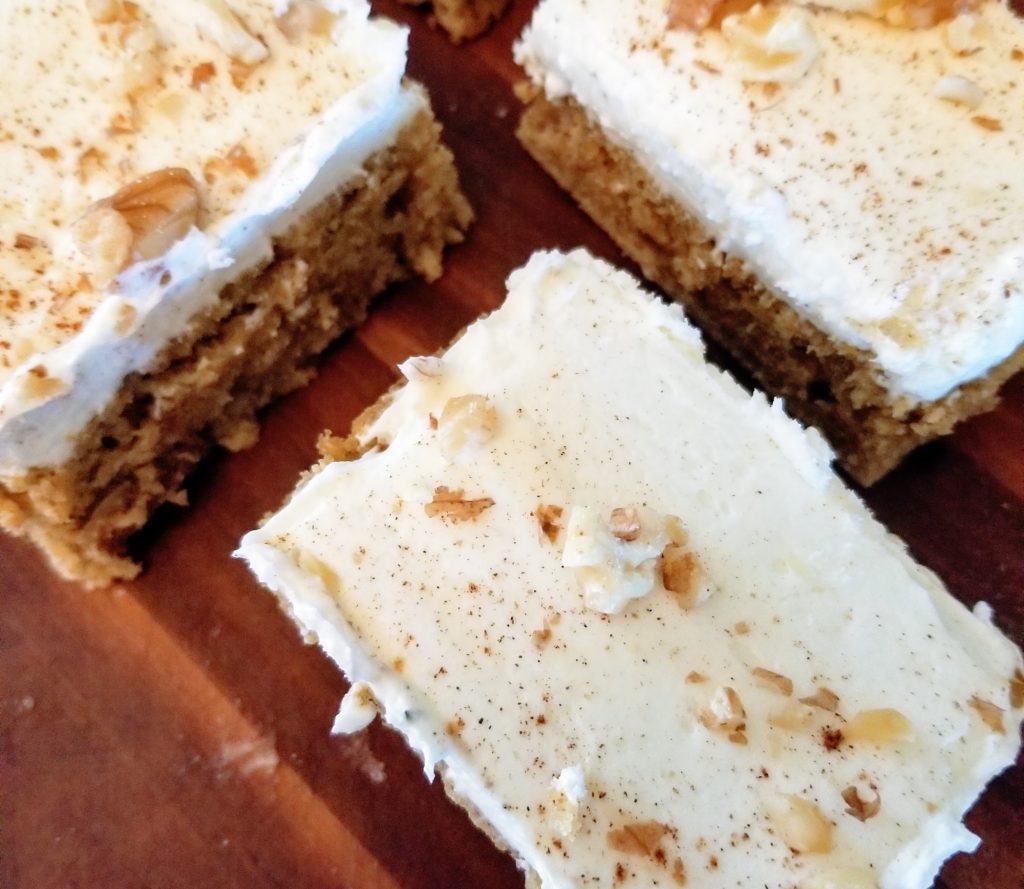
After a few snaps of frost, parsnips (left in the ground) can become quite sweet and are a delicious addition to a cake heady with spices. Mostly because I can, I like to ice this cake with a nice thick cap of snowy cream cheese frosting, a sprinkle of spice and just enough walnuts to let people know it is a nutty cake.
While you can play with the pan size to make it quite high, throw into a loaf, or double to make a lovely layer cake, I like it best when it is unfussy and almost more of a slice than a cake. This way, as I reach for my second helping, I don’t feel nearly as gluttonous. After all, it does contain a vegetable.
Before you get started, I need to talk to you about the frosting. You may hate me for this, but in my not so humble opinion, cream cheese frosting should taste like cream cheese, not like sugar. This is why my recipe has a “to taste” caveat on it. I start very slow with the sugar and add as I see fit. Yes, it should be sweet, but just at the mark of sweet, not sugary sweet. You can disagree with me and pile the sugar in, it’s your choice, but I think you will be just as happy with something that has a nice tangy kick to it.
This cake recipe is adapted from Bon Appetit 2006
Parsnip Spice Cake with Cream Cheese Frosting
CAKE
1 1/2 cups all-purpose flour
1 cup granulated sugar
2 tsp baking powder
1 Tbs ground ginger
1 1/2 tsp ground cinnamon
1 tsp freshly ground nutmeg
1/2 tsp ground clove
1/2 tsp ground allspice
1 tsp kosher salt (i prefer diamond crystal)
3 large or extra-large eggs (duck eggs work great)
1/2 cup olive or vegetable oil
1/2 cup whole milk
1 tsp vanilla extract
2 cups grated parsnip–grated on small holes of a standard grater–packed down
1/2 cup walnut pieces–toasted
Place all of your dry ingredients (including sugar) in a bowl. In another bowl whisk together the eggs, oil, milk, and vanilla. Pour into the dry ingredients and whisk until just incorporated. Stir in parsnip until incorporated, then stir in walnuts.
Pour into a pan of your choice (13×9 makes a cake that is about 1 1/2 inches thick). To prepare your cake tin, grease, then line bottom with parchment paper (i also cut strips for the side of the pan for extra insurance), then grease again. Bake at 350F until done (top is springy) about 25 minutes. I set my timer at 20 minutes and check, then add minutes or pull out of the oven if finished. NOTE: A loaf pan and/or smaller pan for thicker cake will take longer because of less surface area. Please keep this in mind. Let cool completely on baker’s rack.
FROSTING
16 ounces cream cheese–room temperature
8 ounces unsalted butter–room temperature
generous pinch kosher salt
1/4 cup toasted and chopped walnuts
a pinch of cinnamon
a pinch of ginger
powdered sugar to taste (start with 1 cup and add 1 tablespoon at a time)
Using the paddle attachment on an electric mixer, cream the butter and cream cheese until fully incorporated. Add the salt and mix again. Add powdered sugar and mix until completely incorporated. Check for sweetness and add more sugar if desired. Mix until it is light and fluffy. Place into a large piping bag. Cut the tip off the bag giving you approximately an 1/2″ hole in the end and pipe even lines across the cake. Use a spatula to smooth the frosting, careful to keep at an even level. You are looking for a frosting layer of about 1/4 to 3/8 of an inch. Sprinkle the cinnamon, ginger and walnuts over the top.
NOTE: If you are a warm cake fan and like to serve dessert in the vein of an English Pudding, you can serve this cake warm with a bit of custard or double cream. Alternatively, you can use the cream cheese icing and let it melt into a puddle; it will be just as delicious.