Simple Bolognese
On December 10, 2024 by Christy LarsenIn 2009, I traveled to Umbria with my mother and sister on a culinary vacation. We ate at and cooked in small restaurants and homesteads; along the way, we learned techniques and recipes. One evening, we rolled up to an Agriturismo run by a woman named Elena. Elena lived alone in a small brick farmhouse surrounded by beautiful hills and a forest of olive trees. We were there to learn lasagne Bolognese–traditional with spinach pasta and besciamella heavy with nutmeg–it was rustic and delicious.
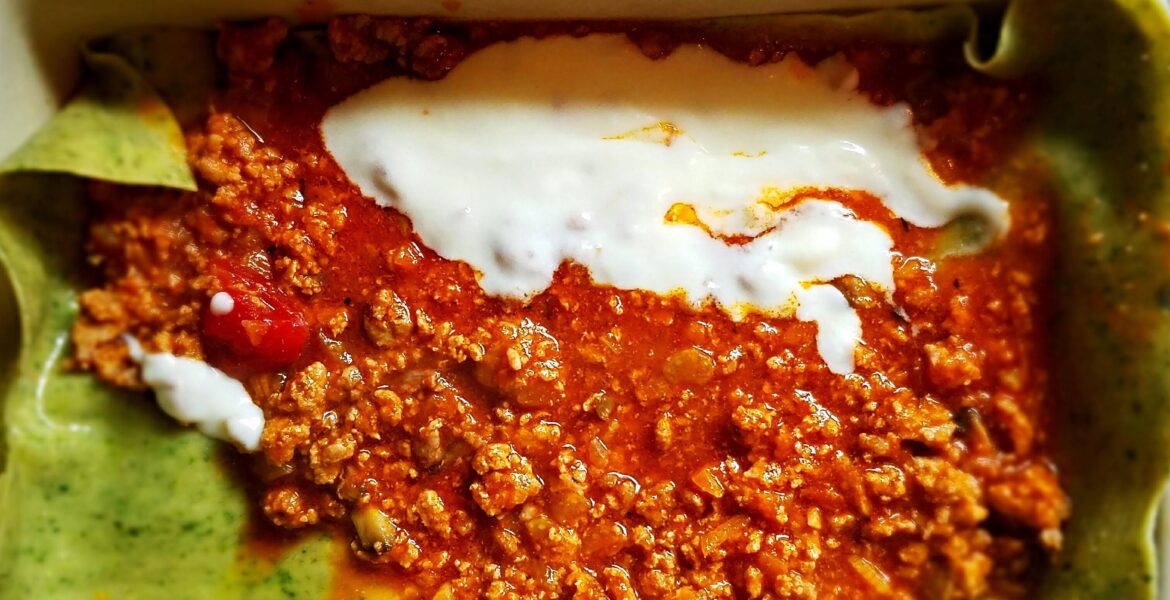
There are as many recipes for bolognese as there are cooks. This one is very simple and will work in a lasagne and as a sauce for pasta. Truth be told, many nights we eat it piled on thick slices of toasted bread topped with mounds of parmesan.
Each time I make this, I think of that wonderful holiday all those years ago. After all this time, it is still my favorite version of a classic sauce.
Simple Bolognese
Elena’s Ragu alla Bolognese
1 carrot
1 celery stalk
1 medium onion
1/2 lb ground pork
1 lb ground beef
1 cup red wine
1 cup tomato sauce
1-2 cups vegetable or meat broth
1 clove garlic–thinly sliced
extra virgin olive oil
salt and pepper to taste
Mince onion, carrot, and celery rather fine. Drop them in a pot with enough olive oil to cover the base. Don’t let them swim in the oil, but don’t skimp. Add a pinch of salt. Fry lightly for about 10-15 minutes, stirring occasionally. You do not want the vegetables to brown. Add the minced meat and mix well until the meat browns a little. Stir occasionally. When the meat is cooked, add the red wine and let it cook into the meat allowing the excess to evaporate. Add the tomato sauce, 1 cup of broth and flavor with a bit of pepper. Add the sliced garlic. Cook the sauce very slowly for 2-3 hours, covered. Stir occasionally and add additional hot broth if the meat looks dry or too thick. Use this sauce for pasta or lasagna.
Homestyle Gnocchi
On April 29, 2021 by Christy LarsenNo big story (although there is always a story) to have to muck through to find out the deets on this one. This recipe is so simple you are going to wonder why you don’t have gnocchi every night of the week. I’m all for that, by the way! Here’s the ‘sitch—
You can scale this up and down based on how much you want to make, or how many potatoes you have in the pantry. Here is what you need to know. There are 3 ingredients to this–potatoes, 00 flour, and salt. The recipe is a ratio 10:1 + a pinch by weight. 10 parts cooked potato to 1 part 00 flour plus 1 nice pinch of kosher salt. I suggest that you make a minimum of 200 grams potato, which is nice for a giant personal batch or a starter serving for 2.
To cook the potatoes, you can peel, cut into chunks and boil in salted water…or you can peel and cut in small chunks, place in a small bowl, add a quick splash of water and a pinch of salt. Cover with plastic wrap and place in the microwave and cook for 3 minutes. Check to see if they are very soft, and if not cook one more minute at a time until the potatoes mash at the push of your thumb. While they are still hot, weigh and mash. You can use a fork for a very rustic approach, or a food mill for a more refined mash. Add 10% 00 flour (by weight) of the potato. If you have 200gr potato, you will have 20 gr 00 flour. Add another pinch of salt and mix together. Knead everything until you have a nice pliable dough.
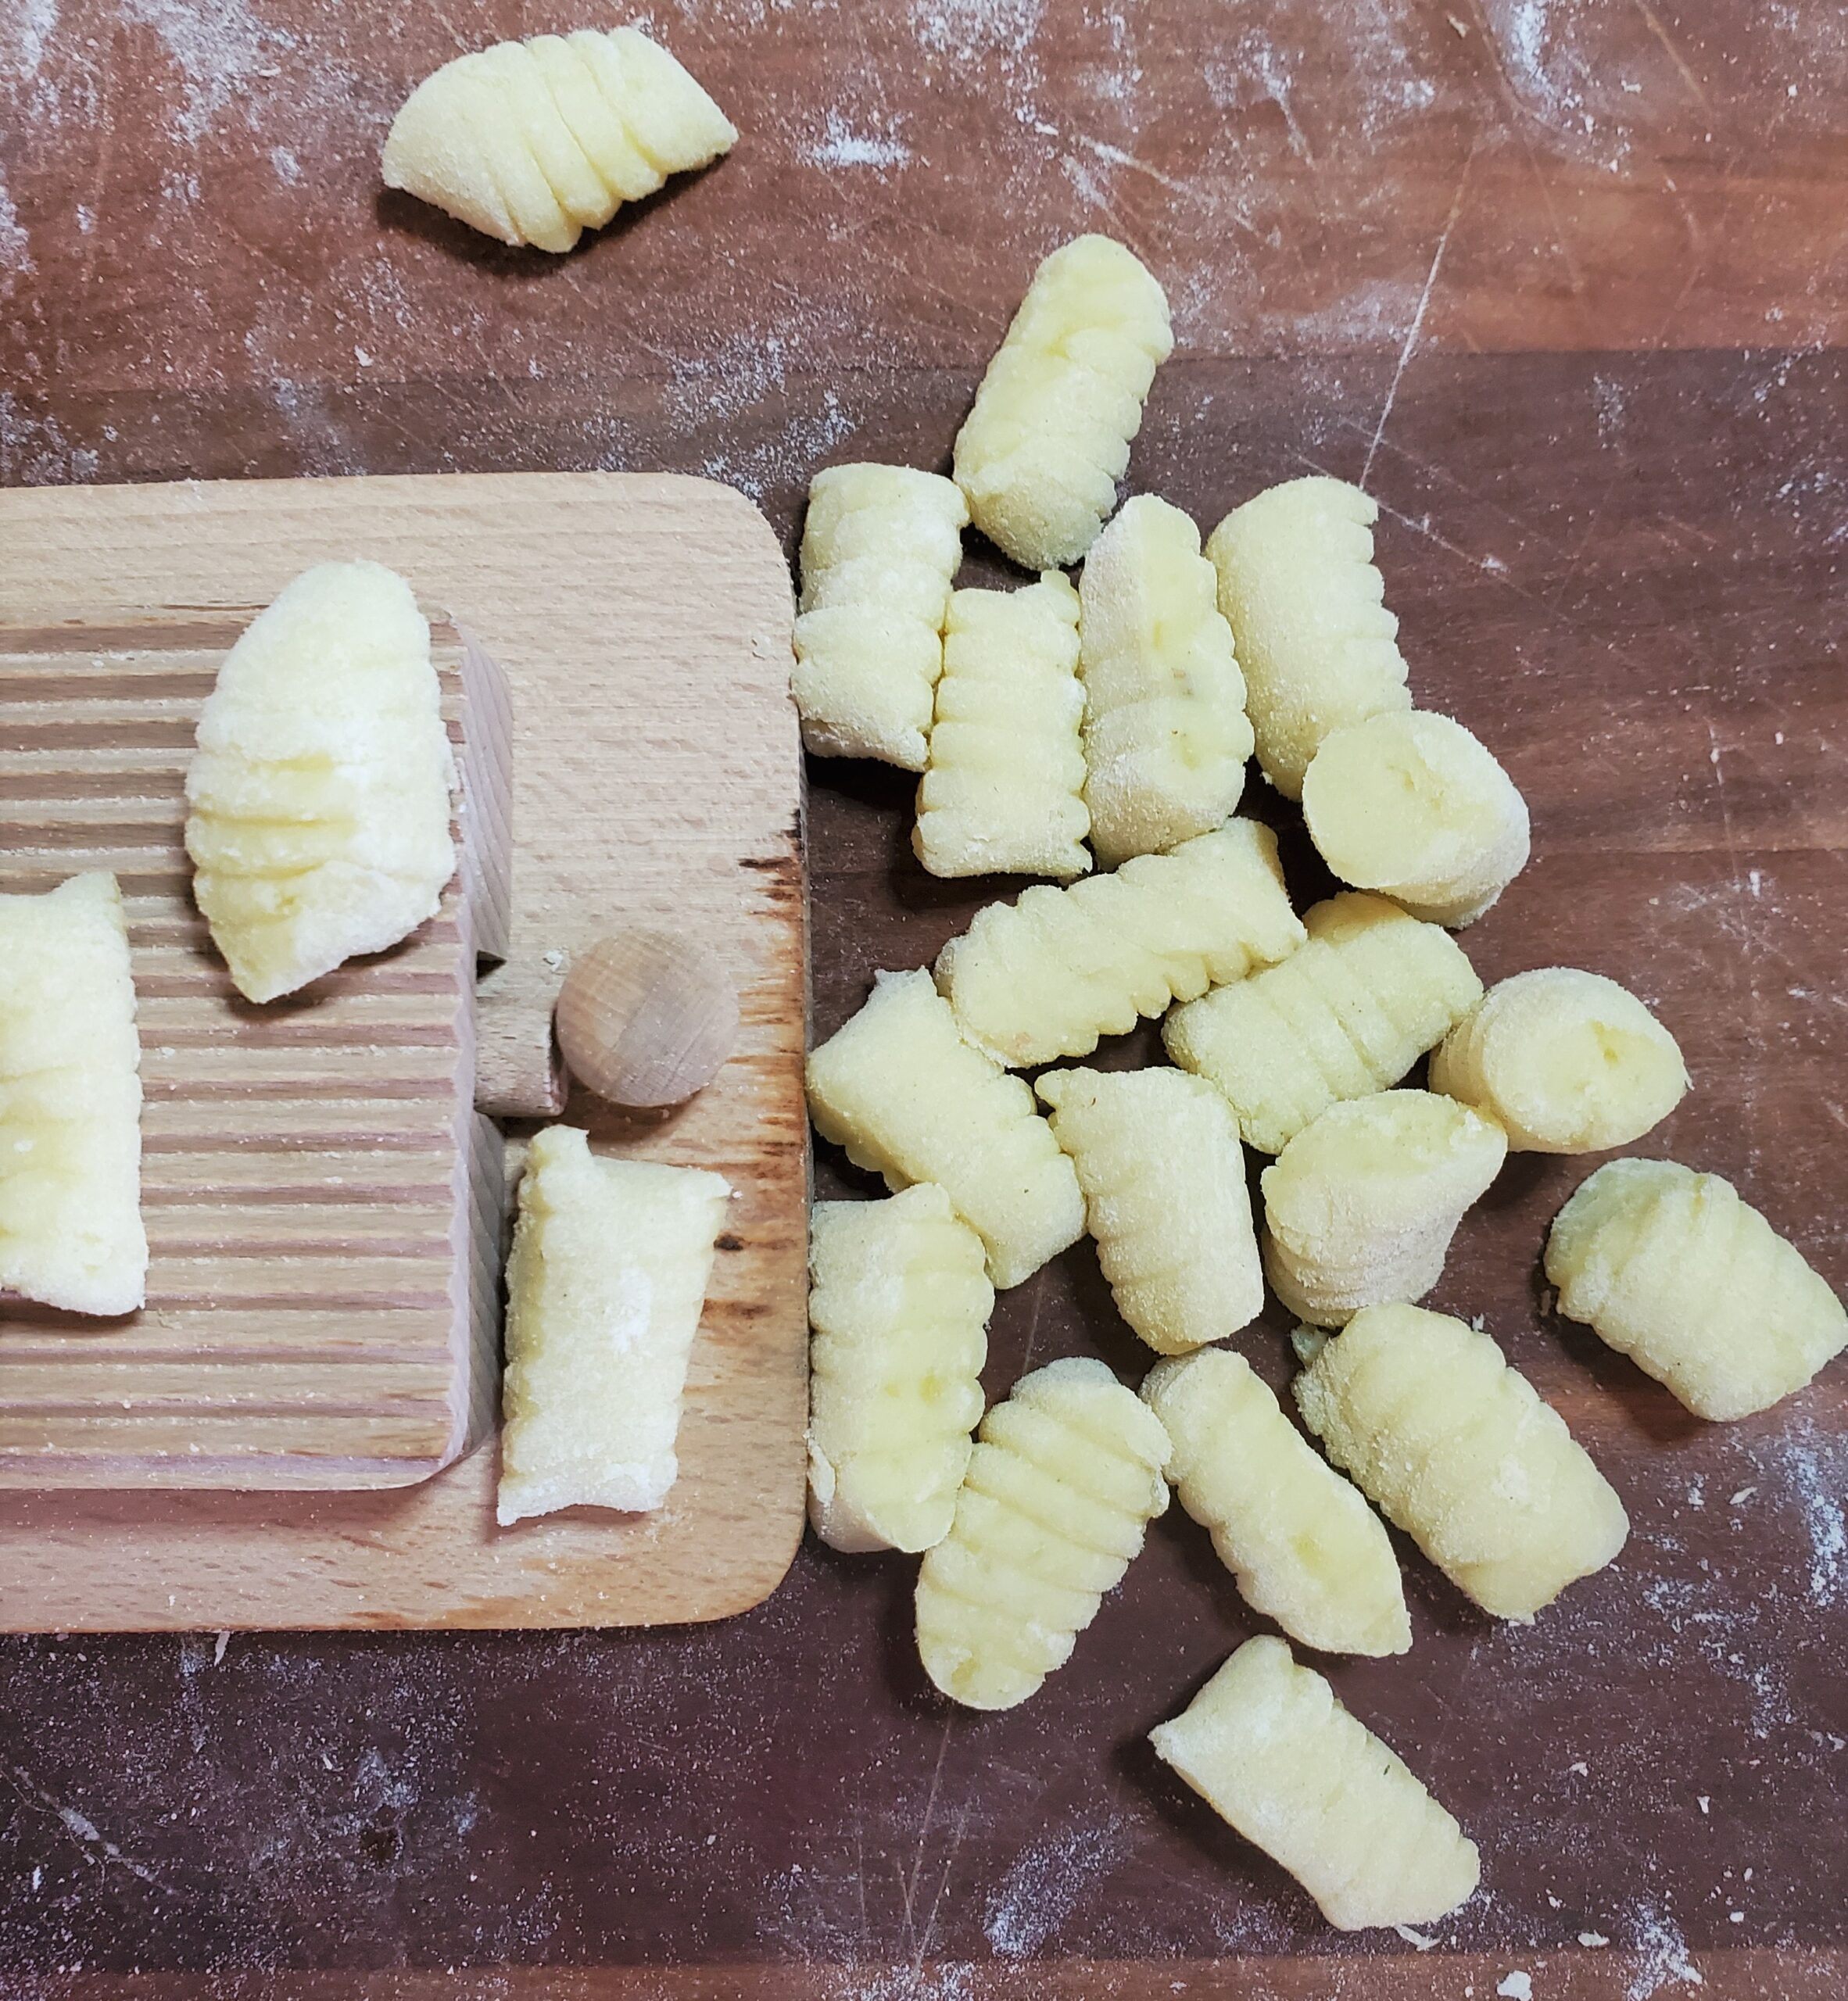
Roll the dough into a long snake about 1/2″ thick. Cut the snake into squares and then use a fork or a ridged board to make marks into the dumplings and set aside.
Boil 4-6″ of water in a medium pot. Throw a couple of gnocchi in the hot water to test the structure and salinity. Allow the gnocchi to pop to the surface of the water, then wait a beat. Remove from water and taste to see if you need to add salt to the boiling water. Add salt if necessary.
Boil the rest in small batches, removing with a slotted spoon. Set aside while you make your favorite sauce. Reheat the gnocchi in the sauce to heat through.
You can refrigerate or freeze the leftovers–sauced or not.
Spaghetti alla Vodka
On March 20, 2020 by Christy LarsenMy grandmother was famous for her alla vodka but not exactly like this. For one thing–she was a traditionalist and used penne. She also didn’t make her own tomato-infused vodka because she was a widow raising kids, with limited amount of time on her hands. Not all sorts like I do (she says with her tongue firmly in cheek). Our garden produced so many late harvest tomatoes that I found myself using them in a variety of ways; sundried, oven-roasted, confit, and soaked in vodka.
Tomato Infused Vodka
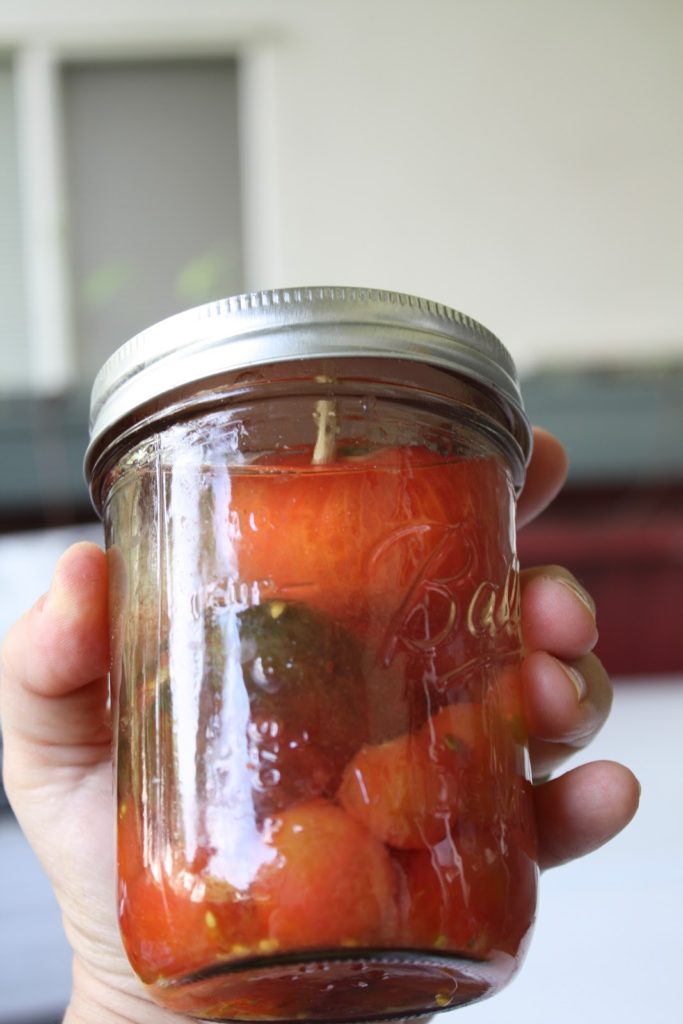
This is really simple. Peel tomatoes and cram into a jar, use a skewer to secure tomatoes if they start to float to the top. Fill the jar with vodka and store in the refrigerator for at least 5 days. I make several jars because I like to use the tomatoes and the vodka for my sauce. Leftover vodka is really great for a bloody mary.
Alla Vodka
1 lb spaghetti or pasta of choice
olive oil
1/2 of small onion–finely diced
2 garlic cloves–finely diced
6-8 basil leaves–chiffonade
1 large tin peeled whole tomatoes or combination of vodka soaked tomatoes and tinned tomatoes to equal about 4 cups whole
1/2-1 tsp crushed red pepper flakes
1/2 cup tomato soaked vodka (or another vodka you have on hand)
1/2 cup heavy cream
1/4 cup grated parmesan plus more for serving
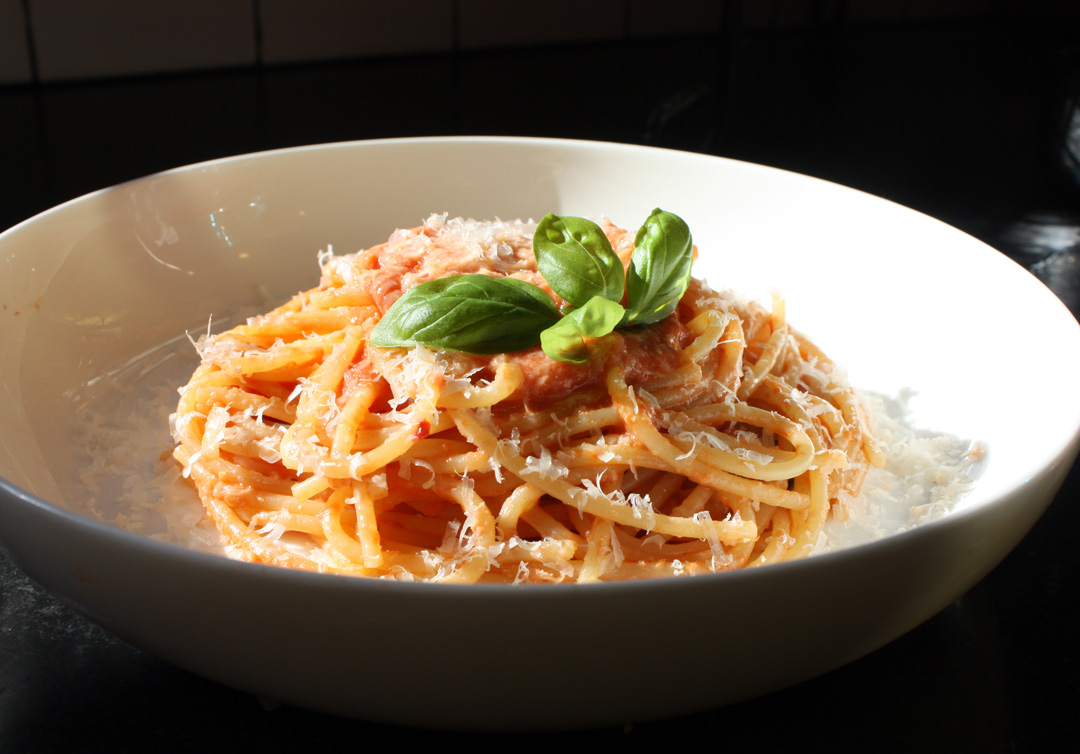
Cook pasta in salted water, according to package instructions. Saute onions and garlic in olive oil over low heat, careful not to brown, but allow to get translucent. Meanwhile, place the tomatoes in a food processor or blender and pulse until smooth. When the onions and garlic are ready, add the tomatoes and vodka and let simmer for about 10-15 minutes. Add the basil, red pepper flakes, and heavy cream. Allow to heat through then stir in parmesan, and toss in the drained pasta. If the sauce seems too thick, use a bit of the pasta water. Shave a bit of parmesan on top of each individual serving, along with additional crushed red pepper, if you like spicy.
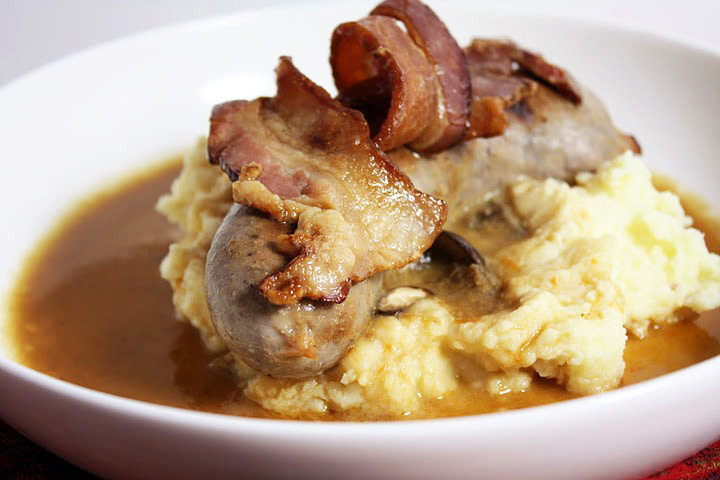
Bangers & Mash
On November 10, 2015 by Christy LarsenSeveral years ago, Mike and I enjoyed a quick trip to London. My good friend Rebecca lives outside of London proper, but popped into the city to treat us to lunch at a fancy restaurant. In typical American fashion, we eschewed the fancy and ordered pub style lunch. And in typical British fashion, Rebecca didn’t flinch. I lived in London, which now seems a lifetime ago, for several years. I always ordered bangers and mash when found on a menu. Its one of those meals that everyone has a version of, and everyone’s mum made best. I always found the meal to be hearty, comforting, and delicious. My version here is an attempt to copy the version we had on our last visit to London.
Bangers and Mash
mushroom gravy
1 stalk celery–finely diced
1 carrot–finely diced
1 onion–finely diced
pinch salt
3 cups beef stock
1 bay leaf
3-4 sprigs parsley
2 sprigs thyme
2 oz unsalted butter-softened
3 Tbs flour
3 crimini mushooms–sliced
4 crimini mushrooms–diced
Cook the celery, carrot, and onion in a bit of olive oil until just softened. Add the beef stock all at once and stir. Toss in the sliced mushrooms, the bay leaf , the parsley and thyme. Cover and let simmer for at least 30 minutes but up to an hour. Strain. Return the liquid back to the pot. Mix together the butter and flour in a bowl. Add the warm stock, a bit at a time to the butter-flour mixture, whisking to make a smooth paste. Once you have a runny paste (much like toothpaste), whisk it into the broth until smooth. Toss in the diced mushrooms and simmer until it thickens and the mushrooms soften–about 10 minutes.
Bangers
4 bangers
4 thick cut bacon rashers
1/2 bottle lager
Put bangers and bacon in a sided saute pan. Pour in beer and simmer until the beer has completely evaporated. Add just a bit of olive oil and allow it to continue to cook until the bangers are cooked through. Your pan will get really dark and scary looking. Don’t worry…it won’t damage (fill the pan with water and slowly simmer on the stove, it will clean right up)
Mash
5 smallish yukon gold potatoes–peeled and halved
1/2 stick of unsalted butter–room temp
2 oz cream chese–room temp
milk
salt and pepper
Boil potatoes in salted water. drain and return to pot. Toss in butter and cream cheese and mash. Add enough milk to get your desired consistency. Once you add the milk, you have to be mindful. Do not whip and beat endlessly. If you do, you may end up with gummy mash–yuck. Better to have a lump or two. If you like silky mashed potatoes, run them through a ricer before adding butter and cream cheese. add salt and pepper to taste.
To Assemble
Place a generous portion of potatoes on your plate. top with the sausage and enough gravy to make you smile. Top with a rasher of bacon.
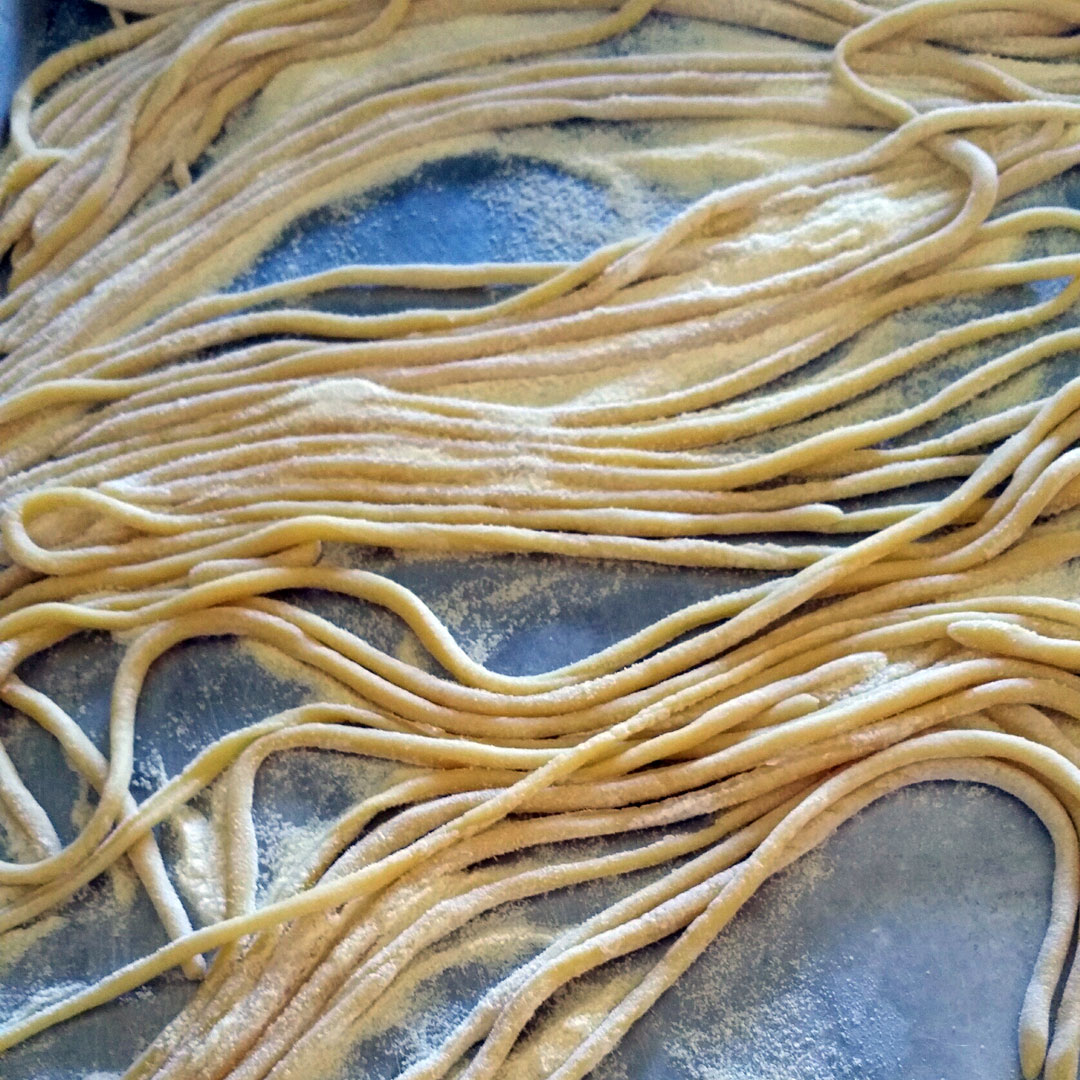
Pici Pasta
On April 26, 2015 by sixtyacrebakerPici pasta is a favorite of mine. When I see it on a menu, I order it. Pici is in a class of its own. It is fresh and chewy, and incredibly slurpable. Truth be told, I use this dough for my cavatelli as well, because of the chew factor.
When I was a kid, my grandparents would arrive on the day summer vacation began and stay until labor day. Some kids would come back from summer vacation, tanned, thin and 3 inches taller than they were when they left? Not this kid. My belly would be slightly rounder, I’d rattle off Italian phrases like I was Sophia Loren. I knew who Sophia Loren was. I was tan. We’d spend long evenings on the sun porch, eating, laughing, listening to the radio, and playing cards. My grandfather was an ace gin player and at a penny a point, we barely noticed our piggy bank dwindling. The food we ate was always delicious, and always from scratch.
Upon the gran’s arrival, the suitcases were hauled into the kitchen and unloaded. It was like Christmas. Literally. Grandma Grace would bring the Christmas stockings she collected from her bank and held from December until June. They were filled with hard candy and cheap toys; we loved them…and her for carrying on this tradition far longer than we really deserved. The grandmas were a tag team. Although they only saw each other this one time a year, they collaborated all year on what to bring with them to California. Out of the cases would come whole salami and prosciutto, buckets of polly-o and parmesan, capers, olives, anchovies. They were like traveling deli salesmen.
We didn’t think it odd at all.
Around day two or three the pasta making began in earnest. The dining room table, the pool table, the kitchen table, were all covered in sheets and dusted with flour. The pasta roller was brought down from the high shelf in the service porch and everyone was enlisted in the task of making pasta. We had one shot at making enough pasta for the summer. Mapping out how many dinners, who would be visiting, how much would each person eat, and what type and shape of pasta was a bit of an ordeal. The kitchen a bustle, until pasta making began. The room became silent. Everyone with a task; everyone working toward a common goal.
My job was always to transfer the pasta from the kitchen to its assigned table. Sometimes, most times, more went into my mouth than on the table. yes raw. Especially if it was cavatelli. I just loved the chew.
Still do.
Which is why I love this recipe. It has that bit of a chew. It also has a raw egg, so eating it uncooked is a risk you have to decide about on your own.
Semolina Pasta Recipe
*use for pici, cavatelli, orecchiette
2 cups 00 flour
1 cup semolina flour
3/4 tsp kosher salt
1 extra large or jumbo egg (i use a duck egg)
1 Tbs olive oil
1/2 cup (+/-) cool water
Place 00 flour, semolina flour and salt in a large bowl. Mix to combine. Make a large well in the center of the flour and fill with egg, olive oil, and 1/2 cup water. Using a fork mix together until all flour is moistened and the mixture is coming together. Use your hands to get the dough together in a ball. Turn out onto a floured work surface and knead for approximately 10 minutes. The dough should not be wet, and it shouldn’t be scraggy, but it should be a bit stiff. If the dough is too wet, use a bit of flour when you knead…just a bit at a time.
Wrap in plastic wrap and place in the refrigerator for about 1 hour.
To roll out the pici:
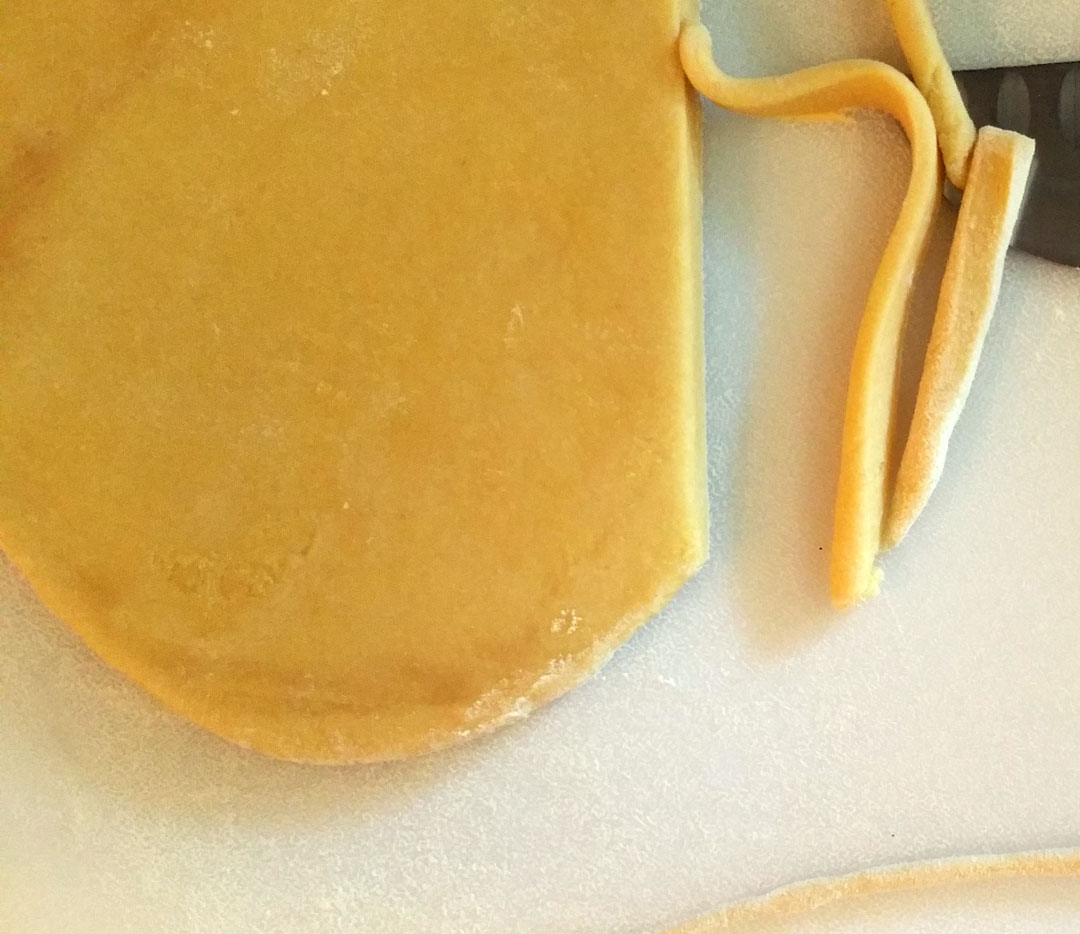
Roll the dough with a rolling pin, on a lightly floured surface to about 1/4″ thick. Using a knife, cut the dough into strips about 1/8″ wide. Gently roll each piece on a lightly floured surface, starting from the center, and work your way out. Place on a tray dusted with semolina flour.
Cook in a large pot of salted boiling water for about 8-10 minutes. Serve with your favorite ragu.
** pici pasta is not spaghetti. it is thicker and a bit denser. As I said before, it has a bit of a chew to it.
Here is a short video demonstrating how to roll out your pici
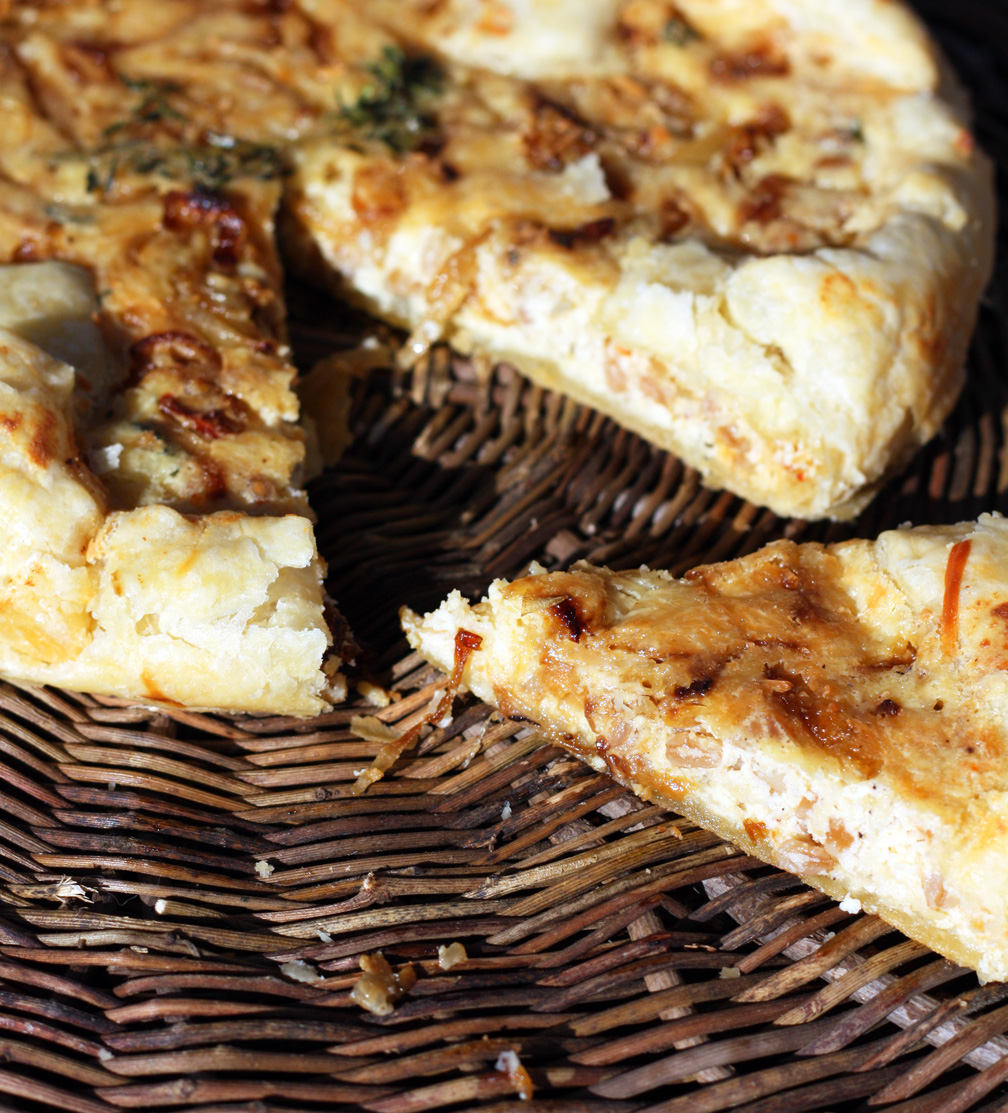
Farro Crostata
On April 6, 2013 by sixtyacrebakerAs spring arrives so does my realization that i have been tucking into thick suppers of roasts and shanks, for months. With the promise of long days and evenings of light, my desires change. I begin to crave hearty vegetarian suppers. When i was offered the opportunity to try Tuscan Fields Organic Farro, I jumped at the chance. I enjoy the meaty texture and nutty flavor of farro, using it mostly in soups and summer salads. However, for this recipe, I took inspiration from a classic and favorite Italian Easter Pie.
Substituting savory elements, for sugar and fruits, this farro pie is lovely as a simple supper. Eat it by itself or paired with a leafy salad.
Farro Crostata
1/2 cup onion–thinly sliced
1/4 cup onion–finely chopped
1 clove garlic–finely chopped
1/2 tsp fresh or 1/4 tsp dried thyme
1/2 cup organic farro alle verdure by Tuscan Fields -cooked
1/2 cup ricotta cheese
2 extra large eggs
1/2 cup grated parmesan (+more for topping)
generous pinch kosher salt
1/4 tsp freshly ground black pepper
1/4 cup cream
1/8 tsp freshly grated nutmeg
olive oil
1 sheet puff pastry
Pour enough olive oil in the bottom of a skillet to just cover the bottom. Toss in thinly sliced onions and over low heat, slowly caramelize. If you find that they are starting to cook to quickly, add a couple of splashed of hot water to slow down the cooking. Once fully caramelized (about 20 minutes), remove from pan and reserve. Meanwhile, whisk together the farro, ricotta, eggs, parmesan, salt pepper, and nutmeg in a large bowl. Using the same skillet in which you caramelized the onions, without washing, add a tiny bit of olive oil (1 tsp) and over low heat, saute the chopped onion, garlic and thyme just until the onion becomes translucent–keep from browning. Pour in the cream, use a spoon to scrape up the bits from the bottom of the pan. Allow the cream to come to a simmer, then slowly stir into the farro and ricotta mixture. Place your puff pastry on a cookie sheet or in a pie tin. It is not necessary to shape it into a circle, if it is square. Gently spoon the farro mixture into the center of the pastry, allowing it to naturally move towards the edges. Allow for at least 2″ from the mixture to the edge of the pastry. scatter the caramelized onions on top and sprinkle with additional parmesan cheese. Fold the pastry ends towards the center, overlapping itself and the farro mixture as necessary to keep the contents within the confines of the pastry. Alternatively, you can line a pastry tin with puff pastry and simply fill with the farro custard. Bake in a preheated 350F oven for 30-40 minutes. After 25 minutes keep a watchful eye that the custard is not “souffleing”–you do not want to over cook this, as it will dry it out and it will taste a bit eggy. This crostata is meant to be creamy. Serve warm or room temperature.
*i received several samples of Farro from Tuscan Fields, free of charge, to utilize in recipe experimentation.
Haggis Reimagined
On January 26, 2013 by sixtyacrebakerAcross the pond and north a bit, January 25th is a big deal.
It is Burn’s Night.
It is a night, in deference to a favored Scottish poet, Robert Burns.
Revelry is compulsory.
And so is haggis.
Words are read, songs are sung and haggis is served.
On this side of the world, prepared haggis is difficult to find.
So, this year I set out to make my own version.
Although true to the spirit, its authenticity can be called to question.
It is not for the weak of stomach nor those with a flair for the dramatic.
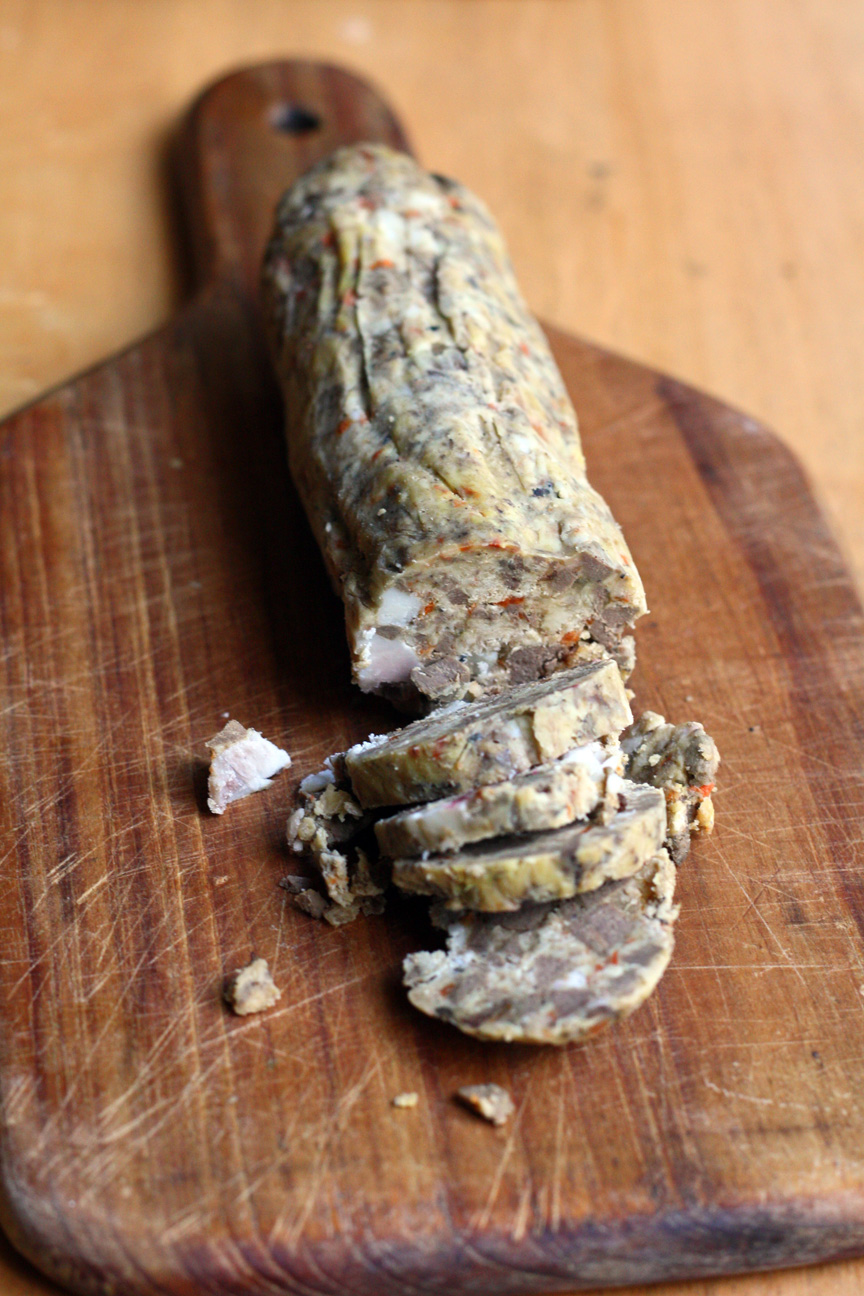
My version is haggis-lite; using more readily available ingredients and served in a less traditional fashion.
To learn more about Burn’s Night Supper click here
Haggis
to prepare sheep heart
1 sheep heart (about 1 lb)
milk
3 pearl onions
6 whole cloves
10 peppercorns
1 large or 2 small bay leaves
a 1/2″ piece of lemon peel–pith removed
water
Thouroughly clean the sheep heart under cool running water. Soak in milk (to cover) for about 4 hours or overnight. Remove from milk and rinse once again. Place in stockpot. Stud the pearl onions with whole cloves and place along with peppercorns, bay leaf and lemon peel in the stock pot. Add enough cool water to cover. Simmer over low heat for 3-4 hours or until the heart is very tender. Remove and let cool, then finely chop the heart. Reserve broth
for the haggis
1/2 cup suet
1 cup onion–finely chopped
1 cup carrot–finely chopped
1/3 cup shallot–finely minced
1 clove garlic–finely minced
1/4 cup scotch
1 cup (approx) broth from heart
1 tsp thyme
1/2 tsp salt
1/2 tsp white pepper
pinch freshly grated nutmeg
1 cup oats–toasted and ground in mortar and pestle or blender
1 cup suet
Heat 1/2 cup suet over medium heat in large skillet. Add onion, carrot, shallot and garlic. Cook slowly until the vegetables are very soft. Stir in the chopped heart and let cook about 3 minutes. add thyme, salt, pepper and nutmeg. pour in the scotch and allow to reduce down (be careful it may flame up) Add 1 cup of broth and stir until all the bits are scraped up from the bottom. Remove from heat and allow to cool for 10-15 minutes. Add oats and suet and form into 3 cylinders about 2″ in diameter. Wrap each cylinder in plastic wrap securely and refrigerate overnight (or freeze for later use).
it is traditional to stuff into a sheep’s stomach and boil directly, however unable to obtain a sheep’s stomach, i opted for the more pedestrian approach. you can certainly “mock” the stomach by making a very large ball with the mixture. you may also stuff into sausage casing if you have on hand
to prepare haggis to serve
keep the haggis wrapped in the plastic wrap, while wrapping in a layer of foil. you may also put in a ziploc bag. place in a pot of boiling water and allow to cook for 30-45 minutes (if using cylindrical method….one large portion will take about 3 hours).
remove from water, unwrap and serve while hot. you may also refrigerate until cool, then slice and fry in a bit of oil for a nice treat.
Buttermilk Fried Chicken
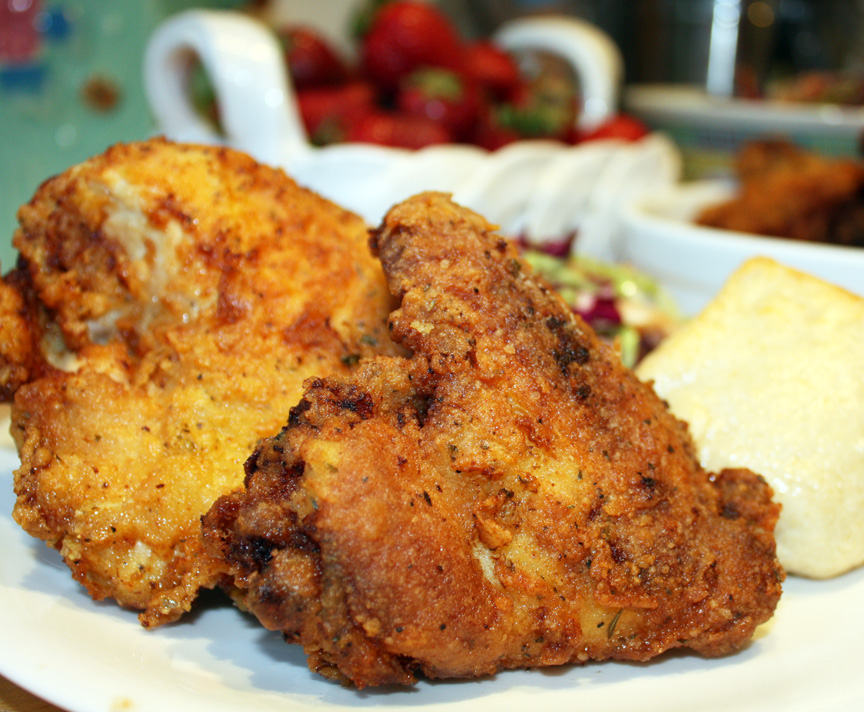
On August 24, 2012 by sixtyacrebakerMy last meal would definitely include fried chicken. To me, it invokes warm summer nights, picnic loaded convertibles driven by dapper gents, and running barefooted at the shore. Grand times and a happy childhood. Forget the trimmings. Serve me up a crispy breast, a slather of honey & leave me in my memories.
Buttermilk Fried Chicken
1 whole fryer chicken–cut into parts (or 8-10 of your fave pieces)
Tabasco
buttermilk
2 cups flour
1/4 tsp turmeric
2 tsp sugar
1 tsp onion powder
1/2 tsp dried parsley flakes
1/2 tsp dried thyme leaves
1/2 tsp dried marjoram leaves
1 tsp black pepper
2 tsp kosher salt
1/4-1/2 tsp cayenne pepper
1 tsp garlic powder
peanut oil for cooking
Clean and dry the chicken pieces. Place in a large freezer/storage bag. Give the Tabasco about 5 or 6 shakes into the bag, then put enough buttermilk in the bag to coat all chicken pieces. Mix it around a bit to insure every piece gets coated with tabasco and buttermilk. Place in the fridge and let “marinate” for 4 hours or overnight. Remove chicken from fridge about an hour before cooking to bring to room temperature (if it is a very hot kitchen, use your judgement on this). You do not want to put ice cold chicken into the hot pan, but you also do not want it to sit out for more than 1 hour. Heat peanut oil in a heavy bottomed pan (i use a cast iron skillet), to about half-way up the sides. Meanwhile, prepare the flour. Mix the flour, turmeric, sugar, onion powder, parsley flakes, thyme, marjoram, pepper, salt, cayenne, and garlic powder in a shallow dish. Remove chicken pieces from the buttermilk and immediately drop into the flour mixture. Coat evenly and generously. Drop into the hot oil and be patient. Do not crowd the pan…do it in several batches if necessary. The chicken will take about 10-13 minutes per side depending on the size of each piece. Dark meat takes a bit longer, so put it in the oil first. Turn each piece only once…and keep the oil below 375..but at or above 350. Remove from oil and drain on brown paper or other kitchen paper
Bram Stoker’s Dracula Dinner
On October 28, 2011 by sixtyacrebaker“We left in pretty good time, and came after nightfall to Klausenburgh. Here I stopped for the night at the Hotel Royale. I had for dinner, or rather supper, a chicken done up some way with red pepper, which was very good but thirsty. (Mem. get recipe for Mina.) I asked the waiter, and he said it was called “paprika hendl,” and that, as it was a national dish, I should be able to get it anywhere along the Carpathians”
“I had for breakfast more paprika, and a sort of porridge of maize flour which they said was “mamaliga”, and egg-plant stuffed with forcemeat, a very excellent dish, which they call “impletata”.
Bram Stoker
Dracula
I‘m really not much for horror stories. However, if the opening chapter references two meals, I become open-minded. For the record, Dracula is a well written story with astounding imagery. We all know Dracula is the only vampire that counts (get it? count dracula!)
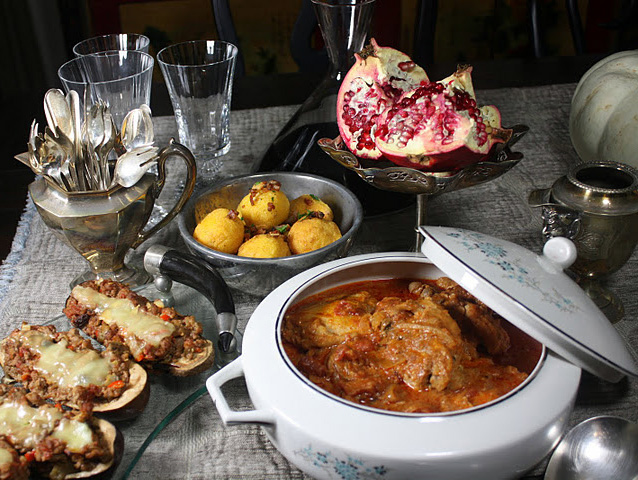
If you are indecisive regarding your Halloween meal, I present to you an idea that is both clever and delicious. A Dracula dinner party using recipes inspired by the words of Stoker himself.
Dracula Dinner Party
chicken paprikash
(printable recipe)
eggplant implatata-ish
(printable recipe)
hungarian-bacon stuffed corn fritters
(printable recipe)
custard tart with sour cherry glaze
tokay wine
Lemon-Chevre Ravioli
On July 18, 2011 by sixtyacrebakerI have been making homemade pasta for as long as I can remember. Growing up, as summer arrived, so would my grandparents. Both sets. Heavily ladened with luggage and lessons, my grandparents were old school Italians. The “grandpops” sat on the sun porch playing cards and tending to the vegetable garden planted each year. The “grans” would sit at the kitchen table compiling lists of what would be needed for the evening supper. Pasta was always a side dish always homemade. We would make it several times each summer; filling our bellies and the freezer. The dining room became pasta central. The dining room table only used at Christmas, in a room that appeared hermetically sealed, would become a work bench covered in flour. We’d spend hours kneading, rolling, cutting, and drying our summer staple. It must be said, we never used 00 flour. It was hard to find and expensive–we used what we had on hand. It was delicious.
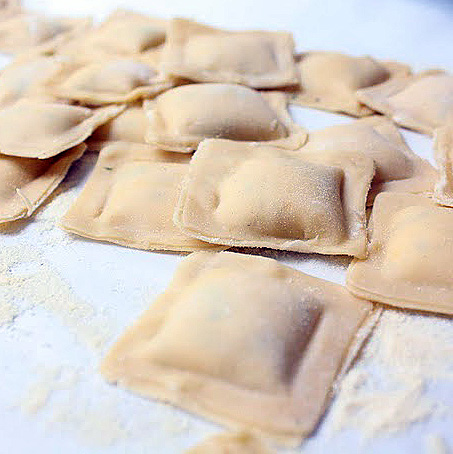
My grandparents have all passed and with them many of the summer traditions we all enjoyed. I still make pasta, in small quantities, with the same equipment as generations past. However, it is abundantly less shocking to see my dining room, littered with flour and covered in pasta. Sometimes I use 00 flour, if I have it on hand. But mostly, I use a high quality cake flour, which works beautifully for a delicate pasta, like this lemon pasta I used to make chevre ravioli. It is not quite how nonna would do it, but delicious none the less.
Lemon-Chevre Ravioli
for the pasta
3 cups cake flour (i use king arthur)
5 extra large eggs
2 tsp finely grated lemon peel
Place the flour in a mound on your work bench. Using your fist, make a large well in the center of the mound. Using the fork, bring the flour into the eggs to begin forming a dough. Continue bringing the flour in until you have a sticky mixture. Begin working the rest of the flour in by hand and knead for at least 10 minutes, and until you have a very smooth dough. The dough must be very smooth and well kneaded before leaving it to rest for 10 minutes or up to an hour at room temperature. Cover the dough with plastic or a towel or something to discourage a “skin” from forming. When ready, use a bit of flour so the dough does not stick and roll very thin. Cut in desired shape(s)
for the filling
5 oz chevre–room temperature
3 oz cream cheese–room temperature
1/2 tsp garlic powder
pinch nutmeg
1 tsp finely grated lemon peel
2 Tbs basil leaves–chiffonade
pinch salt
1/4 tsp white pepper
1 egg
1/4 cup grated parmesan cheese
Mix everything together until evenly incorporated. Place in refrigerator until using. Can be made up to a day in advance and kept covered in the refrigerator.
to assemble
small bowl of water and pastry brush
flour
semolina flour or cornmeal
It is important that your dough is rolled out thin, because you are using two pieces. it doesn’t have to be as thin as a won ton wrapper, but it should be close to it. If you are using a pasta machine, roll the pasta to the second thinnest setting.Place 1 sheet of pasta, cut into strips 2″ wide and as long as you like on your work surface. make sure your surface is dusted with flour to prevent sticking. Place filling with a teaspoon in the center of the dough, leaving room for even border on all sides. brush the dough, where you are going to seal the top piece, with water. Place a second piece of dough on top. Press around the filling with your fingers until you have a nice seal. Stamp with your ravioli cutter, cut with a knife, roller or cookie cutter to make uniform ravioli. Press the seams one more time. Place on a cookie sheet sprinkled with a bit of semolina or cornmeal to prevent sticking. Use immediately, or freeze for future use.