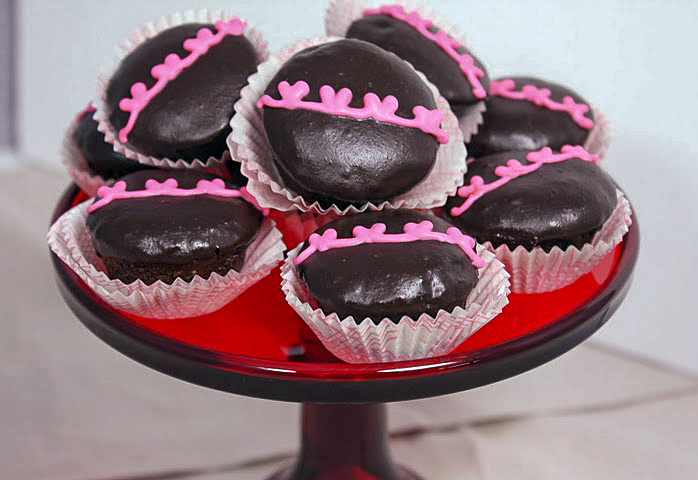
Happy Heart Cupcakes
On January 23, 2019 by Christy Larsen I love it when I make things that look familiar but taste delicious
it is not so difficult when making mock store-bought treats for these hostess-like cupcakes. I use my tried and true devil’s food cake recipe for this; which I also used for my {copycat} ding dongs and instead of
devil’s food cake
3 oz bittersweet chocolate chopped
1 1/2 cups hot coffee or hot water or mixture of the two (i use espresso with water)
3 cups granulated sugar
1 1/2 cups cocoa powder
2 1/2 cups flour
2 tsp baking soda
1 tsp baking powder
1 1/4 tsp kosher salt
3 extra large eggs
3/4 cup vegetable oil
1 cup sour cream + 1/2 cup milk or 1 1/2 cups buttermilk
1 tsp vanilla
Melt bittersweet chocolate in hot water/coffee. Sift dry ingredients together (including sugar). Mix together the chocolate/coffee mixture, milk, sour cream, and vanilla. In a mixer beat the eggs with the oil until thickened and doubled in volume (about 3-5 minutes). Add the dry and wet ingredients, in an alternating pattern, beginning and ending with the dry ingredients. Mix until just incorporated.
Prepare your mini-muffin tins by liberally spraying with baking spray. Bake in a preheated 350F oven. These will bake rather quickly, check after 5 minutes. They are done when the tester comes out clean and the top springs back when lightly touched
creamy fluffy filling
1 cup milk
5 Tbs flour
1 1/4 cup powdered sugar
1/2 cup lard/shortening–room temperature
1/2 cup unsalted butter–room temperature
1/2 tsp vanilla
pinch
salt
Over low heat, cook milk and flour in a saucepan until it makes a thick paste. Use a whisk to break up lumps. Let cool. In
ganache
1/2 lb bittersweet chocolate–
1/2 cup cream
1 Tbs granulated sugar
1 Tbs corn syrup
2 Tbs butter
Heat cream with sugar and corn syrup over medium heat. Once cream begins to simmer and sugar is dissolved, pour over chocolate and butter. Let chocolate melt and then whisk together until it is thick and shiny.
For Royal Icing, I use Martha Stewart’s recipe. You can find a link to her recipe HERE
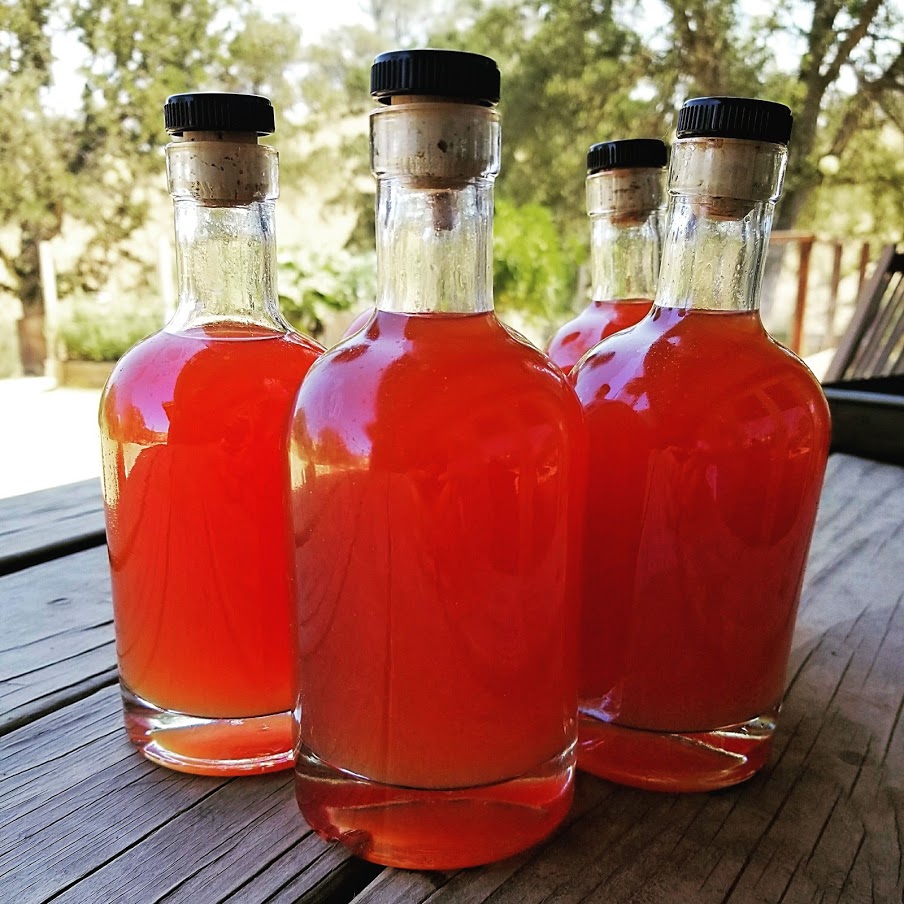
Citrus-Cello
On July 5, 2018 by Christy LarsenI always have a citrus-cello project in the works. It is the final resting place for all the excess citrus that we grow and gather. I currently have a limoncello & arancello in the works. Limoncello is an Italian digestivo, that is most popular on the Island of Capri…but can be found all over Italy, and now the States as well. Arancello isn’t quite as popular, nor is it as authentic, but I love it anyway. It is a delicious liqueur and has many uses beyond drinking. I, for example, toss it into my homemade jam just before canning and often use it as a soak for my olive oil cake. Although making this takes passive time, it’s really easy…and makes a wonderful gift. Start now for the holidays.
You need lots of fruit–use lemons, blood oranges, mandarins, grapefruit, whatever you have on hand. We mostly use the peel, but will also need to juice the fruit and store it for later.
Waste not, want not; so here are some ideas for the rest of the lemon:
Cut in half, pour some salt on it and tame your elbows (Barbra Streisand does it and so should we).
Juice the lemons and make the required sugar syrup in advance (but keep it in the freezer, so it doesn’t get weird).
Make lemon curd…better yet, make lemon chicken…ooh what about lemon bars? Those are my fave.
Back to the recipe. Wash and dry about 10-15 lemons {or fruit of choice}. The lemons should be unwaxed. Remove the peels. Now, this is very important…you do not want the pith. That is the white stuff that hugs the peel like a preschooler hugs his mom on the first day of school. Remove it all…you only want the yellow part. The pith is bitter and is not good for your end result. Place all the peels in a large glass or ceramic jar with a tight-fitting lid. Pour 1 bottle of vodka or grain alcohol over it. You do not need expensive vodka for this, you want the alcohol content, but the theory is that you will be changing the flavor of it, so don’t break the bank on this one.
Put the top on the jar, date it, and put it away in a cool dark place for a minimum of 2 weeks but as long as 3 or 4 months. I tend to steep mine for a long time; mostly because I forget.
When you see that all of the lemon peels have lost their color and/or it’s been at least 2 weeks you can move onto the next step.
In a heavy saucepan place 3 cups of water, 1/2 cup of strained lemon juice, 3 cups sugar and 3 Tbs honey. Boil over low heat until the sugar is completely dissolved and the mixture is clear. Don’t let it go too long and get thick and gooey. Let cool.
Pour the syrup into your glass jar with the lemon peels and vodka. Cover and let steep for another week (or longer if you have the time). When you are ready to bottle your limoncello, strain the liquid using cheesecloth or fine sieve. Squeeze all that you can from the peels and then throw away (or roll in sugar and dehydrate for a sweet and boozy garnish). Bottle the liquid in clean jars and seal tightly.
Like revenge, this is best served cold…store it in the freezer.
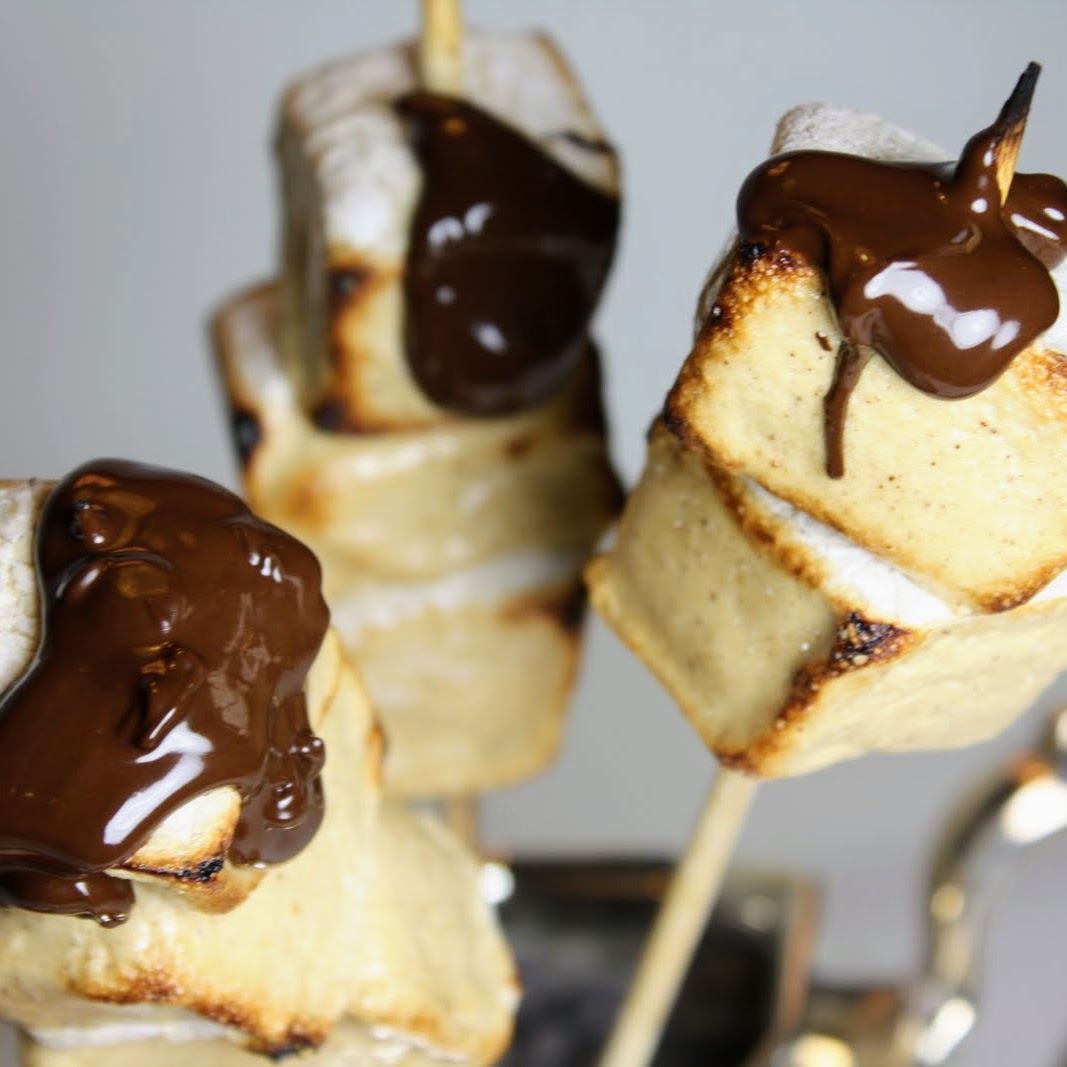
Gingerbread Marshmallows
On June 28, 2018 by Christy LarsenRoasting marshmallows is a year-round sport in my house. Sometimes, I just turn on the stove burner, load a fork, and fire away. Normally, eating ‘mallows out of hand is not my thing…I like a charred exterior and molten center. I do make an exception with these, as they are so good au natural, lightly toasted and dipped in chocolate, or as a float on your favorite hot beverage {even tea…especially tea}.
Gingerbread Marshmallows
3/4 oz gelatin
1/2 cup cold water
1 1/2 cups granulated sugar
1/2 cup dark brown sugar
1/4 cup water
2 Tbs molasses
1/4 tsp kosher salt
1 tsp ground ginger
1 tsp ground cinnamon
1/2 tsp ground clove
2 egg whites
Put sugars in a saucepan. Add 1/4 cup water to make a mixture that looks and feels like wet sand. What is most important is that all sugar has the same amount of moisture. Add molasses, salt, ginger, cinnamon and clove, and place over low heat. Cook until it becomes a sugar syrup of 235-240 degrees. It should have the consistency of corn syrup.
Meanwhile…place 2 room temperature egg whites into the bowl of your mixer. Add the salt .
Prepare gelatin. Place 1/2 cup water in a bowl. Sprinkle the gelatin evenly over the water. Let bloom.
Once the sugar syrup is ready, turn off heat and let sit for a couple of minutes…not too long. Start your mixer on low and get the whites to foamy. Mix the gelatin into the sugar syrup and stir until melted completely. Bring the saucepan over to the mixer and turn it to high. Slowly pour the sugar syrup into the bowl, careful not to hit the whisk attachment. Leave on high and mix until the mixture is warm, but full volume and comes to a peak. While it is still warm, pour into tin or pan. Sift powdered sugar on top. Cut into squares and store in airtight container.
These are yummy tossed into a cup of hot cocoa and a real grown up treat when toasted and sandwiched into a s’more.
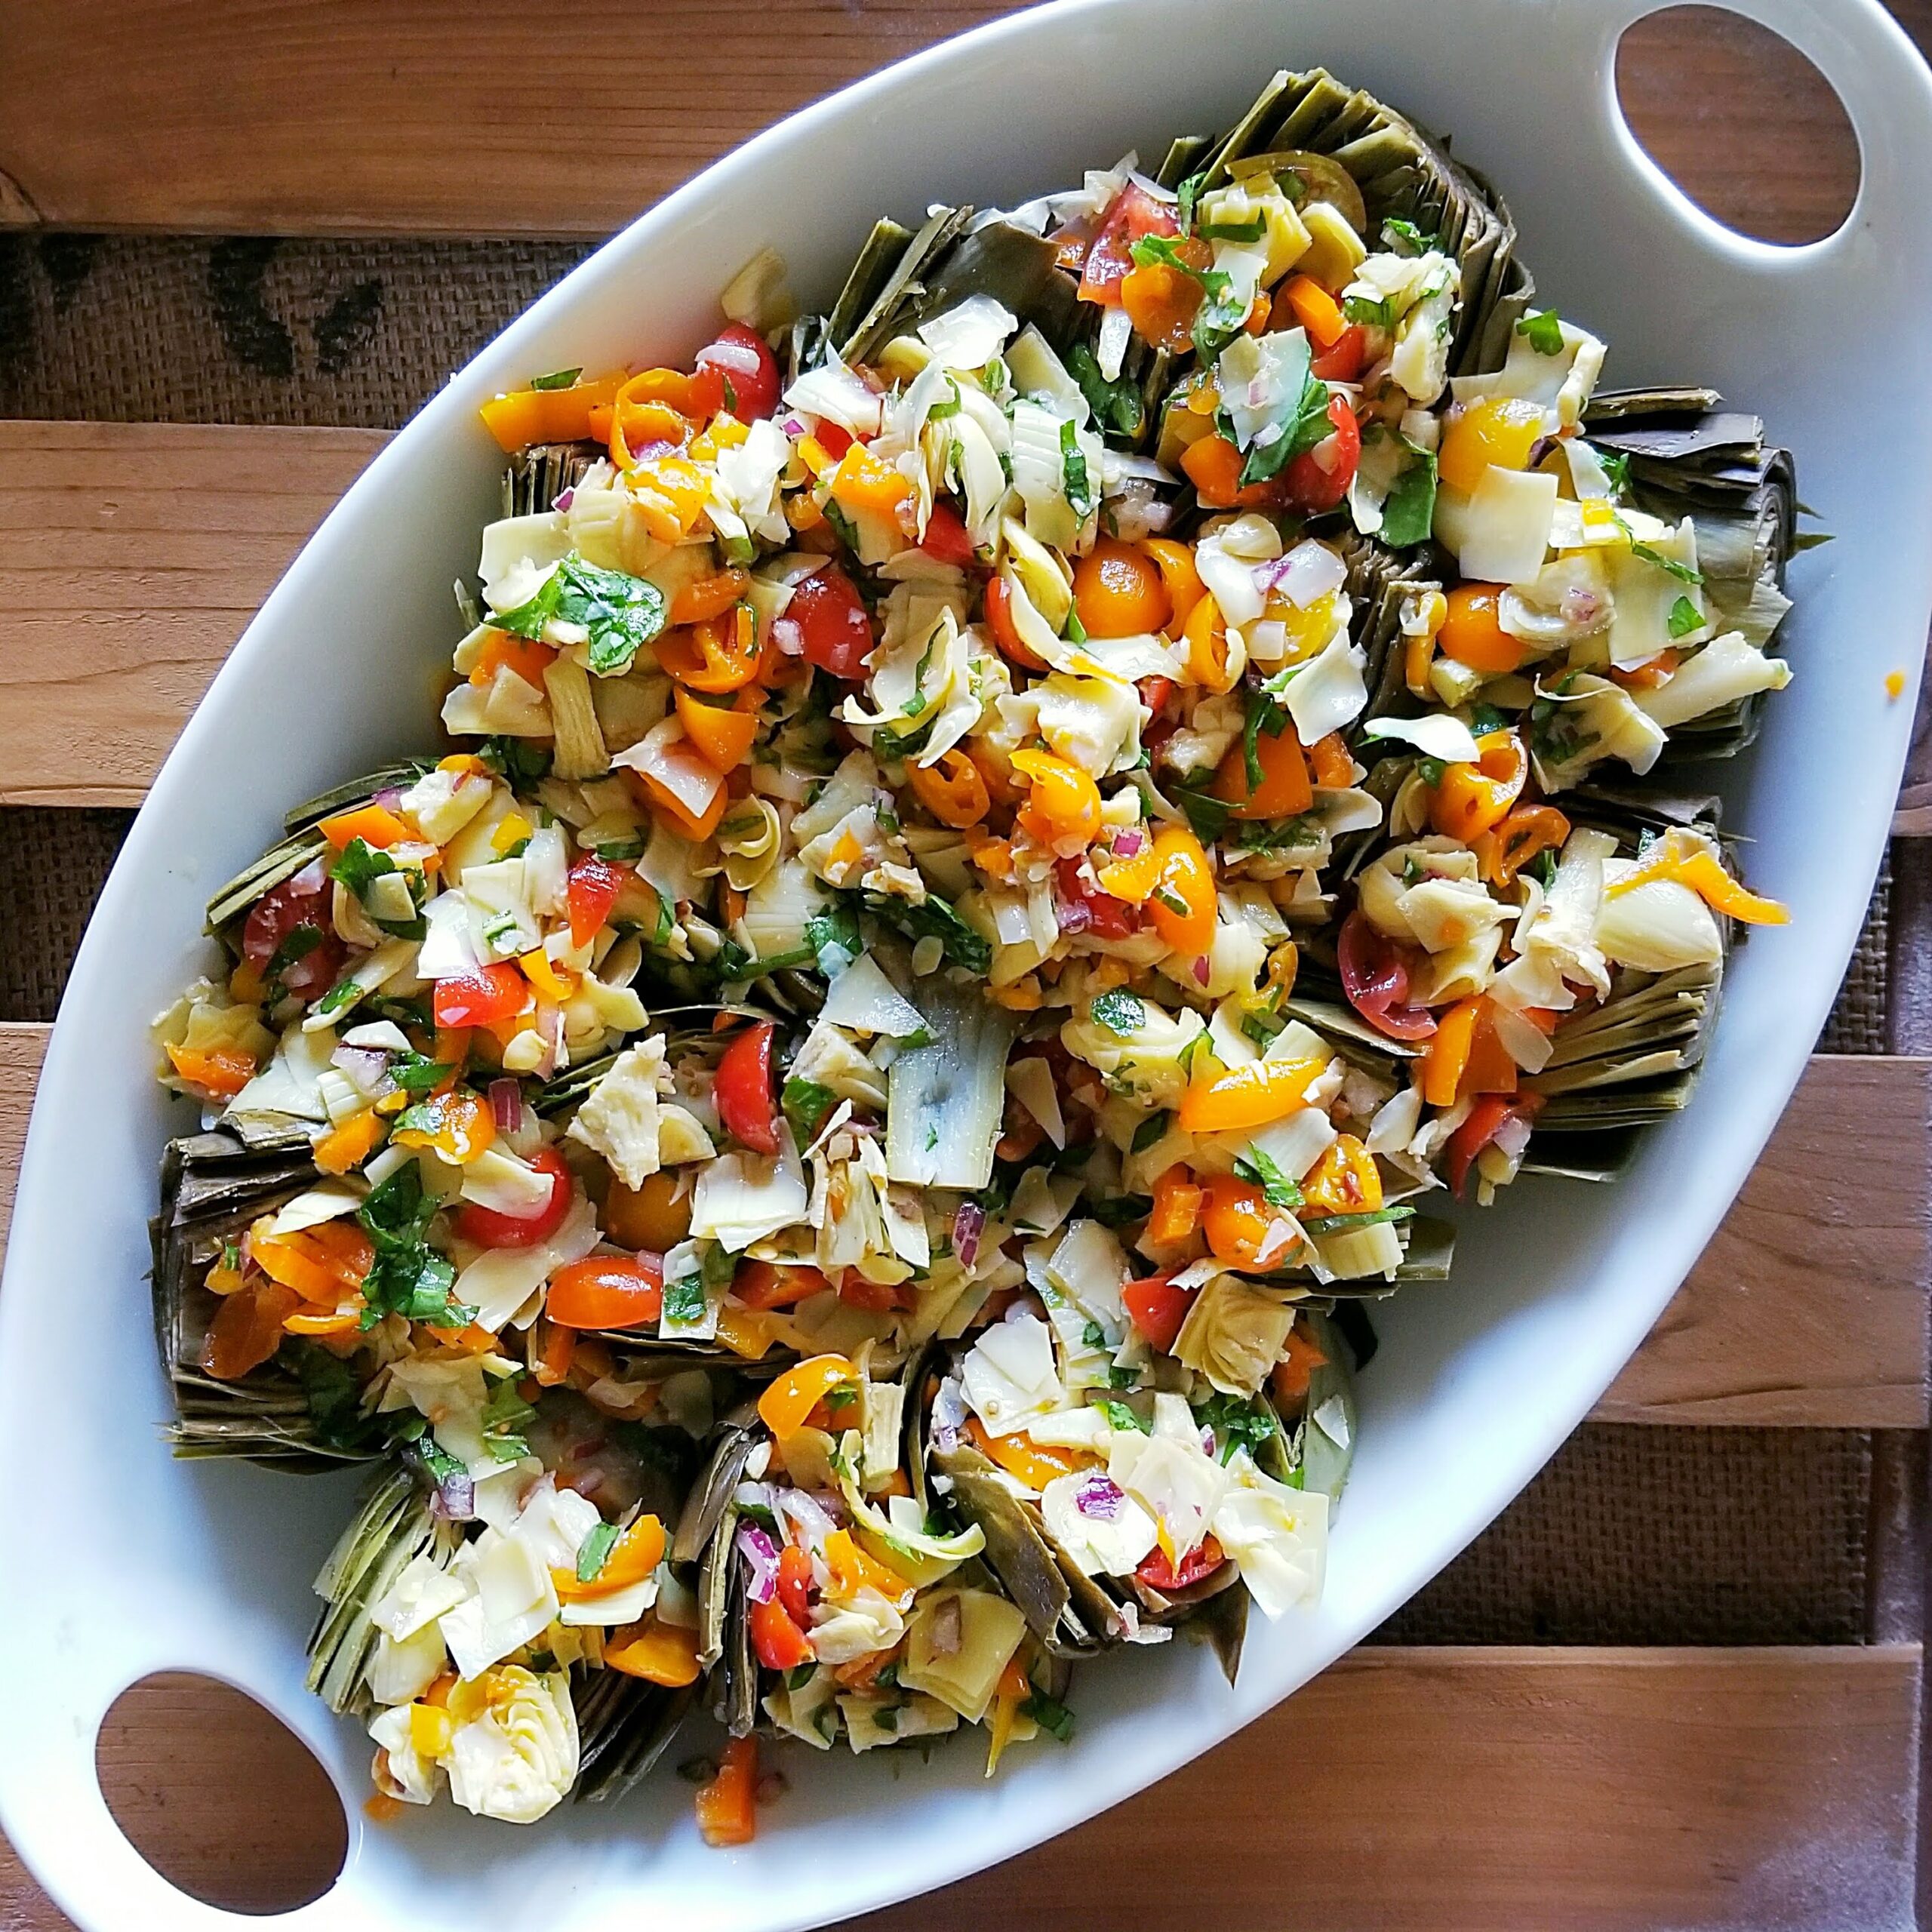
Artichoke Stuffed Artichokes
On April 9, 2018 by Christy LarsenWhen it starts to warm up, and spring is in full swing, we dine alfresco. Our tiny house doesn’t have a dining room, and our “table for two” is never large enough for the number of people eating on any given day. So we take it outside.
Eating outside is wonderful but has some drawbacks; like keeping hot things hot. This is why I shift my cooking to things that are best served at ambient temperature. Unless we have cocktails prior to dinner; because if we have cocktails, then no one really notices that the steak is a bit cold.
One of my favorite dishes is this artichoke stuffed artichoke salad. It is very simple, and is a wonderful way to use up those half-full jars of pickled and marinated veggies in your fridge.
-Wash and trim artichokes and place them in either a steamer or a pan/pot of water with a lemon or two squeezed in it. Don’t fully immerse the artichokes, but use enough water that it won’t evaporate completely before the artichokes are cooked. Place on medium heat and cook covered until you can easily pull a leaf off. Remove from heat, drain and let cool.
-Cut the artichoke in half and use a spoon to remove and discard the choke {the part that has those hairy bits}. Lay the artichoke halves on a platter face up {or alternatively, you can brush with oil and char on the grill, then place on a platter}. Dress with a bit of your favorite vinegar and olive oil. Set aside
-In a large bowl combine your salad ingredients. I like to use, canned artichoke hearts, tomatoes, roasted peppers,red onion, celery, olives, fresh bell peppers, and any cooked rice or barley or grain I have in the fridge. You can use virtually anything you have hanging in the fridge or pantry. Toss together with oil, vinegar, salt and pepper and place a generous scoop into each artichoke half.
-Serve cold or room temperature
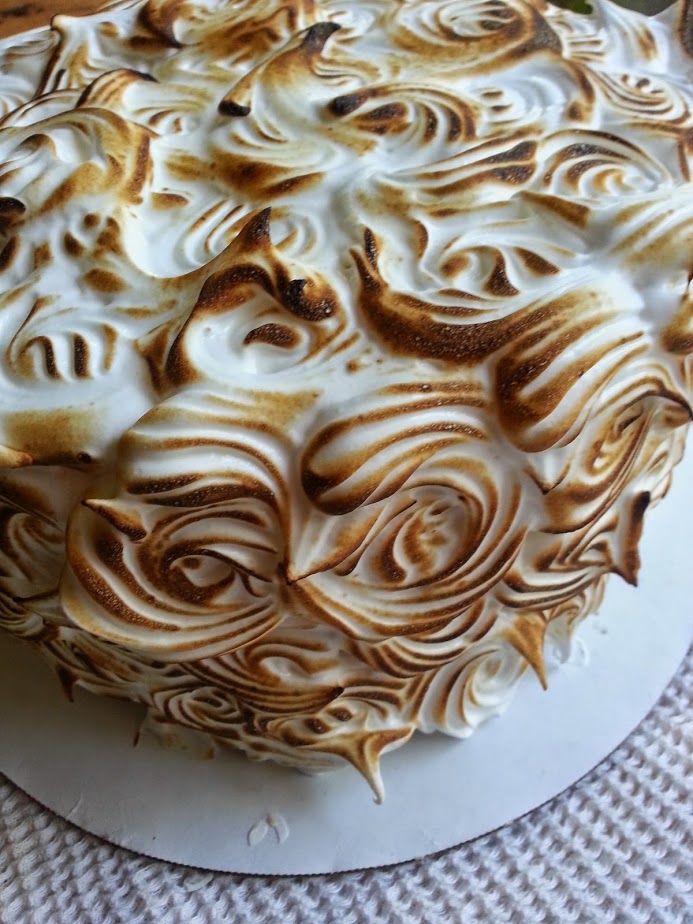
Ten Layer Lemon Meringue Cake
On April 8, 2018 by Christy LarsenLet me get something off my chest; I have a problem with layer cakes that are 3 inches of cake for every 1/4″ of icing. My ideal is {in equal measure} cake, icing, cake, icing ..and so on and so forth until you run out of both. I want layers upon layers that are none too dry or too sweet. It makes it difficult to have perfect sides, and 30 second videos of the perfect spin and frost technique. But it tastes good. Perfect is fine, but delicious is divine.
I first put together this cake for a dear friend’s 80th birthday almost a decade ago. It has become a family favorite. It is perfect all year ’round, but I like to make it when lemons are at their seasonal best.
Lemon Meringue Cake
Cake Layer
{from Nick Maglieri}
3 cups all purpose flour
3 tsp baking powder
1/4 tsp kosher salt
18 Tbs unsalted butter–softened
2 1/4 cups sugar
1 Tbs vanilla extract
9 lg egg whites
1 1/8 cups milk
reheat oven to 350. Whisk together flour, baking powder and salt in a bowl. In a mixer, fitted with paddle attachment, beat the butter and sugar until very soft and light. Whisk together the milk, egg whites and vanilla until just combined. Reduce the mixer speed to low and alternately beat in the flour and milk in 4 batches; starting and ending with flour. In order to not over-mix, do not fully incorporate each addition before adding the next one. Scrape down the sides in between each addition.
I bake this off in thin layers, making it easier to stack when putting the cake together. You can make 2 layers and slice into thin layers, if you prefer…but I like taking the time to bake off thin layers that make assembly a bit more fuss free.
This will make 6-7 thin cake layers. Each layer should be less than 1/2″ thick–i use approximately 3/4 cup batter for each layer.
Spray 9″ cake tins with pan spray and place a circle of parchment in the bottom. If you only have 2 pans, you will have to wash in between bakins. Bake each layer approximately 10 minutes, but carefully watch, as the layers are so thin, they will brown easily. Once you pull the pan from the oven, wait a few minutes, then turn out onto parchment. Wash and dry the tins, then start the process again. Let the layers cool completely. {can be made a day ahead and stored at room temperature, or well ahead and frozen}
Lemon Curd
grated zest from 1 lemon
3/4 cup lemon juice
1 1/4 cup sugar
12 Tbs unsalted butter–cut into small pieces
12 large egg yolks
Whisk the yolks, sugar, lemon juice and lemon zest in a bowl. Place bowl over bain-marie and cook, stirring continually until the liquid thickens to a nappe {coats the back of the spoon and retains shape when you swipe your finger down the middle}. Do not let it boil, as the eggs will scramble. Remove from heat and pour through a sieve into a clean bowl. Toss in the butter while the curd is still hot. Stir until the butter is fully incorporated. Cover with plastic wrap placed directly on top of the curd. Refrigerate until cool and set. {Can be made a day in advance}
Lemon Italian Buttercream Icing
{if you have a favorite icing, use it and add the lemon curd and whip until creamy}
1 cup granulated sugar
1/4 cup water
4 egg whites–room temperature
2 cups unsalted butter–room temperature
1 tsp vanilla extract
1/2 tsp salt
about 1/2 cup lemon curd {this is to taste, it depends on how lemony you want your buttercream}
Place egg whites and salt in the bowl of an electric mixer fitted with whisk attachment. Combine 3/4 cup of the granulated sugar with water in heavy saucepan and bring to a boil over medium heat. Continue cooking until it reaches 235F (just before soft ball stage).
Meanwhile, while the sugar is boiling, begin whisking the egg whites. Once, frothy, “rain” in the remaining 1/4 cup sugar. Whip to soft peak. When syrup reaches 235F remove from heat (it will continue to get hotter and reach the desired 240F). With the mixer on medium speed, begin immediately pouring the hot syrup into the egg whites. Be careful not to hit the whisk directly. Once all the syrup is incorporated, kick the speed up to high and whisk until it cools to room temperature.
Change the attachment from whisk to paddle, and begin adding butter, a few bits at a time. Once it is all incorporated and it looks like buttercream, mix in the vanilla and curd (to desired flavor)
-can be made several days in advance
Meringue
3 large egg whites–room temperature
1/4 tsp cream of tartar
3/4 cup granulated sugar
1/2 tsp vanilla
pinch salt
Make sure the beater and bowl are extremely clean and free of any oil or fats. Beat whites on low until foamy. Add salt and then kick up the speed to medium. Add cream of tartar. Beging to slowly add the sugar “raining” it into the egg whites. Continue to beat until soft peaks form, then add vanilla. Beat to stiff and firm peaks.
If you over-beat, you will see moisture starting to “weep” from the whites. If this happens, start over!
-must be used day it is made
PHEW! –now that you have all the elements, you can start building your cake
To Assemble
Place 1 cake layer on a round cake board. Pipe buttercream around the edge of the cake making a dam. Fill with lemon curd. This curd is quite tart, so you don’t want to over-do it. Also, your filling should not be thicker than your cake layers. Place another cake layer on top of the curd. Pipe a layer of buttercream. Continue with cake, buttercream dam & curd, cake, buttercream, cake….until you run out of cake layers. the top layer should be cake. Refrigerate until cold and firm. You can cover with plastic wrap and refrigerate for 24 house. When ready to finish and serve, cover in meringue (i have piped swirls), and hit with a torch to brown the edges. I do not recommend using the oven as the buttercream and curd will melt quickly.
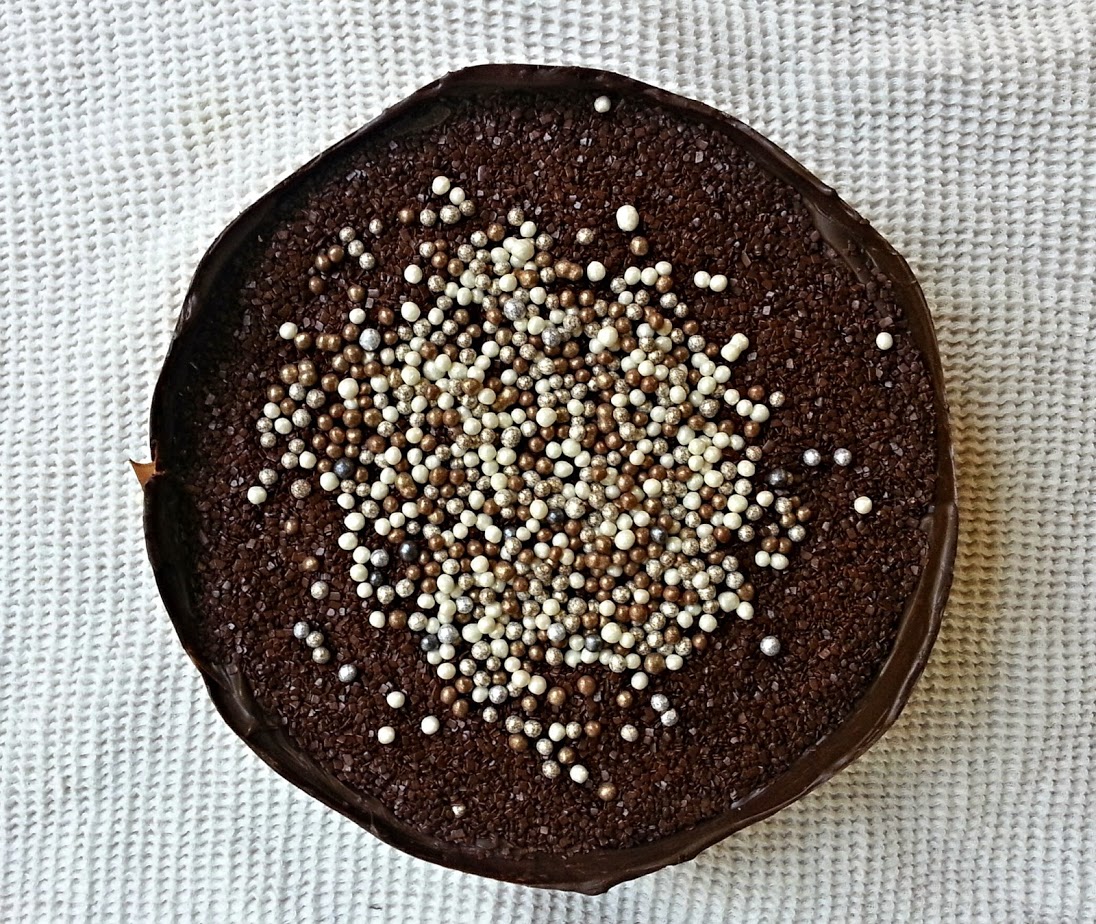
Gateau Noir
On April 6, 2018 by Christy LarsenThis cake is actually named “chocolate nemesis”. It is a wonderful invention of the brilliant ladies at River Cafe in London; and it is simply spectacular.
I call it gateau noir; because, well, it makes me smile. Gateau noir is the name we gave a suitor {not mine} of a girlfriend; whom in my retelling of the 30 year old story, lovingly prepared gateau noir for her in the hope she would be his steady.
Had he used this recipe he might have succeeded.
Gateau Noir
(adapted from river cafe cookbook)
3/4 lb 70% bittersweet chocolate pieces
(please do not make this with nestle or similar chocolate chips–you will not get the result you deserve)
5 large eggs–room temperature
10 1/2 oz granulated sugar
1/2 lb unsalted butter–room temperature
pinch salt (my addition)
1 tsp vanilla (my addition)
1/2 cup water
Place eggs, 1/3 of sugar, salt and vanilla in the bowl of a stand mixer fitted with the whisk attachment. Whisk until the eggs have tripled in volume, and thickened. This will take a minimum of 10 minutes. In the meanwhile, place the remaining sugar in a saucepan with 1/2 cup of water. Bring to a boil and let boil for 3 minutes. Remove from heat and stir in butter and chocolate…letting them melt completely. Allow to cool slightly then slowly pour into the whipped eggs. Whisk for 1 minute, if it doesn’t fully incorporate in that time, use a spatula and fold to fully incorporate. pour into prepared pan.
* to prepare the pan: use a springform pan and spray with pan spray…and then instead of flour, use cocoa powder to coat the pan, tapping out any excess.
there are two ways to bake this cake
To produce a creamy cake, a bit like pudding (this is in tune with the original recipe) bake the cake in a water bath (place your prepared pan, wrapped in foil, into a larger pan that will leave a “moat” of no less than 1″ on all sides. fill the “moat” with enough hot water to reach halfway up the sides of the prepared pan). It is best to do this with the cake pans already in the oven, to avoid spilling water all over the kitchen floor and into the cake batter.
Place prepared pan into a water bath and bake for approximately 35 minutes at 325. the cake is done when it no longer jiggles, but the center still seems a bit soft. if it begins to pull away from the sides, it is over-cooked. After 30 minutes, place your flat hand on top of the center of the cake, if it is no longer liquid, and looks as if it has a skin similar to that of chocolate pudding, and the cake doesn’t jiggle, it is fair to say it is baked enough.
For the more cakey, fallen souffle type of cake; pour the batter into the prepared pan and bake it in the oven without the water bath at 350 for about 30-40 minutes. the cake will rise considerably, then fall. it will look like a fallen souffle and have a light crispy exterior with a dense chewy interior. i love it this way…it tastes just as good and is not nearly as fussy.
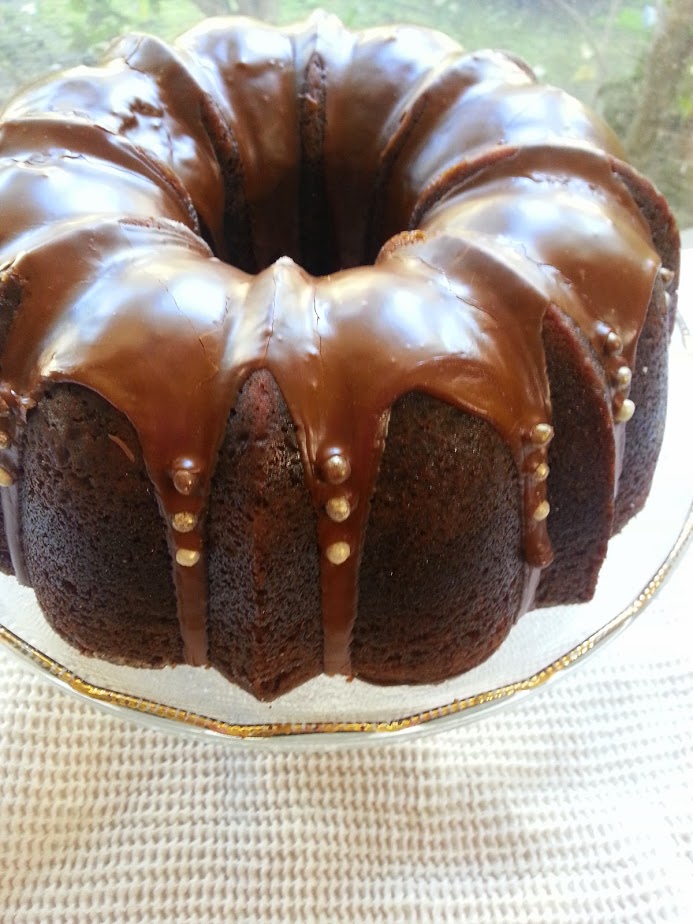
Gingerbread Bundt with Espresso Glaze
On April 5, 2018 by Christy LarsenI disagree that enjoying gingerbread is a cold weather affair. Case in point; this cake. Not only rich and delicious, it is a great way to use up that lingering bottle of guiness a month past St. Paddy’s day.
{this recipe comes from Gramercy Tavern…and developed by Claudia Fleming. I have made this recipe and the recipe in her book “The Last Course”. I prefer this one. I have made a couple very minor adjustments to the recipe, which I will announce so you may or may not choose to do the same}
Gingerbread Bundt
{Gramercy Tavern}1 cup oatmeal or guiness stout
1 cup dark (not blackstrap) molasses
1/2 tsp baking soda
2 cups all purpose flour
1 1/2 tsp baking powder
2 Tbs ground ginger
1 tsp ground cinnamon
1/4 tsp ground cloves
1/4 tsp freshly grated nutmeg
pinch ground cardamom
generous pinch kosher salt {my addition–optional}
3 large eggs
1 cup dark brown sugar
1 cup granulated sugar
3/4 cup vegetable oil
1 Tbs Trablit coffee extract *or 1 Tbs espresso powder {my addition-optional)
Preheat oven to 350F. Use shortening to grease pan (trust me on this…pan spray will not work, butter works better, but shortening works the best) and then dust with flour. Set aside.
Boil stout (or other beer if using) with molasses. Take off heat and then whisk in baking soda. The mixture will bubble up, so make sure your pan has plenty of room, so the mixture does not overflow. Allow to cool to room temperature. Sift together flour, baking powder, salt (if using), ginger, cinnamon, cloves, nutmeg, and cardamom {if using espresso powder, sift with flour. If using coffee extract, whisk in with eggs and sugar} Whisk together eggs, brown sugar and granulated sugar until completely incorporated. Whisk in oil and then molasses mixture. Add flour in single addition and whisk until it is just combined. Pour into prepared pan and bake about 50 minutes or until a tester comes out clean. Allow to cool in pan on rack for about 5 minutes, then turn onto rack, and allow to cool completely.
Espresso Buttermilk Glaze
{this is entirely my addition and is optional}
1 lb confectioner’s sugar
1 oz strong espresso
1 Tbs Trablit coffee extract or 1 Tbs espresso powder
buttermilk
Place the confectioner’s sugar in a bowl. Mix the trablit or espresso powder into the espresso. Pour the espresso bit by bit careful not to thin out the confectioner’s sugar too much. If the confectioner’s sugar is still too thick to pour, add buttermilk until you get a pouring consistency. NOTE: this uses such a small amount of buttermilk, if you don’t have it on hand, you can easily substitute cream, half and half or milk.
Generously pour over cooled cake and allow to harden.
*Trablit is a very strong and specific coffee extract. It cannot be substituted with clear extract or candy oil. If you can’t find it (or it is cost prohibitive) please use espresso powder.
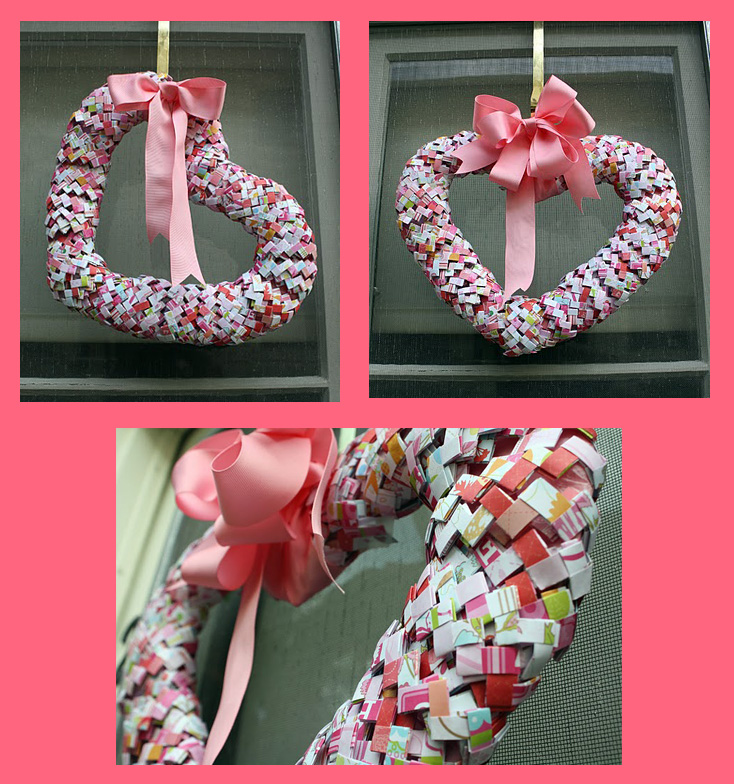
Gum Wrapper Wreath
On February 6, 2018 by Christy LarsenI’m probably aging myself by admitting that a favorite past-time of mine,as a kid, was making gum wrapper chains. I just loved it. Sadly, sticks of gum are not easily found anymore. But colorful paper is and it works just as well.
for a tutorial on how to fold click here
I cut the heart shape from a box, and wrapped it in pink ribbon; then wrapped it again in gum wrapper chain, rather loosely, giving it a “bubbled” effect. This is not a quick craft–I folded about 5000 papers for this wreath
May I suggest getting the whole family involved?
Ding Dong Derivative
On January 25, 2018 by Christy LarsenWhy I have nostalgia for snacks I never actually ate as a kid is something for me to take up with my therapist. And when I say “my therapist”, I actually would be referring to my cat, or dog, or husband, or any poor soul who happens to be in the room listening to my audible reflections.
My mom did not allow “junk food” in her house. We had sweets, but everything was always made from scratch, and was mostly for special occasions. Snacks were cheese or a piece of fruit. Candy was for halloween, and ready-made cream filled cupcakes were for other people.
As a kid, I was always so envious of the kids with the silver wrapped delight in their lunch, while mind held an
Without belaboring the point, skip the store-bought and make your own. You won’t be sorry.
devil’s food cake
3 oz bittersweet chocolate chopped
1 1/2 cups hot coffee or hot water or mixture of the two (i use espresso with water)
3 cups granulated sugar
1 1/2 cups cocoa powder
2 1/2 cups flour
2 tsp baking soda
1 tsp baking powder
1 1/4 tsp kosher salt
3 extra large eggs
3/4 cup vegetable oil
1 cup sour cream + 1/2 cup milk or 1 1/2 cups buttermilk
1 tsp vanilla
melt bittersweet chocolate in hot water/coffee. Sift dry ingredients together (including sugar). Mix together the chocolate/coffee mixture, milk, sour cream
*note…for ding dongs,
Oven temp should be 350 and bake until
creamy filling
1 cup milk
5 Tbs flour
1 1/4 cup powdered sugar
1/2 cup shortening or lard–room temperature
1/2 cup unsalted butter–room temperature
1/2 tsp vanilla
pinch salt
Over low heat, cook milk and flour in a saucepan until it makes a thick paste. Use a whisk to break up lumps. Let cool. In
ganache
1/2 lb bittersweet chocolate–chopped
1/2 cup cream
1 Tbs granulated sugar
1 Tbs corn syrup
2 Tbs butter
Heat cream with sugar and corn syrup over medium heat. Once cream begins to simmer and sugar is dissolved, pour over chocolate and butter. Let chocolate melt and then whisk together until it is thick and
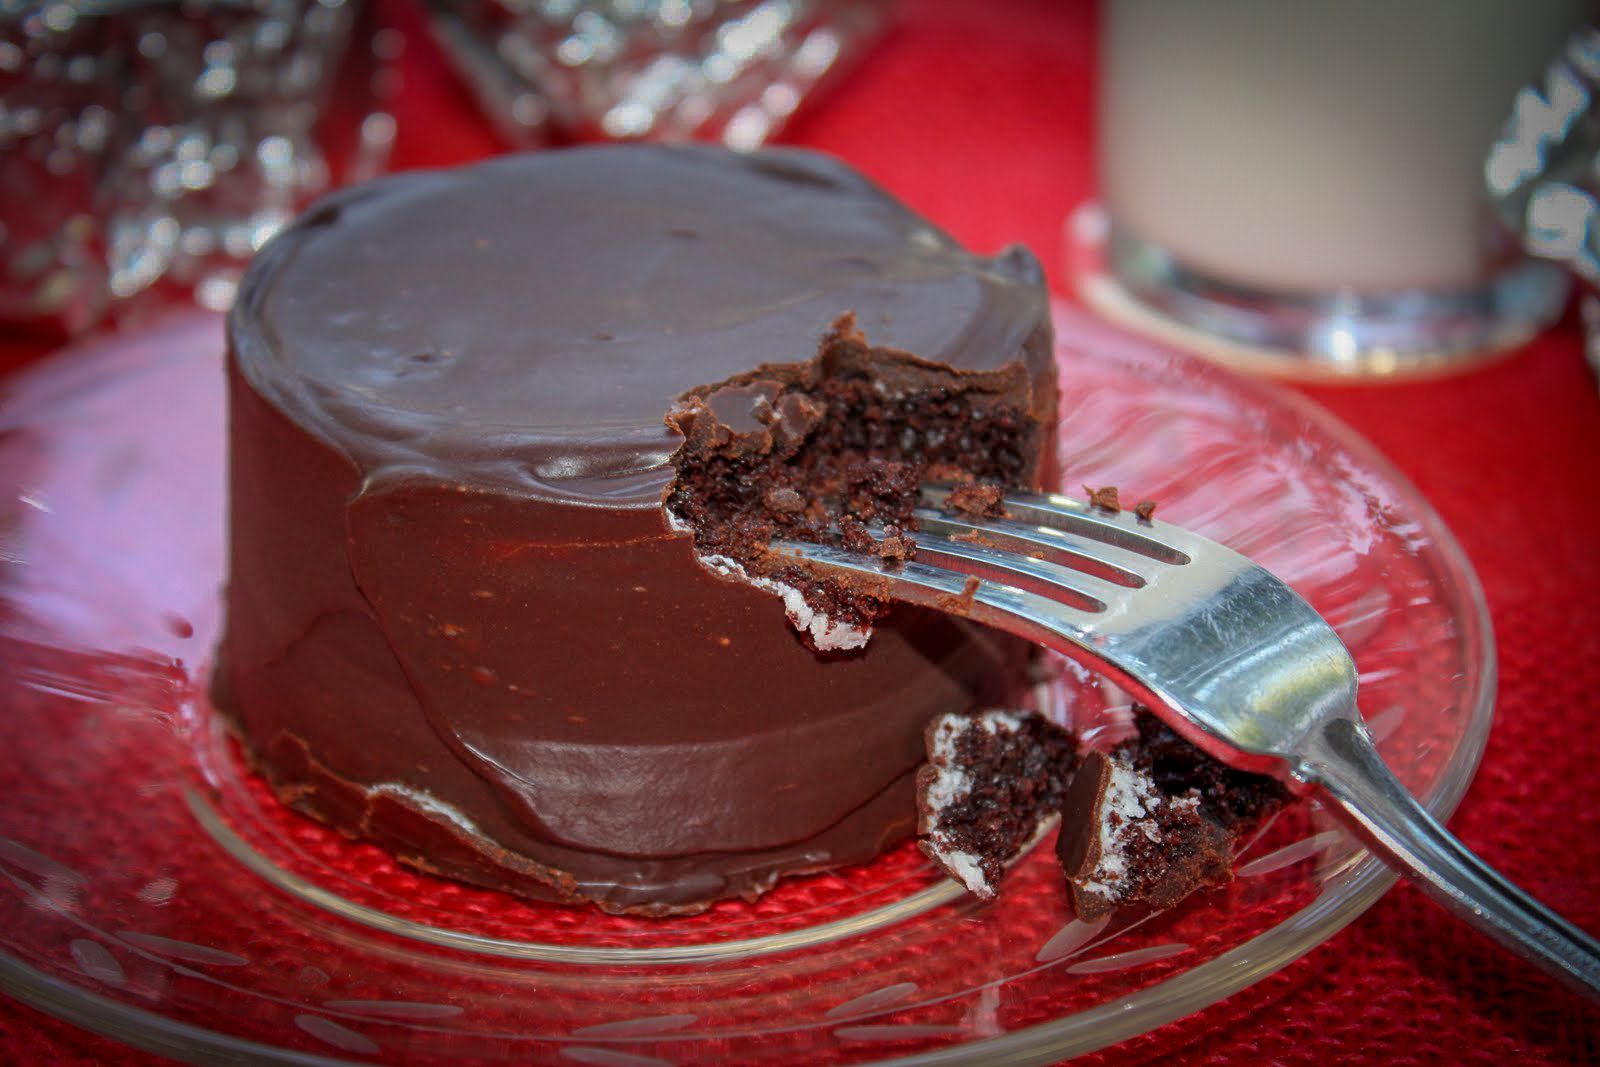
assembly
Cut rounds of the chocolate cake. Spread a layer of filling on top of one round and top with a second round. Fill in nooks and large gaps with a bit more filling. Place in fridge to harden.
Set cakes on a cooling rack over a lined sheet pan. Pour ganache over cooled cakes and gently tap the rack to move the ganache over the cake. Use a small spatula warmed over a flame to nudge and smooth out the ganache. Let cool at room temp or in the fridge if you are in a rush. You may loose some of the gloss if you refrigerate. Serve as is, or wrap in foil for authenticity

Boxing Day Pate {chicken liver pate}
On December 26, 2017 by Christy LarsenI’ve celebrated boxing day a few times. In my first experience of “celebrating”, while living in the UK, I found myself going from store to store in my village; finding locked door and closed signs. Even with mail delivery two times a day, I didn’t get the memo that commerce ends when Christmas celebrations begin.
Boxing day is a lovely tradition and much more meaningful than half-off sales and crowded malls.
This simple pate rounds out a simple buffet. Or if you fancy yourself a bit more posh, a nice glass of champs, a cool jar of caviar, and this on a silver tray would have the Queen bowing to you.
Chicken Liver Pate
1/4 cup shallots–finely diced
1/2 cup salt pork –diced
2 large garlic cloves–smashed but kept whole
2 Tbs olive oil
1 lb chicken livers–well trimmed
1 cup chicken broth
leaves from 1 sprig thyme
pinch black pepper
1 stick butter
3 generous tablespoons cognac
In a saute pan with non-sloping sides, heat the olive oil and toss in the garlic, the shallots and the salt pork. Cook on low until the shallots begin to soften. Wash and dry the livers. Toss them into the shallots and oil and let brown, but don’t cook all the way through. This will only take a few minutes. Toss in the thyme and black pepper, then pour in the chicken broth. Cover the pan and let cook until the liver is cooked through and everything else is softened. Remove from heat and immediately tip everything into a food processor. Add the butter in chunks and process until you have a nice thick paste. Pour through a fine sieve into a clean bowl. Stir in the cognac and then pour into ramekins or gifting jars. For a nice presentation, you can top with clarified butter and a fresh sprig of thyme.