
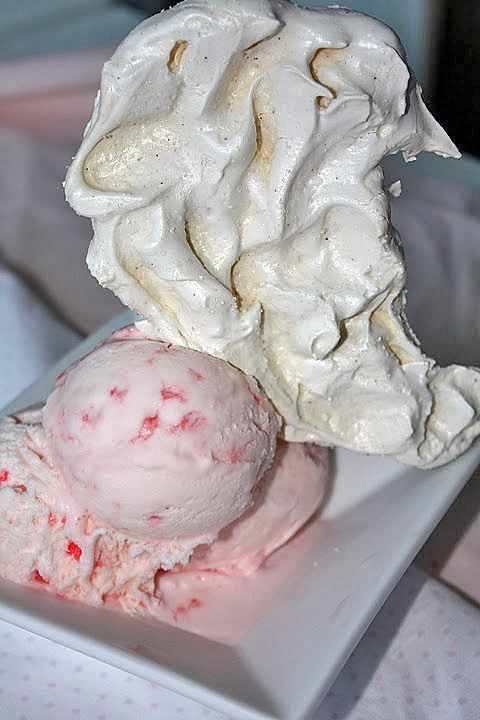
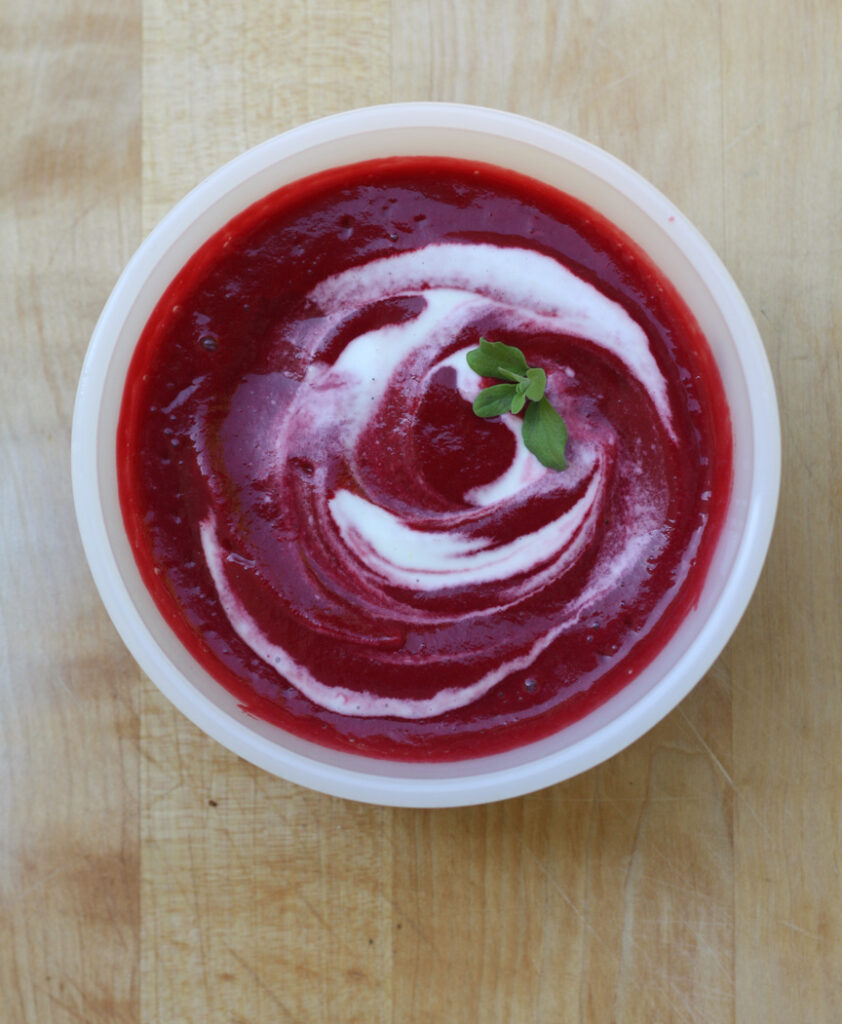
Honey Ice Cream
On April 5, 2025 by Christy LarsenIt seems our egg situation is very different than the rest of our nation. We have hens and our hens lay eggs. Not as many as in the past, as our hens are aging out faster than they are reproducing. For quite a few years we added hens each year, and would find that despite baking and eating eggs on the daily, we couldn’t get ahead of it. It isn’t like that now, but we do have laying hens and we have access to eggs for our dining pleasure.
In addition to eggs, my larder basics include cream, yogurt, and a selection of honey. While we haven’t harvested honey from our bees in many years, we still have jars aplenty.. I have a private stash from our mountain cabin hive (harvested over a decade ago) and a more visible selection from local purveyors.
Facing these ingredients in the glow of the ice box, I am inspired to dust off the ice cream maker and make this simple recipe.
Honey Ice Cream
5 egg yolks
1/2 tsp sea salt
2/3 cups honey
1 cup milk
1/2 cup Greek yogurt
1 cup cream
1 tsp vanilla
Whisk egg yolks, salt, and honey together in a bowl. Heat 1 cup of milk until it simmers. Temper the egg mixture with the hot milk and return the entire mixture to the pan and cook, while continually stirring, until it thickens to a nappe. it will be the thickness of heavy cream. Strain into a clean bowl…let cool a bit. While it is still warm, but not hot, stir in the yogurt. Let cool to room temperature and add the cream and vanilla. Chill and freeze according to the manufacturer’s instructions.
**You can stir in toasted nuts just before you pack into freezer containers.
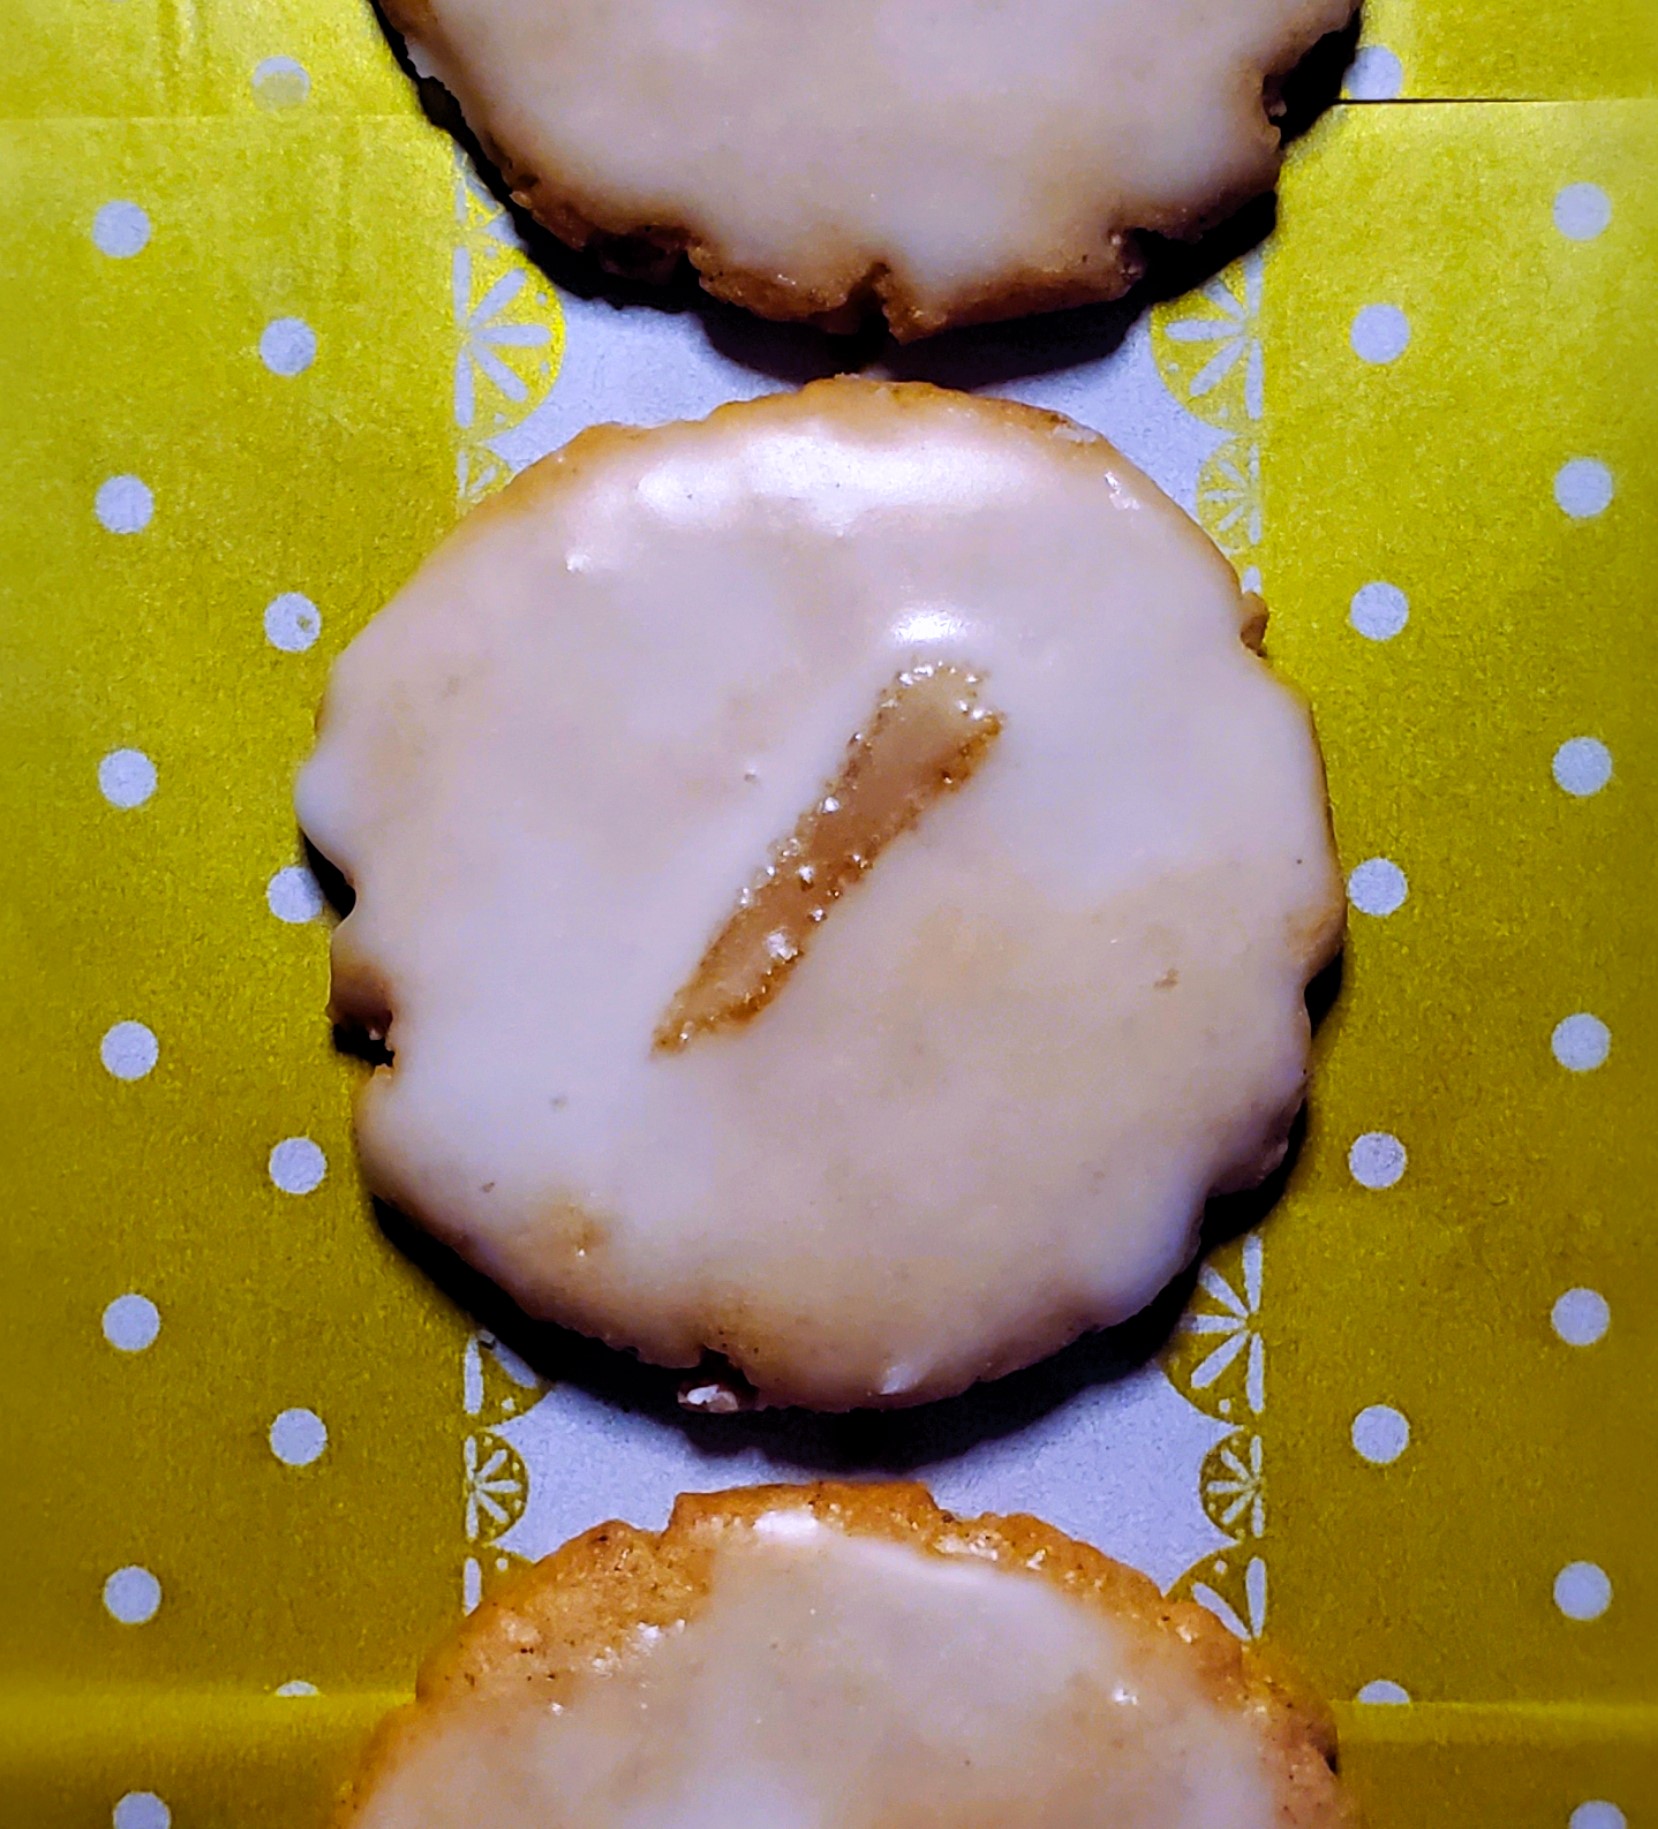
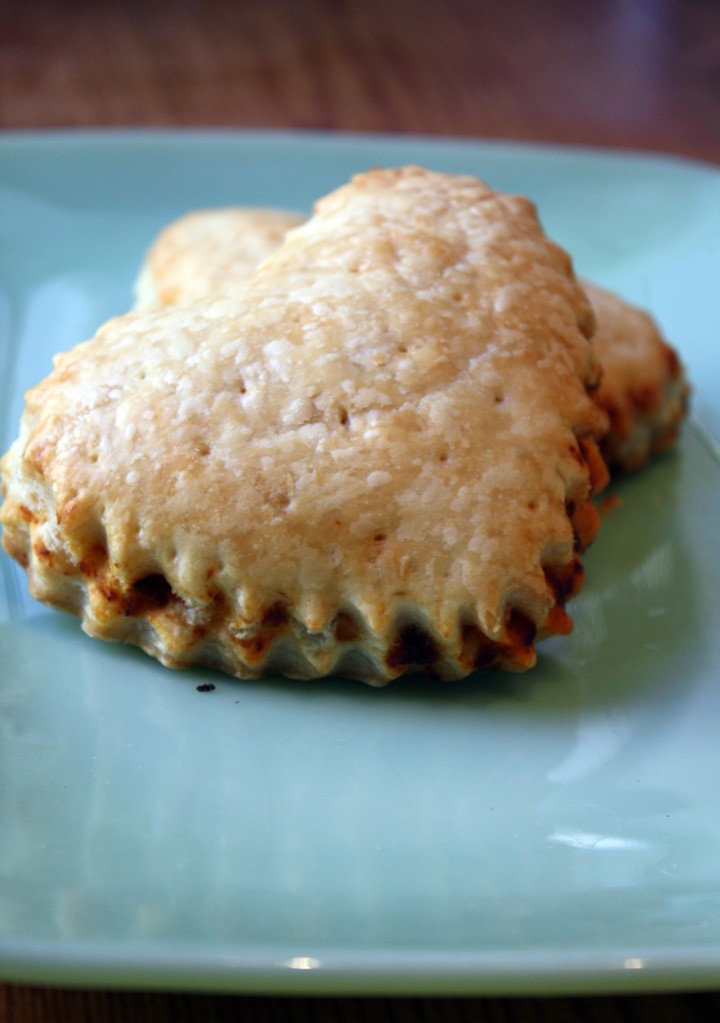
Lemon Glazed Gingersnaps
On November 21, 2024 by Christy LarsenCladia Fleming’s recipe with a little update by me
My first edition of “The Last Course” by Claudia Fleming is well-used and slightly abused. The pages are spattered and worn, and the entire book looks older than its 20 years. It is a great book; if you can find it, I suggest you grab a copy.
These little cookies are delicious, just as Claudia imagined them. As one does, I am giving them a holiday gild. The glaze gives them a few extra days of “freshness” and a distinct citrus punch. Drop them onto your holiday cookie platter, gift them with your favorite tea blend, or drop a few in your glove box for any cookie-related emergency.
Gingersnaps
1 3/4 cups firmly packed dark brown sugar
1 1/2 cups unsalted butter-softened
1 large egg
1 Tbs grated (peeled) fresh ginger
1 1/2 tsp lemon zest
3 3/4 cups all-purpose flour
2 Tbs ground ginger
1 Tbs ground cinnamon
1 1/4 tsp baking powder
1/2 tsp ground white pepper
1/4 tsp ground cloves
1/2 tsp kosher salt
Beat sugar and butter until smooth. Add egg, fresh ginger, and lemon zest and beat well. In a bowl, whisk together flour, ground ginger, cinnamon, baking powder, white pepper, cloves, and salt. Beat until well combined. Form into a large disk, wrap in plastic wrap, and chill for at least 4 hours or overnight.
Preheat oven to 350F. Scoop out 1 tsp of dough at a time and roll between palms. Flatten with the base of drinking glass dipped in flour. Bake 8-10 minutes until crisp or browned. Let cool completely before glazing
Lemon Glaze
2 cups powdered sugar
1 Tbs agar agar
1 Tbs lemon zest
1 Tbs lemon juice
candied ginger, slivered for decoration
Place sugar in a bowl, add the agar agar and lemon zest. Slowly add the lemon juice until you get to your desired consistency. If additional liquid is needed, use cream or water (your choice). If you make it too thin, add more powdered sugar. Dip each cookie into the glaze, add a tiny sliver of candied ginger, and let sit at room temperature until the glaze is set. Store in an airtight container at room temperature.
*if you make ahead, you can bake and freeze the cookies without glazing. Defrost and glaze.
**If you want to be very clever, sandwich a bit of ice cream between a glaze and an unglazed cookie and act like it “was nothing.”
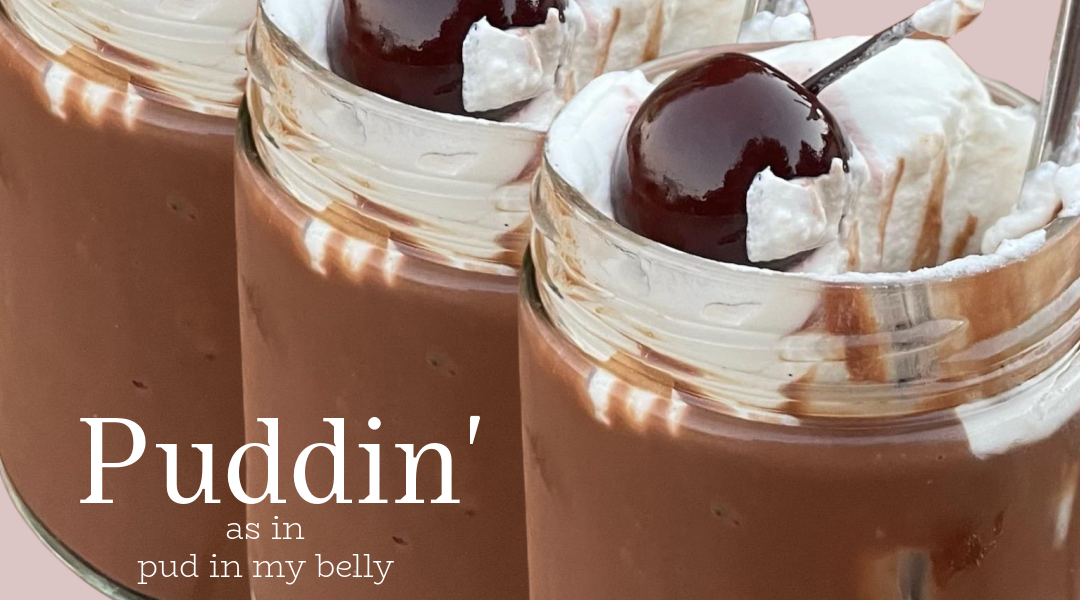
Chocolate Pastry Cream
On February 16, 2024 by Christy Larsenaka puddin’
I came a little late to the pudding game. If you have been following along for any amount of time, you know that I grew up in a only homemade, no convenience food home. Pudding stayed in its box, on the shelf of the grocery store. And…to be honest…whenever I had it a friend’s house, I kinda didn’t see the allure. Don’t even get me started on banana pudding–talk about gaslighting.
I knew pastry cream, because my mom would make it to put in her eclairs, but it took me a while to realize that pastry cream and pudding are basically the same. Except pastry cream uses whole milk enriched with egg yolks and butter, rather than only relying on cornstarch to thicken.
This recipe is very easy and will have you whipping up puddin’ on the daily. It is basically breakfast food
try and convince me otherwise
I enjoy it topped with gently whipped {unsweetened} cream or creme fraiche and a brandied or Amarena cherry for further indulgence
Ingredients
3 cups full-fat milk
3 duck egg yolks, or 5 large chicken egg yolks
1/2 cup granulated sugar
1/4 cup cornstarch
1/2 tsp kosher salt
1 tsp vanilla extract
7 oz bittersweet chocolate chips or chopped bar (63-70%)
1 oz unsalted butter at room temperature
Directions
- Whisk the egg yolks, cornstarch, and salt in a bowl until they are well incorporated
- Heat the milk with the sugar over low heat until it comes to a simmer
- Meanwhile place the chocolate, butter and vanilla in a separate bowl
- When the milk has simmered, use it to temper the eggs. This is done by slowly whisking the milk into the egg mixture to slowly warm the eggs.
- Turn the milk and egg mixture back into the saucepan and heat on low, while continually whisking, as it thickens quite a bit. Once you start to see bubbles forming, remove it from the heat
- Pour hot custard into sieve that is held over the bowl of chocolate/butter/vanilla and allow to fall over and melt the chocolate and butter. Discard any clumps of egg white remaining in the bowl of the sieve. Wait a few minutes, then whisk until butter, vanilla and chocolate are fully melted and incorporated.
- Enjoy warm with a bit of cold cream, or place bowl over a larger bowl of ice water and stir to bring temperature down to room temperature. Place a bit of plastic wrap directly on top to keep a skin from forming. If you like the skin, skip that part. Place in the refrigerator for several hours or overnight to chill completely.
- Serve cold with gobs of cream; cultured or whipped

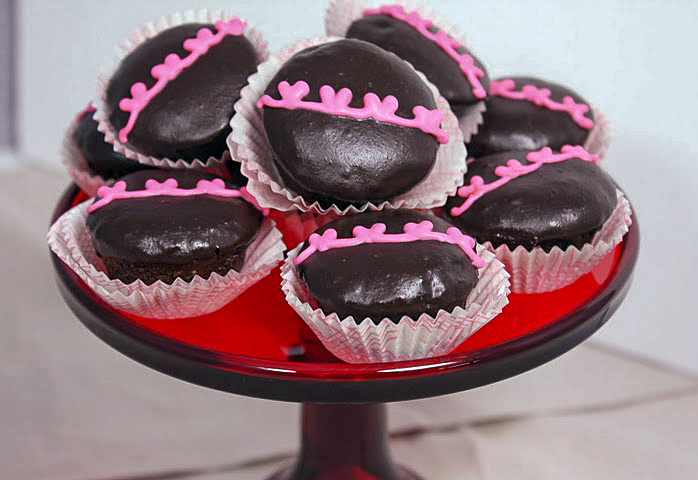
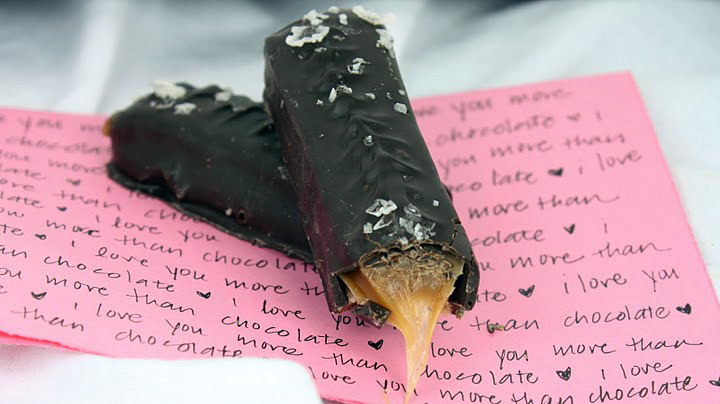
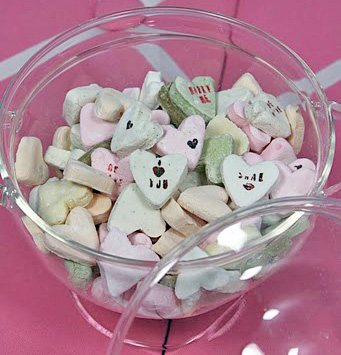
February 14th Yay or Nay?
On February 8, 2024 by Christy LarsenSo tell, me. Are we fans of Valentines, Galentines, Palentines Day?
I kind of am; in the way that it is hard for me to say yuck to pink and red and conversation hearts AND giant boxes of chocolates AND flowers AND testimonies of love.
I’m also kinda not. In the way that I don’t want anyone to feel obligated to spend money or insist there is a right way to spend the 14th of February
In this house, we celebrate with lunch. Sometimes it is a picnic, sometimes it is a restaurant, sometimes it is kraft mac n’ cheese while watching Newhart on DVD. Mike and I swap planning from year to year. Sometimes, we shift it to another day if something comes up or the restaurants get savvy to the tradition and only offer a special Valentine’s Day prix fix meal.
This year, I will be out of town on the 14th. Also, it lands on a day I observe a fasting tradition, so I planned Saturday lunch at a great little fish house in a nearby town. We make a little effort for Valentine’s. Even though we show our love for each other every day, we don’t show it like this. Sometimes, it is nice to shake off the norm and proclaim a day of love designed around commercialism instead of deep and abiding tolerance (she says with tongue firmly planted inside cheek).
If you feel like doing something a little extra for yourself or yourself and someone else, might I suggest a few of these fun and delicious treats?
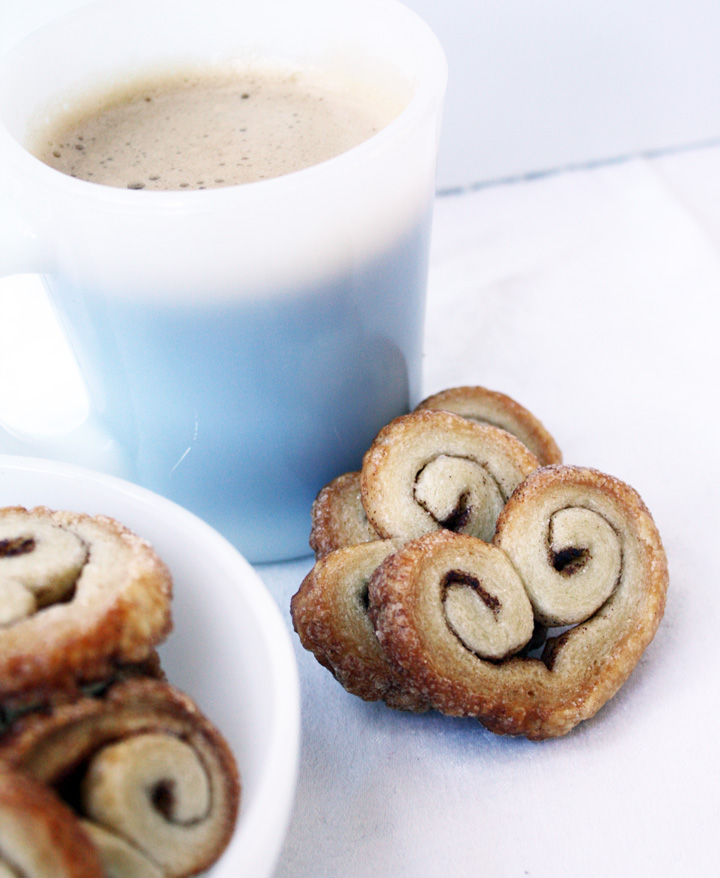
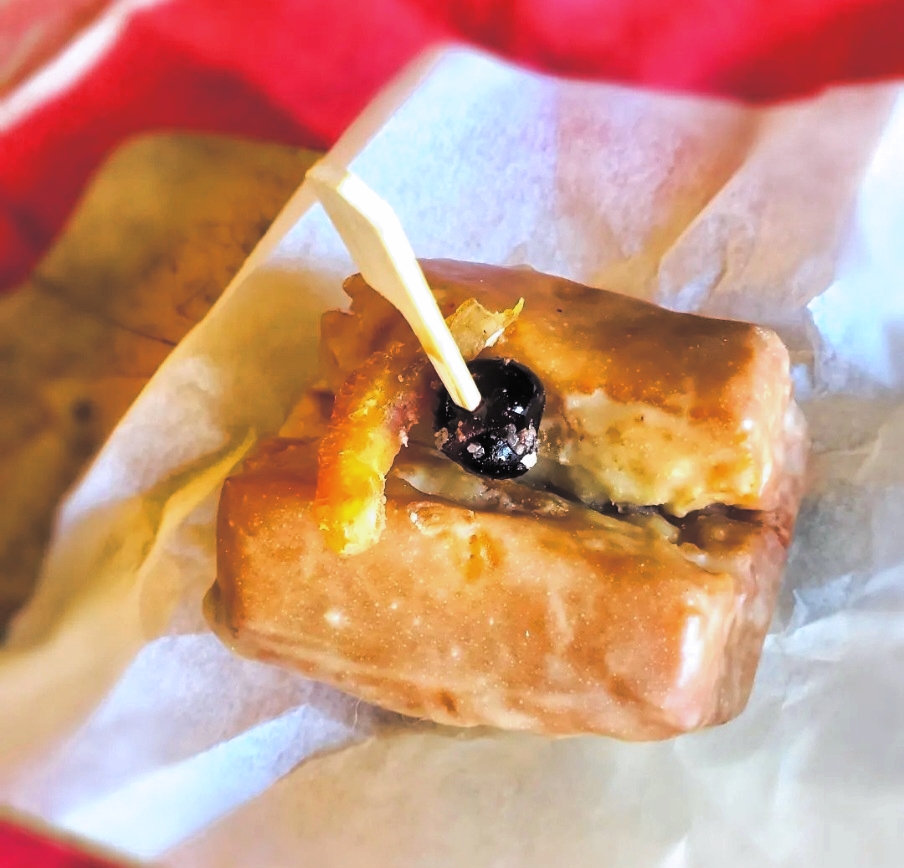
Old-Fashion, Old-Fashion
On October 11, 2023 by Christy LarsenWhere a rye old-fashioned donut meets the classic cocktail
Listen, I am a donut person. As a self-proclaimed donut person, I can, with much authority, tell you that not all donuts are equal. You can line a path with warm raised, and I could easily crawl through, nose to the ground, without even stopping for a sniff. Switch them out with buttermilk bars, glazed old-fashioneds, even a jimmie-covered cake, and I’ll have crumbs in my hair within minutes.
#noregrets
The old-fashion cocktail has been having its moment lately, and its flavor profile quite nicely translates to the sweet side. Use a nice rye and fancy cherries to up the snob factor.
Old Fashion Donut
1/2 cup pumpernickel rye flour–toasted
2 3/4 tsp baking powder
1/4 tsp baking soda
1 1/2 tsp kosher salt
3/4 tsp ground nutmeg
4 Tbs unsalted butter-melted
1/2 cup packed dark brown sugar
1/2 cup granulated sugar
2 Tbs rye syrup (see note)
1 large egg
3 large egg yolks
3/4 cup buttermilk
Mix the dry ingredients: flour, baking powder, baking soda, salt, nutmeg and set aside. In a stand mixer, using the paddle attachment, beat the butter and sugars until fully incorporated but not yet fluffy. Beat in the egg, egg yolks, and rye syrup and mix until they lighten. Add the flour and buttermilk alternately, beginning and ending with the flour. Scrape from the bowl onto a lightly floured workspace. Form into a square, wrap in plastic, and place in the refrigerator to rest for at least 1 hour or as long as overnight.
When ready to make the donuts, remove the dough from the refrigerator onto a lightly floured surface. Dust the top with flour and roll out to 3/4″. Cut into bars. Using the back of a knife or a bench scraper, make a deep line down the length of the bar, careful not to cut all the way through. Place back into the refrigerator until ready to fry.
Place enough oil in a heavy pan to at least 2″. Heat oil to 325F. Remove the dough from the refrigerator and fry in small batches, remembering that the cold dough will reduce the oil heat. Let the oil come back to temperature between batches. Fry for about 2-3 minutes on each side. The internal temperature of the donut should be 185-190F. Place on a cooling rack. Dip in the old-fashioned glaze.
Once the glaze is hardened, decorate with amarena or luxardo cherry and candied orange piece.
Rye Syrup
1 cup rye
1/4 cup (or so) candied orange peel
2 Tbs lemon-lime soda (optional)
Pour the rye and soda into a saucepan and add the candied orange peel. Heat over low heat for a minute, turn off the burner, and light the liquid on fire. Let the flame go out naturally. Remove the orange peel and place it in a dish of granulated sugar. Coat and use to decorate completed donuts. Use in donut dough and glaze.
Old Fashion Glaze
3 cups powdered sugar
1 Tbs tsp agar agar*
3 shakes of Angostura bitters
few drops of Fiori di Sicilia or a bit of orange zest
rye syrup
Place the powdered sugar and agar agar (if using) into a bowl. Add the Angostura bitters and the flavoring (and/or zest) and mix well. Add enough rye syrup to make a glaze slightly thinner than heavy cream.
*I use agar agar for my powdered sugar glazes as it hastens the hardening of the glaze. It can be an allergen, so use it with caution.
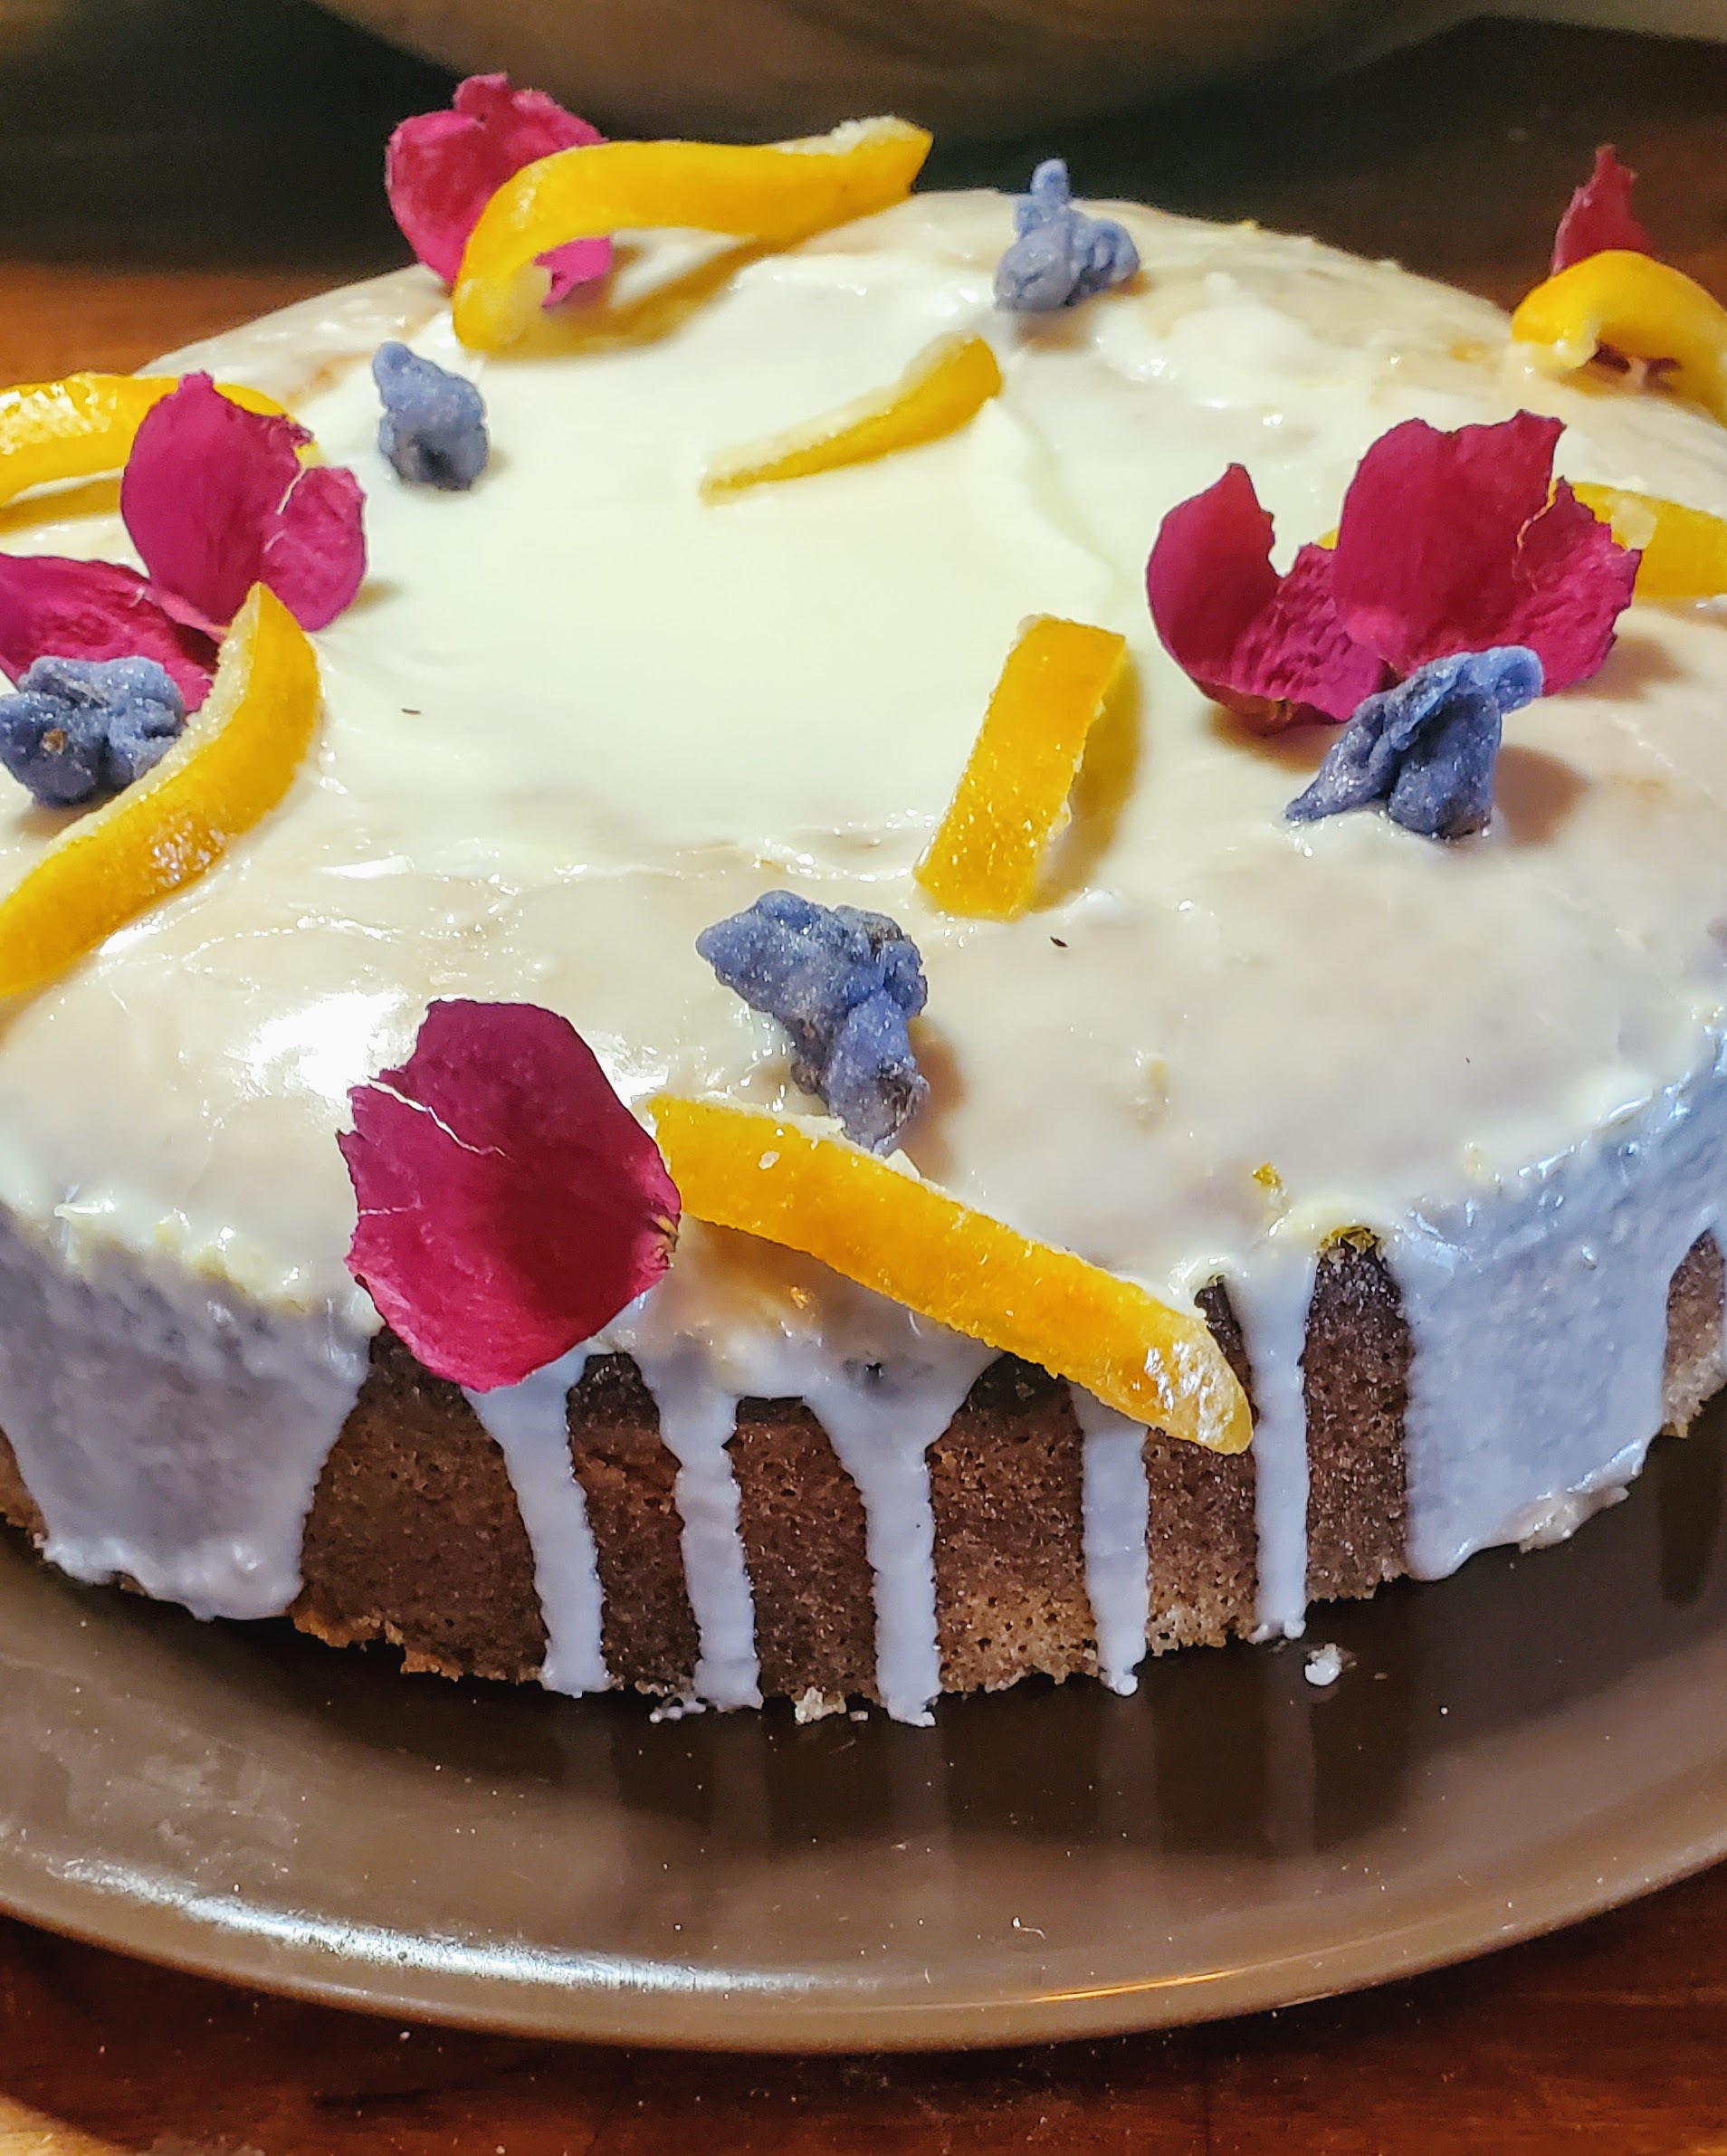
Olive Oil & Limoncello Cake
On March 22, 2022 by Christy LarsenWhen I have guests over for a meal or celebration, I am cognizant of dietary desires and restrictions. I don’t specifically design the menu around the issue, but I always make sure there are dishes served that everyone can enjoy. Dessert can be problematic, which is why I love an olive oil cake. While it doesn’t work for everyone, it is great for those with a dairy allergy. It is my go-to when I am trying to please a crowd. Best part; it can look festive and celebratory without being an elaborate layer cake. Single-layer cakes are my best friend.
Don’t let the additional components of a sop and icing deter you from trying this cake. It is a delicious addition to any celebration, or a mid-week tea and cake sesh. The addition of Limoncello (or any citrus cello) gives it a bit of an adult edge and sophistication.
for the cake:
3 extra-large eggs
1 cup + 2 Tbs granulated sugar
1 tsp kosher salt
1 Tbs lemon zest
1 1/4 cup olive oil (the less bitter, the better)
2 cups all-purpose flour; sifted
1/3 cup fine cornmeal
2 tsp baking powder
1/2 tsp baking soda
6 Tbs fresh lemon juice*
3 Tbs limoncello (or any citrus-cello)
2 tsp vanilla extract
*depending on the flavor profile you desire, you can substitute orange, grapefruit or lime (or a mixture) for the juice. Lemon packs the most punch, but you can play around. Make sure whatever you use compliments the liquor (lemon or citrus-cello).
Prepare your 9” springform cake pan by spraying with pan spray, lining the bottom with parchment, then spraying with pan spray again. Dust with granulated sugar; tapping out the excess. Preheat oven to 350.
In a stand mixer fitted with whisk attachment, beat eggs, sugar, salt, and lemon zest until they are pale yellow and reach ribbon stage (about 3-5 minutes). While whisking, slowly pour in olive oil. Whisk on medium/medium-high for another 2-3 minutes.
Meanwhile, whisk sifted flour, cornmeal, baking powder, and baking soda in a separate bowl. Measure the lemon juice, limoncello, and vanilla extract together.
With the mixer on low, alternate adding the dry ingredients (flour, cornmeal, etc) with the wet (lemon juice, limoncello, etc) beginning and ending with dry. Take care to not overmix
Pour into prepared pan and bake for approximately 50-60 minutes. It may take less, it may take more. I make a habit of checking after 45 minutes. It will brown a bit because of the sugar lining the pan; use a tester to make sure it is fully baked before removing it from the oven. The cake should be just firm to the touch.
While the cake is baking, make the sop syrup
for the sop syrup:
1/4 cup lemon juice (or other if you are changing it up)
1/2 cup granulated sugar
2 Tbs olive oil
Simmer the lemon juice and sugar over low heat until it starts to thicken to the consistency of cough syrup. Remove from heat and allow it to cool slightly. Pour 3 Tbs into a separate bowl and add the olive oil. Set aside the remaining to use in the icing. Pour the syrup/olive oil mixture evenly over the cake immediately after removing from the oven.
Make icing while the cake cools
for the icing
1 1/2-2 cups powdered sugar
1 Tbs agar-agar (optional)**
remaining sop syrup
limoncello
cream or water (if going dairy free)
**using agar-agar helps the icing firm up quicker than if you do not add it. It is an old doughnut shop trick. Be careful as sometimes it firms up so quickly that you can’t get your decorations on fast enough! Agar-agar is derived from algae and can be an allergen for some.
Stir the powdered sugar and agar-agar until fully incorporated. Add the remaining sop syrup. Use limoncello and cream (or water) to create desired consistency. Pour over slightly warm (for a less opaque glaze) or cooled (for thicker and more opaque icing) cake allowing it to over the sides. Decorate as desired.
The cake pictured is decorated with dried rose petals, candied orange peel, and candied violets.
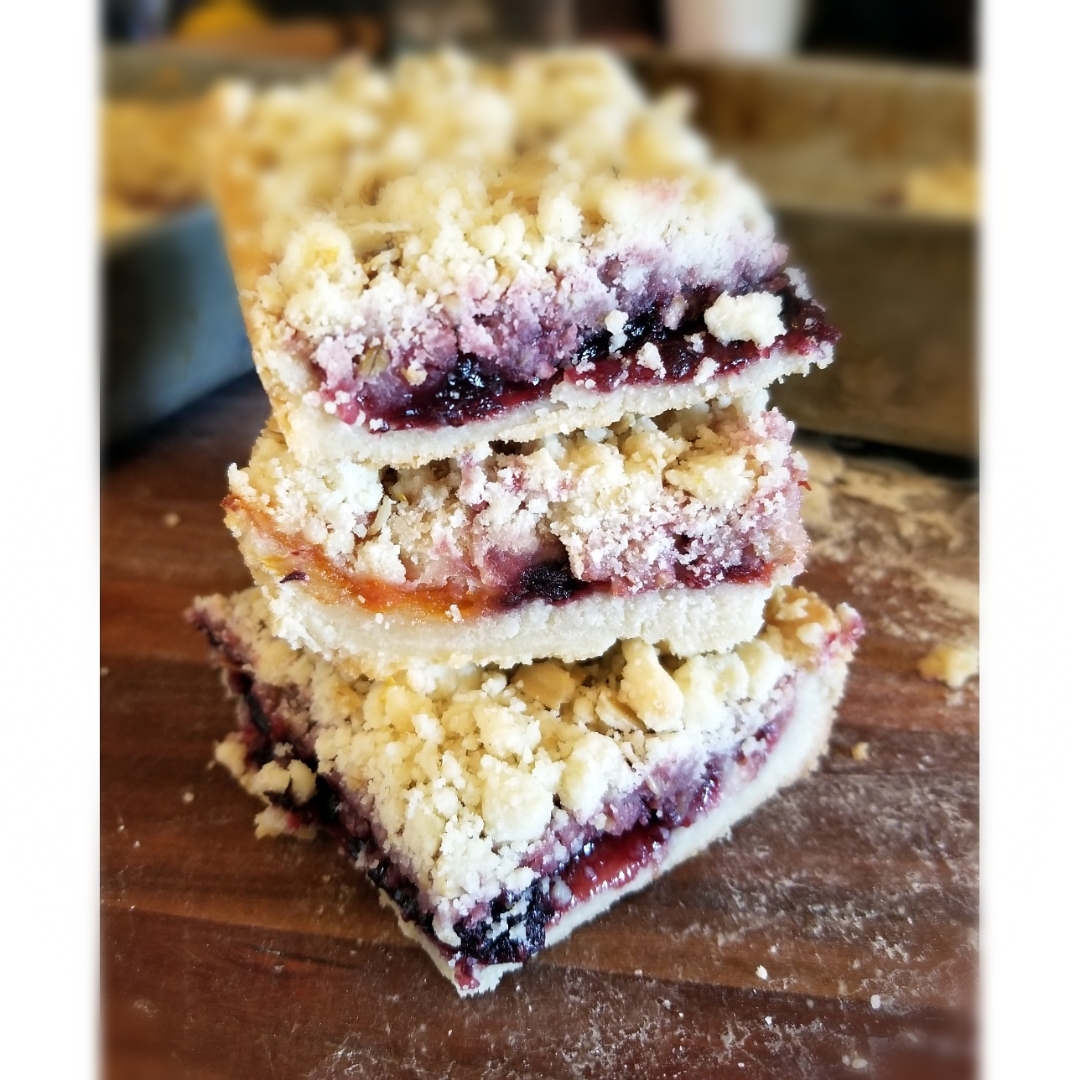
Jammy Jam Bars
On October 11, 2019 by Christy LarsenBeing a person that spends the summer and early fall preserving fruit in the form of jam, while also being a person that eats very little jam is the dichotomy I find myself to be.
I do however love things filled with jam; scones, hand pies, thumbprint cookies are all things I love. I also love these jam bars. This is a great way to use up the half-empty or “just a smidge” left jars that may be occupying the top-shelf in your refrigerator at this very moment. If you purchase a jam specifically for these bars, please splurge a bit; you do not want to use a jam that is sticky-sweet.
Jam Bars
makes 9 large bars
1 cup unsalted butter–room temperature
3/4 cup granulated sugar
3/4 tsp kosher salt
1 1/2 tsp vanilla
2 1/3 cup all purpose flour or 2 cups all purpose and 1/3 cup whole wheat
1 1/2 cups of good jam (single flavor or mixture)
1/2 cup rolled oats
1/2-1 tsp spices–use is optional. choose spices that are complimentary to your jam. I find ginger, cardamom, and cinnamon work well with most jams, but you can be as creative as you like, or omit altogether.
1/2 cup toasted and chopped nuts–optional
Preheat the oven to 350F. Spray the bottom and sides of an 8 or 9″ square cake pan (the 8″ will result in thicker bars).
Cream the butter, sugar, and salt together. Add the vanilla, scrape down the sides of the bowl and mix well again. Add the flour all at once and mix until just incorporated.
Press about 1/2 of the mixture into the bottom of your pan to a thickness just less than 1/4″. Press some of the mixture up the sides to create a bit of a ledge (about 1/4″). Pour the jam evenly on top of the crust. If you are using several flavors try not to fully mix the flavors; either layer or intersperse to avoid muddling too much.
Add the oats, spice, and nuts (if using) to the remaining mixture and lightly mix with your hands. If you are a salt-loving person, you can add a few more pinches of a finishing salt here, or use salted nuts in the mix. Generously sprinkle the mixture on top of the jam layer. I like to use a mixture of small bits and large chunks on top. To make larger chunks, simply pinch pieces together and drop onto the jam. I’m partial to lots of topping, but if it seems too much for you, don’t use it all. You can bake it off separately and have as a topping for yogurt or ice cream, or even as a snack.
Bake for approximately 20-25 minutes or until golden brown. Cool before cutting.
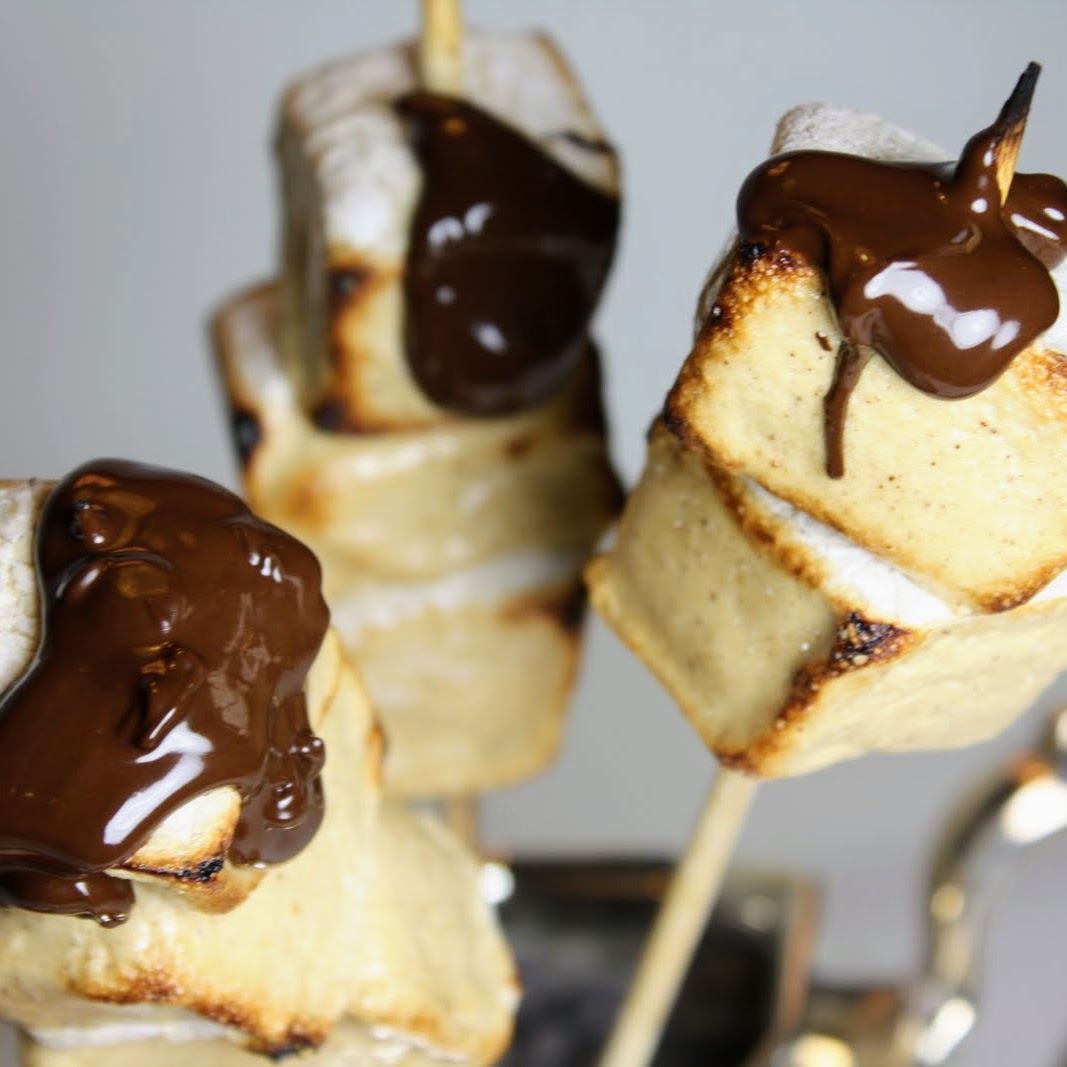
Gingerbread Marshmallows
On June 28, 2018 by Christy LarsenRoasting marshmallows is a year-round sport in my house. Sometimes, I just turn on the stove burner, load a fork, and fire away. Normally, eating ‘mallows out of hand is not my thing…I like a charred exterior and molten center. I do make an exception with these, as they are so good au natural, lightly toasted and dipped in chocolate, or as a float on your favorite hot beverage {even tea…especially tea}.
Gingerbread Marshmallows
3/4 oz gelatin
1/2 cup cold water
1 1/2 cups granulated sugar
1/2 cup dark brown sugar
1/4 cup water
2 Tbs molasses
1/4 tsp kosher salt
1 tsp ground ginger
1 tsp ground cinnamon
1/2 tsp ground clove
2 egg whites
Put sugars in a saucepan. Add 1/4 cup water to make a mixture that looks and feels like wet sand. What is most important is that all sugar has the same amount of moisture. Add molasses, salt, ginger, cinnamon and clove, and place over low heat. Cook until it becomes a sugar syrup of 235-240 degrees. It should have the consistency of corn syrup.
Meanwhile…place 2 room temperature egg whites into the bowl of your mixer. Add the salt .
Prepare gelatin. Place 1/2 cup water in a bowl. Sprinkle the gelatin evenly over the water. Let bloom.
Once the sugar syrup is ready, turn off heat and let sit for a couple of minutes…not too long. Start your mixer on low and get the whites to foamy. Mix the gelatin into the sugar syrup and stir until melted completely. Bring the saucepan over to the mixer and turn it to high. Slowly pour the sugar syrup into the bowl, careful not to hit the whisk attachment. Leave on high and mix until the mixture is warm, but full volume and comes to a peak. While it is still warm, pour into tin or pan. Sift powdered sugar on top. Cut into squares and store in airtight container.
These are yummy tossed into a cup of hot cocoa and a real grown up treat when toasted and sandwiched into a s’more.
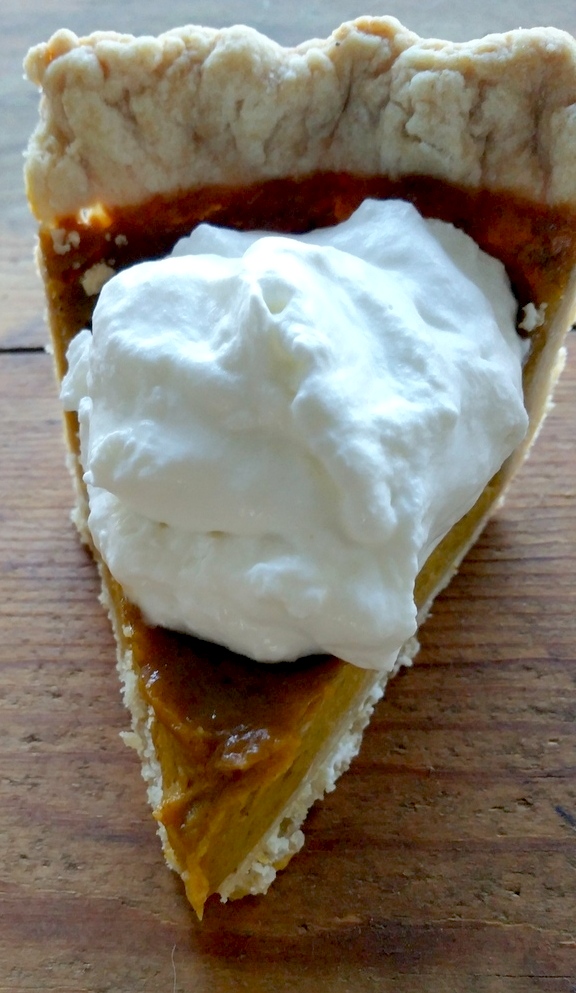
Fresh from the Field Pumpkin Pie
On November 3, 2015 by sixtyacrebakerPumpkin pie and I have made a bit of a journey together. Up until a decade or so ago, I used canned pumpkin and its accompanying recipe for my pie. It was good. Libby’s had a bit of a lock on the pumpkin pie market and deservedly so. Canned pumpkin, canned milk, sugar, eggs, spices. Easy as pie, right? It wasn’t until I started buying sugar pumpkins, at the farmer’s market, and subsequently growing my own,that I began making homemade pumpkin puree. The change has been slow, and deliberate. Moving from canned pumpkin to homegrown was a bit more daunting than ditching the canned milk. When we moved to the ranch we started growing some heirloom varieties of pumpkins. After a myriad of taste tests and bum to prove it, we’ve decided that the Jarrahdale pumpkin makes the best pie. Or should I say, my best pies are made with Jarrahdale pumpkins. The flesh is firm and a bit sweet after roasting and decidedly “pumpkinny”. When processed it is very smooth and makes an almost pudding like pie. Admittedly, they can be difficult to find..and this recipe works well with any (except jack-o-lantern type) pumpkins…but if you see one…grab it. They keep well, look eerie and taste amazing.
Pumpkin Pie
makes an 8 or 9 inch standard depth pie
1 recipe flaky pie crust (recipe follows)
2 cups fresh pumpkin puree (instructions follow)
2 whole large eggs
2 large egg yolks
1/2 cup whipping cream
3/4 cup dark brown sugar–gently packed (add a bit more if you like a sweeter pie
1/4 tsp salt
1 tsp cinnamon
1/2 tsp ground ginger
1/8 tsp ground cloves
1/8 tsp freshly ground nutmeg
1/8 tsp allspice
*note: you can add or eliminate any spices you wish. I only suggest that you don’t overdo the cinnamon. The flavor of fresh pumpkin is gentle, if you put too much cinnamon, you will kill the subtlety.
Preheat the oven to 375f.
Whisk all ingredients, except the eggs, together in a large bowl and taste for sweetness and spice. At this point you can add a bit more sugar (add 1 Tbs at a time) and spice. When you are happy with the flavor, whisk in the eggs and egg yolks and place the bowl in the refrigerator while you “blind bake” the crust. Be sure to bake only until the crust begins to look cooked, but not browned. You do not want to over bake, as you need to put it back in the oven once you fill with the pumpkin custard. Remove the crust from the oven, remove the weights and parchment paper, and immediately pour in the custard. Reduce the oven heat to 350f. Place the pie on a baking sheet and bake for approximately 40 minutes. It is important that you watch it. You do not want to overcook the custard. It is done if you tap the side of the pan and you get a slight jiggle/ripple in the middle of the pie (1 or 2″ from the center of the pie). Just as if you have skipped a small rock into a pond. If the ripple starts from the outer rim of the pie, it is not done. If it doesn’t ripple at all, pull it from the oven and get it on a cooling rack right away. Let cool at room temperature. Store in refrigerator.
Pie Crust
you can use a favorite recipe, or even a store bought crust (which simply isn’t as good, but I understand). This is a simple recipe that I use for a nice tasting and sturdy crust.
2 1/4 cups all purpose flour
3/4 tsp kosher salt
1 Tbs sugar
1/2 cup cold butter–cut into chunks
1/2 cup lard
5-6 Tbs of cold water + 1/2 tsp vinegar
In a large bowl mix together the dry ingredients. Add the butter and shortening all at once and “cut” into the pastry. I like to use my hands for this. I will work the mixture until the butter and shortening are incorporated into the flour in hazelnut size pieces. Add enough very cold water to bring the mixture together, but it should not be sticky. It should also not be dry. Handle the dough as minimally as possible, wrap in plastic wrap and refrigerate for at least 1 hour or overnight. If you are making the pastry well in advance (more than a day), I suggest wrapping it and freezing it. Raw dough will turn gray after a time in the refrigerator.
Fresh Pumpkin Puree
Do not use a pumpkin that you would use for carving. They can be stringy and don’t carry the flavor of sugar or (in this case) the jarrahdale pumpkin. Wash the pumpkin well, cut in half and remove all the seeds and stringy bits. Reserve the seeds and roast them for a treat. Place the pumpkins, cut side down on a lined baking sheet and place in a 350f oven until they are very soft. Let cool, remove skin run through a ricer, food mill, or immersion blender. For a silky smooth texture, process the “meat” of the pumpkin until it is no longer lumpy. I use a hand blender which works perfectly, but you can use a processor as well. Place puree in a cheese cloth lined colander and let drain 6 hours or overnight. You will need 2 cups for the pie recipe, but your pumpkin might yield more. You can freeze the extra at this point.

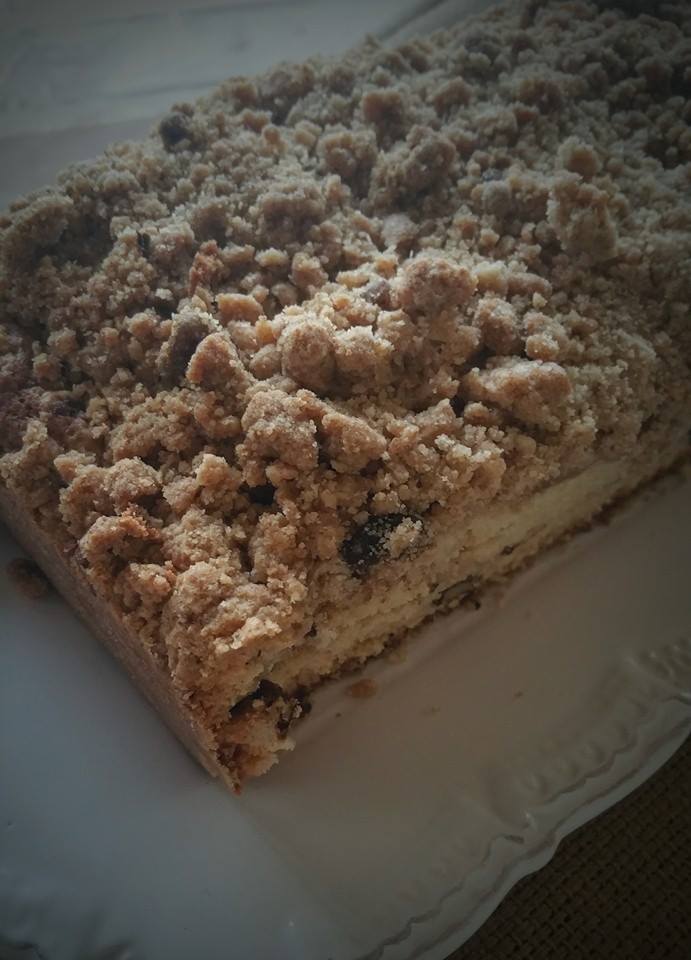
Every Day Crumb Cake
On October 4, 2015 by sixtyacrebakerI prefer a piece coffee cake to birthday cake because it has to rely on itself to be good. It doesn’t have some kind of amazing mocha-buttercream frosting to make it moist
or big red roses with that funny but somehow pleasing taste. Also, it really does taste great with coffee or a mug of tea. It reminds me of my grandparents who insisted on having coffee and cake
while playing gin and smoking cigarettes on our back porch during the warm summer nights. My. entire. childhood. It was magic.
Big Ginormous Coffee Cake
(adapted from Nancy Silverton’s La Brea Bakery Cookbook)
Streusel
1 cup toasted walnuts
1/4 cup granulated sugar
1/4 cup dark brown sugar
1/2 cup flour
1 tsp cinnamon
1/4 cup softened butter
Sprinkling Sugar Layer
1 Tbs granulated sugar
1 tsp cinnamon
1/4 cup toasted walnuts
Batter
8 oz unsalted butter–room temperature
1 3/4 tsp baking soda
2 tsp baking powder
2 tsp kosher salt
2 1/2 cups granulated sugar
3 extra-large eggs
1 1/2 tsp vanilla
4 cups flour
2 cups sour cream
For the struesel: Mix in a bowl all ingredients except the nuts. Mix until it becomes a bit lumpy then toss together with nuts. Set aside
For the Batter: Cream the butter, baking soda, baking powder and salt on low until softened and mixed together. Add sugar and mix until light and fluffy. Mix together the eggs and vanilla in a bowl. Alternately add to the sugar and butter the eggs and the flour, beginning and ending with the flour. Stir until just incorporated, do not over-beat. Stir in the sour cream.
Line the bottom of a tube pan with baking paper, spray with pan spray being sure to hit the inner tube well. Spoon half of the batter in the pan and spread to create an even layer. Sprinkle the cinnamon sugar mix over on top of the batter. Drop the nuts on top and press a bit to get them into the batter. Spread remaining batter evenly on top and then cover with the streusel mixture.
Bake in a preheated 350 oven until firm to the touch and a toothpick inserted in the center comes out clean.
It will take more than an hour.