Bourbon Pecan Hand Pies
On May 1, 2015 by sixtyacrebakerThe season is starting. The season where you would rather be standing at the first turn cheering your horse, than sitting inside, fork in hand. This weekend is a race and event, anticipated like Christmas and filled with tradition. Every Southerner I know has a menu they serve every year, and their favorite milliner on speed dial. In breaking with tradition, this year, I am servingg hand held derby-like pies. In your left hand a buttery crust, filled with bittersweet chocolate, pecans and bourbon custard, in your right hand a winning ticket. Add a ice cold mint julip for your very own trifecta.
Bourbon Pecan Hand Pies
makes about 10-4″ hand pies
1 recipe pie crust
filling
1/3 cup honey
1/3 cup brown sugar
generous pinch kosher salt
3 Tbs bourbon
3 large egg yolks
2 Tbs unsalted butter
1 cup pecans-toasted
about 3/4 cup bittersweet chocolate chips
Use your favorite pie crust recipe, or purchase already prepared.
Place honey, brown sugar, kosher salt, bourbon and egg yolks in a saucepan. Whisk until well incorporated. Place over low heat and stir continually with a rubber spatula until mixture thickens. Coat the spatula with the mixture and run your finger down the middle of it. If doesn’t run back together, then it is ready. Run through a strainer into a clean bowl. Add butter and stir until incorporated. Stir in pecans. Refrigerate until ready to use.
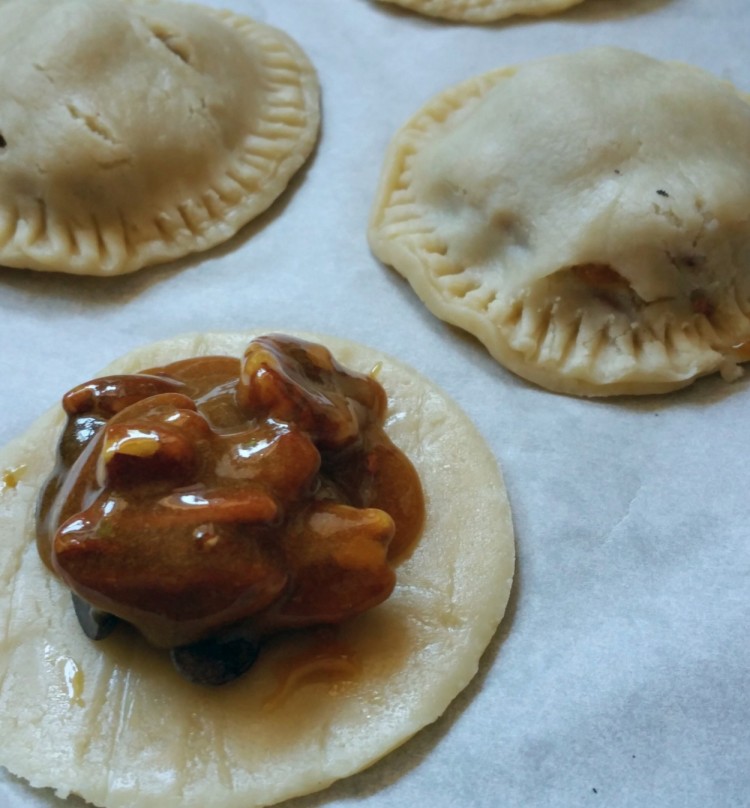
Roll out your pie crust to about 1/4″ thick. Using a round cookie cutter, cut out an even number of circles. Line a sheet pan with parchment. Place 1/2 of your rounds on the parchment, approximately 1/2″ apart.Place a tablespoon of chocolate chips in the center of the circle. Top with a generous spoonful of filling. Place a second round of crust on top. Brush with egg yolk and bake in 400F oven for about 15 minutes or until golden brown.
Hot Cross Scones {with rum soaked dates and toasted pecans}
On April 3, 2015 by sixtyacrebakerCome Easter, I yearn for all the delicious delights from both my childhood, and my travels. Whilst (see how I did that?) living in London, the hot cross bun craze eluded me. I participated, but was never that enthusiastic about the taste. They however, are fun to make, and do signal the last days of the Lenten season…which is joy in and of itself. In the tradition of Good Friday must eats (if you are not fasting today), I give you Hot Cross Scones. Instead of raisins, they have rum soaked dates and toasted pecans. You’re welcome.
These, like hot cross buns, are meant to be shared “Half for you and half for me, between us two goodwill shall be” While the “diddy” intimates sharing a single bun, this recipe makes about a dozen scones. I don’t think anyone would balk at the notion that 6 a piece is fair share.
Hot Cross Scones {with dates and pecans}
for the scones
1/2 cup dried dates: chopped into raisin size pieces
1/2 cup spiced rum
1 cup whole wheat flour
1 cup all purpose flour
4 Tsp baking powder
1/2 cup granulated sugar
1/2 tsp ground ginger
1/4 tsp ground cinnamon
3/4 tsp kosher salt
6 Tbs unsalted butter–cold and cut into small pieces
1/2 cup toasted pecans–chopped
3/4 cup heavy cream–cold
1 large egg
1 tsp vanilla
for the icing
1/3 cup powdered sugar
pinch ground ginger
1 tsp +/- heavy cream
to make scones
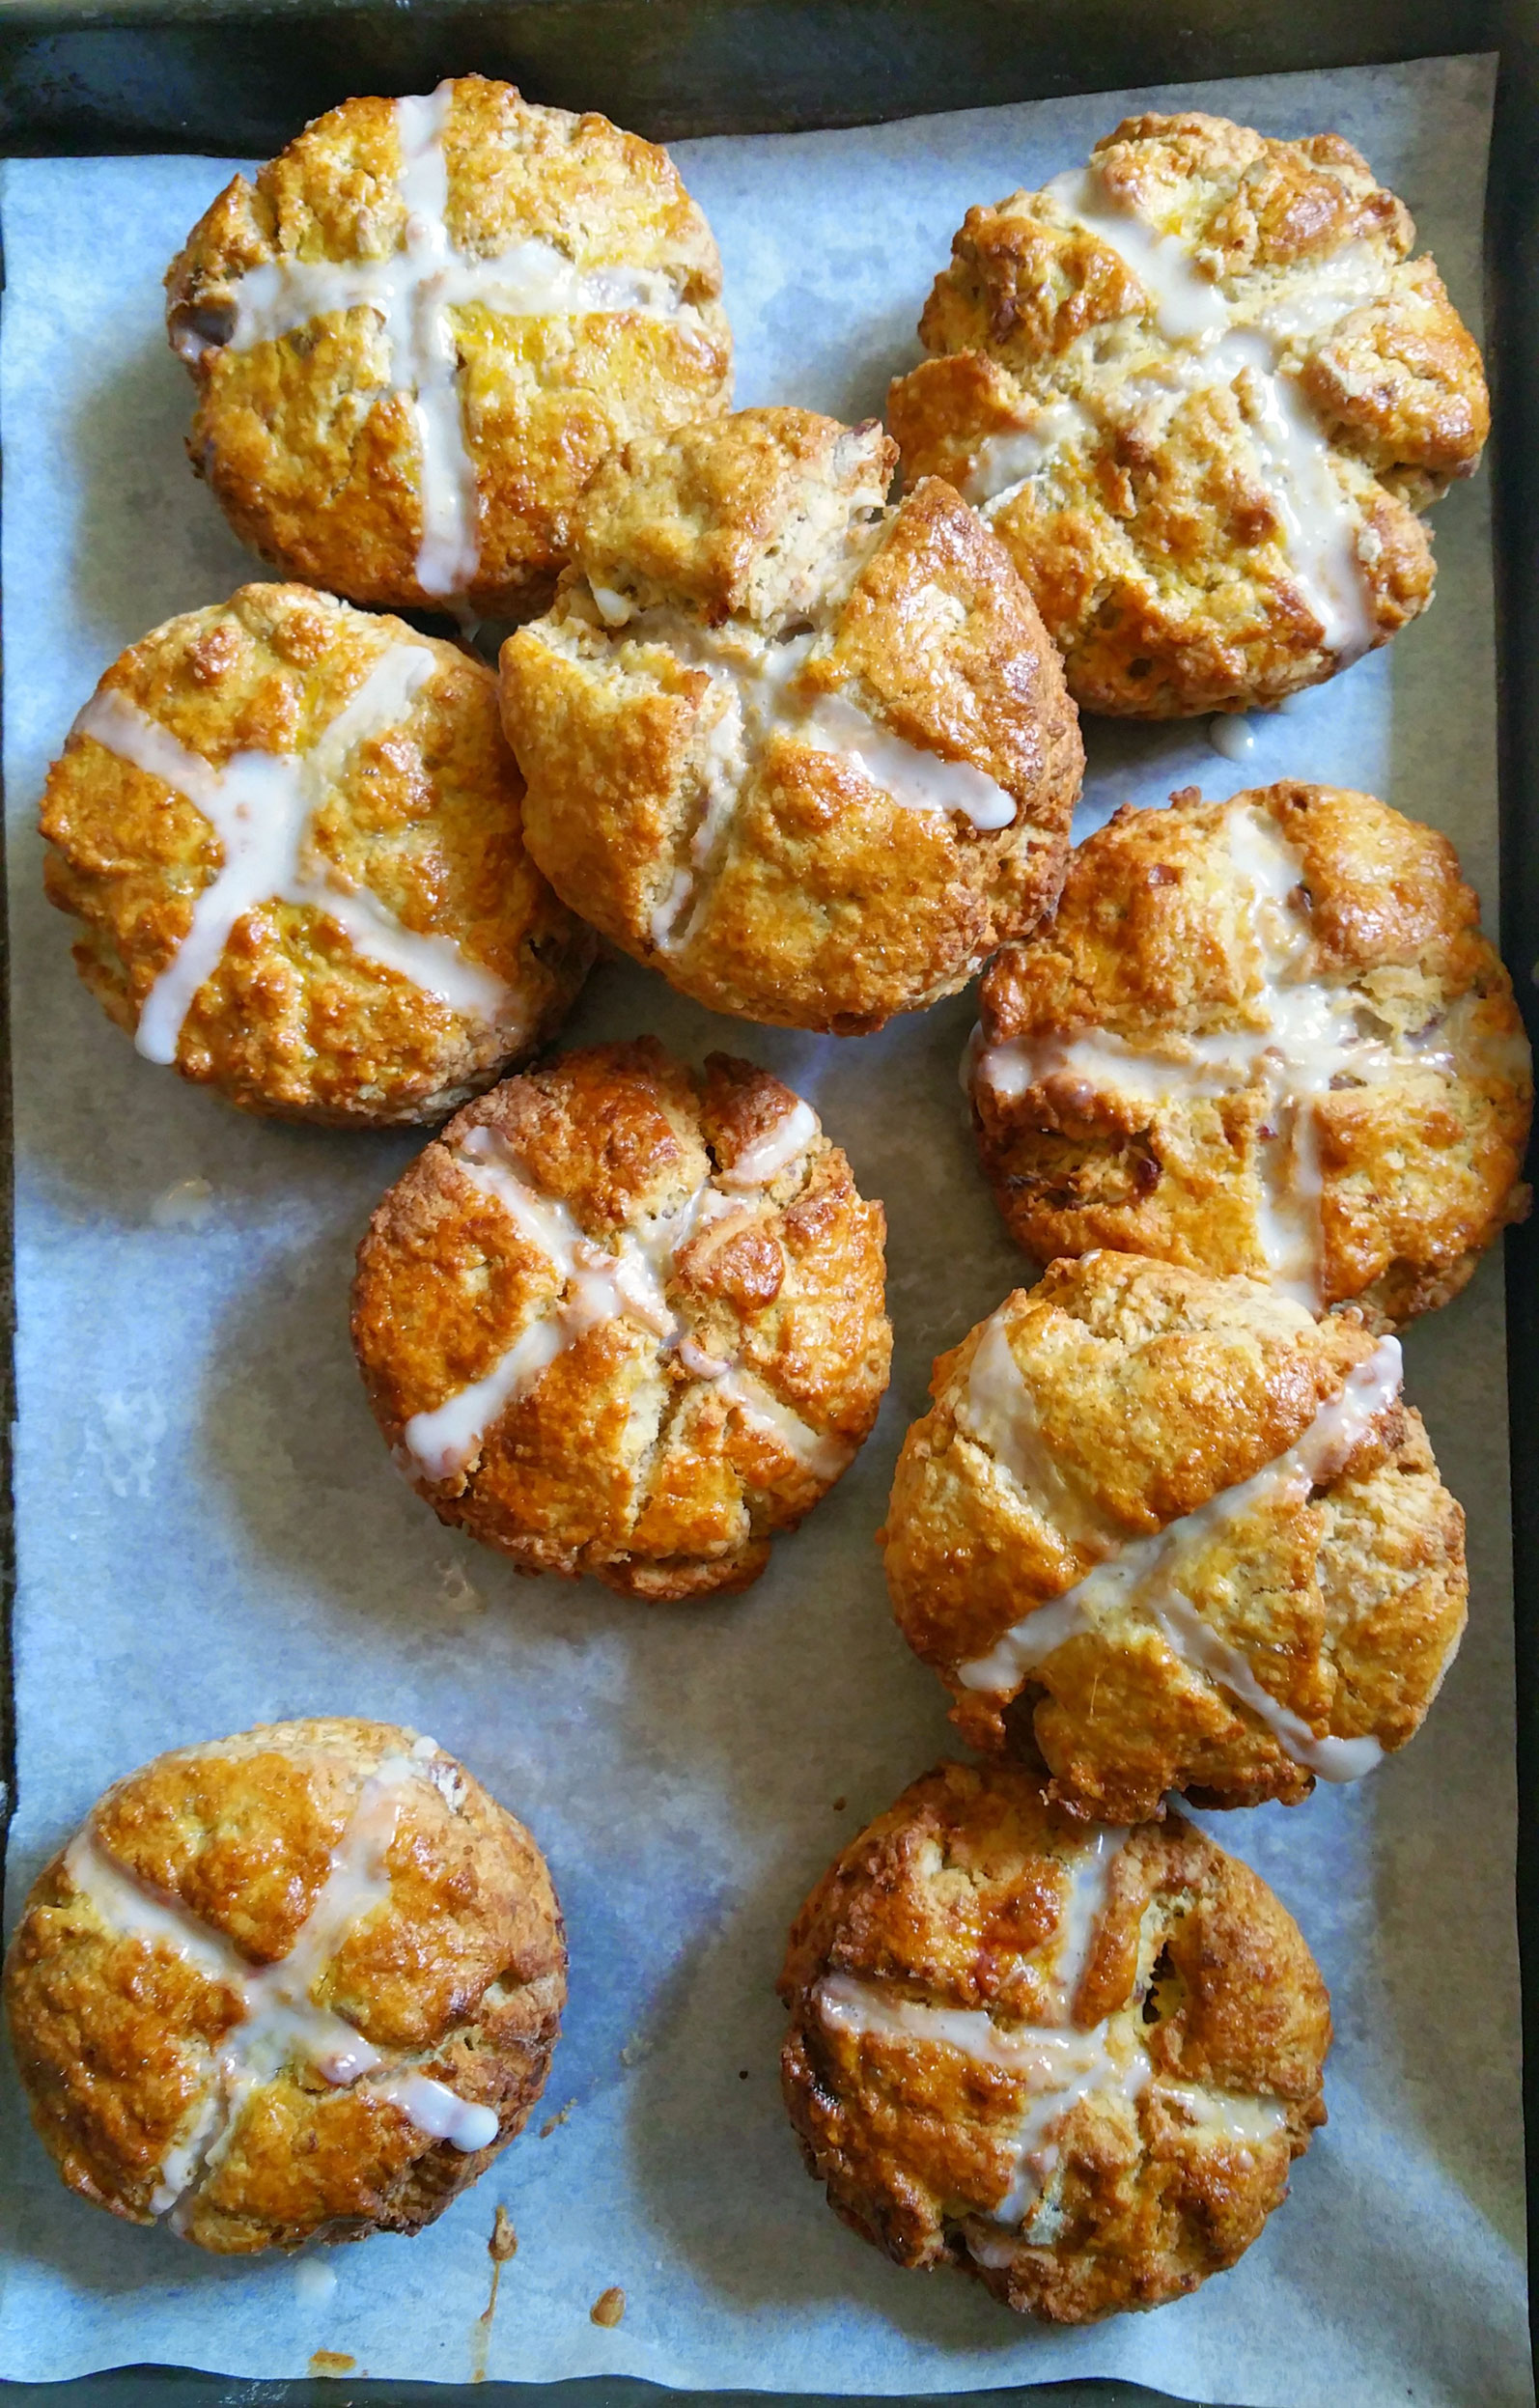
Heat the spiced rum over low heat, and pour over the chopped dates. Let sit for no less than 10 minutes and up to an hour. Drain well. In a large bowl whisk together the whole wheat and all purpose flour, baking powder, granulated sugar, ginger, cinnamon and salt. Using a pastry cutter, or your hands cut the butter into the flour mixture. Do not overwork. Toss the drained dates and pecans in. Give them a quick stir to coat with flour. Whisk the cream, egg and vanilla together and add all at once to the flour mixture. Using your hands gently mix together. When the dough has just come together, place onto a lightly floured surface and shape, by hand or with a roller, into a 3/4″ round. sprinkle a bit of flour on top, if sticky, and cut out with 3″ round cutter. Place on lined sheet pan. Using the back of a knife, swept in flour, make a cross indentation in the top. Brush with egg wash or the remains of your egg/cream mixture. Bake at 400F for about 15 minutes. Ice when cooled.
to make the icing
Place powdered sugar in a small bowl, whisk in ground ginger. Add cream 1 tsp at a time until the mixture is thin enough to pipe, but not too thin. You don’t want a runny icing. Pipe with a pastry bag.
Lemon Curd
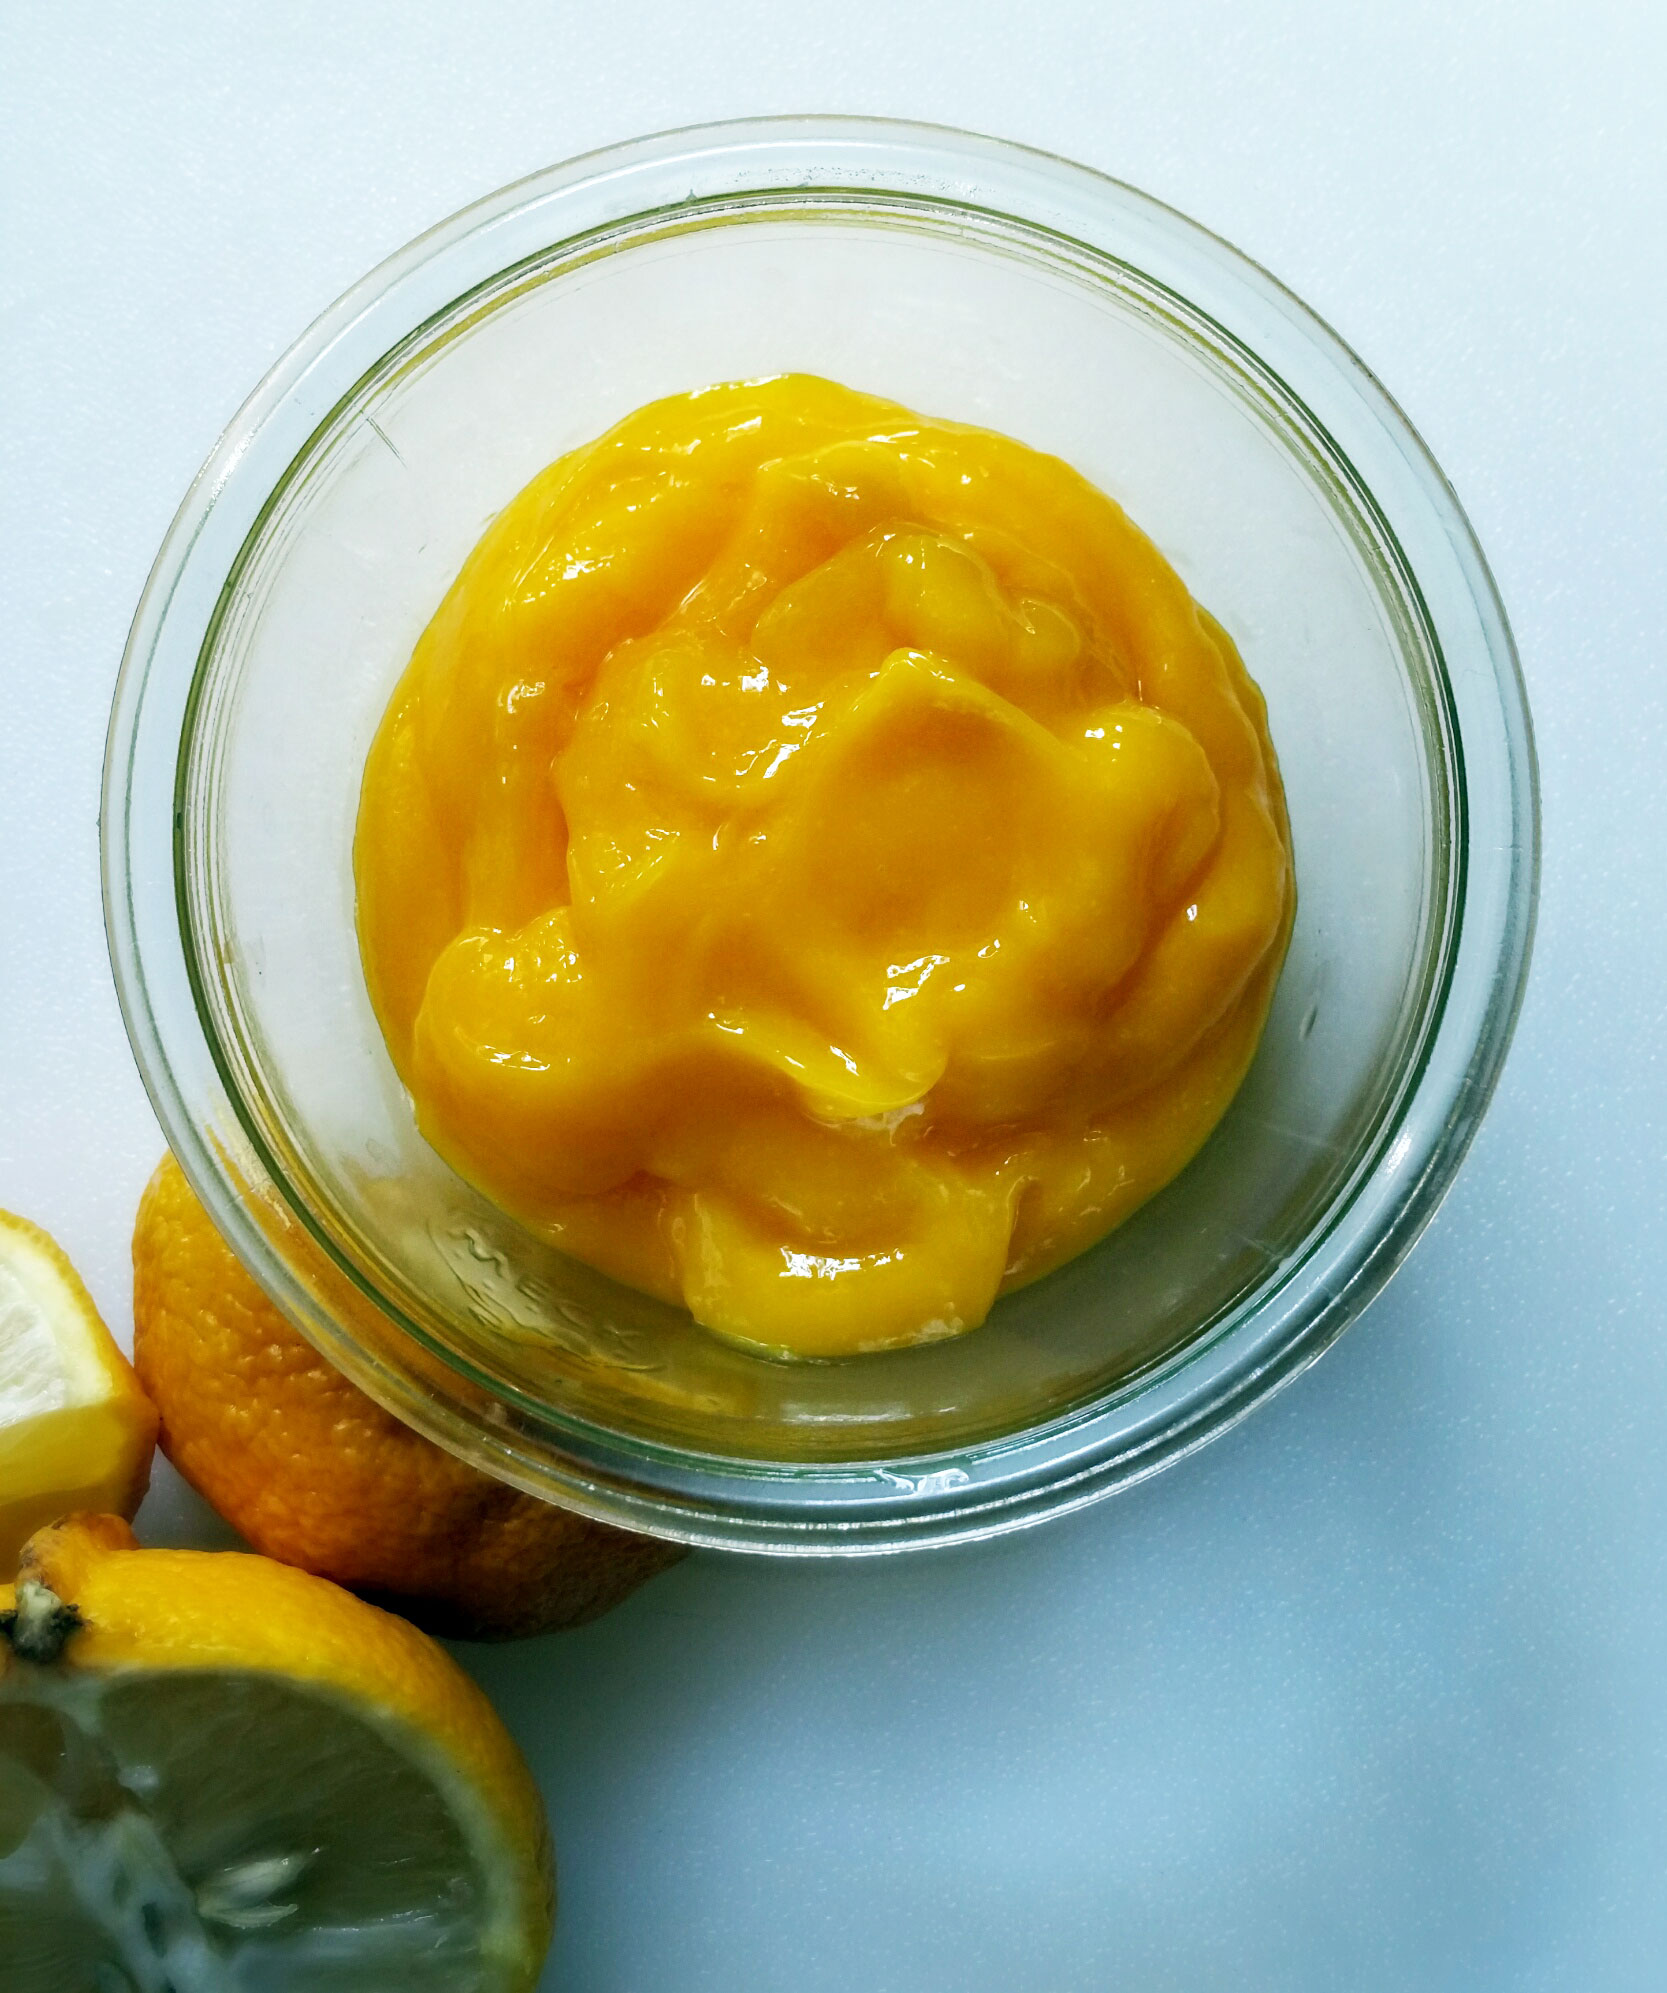
On March 30, 2015 by sixtyacrebakerI have been waxing lyrical about lemon curd for days. Finally, the desire had become so overwhelming, I took matters into my own hand. It was time. My counter top had become over-run with duck eggs, a basket of lemons was prepping for it siren song to the fruit fly migration, and I can only stand the thoughts in my head for so long. The hue of this curd is overwhelmingly beautiful and true. It is a foreshadow to the bright treat I love so much.
Lemon Curd
makes approx 3 1/2 cups
8 extra large egg yolks
1 cup granulated sugar
3/4-1 cup fresh lemon juice*
1 Tbs lemon zest
pinch kosher salt
1/2 cup unsalted butter-cut into pieces
Place the butter in a glass or ceramic bowl and set aside. Place egg yolks, sugar, lemon juice, lemon zest and salt in a med/large saucepan or high sided saute pan. Whisk to fully incorporate all ingredients. Place over low heat and stir continually with a spatula. Be mindful to scrape the sides and bottom of pan while stirring. Continue stirring until the mixture thickens enough to heavily coat the spatula, and you can easily trace a clear path through with your finger. Do not let the mixture simmer or boil, otherwise you will cook your egg yolks. Remove from heat and pour through a sieve directly into the bowl with the butter. Whisk until all of the butter is melted and incorporated into the curd. The sieve will catch any cooked particles and most of the zest. This will allow for a clear texture to your curd.
To cool, place the bowl of curd into a larger bowl of ice water (mostly ice) and stir until the temperature reduces to room temp. You may continue cooling to use immediately, or place a piece of plastic wrap directly onto the curd and allow to finish cooling in the refrigerator.
*I enjoy a very tart lemon curd as I mostly pair with sweet meringue, shortbread, or ice cream. If you like it a bit more tame, use 3/4 cup of lemon juice, if you are like me, use 1 cup.
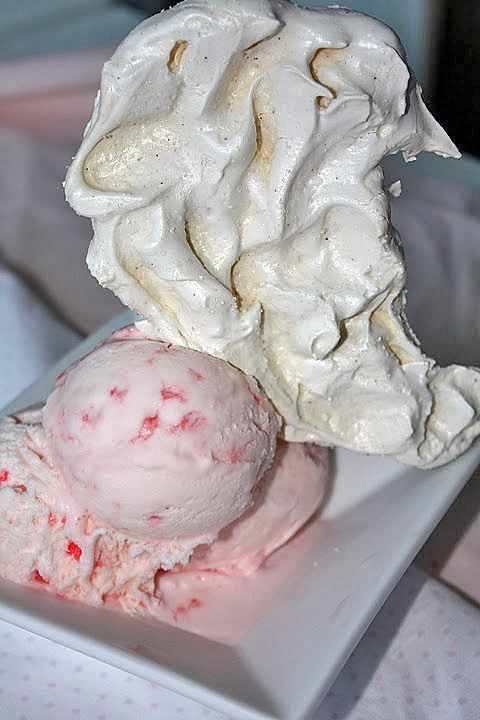
Cupid’s Wings
On February 10, 2015 by sixtyacrebakerI find egg whites whipped, billowy and cloud-like, to be utterly satisfying. They are a testament to the notion that desserts don’t have to be fussy to be extraordinary. Their only real requirement is a clean bowl and strong wrist. On the ranch, eggs are readily available for a last minute fix. This valentine’s day, I will use the yolks for a decadent frozen custard, and the whites for these ethereal wings.
Meringue
3 large egg whites at room temperature
1/4 tsp cream of tartar
3/4 cup sugar
1/2 tsp vanilla
pinch of salt
Make sure the beater and bowl are extremely clean and free of any oil or fats. Beat whites on low until foamy. Add salt and then kick up the speed to medium. Add cream of tartar. Begin to slowly add the sugar “raining” it into the egg whites. Continue to beat until soft peaks form, then add vanilla. Beat to stiff and firm peaks.
If you over-beat, you will see moisture starting to “weep” from the whites. If this happens, start over!
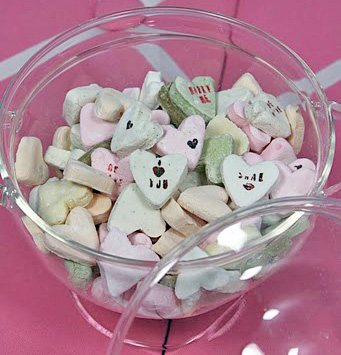
Homemade Conversation Hearts
On February 5, 2015 by sixtyacrebakerValentine’s day wouldn’t be complete without a conversation through candy hearts. I remember the days when hearts were carefully shared, making sure “i love you” didn’t get inadvertently passed, to a 4th grade crush. Also important: sharing only
the good flavors. Anyone would shudder to see the object of her affection, chewing up and spitting out her heart. Ten years old is too young to fully understand foreshadowing. I am confident any valentine would appreciate an “i love you” or three in flavors such as orancello, coconut, green tea, almond, anisette, coffee and vanilla bean. These are so much fun to make. I think a robin’s egg blue box full of “marry me” hearts would be a darling proposal. Or a love poem stamped out word by word, heart by heart, snaked down the dining room table, as a simple but thoughtful centerpiece. The possibilities are endless.
Just. Like. Love

Conversation Hearts
1/4 oz gelatin
1/2 cup water
2 tsp light corn syrup
2 lbs powdered sugar
cornstarch
flavorings
color
rubber stamp kit and/or food color pens
Place water in a bowl and sprinkle gelatin over. Let bloom. Add the corn syrup and gently cook in the microwave until the gelatin and corn syrup have melted. Do this in 20 second intervals. Mix the gelatin mixture into about 2/3rds of the powdered sugar. Knead with your hands, adding more powdered sugar as necessary until the dough is satiny and doesn’t stick to the counter. Divide the dough into 6-8 pieces, coloring and flavoring as desired. Keep tightly wrapped in plastic wrap, as this dough will dry out quickly. Keep some powdered sugar on hand, in case adding color and flavor makes the dough sticky.
Roll the dough out and cut with small heart cutter. Place on a cornstarch dusted sheet pan and let dry a minimum of 48 hours. When ready to decorate, use food color based pens, or brush food coloring directly onto a rubber stamp with the words spelled backwards. Press the heart onto the stamp and let dry about 15 minutes. You can also paint food coloring directly onto the heart as well.
{this is a post transcribed from my blog fudgeripple. the content exclusively belongs to me}
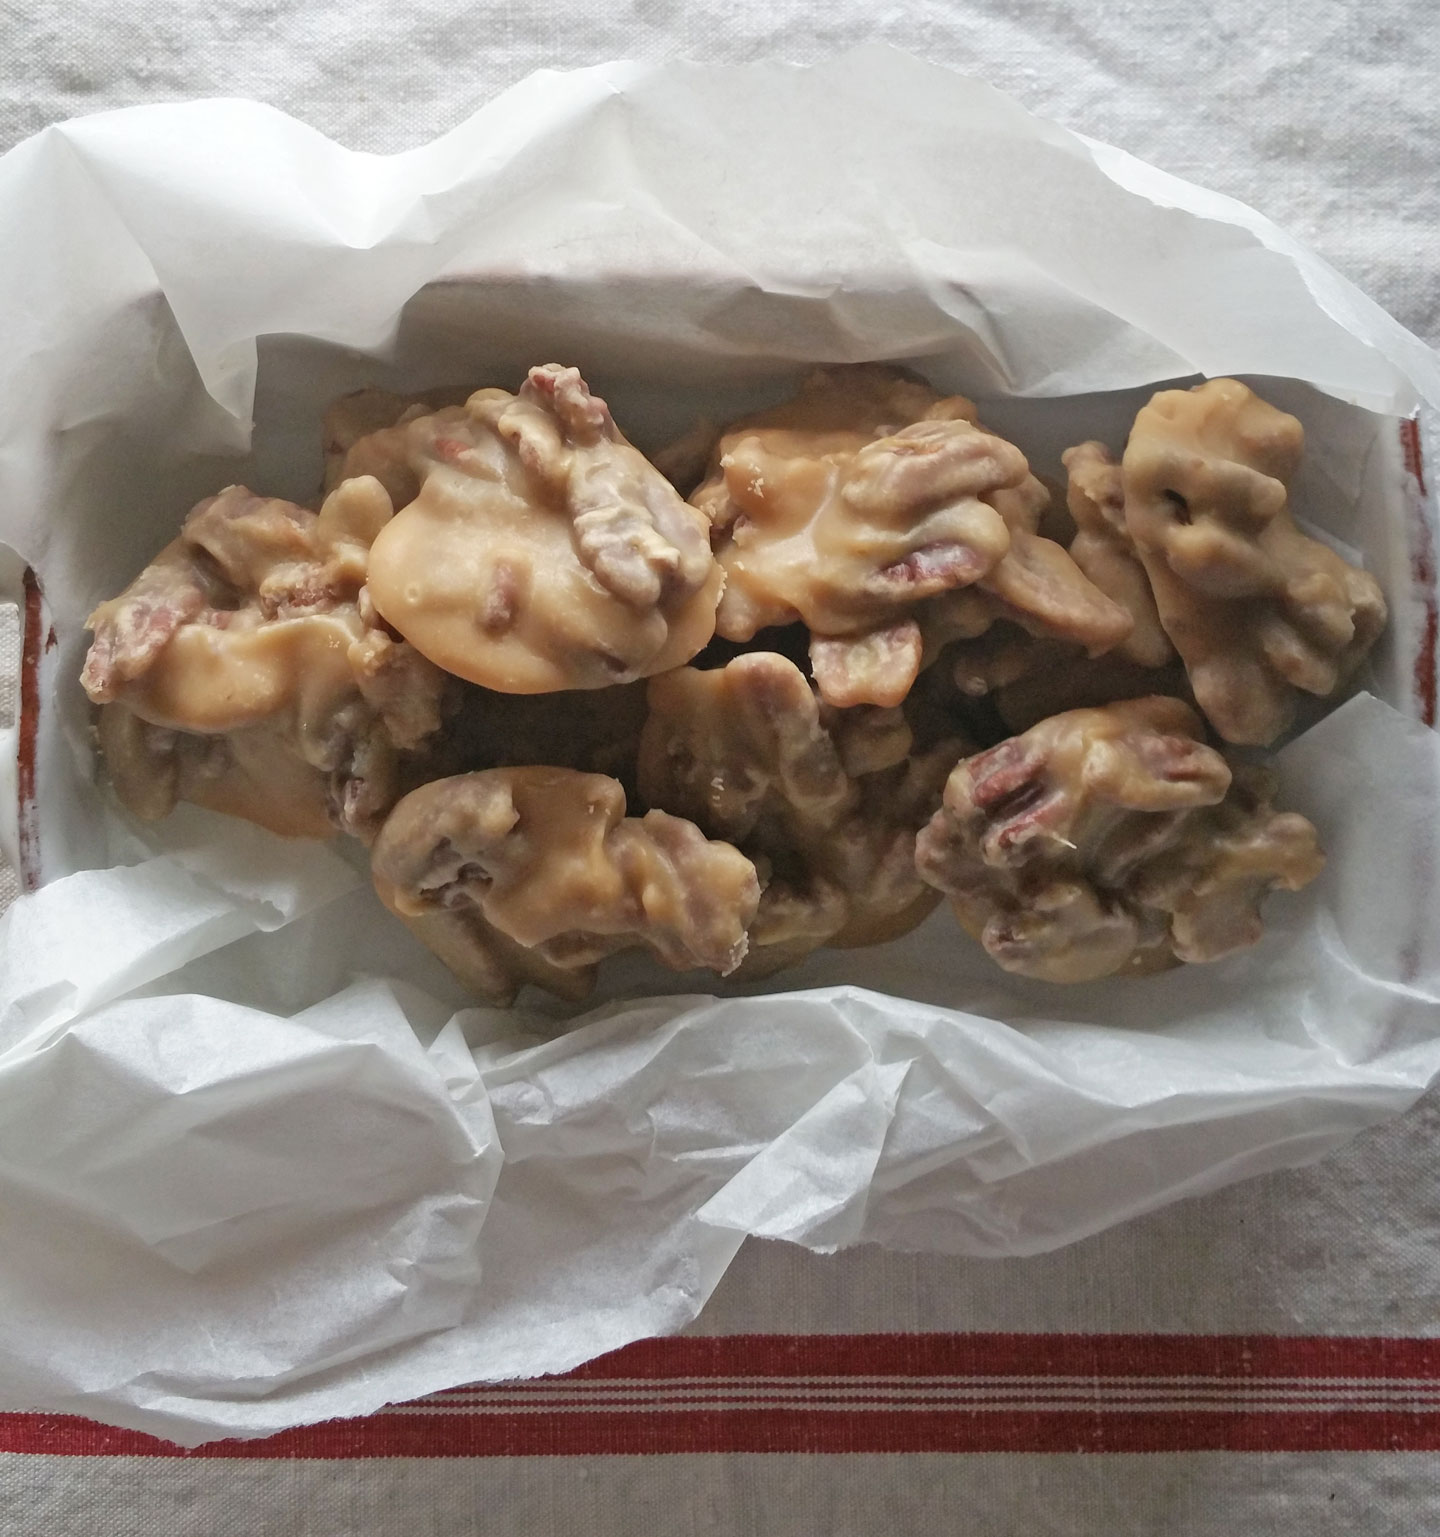
Pecan Pralines
On December 15, 2014 by sixtyacrebakerPRAWWWWWWlines. Say it with me, and then get in the kitchen and make some. You won’t be disappointed. I Guarantee It.
This recipe came from my love of the sweet confection. I have been obsessed with the treat since my first visit to New Orleans way back when Emeril had a last name. I printed this recipe and a story to go with it on my previous blog, but they are so good, I thought they warranted their own page on Sixty Acre Baker. They make a perfect holiday (or any time of year, really) gift.
Pecan Pralines
1 quart heavy cream
3 cups granulated sugar
generous pinch of kosher salt
1 1/2 lbs toasted pecans
1 Tbs+ 1 tsp lemon juice
1 Tbs unsalted butter
2 tsp vanilla
In a heavy bottomed pan, stir together the cream, sugar and salt. Place on low to med-low heat and pop in a candy thermometer. Cook until thermometer reaches 234 degrees F. The wait between 220 and 234 is lengthy..don’t be tempted to up the heat to make it happen faster. You can pretty much leave it alone until it reaches 220, at 220, stay in the kitchen checking on it frequently. When it hits 230, watch it and start stirring, it will start to change colors at this point and you want to make sure the bottom doesn’t burn. There will be brown bits, but just mix them in. Stir, stir, stir. When it hits 234, take the pot off the heat, remove the thermometer and add the lemon juice, vanilla, butter and pecans. Stir to incorporate, then pop the thermometer back in and bring the temp back to 234. It will go a bit faster this time, keep an eye on it and stir continually to prevent burning on the bottom. When it hits 234, spoon it out in dollops (i use a soup spoon),onto parchment lined cookie sheets, or aluminum foil that has been sprayed or greased lightly.There are a lot of pecans in this, so make sure you get a nice mix of the caramelly goodness. One batch will make about 50 moderately sized pralines. They will look like caramel until you cool them. As they cool and sit, they will begin to get a bit cloudy. That is a good thing. You are not looking for chewy here.
Let cool for a few hours. They will keep for quite a while if you keep them in an airtight container in a dry place. Please, do not put in the fridge.
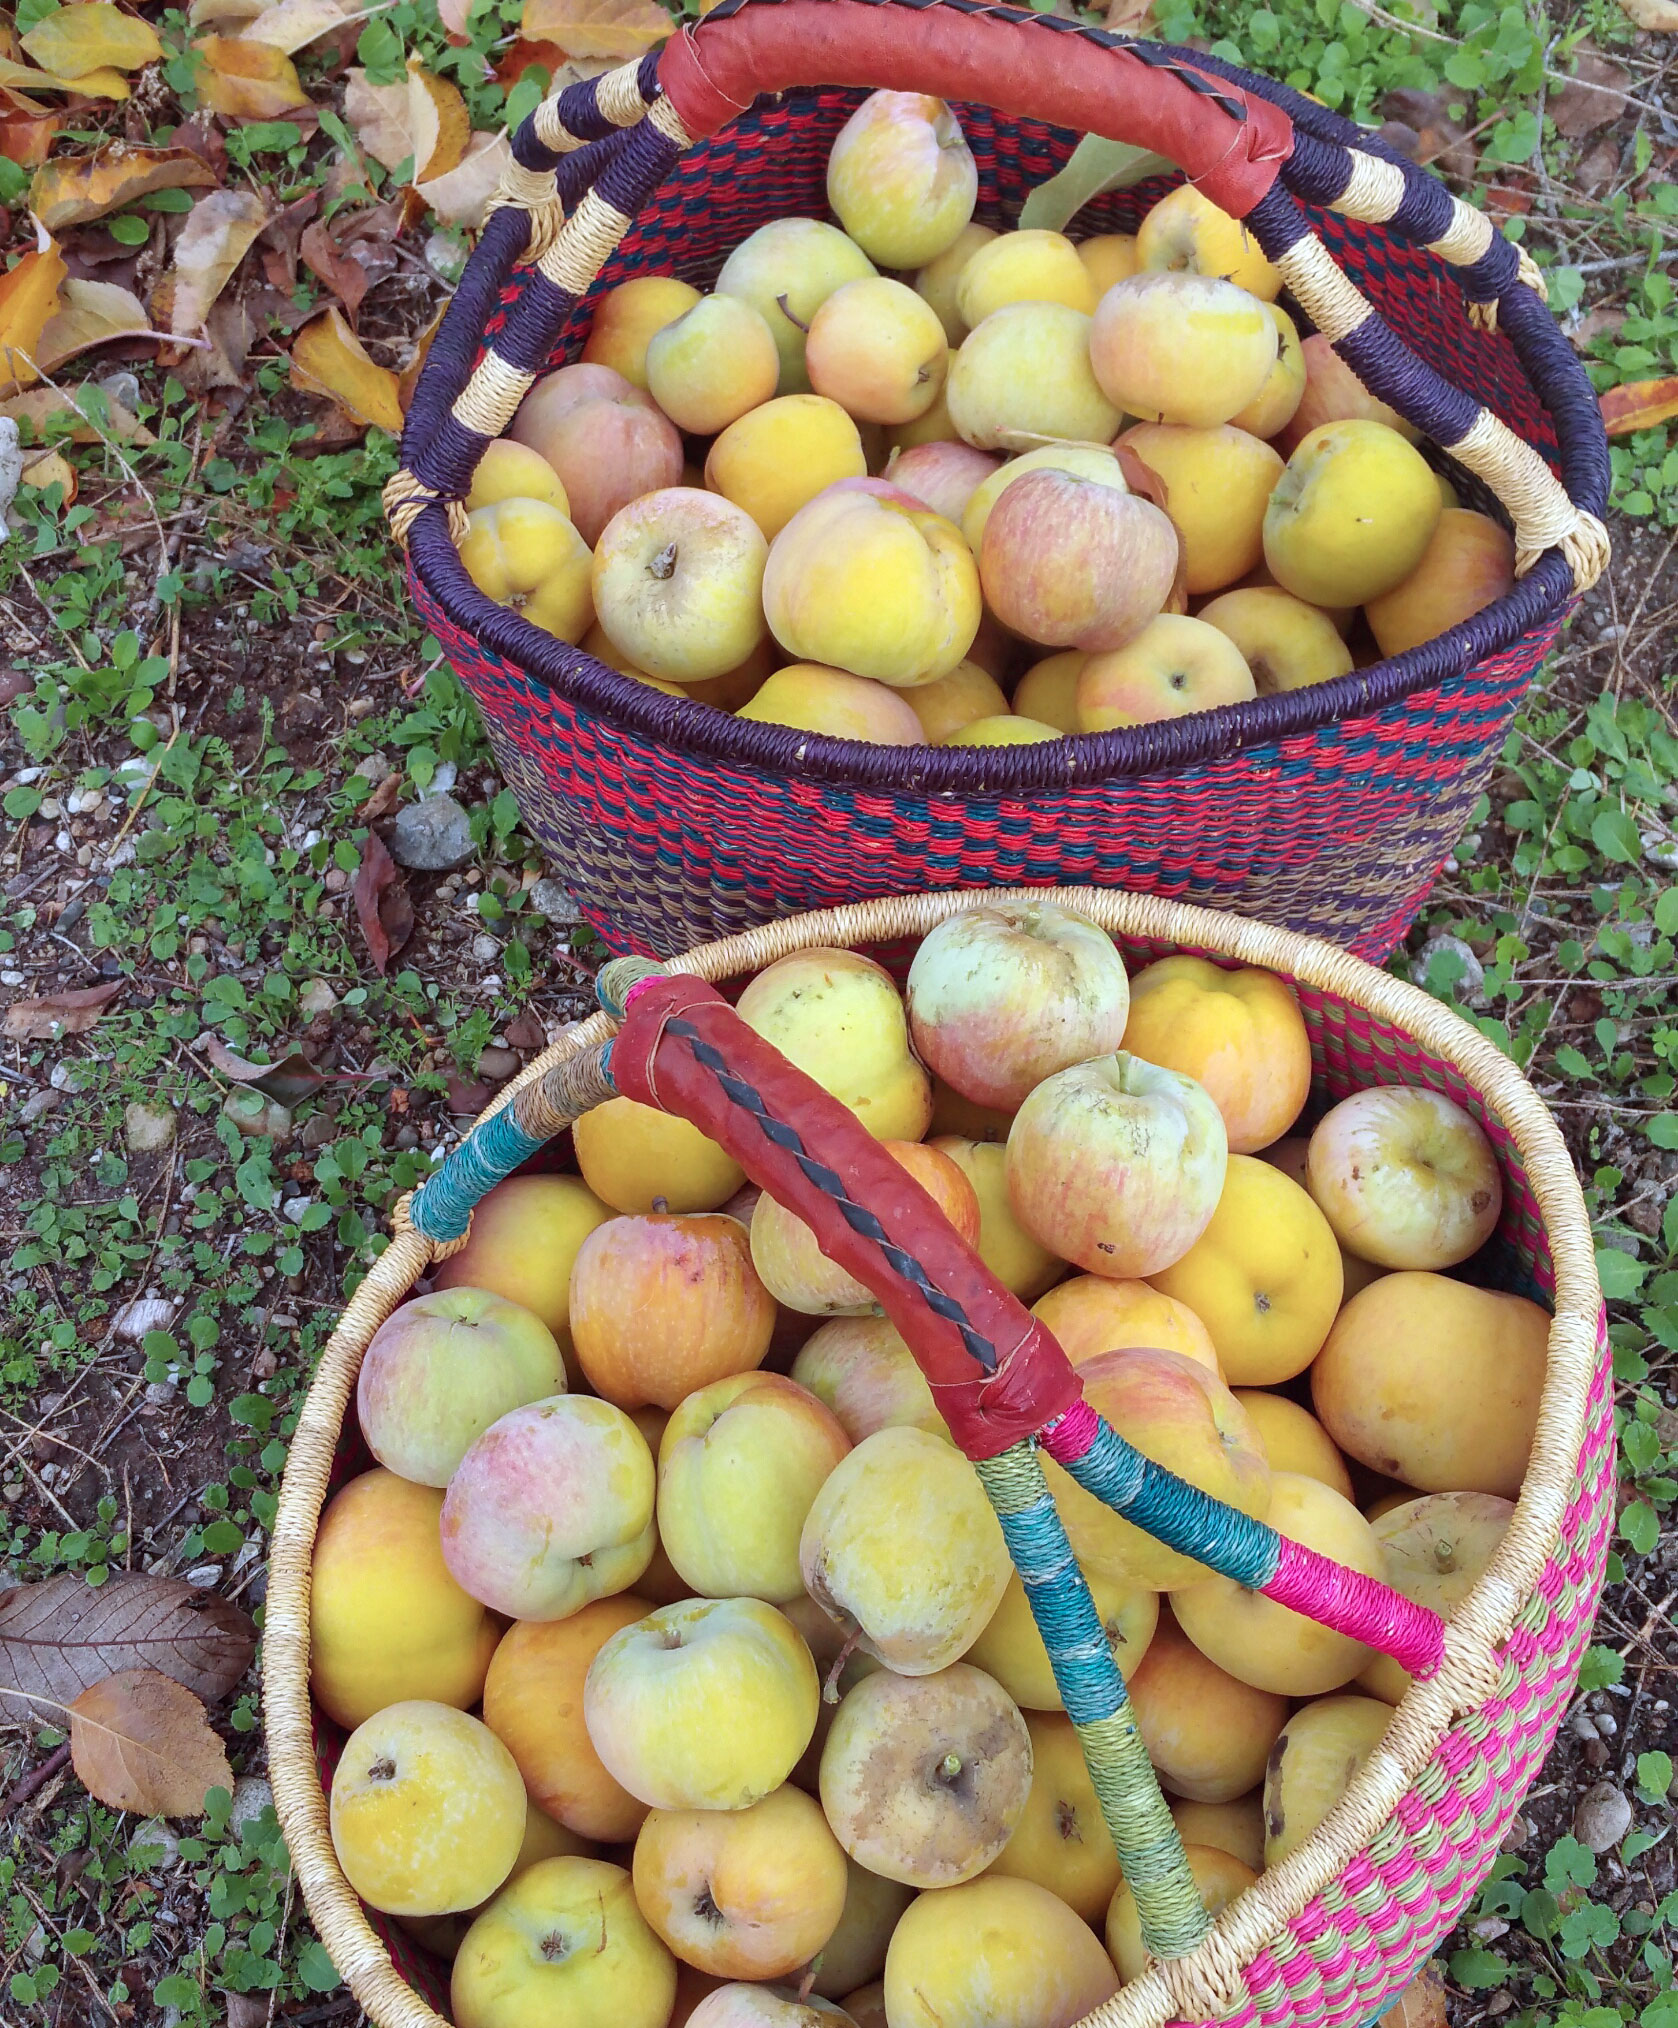
Apple Fritters
On December 7, 2014 by sixtyacrebakerMike planted 20 plus varieties of apples in our orchard. We have pie apples, sauce apples, snack apples, brandy apples and cider apples. To further the cause, our neighbor also grows a variety in her orchard. We are not starved for apples from late spring to early winter. Today, in the dense of early morning mist and chill, I picked the trees clean. Bushels and bushels of apples. A workout and a treat! These apples are slated for hard cider. I’m still gathering all of the supplies, but I will be pressing the apples this week, and starting the fermentation process straight away. I’ll keep you posted on the progress. With any luck it won’t end up like the root beer project of 2005. Spoiler alert, it ended with me in a delightfully rich, if not sticky, bath.
While you (and I) are waiting for the results of the cider…you may want to try making these delicious apple fritters.

Apple Fritters
for the apples
1 cup apples–cut in a 1/4″ dice
1 Tbs sugar
1 Tbs lemon juice
pinch cardamom
pinch nutmeg
pinch cinnamon
mix together in a bowl and let sit while you do your preparations
for the batter
1 cup apple cider
2 cups flour
1/2 cup sugar
1 tsp kosher salt
1 Tbs baking powder
1/2 tsp cinnamon
1/2 tsp nutmeg
1/3 cup milk
1 tsp vanilla
3 Tbs unsalted butter–melted
2 large eggs
oil for frying
Simmer the apple cider on the stove until it is reduced to 1/4 cup, and let cool. Heat your oil in a sturdy deep pot, to 360F. Your oil should be deep enough so the fritter can float, but you must also have at least 3″ between the top of the pot and the top of the oil. Meanwhile, place all your dry ingredients in a bowl and whisk to combine. Make a well in the center and pour in milk, vanilla, butter, cider and eggs. Slowly stir together, making sure all ingredients are incorporated, but do not beat. Stir in the apple and any juices that may have accumulated. you can make these small or big, the process is the same. Drop into hot oil and then using a spatula poke it a few times to flatten it a bit and give it some nooks and crannies. Fry until golden brown, then flip and continue until both sides are equally colored. Remove from oil and place on a cooling rack, placed over a sheet pan.
for the glaze
1 cup powdered sugar
2 Tbs (more or less) cider
Mix together in a shallow bowl. When the fritters are still warm, but not too hot to touch, dip in the glaze.
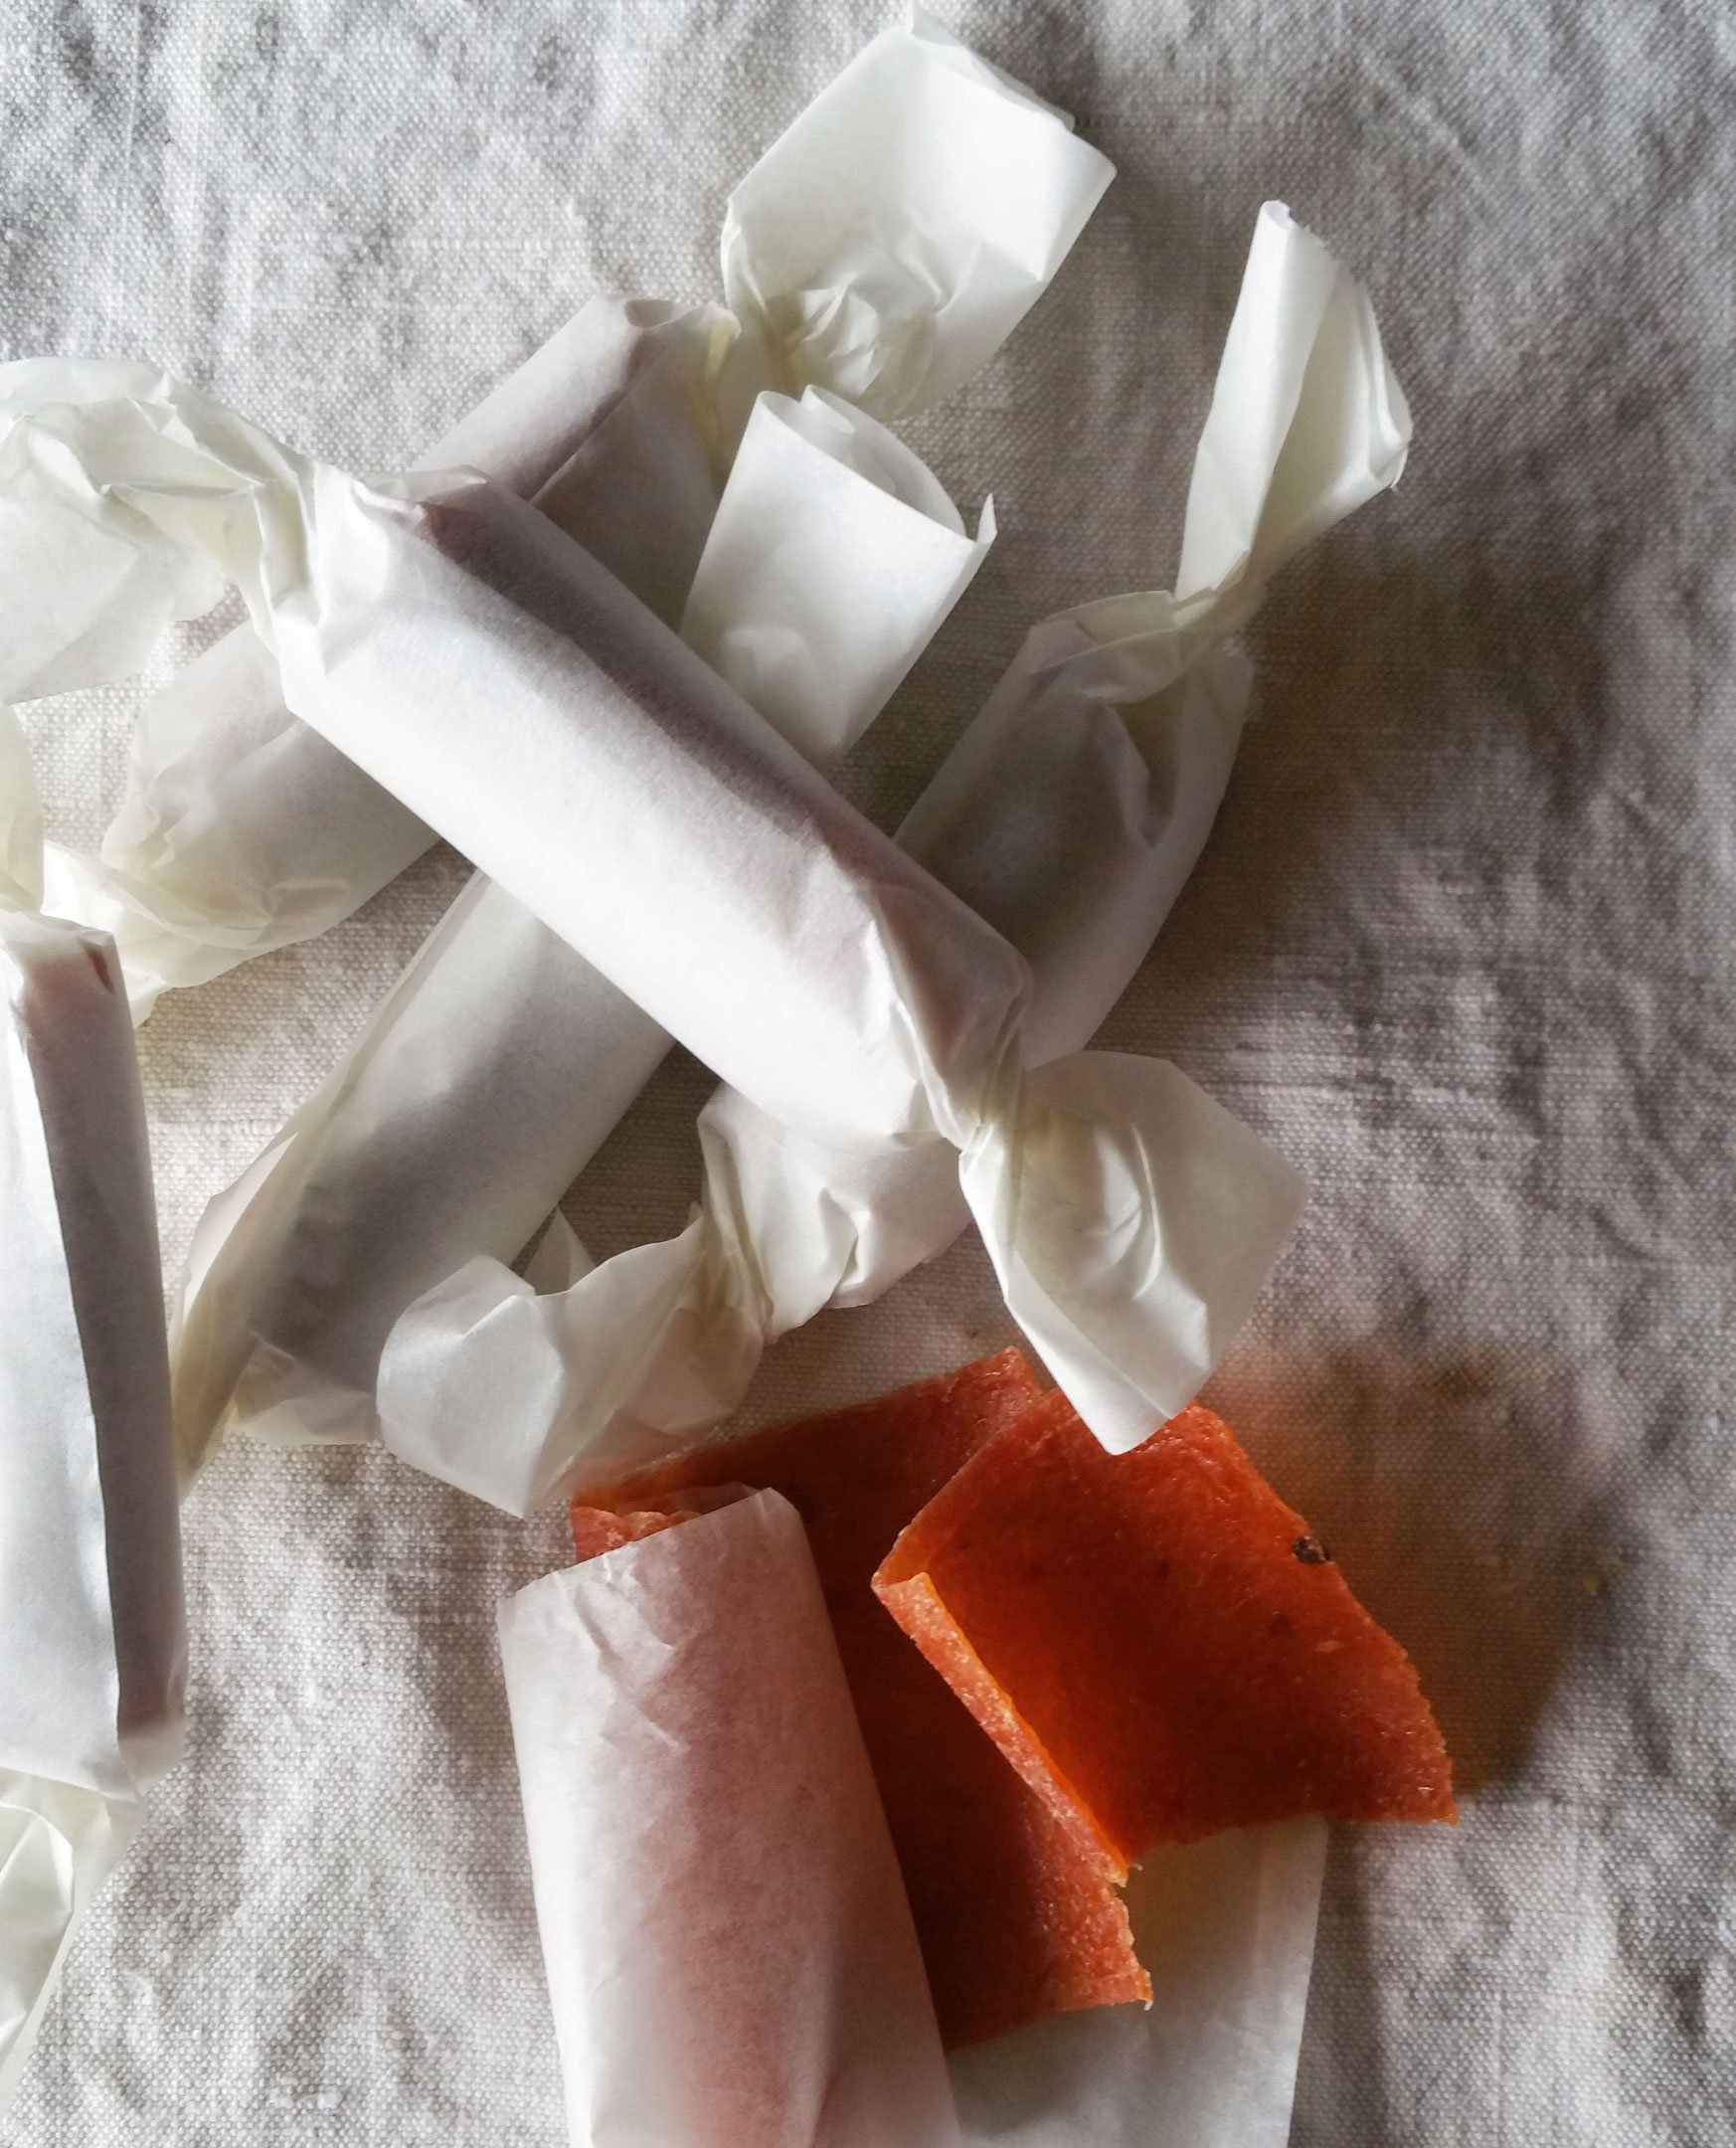
Quince Fruit Leather
On December 5, 2014 by sixtyacrebakerAs a kid, I brought a sack lunch to school every day…as did most of my classmates. What I would never find packed in my lunch were modern day snack foods. I was always trying to trade up for fruit roll-ups. Oh how I loved them. The whole thing…the sound the leather made while being ripped off its backing. Eating it piece by piece…or better yet…making a dense chewy mini roll-up which would burst with flavor at every gnash. Apricot was always my favorite. I would trade my best halloween candy for a roll of apricot.
I learned to make fruit leather in fancy french culinary school. It was a bit of a production; mostly because it was fancy culinary school. Making fruit leather is simple and easy, and extremely satisfying. I love it because it gives a use for the “dregs” from another product: the pulp from jelly making, juicing, and simple syrups. I made a lovely quince sorbet as a palate cleanser for our Thanksgiving dinner {recipe coming soon}. I boiled down the beautiful fruit and extracted a lovely pink elixir. At the end of it all, I was left with a bundle of fruit. It was a bit chunky, and was lacking sweetness. With just a little bit of flavor tweaking, and a good dry out in the dehydrator, I was able to make a roll-up that was better than the memory of my youth and cheaper than culinary school tuition. Once you have the method down, you can make leather with all your favorite flavors. You also will be glad to know that having a fancy dehydrator, while a great convenience, is not required to make this tasty treat.
Quince Fruit Leather
2-3 lbs quince
juice of 1/2 lemon
seeds from 3 cardamom pods
1″ ginger root, peeled and smashed
1/2 cup granulated sugar (optional: I find that it helps bring out the pink color of the quince when cooking)
piece of parchment paper
additional sweetener (sugar, brown sugar, honey, agave; your choice)
ground cardamom, ground ginger
Wash fruit well and scrub off all fuzz from exterior. Chop quince into chunks (about 2″ each). Place in a heavy bottom pot and cover with water. Add lemon juice, cardamom seeds, ginger root. Cut your parchment paper into a round large enough to cover your pot Cut a small hole in the middle of the parchment round for venting. Place the parchment snugly on top of the quince. The purpose of the parchment is to keep the fruit submerged under the liquid. Cook until the fruit is very soft and falling apart and the color has changed from yellow to pinkish. The longer you cook, the more color you will get from the fruit. Blend everything together using an immersion blender, blender, food processor or food mill. Drain using a cheesecloth lined sieve or jelly bag. If you don’t want to drain the liquid out, toss the whole mess back into the pot and cook off most of the liquid. You don’t want the mixture to be completely dry, but you don’t want it to be so liquidy that you can drink it. Whether you drain or don’t drain, place the mixture you will turn into leather back onto the pot and taste for sweetness and spice. Don’t over sweeten. You will be dehydrating, which will make the flavor extra bold. Add enough sweetness and spice to highlight the flavor. You may want to add a bit more lemon juice at this point as well. Just cook long enough for the sugar to melt into the mixture.
You can use the drained for cocktails, homemade sodas, sorbet, over fruit, soaked in pound cake…
Prepare your dehydrator or sheet pans. If you have a dehydrator, line the mesh sheets with plastic wrap. If using oven, line with silpat or heavy plastic wrap. Using an offset spatula spread an even 1/8″ thick layer of fruit paste onto your prepared surface. If using a dehydrator or oven use a setting of 135-140F. It can take anywhere from 6-12 hours. Start checking up on it at 6 hours. The paste should have lost its stickiness, but not be hard. If it is hard, while still warm, it will be fruit crackle when it cools (which is still edible and yummy). I like to turn the dehydrator off at maximum of 8 hours and let the leather sit for a few hours or overnight.
Store in an airtight container…or fancy wrap them like the gift they are.
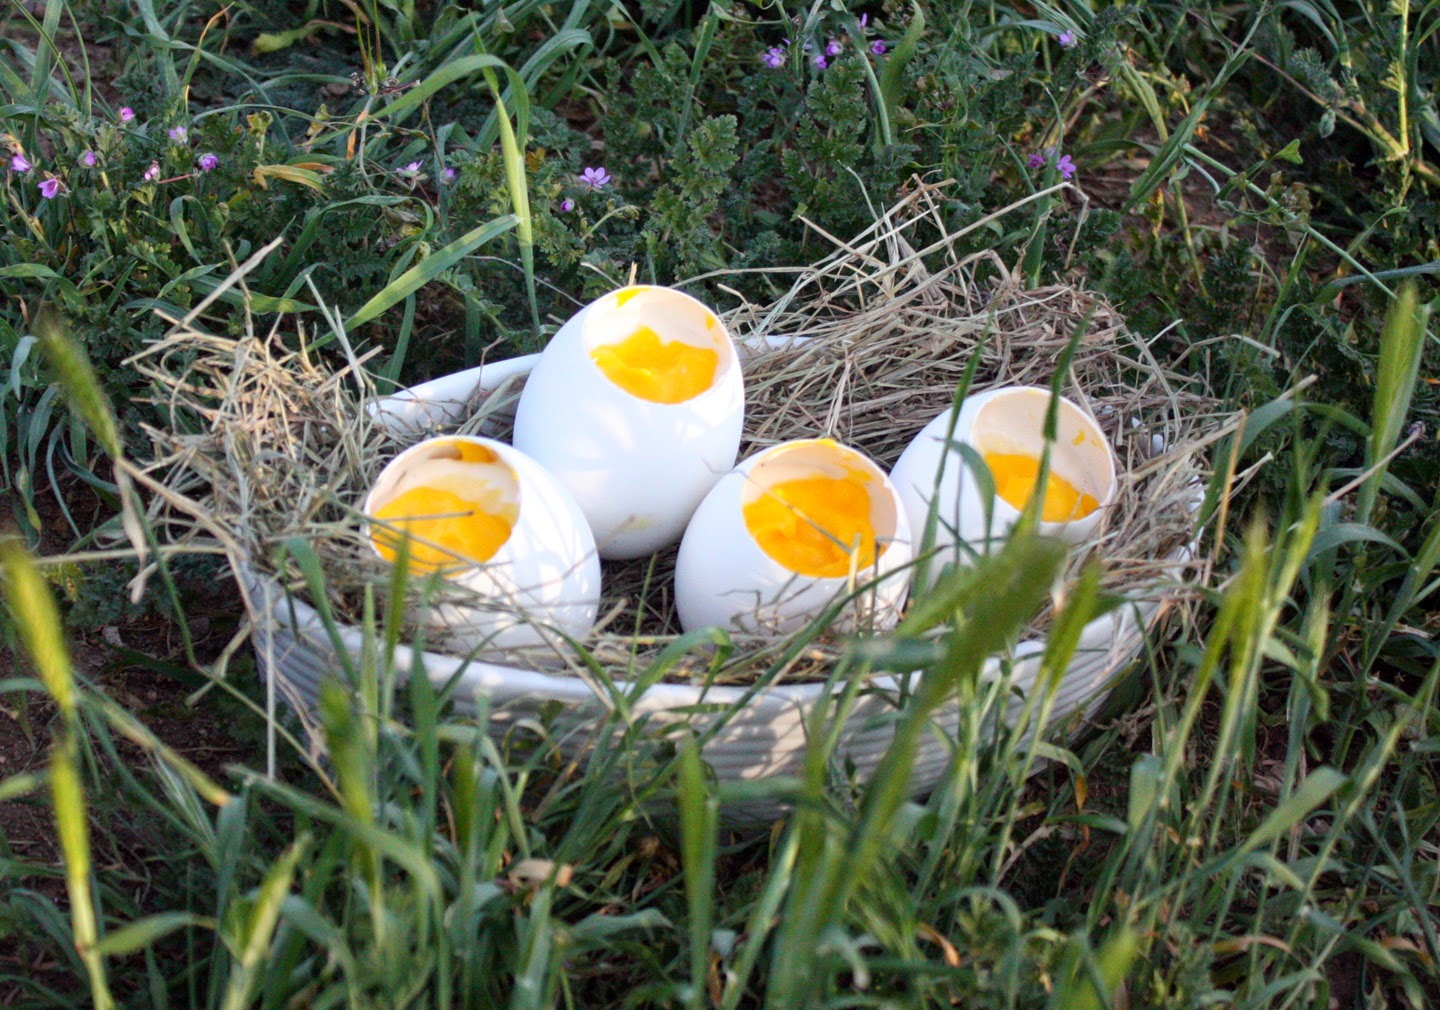
Sweet Eggs
On May 8, 2014 by sixtyacrebakerCome spring we bring it outside. Entertaining is a bit more relaxed and food becomes a bit less fussy, perhaps a tad more whimsical. Certainly, more seasonally driven. We keep chickens, ducks and geese; which means a generous supply of eggs. When putting together a weekend brunch, I love to serve sweet eggs. Very simple, and darling on display, these eggs are filled with vanilla yogurt and lemon curd.
Sweet Eggs
egg cups
emptied and cleaned goose, duck or extra large chicken eggs
-using an egg topper is by far the easiest way to get those perfect edges.
-while the eggs are uncooked, take the top off. separate the whites and the yolks as you empty the shell. use the yolks for your curd, the whites for another delicious recipe.
-you must be gentle when washing the shells, but you must be very thorough in the washing. there may be a layer of membrane attached to the interior of the shell. make sure you get that completely out. it comes out easier when you run water through it. once the membrane is cleared, use a good soap and hot water to get it completely cleaned out. let them air dry with good air-flow.
-you can either set the eggs in egg cups, or use the top inverted and glued to the bottom of the egg to create a stand. you may also just want to place in a small bowl, or in a large bowl on top of artificial grass (or if you have access, hay or straw)
plain or vanilla yogurt
vanilla extract-optional
brown or granulated sugar -optional
if you are using plain yogurt and wish to sweeten it up a bit (i recommend doing so, particularly if you have a nice tart lemon curd), add just a touch of sweetness with your sweetener of choice. i like brown sugar because it takes very little and adds a bit of a caramel flavor to the yogurt. start with 1 tsp per 2 cups and add more to taste. the same with the vanilla.
lemon curd
your favorite lemon curd recipe
-martha has a nice one HERE
-make the lemon curd as directed and let cool completely
to assemble
Place the yogurt and lemon curd in separate decorating bags (alternatively you can use a small spoon). layer directly into the shell starting with the yogurt. fill the shell approximately 1/3 full with the yogurt. add a thin (max 1/4″) layer of lemon curd. add more yogurt to almost reach the top of the shell, and top with more curd, placed to resemble an egg yolk.
serve with demi-tasse spoons.
you may also add gingersnap crumbles or graham cracker crumbles to the bottom for additional flavor and a bit of crunch. serving with a bit of granola is a nice compliment.
for something really fun, fashion sugar cookies into “toast soldiers” and pop them right in to look like a soft boiled egg and toast.
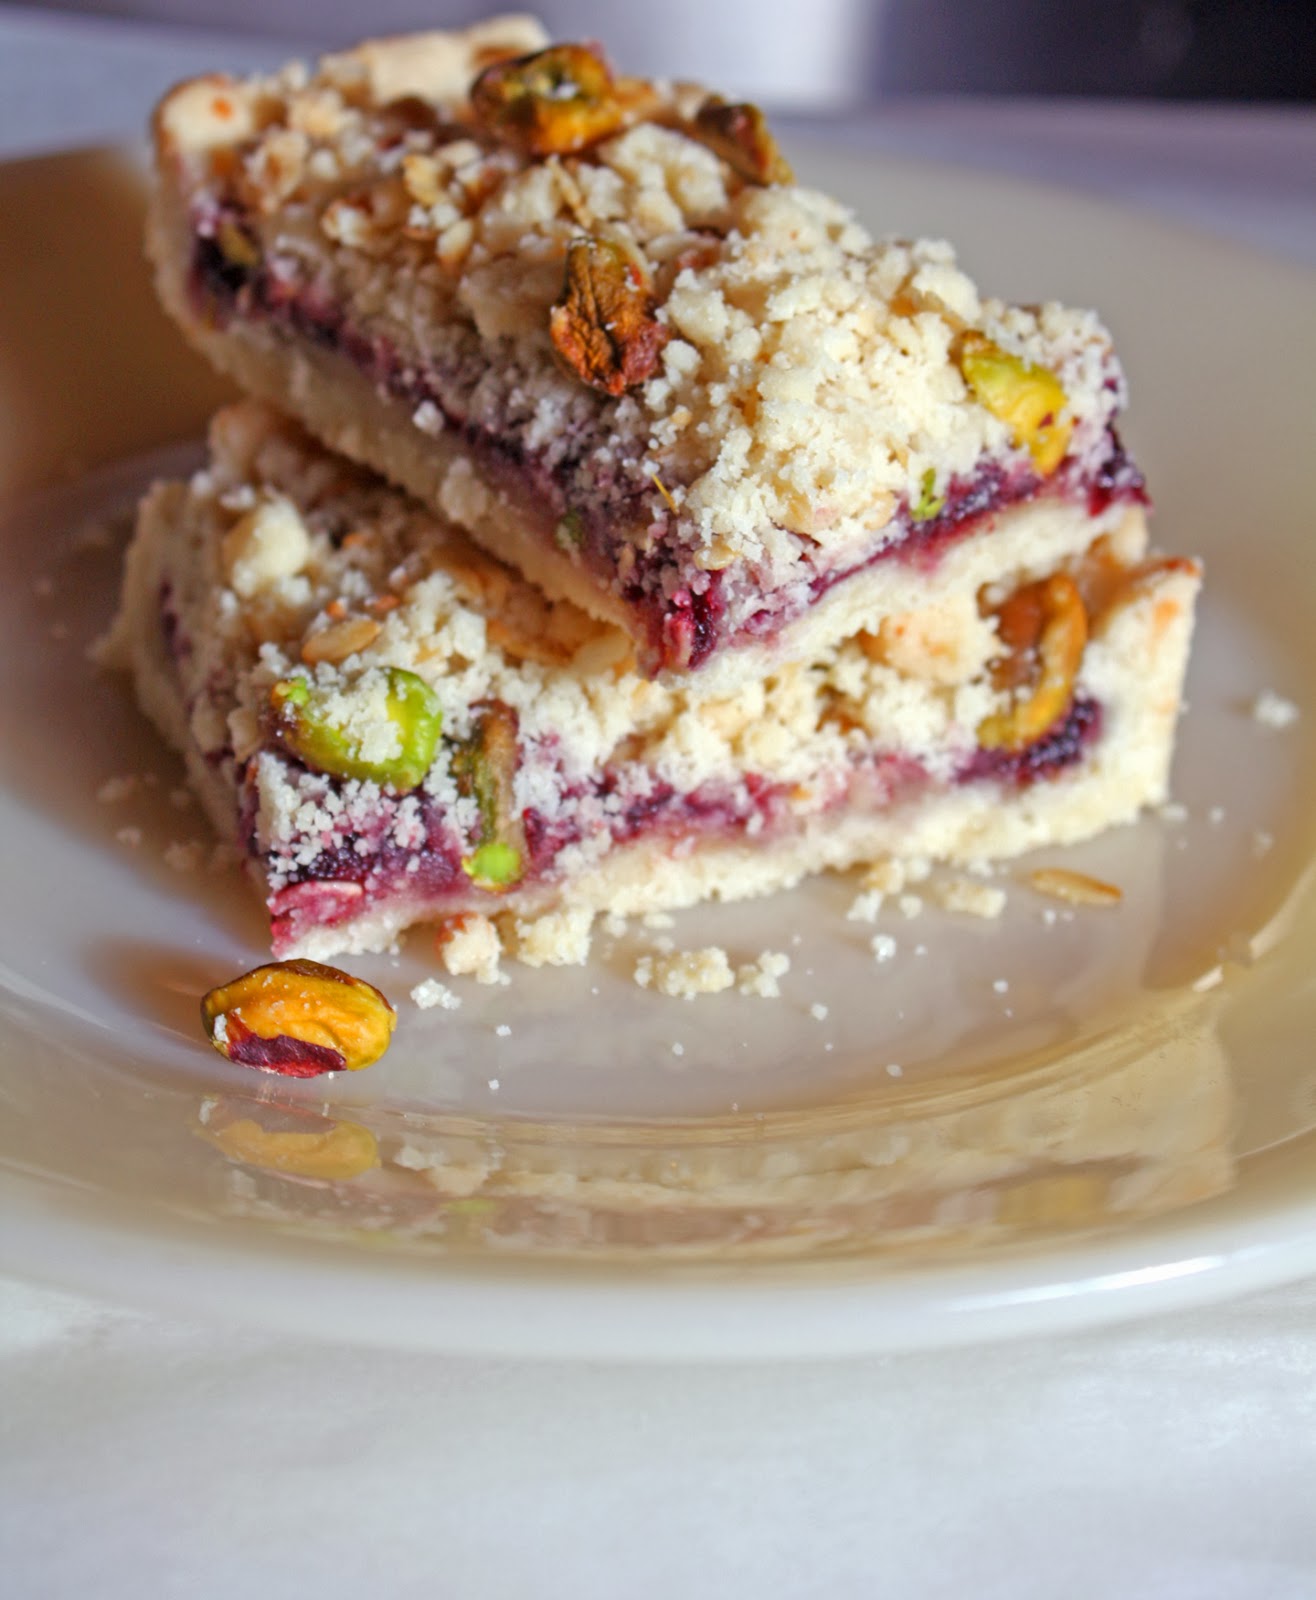
Jammy Almond Crumb Bars
On January 12, 2014 by sixtyacrebakerWe live in the country. Not the county of estates and tag sales; but the country of pastures and dairy sheep. So when someone stops by; we wave them in, take their coat and sit them down with a hot cup of coffee and a sweet.These bars are a twist on the common crumble bar. I use whatever jam i have on hand. {usually something not too sweet loaded with bits of fruit}
The twist comes in the form of almond paste. It finds its way into these cookies, at every bite.
Jammy Almond Crumb Bars
2 sticks unsalted butter–room temperature
3/4 cup granulated sugar
7 oz almond paste (divided)
2 1/2 cups all purpose flour
1/2 tsp kosher salt
3/4 cup high quality-not too sweet jam (ollalaberry, raspberry, blackberry, fruits of the forest, etc)
1/4 cup toasted pistachio nuts
Place sugar, flour and 1/3 of the almond paste in a bowl. By hand, work in the almond paste so that it is in small bits throughout the flour. Add the butter and work by hand until you get a crumble that will stick when pressed together.
Press about 2/3 of the dough into the bottom and up the sides of a 9″x9″ fluted tart pan*. Take remaining almond paste and lightly press a thin layer on top of the crust. You may not use all of the paste. spread evenly with jam.
Mix the pistachio nuts in with remaining dough. Evenly distribute remaining dough by crumbling on top of jam. (i like a thick layer of topping)
Bake at 350 for approximately 40-45 minutes. You want the crust and crumble to be slightly colored, but not over-browned.
*if you do not have a fluted tart pan, this works fine in a standard 9×9 cake pan, just be sure to bring the crust 1/4-1/2″ up the sides.