
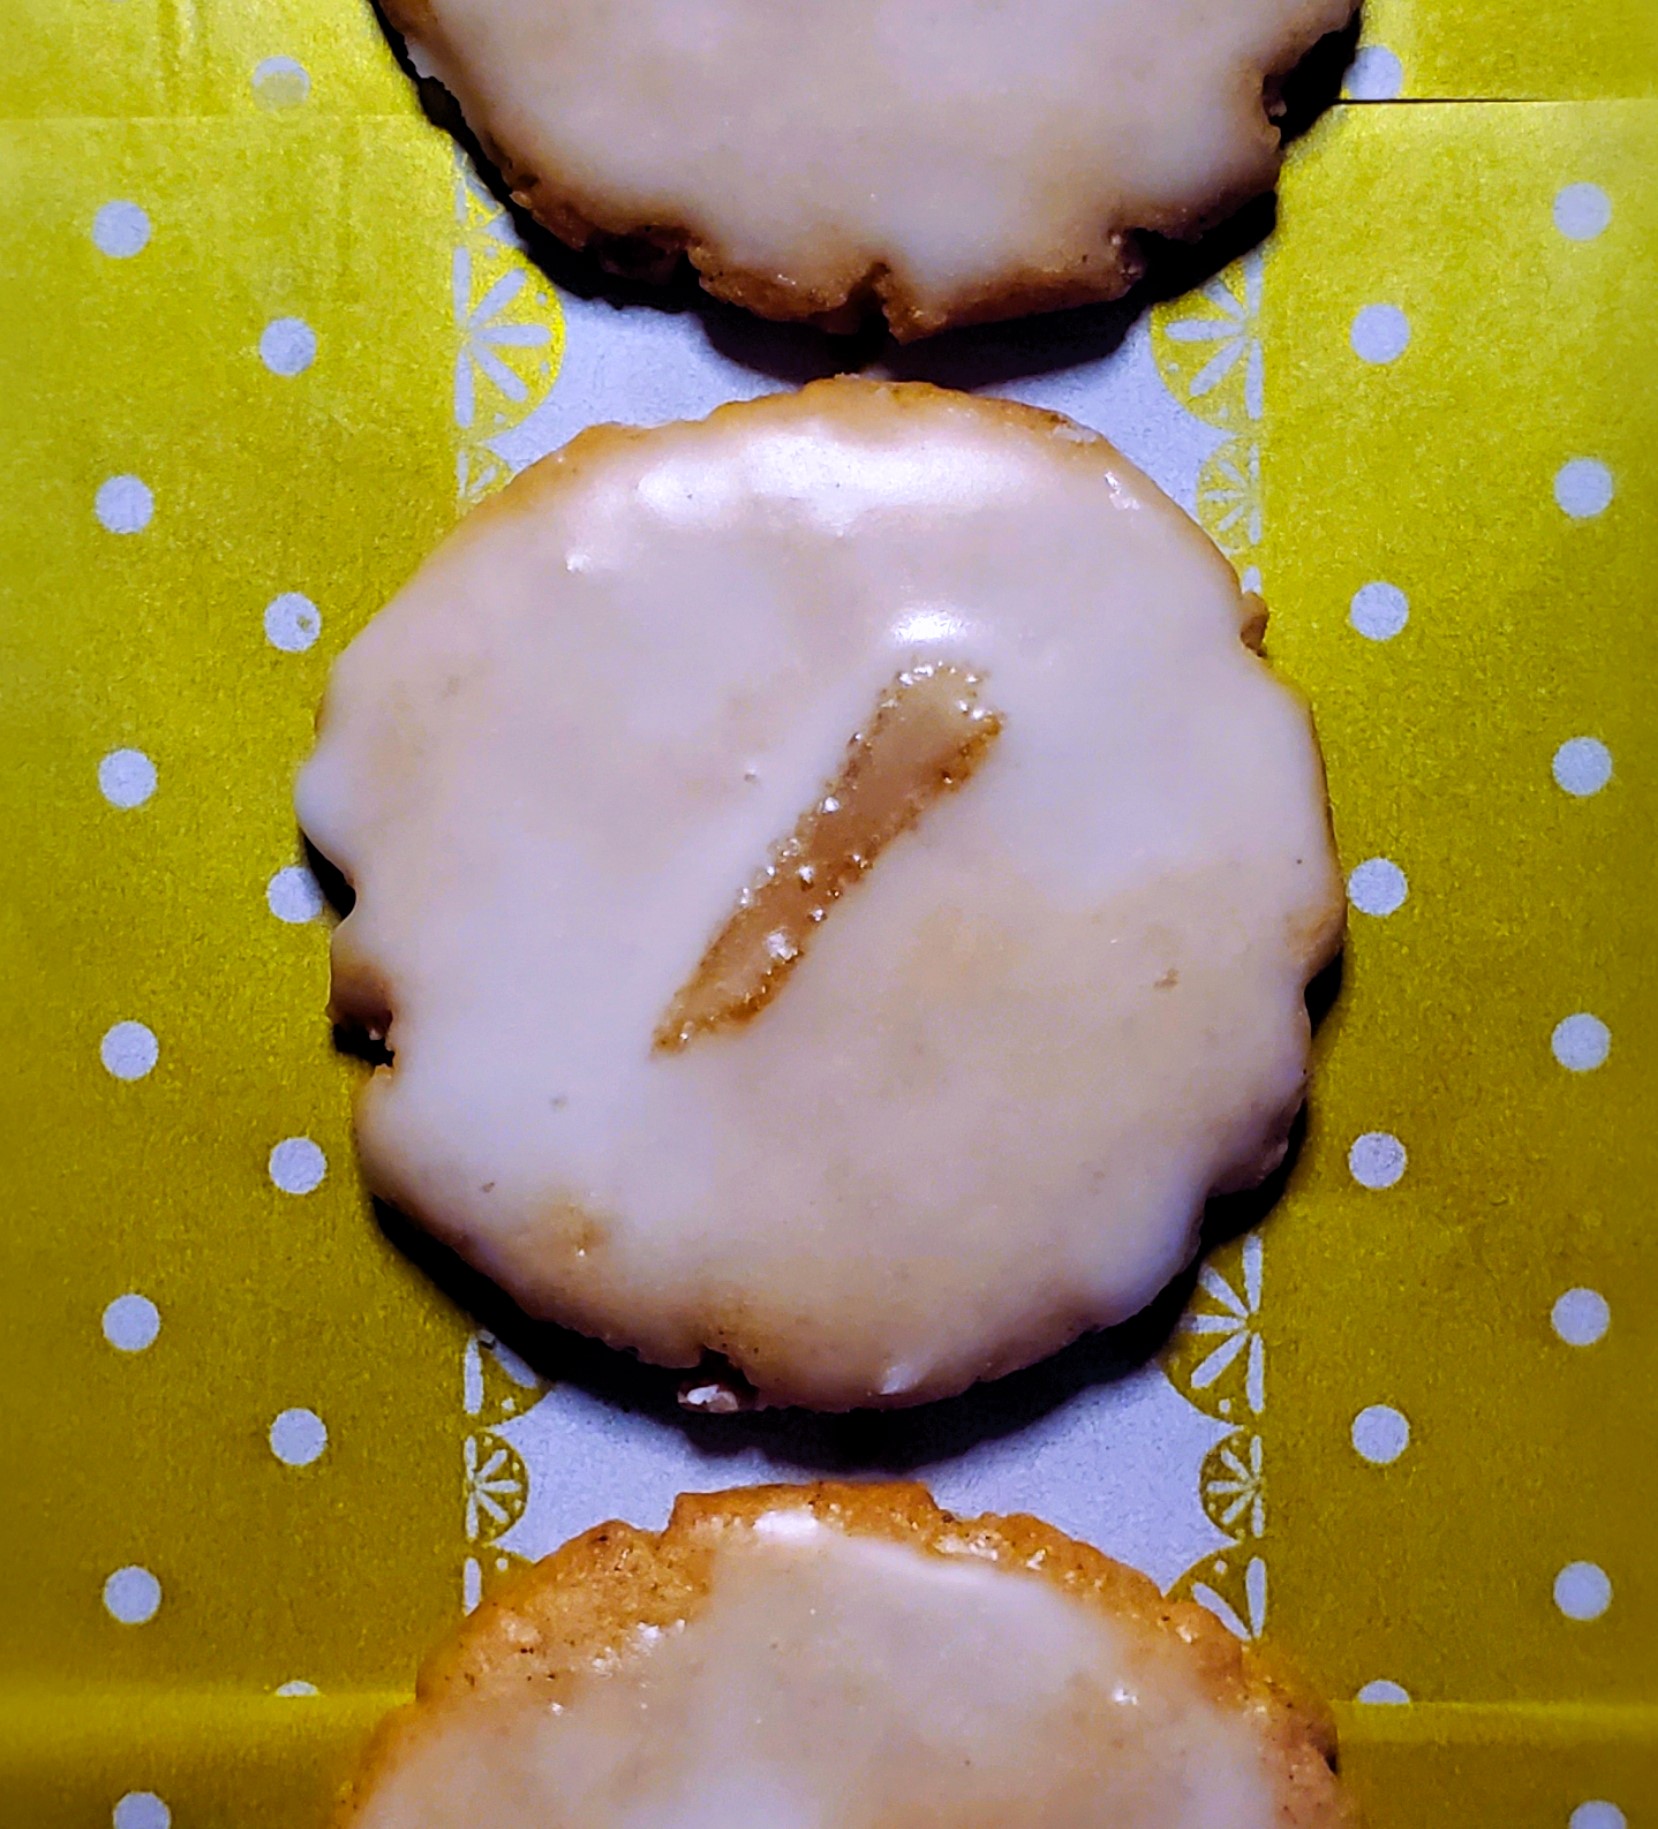


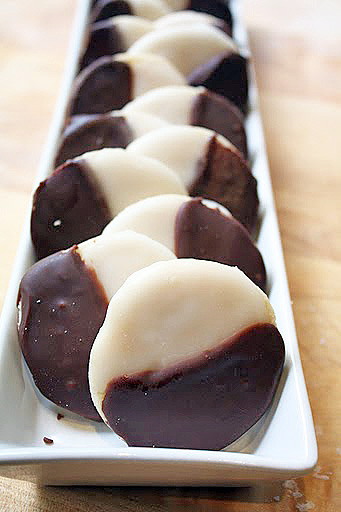
Black and White Cookies
On August 11, 2011 by sixtyacrebakerMy parents grew up in New York. Although we moved to California when i was a toddler, “new yorkness” remains in my dna. I won’t apologize for it. See? i warned you. My favorite goodies from the old neighborhood were tucked in a pink box and secured with twine. Wrapping not only sweets but stories of my mother as a young girl; a nickle in her pocket, walking to and from school in snow up hill–both ways, stopping at the local bakery to warm her toes and carefully choose an afternoon treat. Times have changed and so have bakeries. Fancy cupcakes, mini pies and low-carb muffins have edged out old fashion favorites like; slabs of coffee cake, sweet buns crullers and black & whites as big as your noggin. Thankfully, Nancy Baggett has a knock-out recipe for black and whites in her “The All American Cookie Book”. There is nothing I like more than presenting this New York favorite to my favorite New Yorker, my mom.
New York Black and Whites
recipe from Nancy Baggett
3 cups all-purpose white flour
Scant 3/4 teaspoon salt
1/4 teaspoon baking soda
1 1/3 cups sugar
2/3 cup (1 stick plus 2 2/3 tablespoons) unsalted butter, slightly softened
1/2 cup white vegetable shortening
2 large eggs
2 1/2 teaspoons vanilla extract
2 teaspoons light corn syrup
Scant 3/4 teaspoon lemon extract
1/3 cup sour cream
Quick Vanilla and Chocolate Fondants:
1/4 cup light corn syrup
5 cups powdered sugar, sifted after measuring, plus more if needed
3/4 teaspoons vanilla extract
2 ounces unsweetened chocolate, chopped
Preheat oven to 350 degrees F. Grease several baking sheets or coat with nonstick spray. In a medium bowl, thoroughly stir together flour, salt, and baking soda; set aside. In a large bowl, with an electric mixer on medium speed, beat together the sugar, butter, and shortening until well blended and fluffy, about 2 minutes. Add the eggs, vanilla, corn syrup, and lemon extract and beat until evenly incorporated. Beat in half of the flour mixture until evenly incorporated. On low speed, beat in the sour cream. Beat or stir in the remaining flour mixture, just until well blended and smooth. Let the dough stand to firm up for about 5 minutes.
Using a scan 1/4-cup measure of dough, shape into balls with lightly greased hands. Place on the baking sheets, spacing about 3 1/2 inches apart. Using your hand, press and pat the balls to about 3 1/4 inches in diameter.
i make mine mini..using a small ice cream scoop as my measurement
Bake the cookies, one sheet at a time, in the middle of the oven for 10 to 14 minutes, or until lightly browned at the edges and the tops just spring back when lightly pressed in he centers. Reverse the sheet from front to back halfway through baking to ensure even browning. Transfer the sheet to a wire rack and let stand until the cookies firm up slightly, 1 to 2 minutes. Use a spatula, transfer the cookies to wire racks. Let stand until completely cooled.
For the Fondants:
In a medium, heavy saucepan, bring 1/2 cup water and the corn syrup just to a boil over medium heat. Remove from the heat and stir in the powdered sugar and vanilla until completely smooth. Place the chocolate in a small, deep bowl. Pour 2/3 cup of the hot vanilla fondant over the chocolate. Stir until the chocolate is partially melted. Pour another 1/2 cup of the vanilla fondant over the chocolate. Stirring constantly, thin the chocolate fondant to a fluid but not runny consistency by adding 3 to 4 teaspoons of hot water, a little at a time. Stir until the chocolate melts completely and the water is thoroughly incorporated.
Set the wire racks with the cookies over wax paper to catch drips. Using a small, wide-bladed spatula, spreader, or table knife, immediately ice half of each cookies with the chocolate fondant. (if the fondant stiffens as you work, thin it by thoroughly stirring in a few drops of hot water. If the fondant cools completely, rewarm it over low heat, stirring).
In necessary, adjust the consistency of the vanilla fondant by stirring in additional powdered sugar or hot water until fluid by not runny. Ice the second half of each cookies with the vanilla fondant. Let the cookies stand until the icing set, at least 2 hours and preferably 4 hours.
**
This recipe comes directly from Nancy Baggett’s All American Cookie Book; a book that has been in my library for about 10 years. I have not bee asked to endorse the book or any individual recipes by the author or publisher. This is simply a darn good recipe, one of many in this book

Lemon Cooler Cookies
On August 3, 2011 by sixtyacrebakerHonestly, I’m not sure if i have actually tasted the original lemon cooler cookie. I do know that I wanted to try them. But alas, they were in a box, on a shelf, in the grocery store. Lest you forgot, we have established that my mom didn’t do “store bought”. Odds are I only remember these cookies by how my friends, with better brown bag lunches than mine, described them. Which is why I believe my version is a perfect impostor. It packs a lemony punch with a sweet sugar chaser.
Lemon Coolers
1 1/2 cups unsalted butter–room temp
2 cups powdered sugar-divided
2 heaping tsp lemon zest
1/4 cup lemon juice
3 1/2 cups all purpose flour
1/4 cup cornstarch
1/2 tsp kosher salt
Stir together flour, cornstarch and salt in a bowl. In a mixer fitted with the paddle attachment, cream butter and 1 cup powdered sugar until evenly mixed. Beat in lemon zest and lemon juice. slowly stir in the flour mixture, mixing until just combined. Gather the dough and form into a flat ball. Divide dough into 4 pieces, rolling each into a log. The diameter of the log is to your own specifications, depending on your desired cookie size. My preference is about 2″ round. Wrap each log in plastic wrap and refrigerate for 2 hours or overnight. You may also freeze the log(s) at this time. When ready to bake, preheat the oven to 325. Line cookie sheets with parchment. Remove the log from plastic wrap and slice in 1/4″ rounds. Tt is helpful to twist the log clockwise each time you cut, so as to avoid a flattened bottom. Place cookies 1″ apart on the cookie sheet and bake approximately 10-12 minutes. Cookies are done when they are just turning golden on the bottom. While cookies are baking, place the remaining 1 cup powdered sugar in a shallow bowl. As you remove the cookies from the oven, they will be too delicate to handle. Once they are cooled a bit (not fully cool, still slightly warm), carefully turn them in the powdered sugar, and place back onto same cookie sheet. The sugar will melt slightly and be a bit like frosting. Once the cookies are fully cooled, toss them in the powdered sugar a second time.
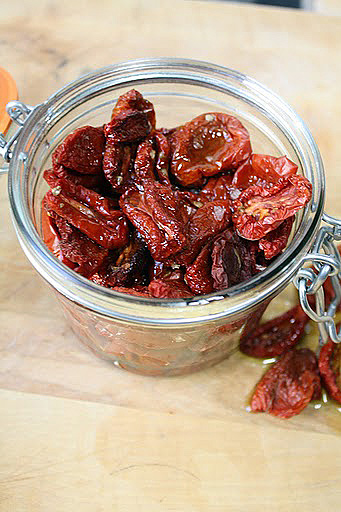
“Sun Dried” Tomatoes
On July 30, 2011 by sixtyacrebakerOur first tomatoes to ripen this season were our Romas. Unfortunately, they ripened while we were away from home. By the time I picked them they had shriveled on the vine. Handfuls upon handfuls of tomatoes baking in the sun. Going from sun-kissed
to heat stroke in my absence. Solar energy had zapped my tomatoes. Once picked, I sliced each tomato in half, placed them cut side up on a sheet pan and sprinkled with sea salt. I popped them in a 175-200 degree oven to dry. About 2 hours later, or maybe 3 i lost count. They should be checked on every 30 minutes after the 1st hour. They should be dry, but not dried out. After cooling, I stuffed the deep red chewy goodness into a fancy jar and smothered them with good olive oil.
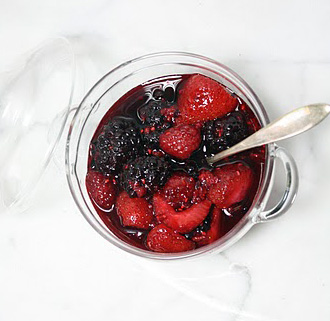
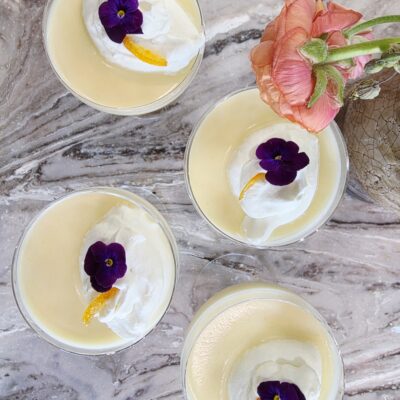
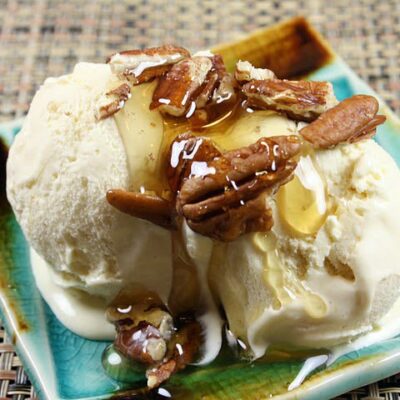
Triple Berry Dessert Sauce
On July 23, 2011 by sixtyacrebakerWe grow strawberries in our garden. Each June we joyfully harvest them. We also grow raspberries, blackberries and boysenberries. They are only evident by the bare vines choking our fences. Those sweet berries are harvested by the local fauna; which possess ripeness gauges to rival a seasoned gardener. I buy most of our berries at the local farmer’s market. This week I found gorgeous raspberries, perfectly ripe and brightly colored, at four bucks a punnet. Here I was, mulling my decision to buy when a woman beside me said “they would make the most delicious coulis”. “do you know what a coulis is?” she asked with a tip of her head. I sweetly smiled (which is a bit of a feat), and and said “yes i do” and “yes they would”. But what I was thinking was lady, you are either crazy or rich; four dollars a handful is not a bargain. Furthermore, if I planned to whirl these in a blender with some sugar, I might as well buy frozen ones for half the price. This was going through my mind, as I handed over my eight dollars and chose the ripest berries, in the most full containers.
I brought them home and they sat. Then I moved them to the fridge where they satsome more.
Today, I am reminded of that woman at the market with her clarvoyant premonition, as I simmer these over-ripe berries into a sauce. Not a coulis. But a sauce just the same.
Triple Berry Dessert Sauce
1 pint raspberries
1 pint blackberries
1 lb strawberries–hulled and cut in half
juice of 1 lime
3/4 cup granulated sugar
1 oz cassis
Place all ingredients in a saucepan and simmer on low until the berries are soft and the sugar is melted. The strawberries may take a bit longer to soften than the raspberries or blackberries. If you find this happening, just turn the burner off and allow the berries to sit in the warm juice for 10 minutes or so, the strawberries will continue to soften from the residual heat. Allow to cool to warm. spoon over ice cream or a slab of shortcake. Refrigerate whats left. Will keep about 5 days.
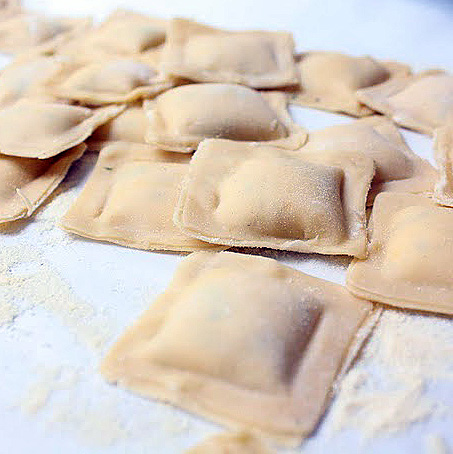
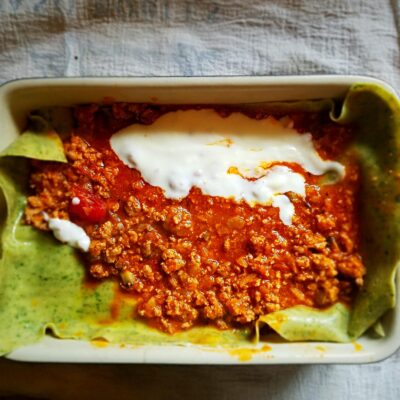
Lemon-Chevre Ravioli
On July 18, 2011 by sixtyacrebakerI have been making homemade pasta for as long as I can remember. Growing up, as summer arrived, so would my grandparents. Both sets. Heavily ladened with luggage and lessons, my grandparents were old school Italians. The “grandpops” sat on the sun porch playing cards and tending to the vegetable garden planted each year. The “grans” would sit at the kitchen table compiling lists of what would be needed for the evening supper. Pasta was always a side dish always homemade. We would make it several times each summer; filling our bellies and the freezer. The dining room became pasta central. The dining room table only used at Christmas, in a room that appeared hermetically sealed, would become a work bench covered in flour. We’d spend hours kneading, rolling, cutting, and drying our summer staple. It must be said, we never used 00 flour. It was hard to find and expensive–we used what we had on hand. It was delicious.
My grandparents have all passed and with them many of the summer traditions we all enjoyed. I still make pasta, in small quantities, with the same equipment as generations past. However, it is abundantly less shocking to see my dining room, littered with flour and covered in pasta. Sometimes I use 00 flour, if I have it on hand. But mostly, I use a high quality cake flour, which works beautifully for a delicate pasta, like this lemon pasta I used to make chevre ravioli. It is not quite how nonna would do it, but delicious none the less.
Lemon-Chevre Ravioli
for the pasta
3 cups cake flour (i use king arthur)
5 extra large eggs
2 tsp finely grated lemon peel
Place the flour in a mound on your work bench. Using your fist, make a large well in the center of the mound. Using the fork, bring the flour into the eggs to begin forming a dough. Continue bringing the flour in until you have a sticky mixture. Begin working the rest of the flour in by hand and knead for at least 10 minutes, and until you have a very smooth dough. The dough must be very smooth and well kneaded before leaving it to rest for 10 minutes or up to an hour at room temperature. Cover the dough with plastic or a towel or something to discourage a “skin” from forming. When ready, use a bit of flour so the dough does not stick and roll very thin. Cut in desired shape(s)
for the filling
5 oz chevre–room temperature
3 oz cream cheese–room temperature
1/2 tsp garlic powder
pinch nutmeg
1 tsp finely grated lemon peel
2 Tbs basil leaves–chiffonade
pinch salt
1/4 tsp white pepper
1 egg
1/4 cup grated parmesan cheese
Mix everything together until evenly incorporated. Place in refrigerator until using. Can be made up to a day in advance and kept covered in the refrigerator.
to assemble
small bowl of water and pastry brush
flour
semolina flour or cornmeal
It is important that your dough is rolled out thin, because you are using two pieces. it doesn’t have to be as thin as a won ton wrapper, but it should be close to it. If you are using a pasta machine, roll the pasta to the second thinnest setting.Place 1 sheet of pasta, cut into strips 2″ wide and as long as you like on your work surface. make sure your surface is dusted with flour to prevent sticking. Place filling with a teaspoon in the center of the dough, leaving room for even border on all sides. brush the dough, where you are going to seal the top piece, with water. Place a second piece of dough on top. Press around the filling with your fingers until you have a nice seal. Stamp with your ravioli cutter, cut with a knife, roller or cookie cutter to make uniform ravioli. Press the seams one more time. Place on a cookie sheet sprinkled with a bit of semolina or cornmeal to prevent sticking. Use immediately, or freeze for future use.
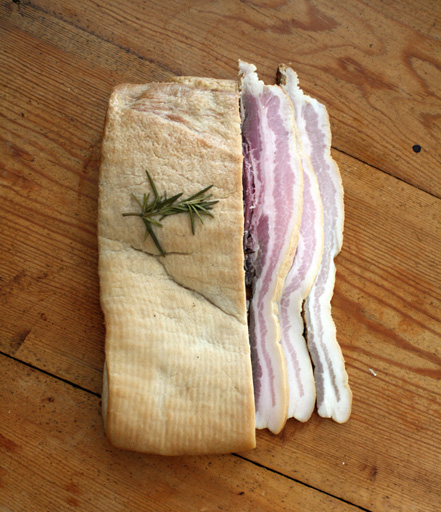
Home Cured Maple Bacon
On July 1, 2011 by sixtyacrebakerHere is something i can hardly believe myself. I shunned bacon for 5 years. It was complicated, and in hindsight, foolish. I mean really religious convictions aside I can’t think of a reason NOT to eat it. It is just.that.good. Recently, curing my own bacon has elevated to obsession status. A few bats of my baby blues and Mike agreed to buy a smoker. It was time. He is itching to make venison jerky and of course, I have my bacon thing. Here is my first attempt. Honest report–it is good. Now, I made the mistake of washing off the brine, but not soaking, the bacon before smoking. This meant it came out very salty. I soaked it after the smoke, which not only soaked out the salt, but also the smokiness. So I cold smoked it again and it just isn’t perfect,
but it is close.
Maple-Brown Sugar-Rosemary Bacon
3lbs pork belly
1/4 cup +/- kosher salt
1/4 cup +/- brown sugar
3 Tbs good quality maple syrup
1 Tbs fresh rosemary
place pork belly in a large tupperware type container
3 Tbs maple syrup & rosemary sprig (post curing)
apple or cherry wood chips for smoking
rub all sides with salt
Mix together the brown sugar, maple syrup and rosemary. Rub all sides of the pork belly with the mixture. Cover and place in the refrigerator for 24 hours. After 24 hours, repeat the process and place back in the refrigerator. Check daily, if liquid begins to gather on the bottom, pour it off and place back in the refrigerator. At 5-7 days, you should be done. The pork belly will be a bit more dense, and firm. Rinse the pork belly well and dry with paper towel. Slice off a small piece and fry. If too salty, place the belly in a bowl of cold water and place in the fridge for 1 hour. Dry, slice off a piece and fry a piece. If it is still too salty, repeat the soaking process, 1 hour at a time. Once the bacon is to your liking, dry off. Rub the fatty side with maple syrup and place rosemary sprig on top. Meanwhile prepare your smoker
I smoked my bacon at 120 degrees and smoked it to an internal temperature of 130. There are so many different philosophies on this. you can cold smoke it, hot smoke it, not smoke it at all. This will not keep in the fridge like store bought bacon…it does not have nitrites. It is best to cut what you will eat within a week, then freeze the rest. It is very important to keep your pork belly at proper temperatures and to keep all surfaces it touches very clean. This is not a time to be lenient in your sanitary rituals. Bacon should not be eaten raw, once cured and smoked, it should be cooked fully before enjoying.
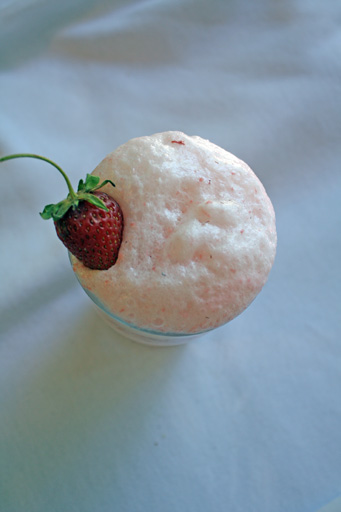
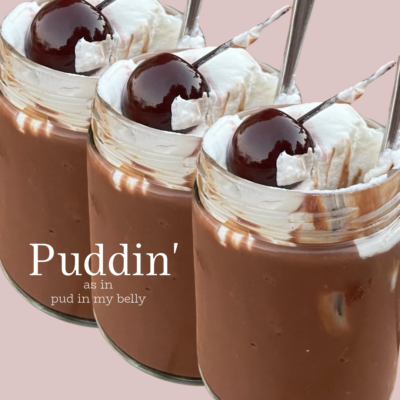
Strawberry Cream Soda
On June 28, 2011 by sixtyacrebakerWhen I think of summer picnics, my mind wanders to a scene from Oklahoma. The one where they were raising money for the schoolhouse; the gals made picnic hampers and the pals bid on them. While we never actually saw the food; we were told that under the kitchen cloth, the baskets overflowed with ham and biscuits and pie. Food so good, it made people break out in song. I wish my picnics were as magical. I’m betting that if i whipped this cream soda out of my hamper, Mike would whisk me away in a surrey with fringe on top. White horses and all.
Strawberry Cream Soda
makes 1 serving
1 Tbs mashed strawberries or strawberry puree
sugar *
1 Tbs cream
1/2 cup ice cold ginger ale
ice cubes
*summer strawberries are so sweet the don’t need extra sugar, but if you like a really sweet soda, use at your discretion.
Place the strawberries and cream in a glass and give it a good stir. Add several ice cubes and then pour ginger ale to fill the glass. Serve immediately
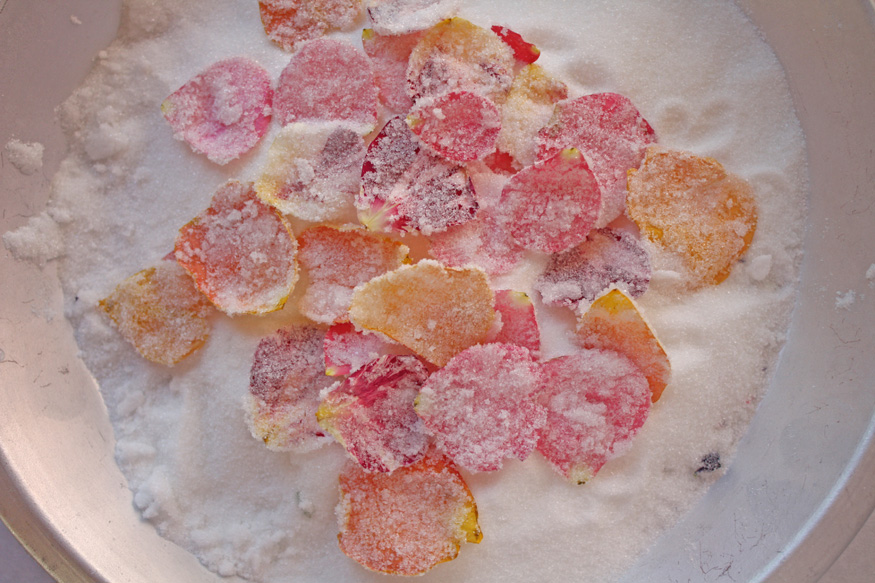
Sugared Rose Petals
On June 22, 2011 by sixtyacrebakerIt has been mentioned before that our mountain cabin was once owned by the character actress Dodo Denny. By all accounts she was a lover of roses. Her rose garden is the talk of the neighborhood. The same people, whom collectively, may have been
a bit disappointed in our attention to it. I personally believe Dodo is a bit put off too. Let me explain. We purchased the home after Dodo passed. 4 years after. The grounds had been neglected, and the prized roses left to die. I am not fond of taunting the dead, so I pruned the bushes back to almost nothing. I retrained the trellis roses, pulled those that were not going to make it, and then I let them be while we worked on the rest of the garden. Finally, two summers later, Dodo’s rose garden is making a comeback. We are enjoying the scent and beauty of the flowers, but I couldn’t resist cutting a few to make sugared rose petals. Please don’t snitch Dodo is just starting to like us.
Sugared Rose Petals
freshly picked, pesticide free roses*
granulated sugar (about 1 cup per rose)
vodka
Wash the roses while whole gently, and allow to dry. I swish them in a bowl of cool clean water. Once the roses have air dried, carefully remove the petals. Discard any that are discolored or are browning (or set aside to dry and use as potpourri). Spread the petals out on paper towels while you work on the other flowers. Place about a 1/4 cup of vodka in a bowl. Pour sugar in a shallow dish about 1/2 inch thick. You will need more sugar, as it will get damp and become difficult to work with. do not pour in all your sugar at once. Prepare a sheet pan with wax or parchment paper on it to be used for your sugared petals. Dip each petal in the vodka, then lay it on the sugar. You can do 4 or 5 at a time, but work quickly, as the vodka evaporates. Once you have 4 or 5 petals resting on the sugar, spoon more sugar on top. Gently press the petals and turn once to coat evenly. Remove from the sugar and place on parchment lined sheet pan. Resist the urge to move/touch them. allow to dry about 12 hours, but can take up to 48. store in an airtight container, lined with paper towel in a single layer until ready to use.
note: i used vodka rather than egg white, for ease. you can use powdered egg whites with a bit of water and have a great result. if you choose to do it this way, use a paint brush to get the whites on the flower.
*it is very important that you know firsthand that your roses are free of pesticides
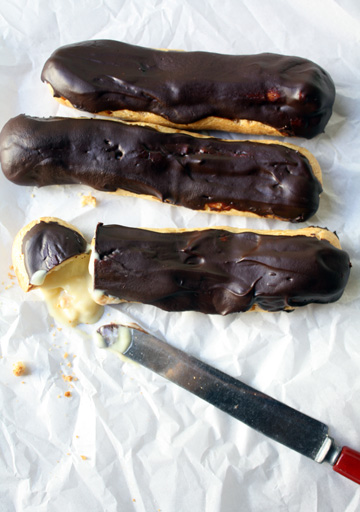
Chocolate Eclairs
On June 20, 2011 by sixtyacrebakerWhile in Paris last fall Mike and I made a quick stop at Lauduree; a beautiful pastry shop known world-wide for gorgeous confections and beautiful tea salon. Only in Paris for the afternoon; arriving via chunnel from London in the morning
and scheduled on a sleeper train to Barcelona, later in the evening. We were making a whirl-wind day of it. While waiting in a very long taxi queue, I spotted a gentleman with a car for hire. Because it was Mike’s first time in Paris and we wanted to see as many sights as possible, in our short stay, I made a unilateral decision. A hired car was definitely the way to go. Thankfully Pierre was a good sport and negotiated fairly with me, despite my butchering of his beautiful language. As I waved Mike from the taxi queue, I saw a look I have never before seen; one that perfectly combined the relief he felt that we would be on our way, and worry that I had blown our entire travel budget on a frivolous luxury. He was partly right.
The day was perfect. We climbed the Eiffel Tower, stood under the Arc de Triomphe, glided down the the Champs-Elysees, spent hours in the Louvre, relished in a languid lunch with a bottle of wine, and shared afternoon tea with well dressed dames at Laudree. Drunk with culture and satiated with sweets, I eagerly purchased the Laudree Sucre Cookbook. It is a beautiful tome with a cover of suede, presented in a gift box so beautiful and full of promise, I tucked it away for the rest of our journey and promptly forgot about it. Recently I discovered this little jewel and became inspired. Which is why on a whim, I made eclairs.
Chocolate Eclairs
Bake the eclair shells up to 2 days in advance. If you see that they are beginning to get soft, you can place them back in the oven to crisp. do not place back in the oven once coated or filled. Once filled, they should be kept in the refrigerator until eaten.
Allow the pastry shells to cool completely, then dip in the ganache to cover the tops. Place in the refrigerator to allow the chocolate to harden. When ready to fill, spoon the pastry cream into a pastry bag fitted with a “filling” tip, push the tip into the short end of the shell and slowly squeeze the filling in. You will see the pastry plump up a bit, but be careful to to over-fill as the cream will push out through the sides and make a mess if you do.
Pate A Choux
1 cup water
4 oz unsalted butter cut into pieces
1 cup flour
1 tsp sugar
1 tsp salt
3 extra large eggs (about)
Sift sugar, salt and flour together. Place water and butter into a saucepan Heat and bring to a simmer, you want the butter to incorporate into the water, not just float on top. Remove from heat and add flour mixture all at once. Stir vigorously with a wooden spoon, until it is all mixed together. Place back on heat and continue to stir until the mixture begins to come from the sides of the pan. You do not want to dry out too much, but you want to reduce the amount of moisture a bit. Stir over heat about a minute or two. Place mixture into the bowl of an electric mixer fitted with paddle attachment. Turn mixer to medium speed to assist bringing the temperature down a bit, but not fully cooled. Add eggs one at a time, mixing thoroughly after each addition. After adding the last egg check for consistency. You want the mixture to be a bit firm, and sort of webby. When I say webby I mean it has a consistency where is stretches between the parts sticking to the sides of the bowl and what is on the paddle. 3 eggs should be enough.
Place in pastry bag and pipe in 6″ rods approximately 1″ wide, onto a lined pastry sheet. You can use this same batter for cream puffs, or deep fry for delicious donuts. The batter can be refrigerated for a max of three days before using.
Vanilla Pastry Cream
Bake in a preheated 425 oven for 15 minutes, then reduce the heat to 375 until the eclairs are browned and crispy. The interior needs to be dry. Let cool
6 large egg yolks
5 Tbs cornstarch
2 1/2 cups milk ( i used 2%)
1/2 cup sugar
1 tsp vanilla
1/4 tsp salt
4 Tbs unsalted butter
For pastry cream: Whisk the egg yolks and the cornstarch in a bowl. set aside. In a saucepan, simmer milk, sugar and salt.
Once it is simmering, temper the eggs with the hot milk. Return to the saucepan and whisk continuously until the custard begins to thicken.
When you see large bubbles coming up through the middle of the pot, remove from heat. Pour into a clean bowl
(use a sieve if you feel you have overcooked), and stir in butter and vanilla. Place clingfilm over top and refrigerate until ready to use.
Allow to cool completely before filling the eclair shells.
Chocolate Ganache
1/2 lb bittersweet chocolate–chopped
1/2 cup cream
1 Tbs granulated sugar
1 Tbs corn syrup
2 Tbs butter
Heat cream with sugar and corn syrup over medium heat. Once cream begins to simmer and sugar is dissolved, pour over chocolate and butter.
Let chocolate melt and then whisk together until it is thick and shiny.
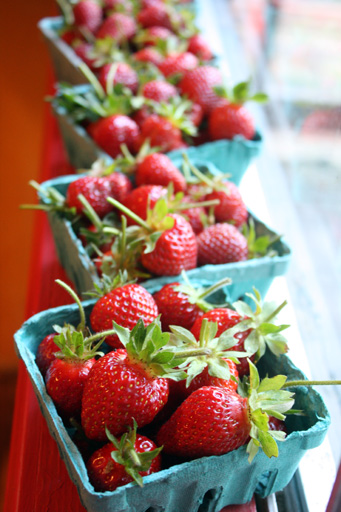
Strawberry Harvest
On June 16, 2011 by sixtyacrebakerThis evening I worked my way through our strawberry patch delicately cupping clusters of sun warmed crimson fruit. Hunched like a greedy troll while on tip-toe, I may have looked like a mountain dancer. While in reality I was minding the space underfoot, careful not to crush those berries not yet at perfect pitch. Last year we planted 4 varieties of strawberry; two June bearing chandler and sequoia, one everbearing quinalt, and finally a variety we brought back from Italy alpine. The berries grow different sizes, at different rates, each with its own flavor profile. They are equally sweet, very sweet, with strawberry flavor that saturates your tongue. Our first harvest is strictly for eating one by one until our bellies are full and our lips rosy red. I’ll let you know if there are any left for sharing.