
Honey Ice Cream
On April 5, 2025 by Christy LarsenIt seems our egg situation is very different than the rest of our nation. We have hens and our hens lay eggs. Not as many as in the past, as our hens are aging out faster than they are reproducing. For quite a few years we added hens each year, and would find that despite baking and eating eggs on the daily, we couldn’t get ahead of it. It isn’t like that now, but we do have laying hens and we have access to eggs for our dining pleasure.
In addition to eggs, my larder basics include cream, yogurt, and a selection of honey. While we haven’t harvested honey from our bees in many years, we still have jars aplenty.. I have a private stash from our mountain cabin hive (harvested over a decade ago) and a more visible selection from local purveyors.
Facing these ingredients in the glow of the ice box, I am inspired to dust off the ice cream maker and make this simple recipe.
Honey Ice Cream
5 egg yolks
1/2 tsp sea salt
2/3 cups honey
1 cup milk
1/2 cup Greek yogurt
1 cup cream
1 tsp vanilla
Whisk egg yolks, salt, and honey together in a bowl. Heat 1 cup of milk until it simmers. Temper the egg mixture with the hot milk and return the entire mixture to the pan and cook, while continually stirring, until it thickens to a nappe. it will be the thickness of heavy cream. Strain into a clean bowl…let cool a bit. While it is still warm, but not hot, stir in the yogurt. Let cool to room temperature and add the cream and vanilla. Chill and freeze according to the manufacturer’s instructions.
**You can stir in toasted nuts just before you pack into freezer containers.
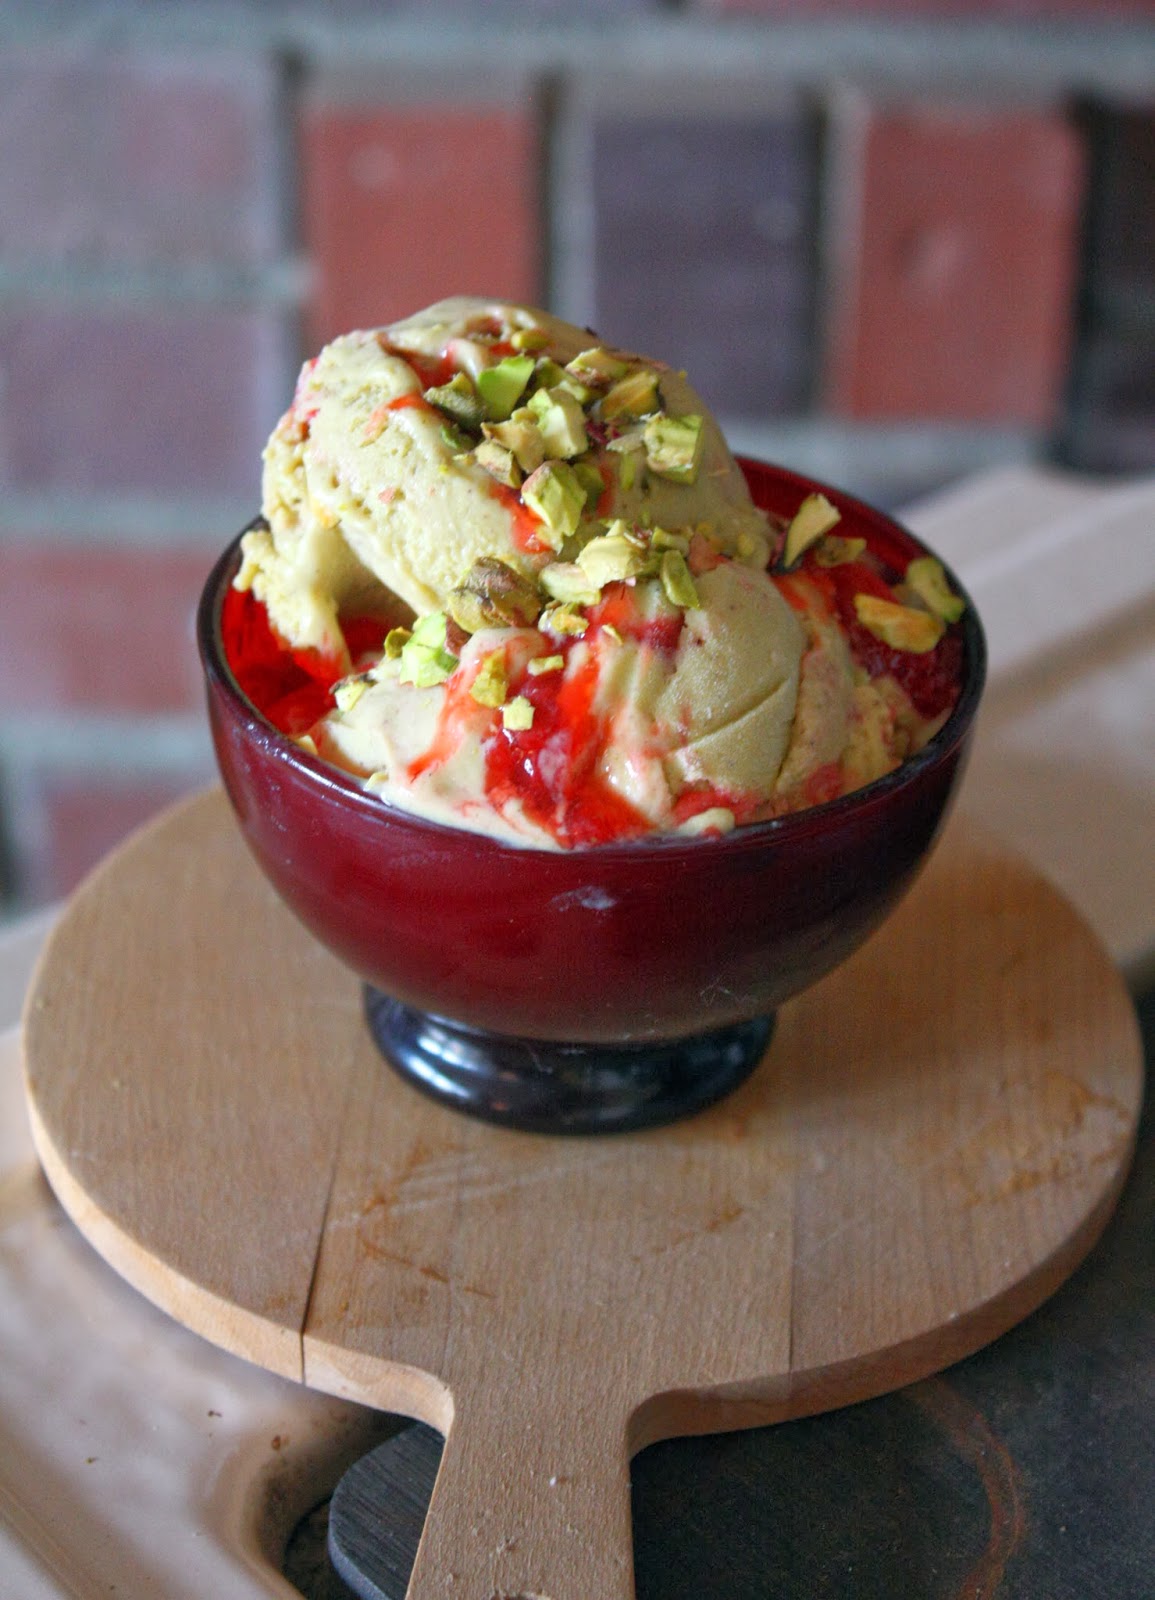
Pistachio-Strawberry Ice Cream
On March 12, 2014 by sixtyacrebakerA warm winter makes way for an early harvest of strawberries. Meandering down a country road this weekend past, i happened across a roadside stand loaded with berries and heaps of pistachios,locally grown. To keep up with our highly productive flock, I find myself dreaming up custards.
frozen custards
Frozen custards made from backyard eggs, fresh milk, and farmstand goodies.
pistachio-strawberry swirl ice cream
1 cup unsalted (roasted and shelled) pistachios
1 1/2 cups milk
1 1/4 cup granulated sugar
7 large eggs yolks
pinch salt (sea or kosher)
2 cups heavy cream
1 tsp vanilla
1 cup strawberry preserves
1/2 cup chopped pistachios (optional)
whisk the egg yolks, salt, and 3/4 cup sugar. place milk and the pistachios in a blender and puree until the nuts are completely liquid and smooth. add 3/4 cup sugar and place over low heat. warm to a simmer. remove from heat and whisk into the eggs and sugar mixture. tip back into the saucepan and cook over very low heat, stirring continually with a rubber spatula. do not allow to boil, and cook until it just begins to thicken to nappe. remove from heat and pour through a sieve into a clean bowl. stir in vanilla and heavy cream. refrigerate fromr 6 hours to overnight. freeze according to ice cream manufacturer instructions.
once the custard is frozen, transfer it to a freezer-safe container. swirl in the strawberry preserves and the chopped pistachios (if using)
*if you choose to make your strawberry preserves, simply place 2 cups of roughly chopped strawberries in a saucepan. taste for sweetness. squeeze the juice of 1/2 lemon. add sugar according to sweetness. add up to 1 1/2 cups of sugar (less if sweet strawberries, more if not sweet). cook at a simmer until strawberries break down and soften and they sit in a thick glaze.
refrigerate until needed
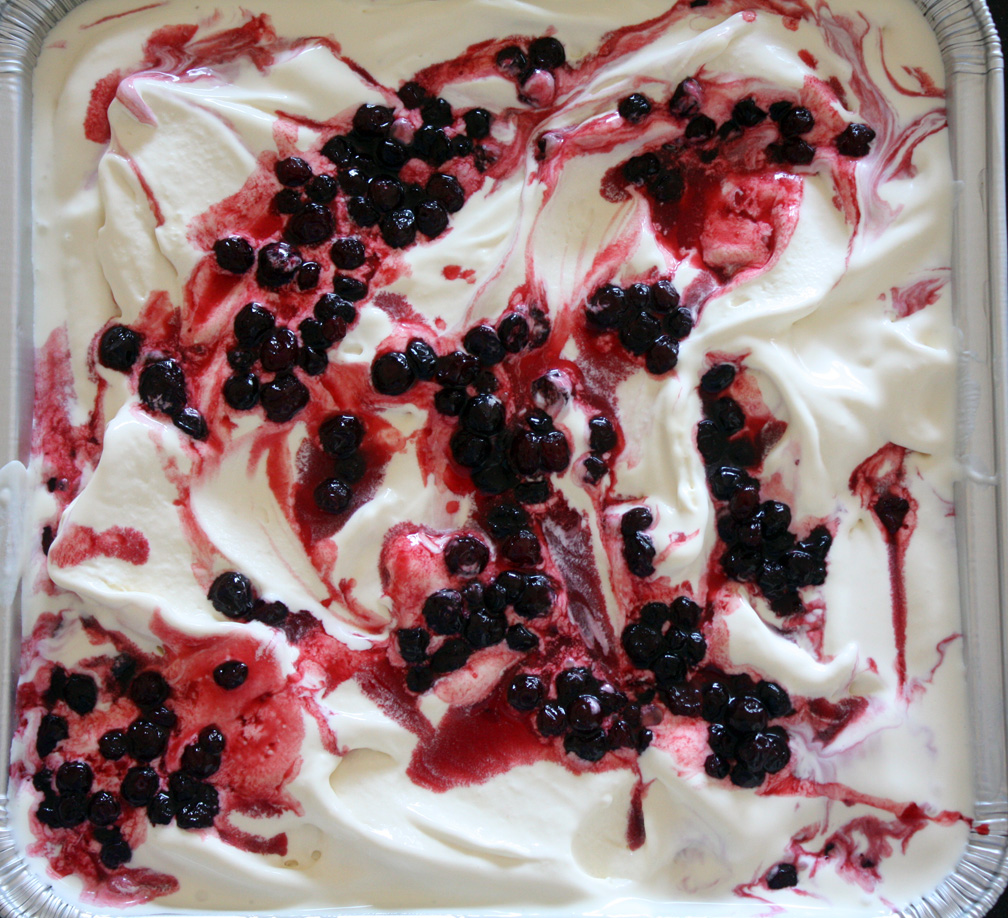
Huckleberry Ice Cream
On July 5, 2013 by sixtyacrebakerHuckleberries are hard to come by. Competing with bears after a long hilly hike, just ain’t my thing. Luckily, those whom are “into it” are willing to share; with one little caveat, my dealer, is 1200 miles away. Traveling for a case of berries. Now, that is my thing. Huckleberries are a bit like blueberries, with more punch of flavor. Sweet with a tinge of sour, no pucker. Just enough to wet your whistle. This gorgeous purple berry cuts rich vanilla ice cream perfectly.
Huckleberry Ice Cream
(vanilla base recipe adapted from David Lebovitz)
vanilla custard
1 cup whole milk
generous pinch kosher salt
3/4 cup granulated sugar
2 cups heavy cream
7 large egg yolks
4 tsp good vanilla extract
huckleberry swirl
1 1/2 cups huckleberries
1/2 cup granulated sugar
1 Tbs lemon juice
Heat whole milk with 1/2 cup of sugar, and kosher salt. Meanwhile whisk egg yolks with remaining 1/4 cup of sugar. Once milk comes to a simmer, slowly pour into the egg yolk mixture, whisking constantly. Quickly rinse the milk saucepan to remove any dried or burnt milk. Transfer warm egg mixture back into the saucepan and cook on low heat, constantly stirring with a spatula. Watch carefully, as to not overcook the eggs. Cook and stir just until the mixture coats the spatula (consistency of a light crepe batter). Remove from heat and run through a sieve into a clean bowl. Stir in heavy cream and vanilla. Place entire bowl into another bowl filled with ice and cool water. Stir until it is cooled to room temperature. Pour mixture into a covered container and refrigerate at least 4 hours, but preferably overnight.
make huckleberry swirl
In a small saucepan, place berries, sugar and lemon juice. cook until the berries throw off juice and all of the sugar has melted, then cook for about 10 minutes more..keep the heat low, you don’t want to burn the sugars. Mash the berries slightly (you will want some whole, some mashed). Allow to cool and refrigerate until ready to freeze the ice cream.
when ready to freeze
Place vanilla base into the bowl of your freezer. Freeze according to manufacturer’s directions. When your ice cream is finished…remove into your freezer container. As you scoop into your freezer container, layer with your huckleberry swirl. This will allow you to have a true swirl. If you put the huckleberry swirl into the mixer, it will completely mix in. Continue to layer adding as much huckleberries and juice as you wish.
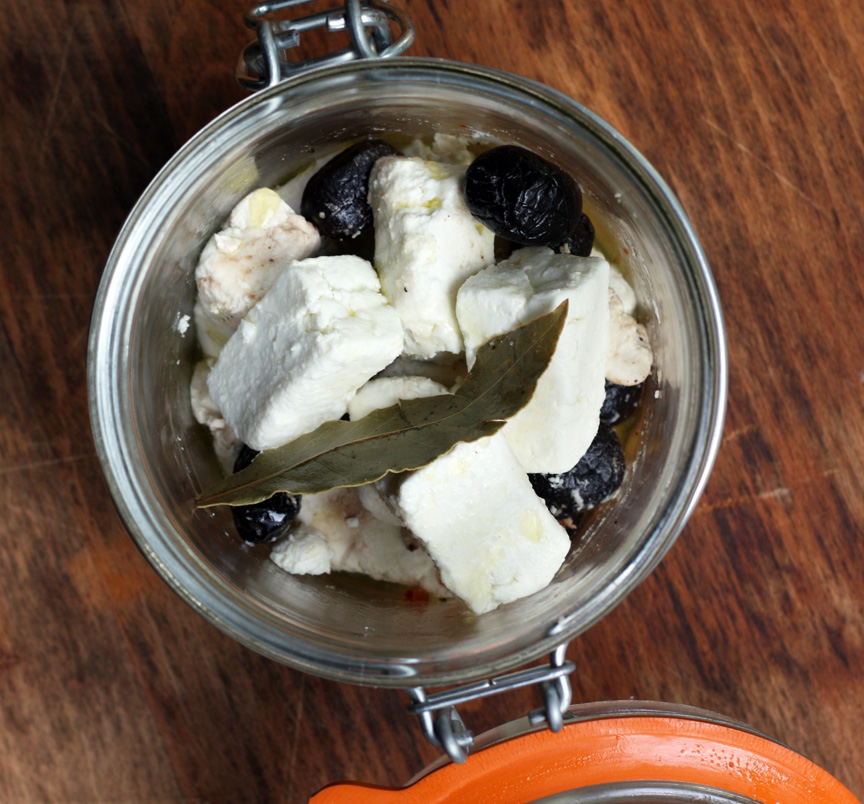
Feta Cheese
On August 4, 2012 by sixtyacrebakerMaking cheese can be labor intensive, but it is not difficult. It requires attention to detail, a super clean work area, a few specialty ingredients, and patience. Feta cheese is aged in a brine; making it salty and creamy.
Feta Cheese
1 gallon pasterized goat’s milk (do not use ultra-pasterized)
1/4 tsp aroma B mesophillic starter
4 drops (double strength*) rennet
1/4 cup non-chlorinated (bottled) water
butter muslin
flake sea salt or kosher salt
for brine
8 cups water
1/2 cup kosher salt
Heat the goat’s milk slowly in a large heavy stock pot to 74F. Remove pot from the flame and burner (but leave on stove), and gently stir in the mesophillic starter. Allow to sit for 10-15 minutes before moving on to the next step.
Meanwhile, mix the rennet into the 1/4 cup water and after the wait time, gently stir into the milk pot. Do not scrape the sides or bottom of pan, but gently stir for about 2 minutes. Cover the pot and leave on the back of the stove undisturbed for 12 hours. the objective is to keep the milk at the 74F for the entire time
After 12 hours, gently ladle the curds into a muslin lined colander (over a bowl if you wish to keep the curds). Allow it to sit uncovered for 1 hour. After 1 hour, tie the ends of the butter muslin to create a pouch that can be suspended or hung**. I tie the pouch to my sink faucet and allow the curds to drain directly into the sink. It is also easy to run a wooden spoon through the knot and suspend the pouch over a deep pot. Allow the curds to drain for a full 12 hours. Open the pouch remove the curd mass (it should be fairly stable) and flip it over. return it to the butter muslin and suspend for an additional 12 hours.
**an alternative: after you have drained the curds for the initial 1 hour, you can transfer the curds to a muslin lined plastic tomato basket, flipping every couple of hours. this will give you a more uniform shape.
remove the curd, which should now be quite firm, from the cheesecloth and place on a draining mat, or surface that has small holes (cooling rack, pizza pan, bamboo mat). Cut the curds into desired size (about 1″x1″ or larger for interesting presentation). Lightly salt all sides of the pieces and allow to dry for 3-5 days uncovered in your refrigerator. you are looking for the pieces to become a bit yellow on the edges. Prepare your brine with enough advance that it is cooled to approx 60F by the time you are ready to use it (you can store it in the refrigerator if made in advance). To prepare the brine, simply boil the water and add the salt. stir to dissolve completely.
When ready to brine, place the dried cheese pieces in a glass jar, careful not to jam and pour the brine over. cover the jar and brine the feta for 2-3 weeks before enjoying. You will notice the flavor builds as time progresses. If stored properly, this will last about 6 months (although i dare say it is so delicious, it probably won’t make it that long!)
I find the brine a bit salty, so I quickly rinse my feta in non-chlorinated water, and gently dry with a paper towel before eating. It is delicious & beautifully presented with strong black olives, a bit of hot pepper, and a drizzle of olive oil.
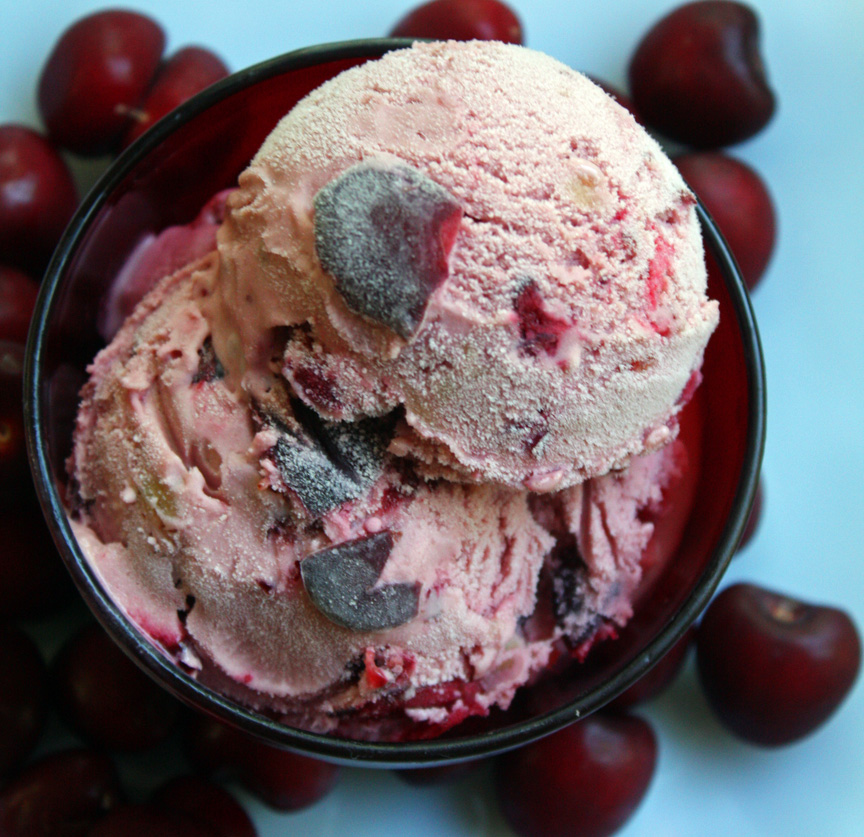
Cherry Marzipan Ice Cream
On June 18, 2012 by sixtyacrebakerRecently, in an early morning whim, I dragged Mike to a far-off orchard to pick a bushel of cherries. As we stood in the shade of a tree, him reaching to higher branches, and I for the low hanging fruit; I, cherry stained and gleeful, half whispered “isn’t this just so much fun”. To which Mike responded, as he bent a branch to my reach; “No. This is torture, but i am happy you are enjoying it”. This ice cream is a love letter filled with sweetness of ripe fruit, rich-depth of ground almonds, & deep warmth of a stiff drink, from me
to him.
I must tell you this is not a difficult recipe, but it is complicated taking many steps and some time but if you are an ice cream person with a special occasion on the horizon, you should make this. It is seriously good
Cherry Marzipan Ice Cream
step 1
3/4 cup milk
2 cups pitted cherries (reserve pits)
1 cup heavy cream
1/4 cup granulated sugar
1/4 tsp kosher salt
step 2
3 egg yolks
1/4 cup granulated sugar
2 Tbs cherry herring liquor (optional)
1/4 tsp almond extract
1 cup heavy cream
step 3
1 cup chopped cherries
1 Tbs lemon juice
1/4 cup sugar
3-4 oz marzipan–cut into bits the size of a small almond
step 1
blend together the pitted cherries and milk to break up, but not puree the cherries. place in a heavy saucepan. add back the cherry pits and stir in 1 cup heavy cream, 1/4 cup sugar and salt. bring to a simmer then turn off heat. allow to steep a minimum of 2 hours or until cool. *if you allow to sit more than 2 hours, place in the refrigerator to steep after 2 hours have passed.
step 2
strain the mixture and place into a clean saucepan. meanwhile, whisk together, in a bowl, egg yolks, 1/4 cup sugar, cherry herring (optional), and almond extract . whisk until the egg becomes pale and all ingredients are fully incorporated. heat the cherry-cream mixture to a simmer, then pour about 1/2 of cup into the egg mixture whisking the egg mixture while doing so. this is called tempering the eggs. slowly pour the remaining warm cream mixture into the egg, and whisk until fully incorporated. pour the egg mixture back into the saucepan and place over very low heat. using a rubber spatula, continually stir the egg mixture until it begins to thicken to a nappe (you should be able to wipe your finger across the back of the spatula and have the “trail” remain. do not let the mixture simmer or boil. once you have obtained the desired consistency, pour mixture through a sieve into a clean bowl. allow to cool for 1 hour, then add 1 cup heavy cream and stir to incorporate. refrigerate 8 hours or overnight to meld the flavors.
step 3
at least 1 hour before churning, place 1 cup pitted and chopped cherries, lemon juice and 1/4 cup granulated sugar in a bowl and macerate for 1-2 hours.
step 4
prior to churning the ice cream, drain the macerating cherries and stir the juice into the ice cream base. churn your ice cream according to the manufacturers instructions. in the final minutes of freezing and churning, add in the cherries and marizipan and allow them to mix in fully. the ice cream will be quite soft. eat immediately, or freeze until ready to enjoy.
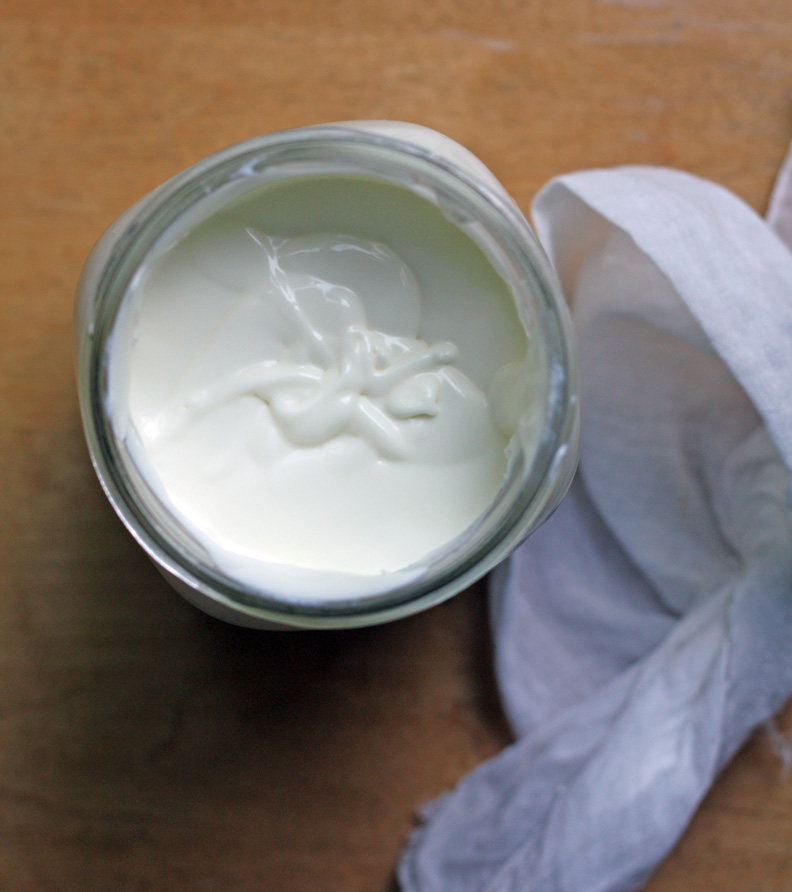
Creme Fraiche
On April 30, 2012 by sixtyacrebakerNo story. No fancy words. Just a simple plea. make.your.own. and use.it.liberally.
Creme Fraiche
3 cups heavy cream–room temperature
6 Tbs plain greek yogurt–room temperature
Stir the yogurt into the heavy cream. Put into a glass jar and cover with a bit of cheesecloth (to keep out bugs and dust, but allow for airflow). Let sit draft free at room temperature for at least 12 hours and up to 36 hours. The longer you leave it out, the more tangy it will become. Give it a good stir, it will thicken right before your eyes. Tightly cover and pop in the fridge.
enjoy where you would otherwise enjoy cream or sour cream
mix with a bit of brown sugar and pour over berries
stir into warm soup
create a calvados cream sauce for roast pork
pour over warm peas, carrots
or
cold beets
just for starters….
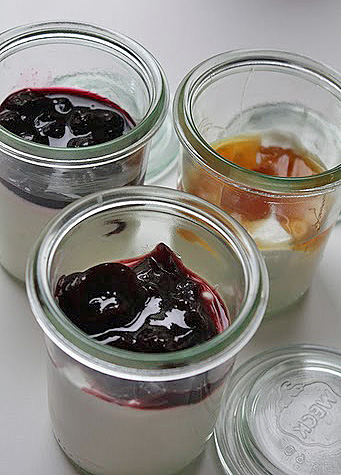
Homemade Yogurt
On April 27, 2011 by sixtyacrebakerMy mother is not a hippie. She would never be mistaken as “granola”. Birkenstocks have never graced her perfectly manicured feet. However, when I was a kid, the dogs were fed brewer’s yeast, our bread came from the health food store, red dye no. 2 was banned from the house, and our yogurt was homemade. I thought it was so lame. My friends were eating yogurt with dreamy flavors of coffee, chocolate, and lemon swirl, while I was being brainwashed. Brainwashed to believe that mine, while not sweet like pudding,was filled with acidolphilus. It would be myy best defense against turistas, if ever I found my 8 year old self in Mexico with a head of unwashed lettuce in one hand, and a tall glass of tap water in the other. Here in lies the rub. Now as an adult, I love homemade yogurt and find myself extolling the virtues of good bacteria without apology, to anyone who will listen.
Homemade Yogurt
1/2 gallon milk (i use 2%)
1/4 cup good quality plain yogurt-room temperature
jams, jellies, honey, fruit–to serve
Preheat oven to 185F. Heat milk in a pot that will best retain temperature over low heat until it reaches 185F. Once it reaches the desired temperature, pop it into the preheated oven and allow to sit for 30 minutes. Remove from oven and allow the milk to cool to 110F. When the milk has cooled to 110F add the yogurt and stir well. It is important to keep the milk at 110F for the next 7-10 hours.(i have a warming oven that i use which will keep a consistent low temperature. Other methods can be a warming pad, creating a foil tent over a electric skillet, testing the residual heat of an upper oven, while the lower oven is on, placing the pot in a water bath and keeping the water at 110F) After 7-10 hours you will see thickened milk soaking in the whey. Give this a good stir, then spoon into containers and place in the refrigerator for at least 12 hours before eating.
What I do next is not necessary, but Mike and I have different ideas about how thick yogurt should be. I like mine extra thick, he doesn’t. I place the yogurt in a sieve lined with cheesecloth over a large bowl, and let it sit for a few hours or overnight. The yogurt becomes the consistency of cream cheese, and the whey collects in the bowl. I place the yogurt in one container and the whey in another. When I make up my pots of yogurt, I whisk in enough whey to achieve the desired consistency. The extra thick yogurt is great as a spread on bread or for flavored dips.
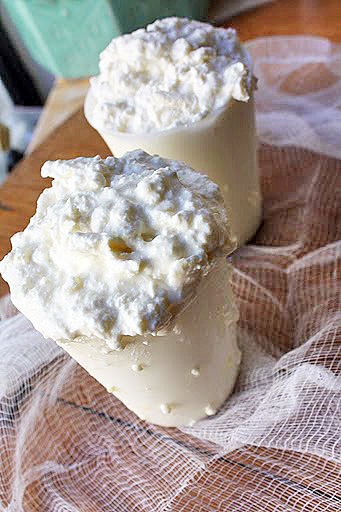
Fresh Ricotta
On March 24, 2011 by sixtyacrebakerHomemade ricotta is nothing like what you find in the supermarket; packed tightly into tubs with expiry dates a month long. It is naturally sweet with creamy curds and only lasts a few days. That is the good news. It is a bit time consuming,uses quite a bit of milk, and can be a bit of a mess. Last week cannoli was on my mind so I whipped up a pot of fresh ricotta. And when I say whipped, I mean spent an entire day preparing, cooking, skimming and draining. For my birthday, my friend gave me a beautiful cookbook
“my calabria” by rosetta costantino. Rosetta shares a family recipe for ricotta using a combination of milk and cream. It produces a large yield perfect for eating with a spoon, whipped into lemon pancakes,stuffed into cannoli shells, or sharing with friends.
Ricotta
*from my calabria
1 gallon whole milk
3/4 cup cream
2 tsp kosher salt
1 tsp rennet
1/4 cup cold water
Place the milk and cream in heavy pan and stir to mix well. warm over heat to 200-210F. Remove from heat and add the salt. stir to dissolve. Let the milk to cool to 100F. skim any foam or skin that forms on top of the milk. In a small bowl, mix the rennet with cold water. Stir the diluted rennet into the pot of milk, then leave undisturbed until the milk has visibly thickened, about 10 minutes. Cut a large “cross” in the milk. Stir quickly with a wooden spoon for 15-20 seconds to break up the coagulated milk. Using a perforated metal skimmer immersed in the milk,slowly and gently stir in one direction, so slowly that it takes about 20 seconds to make one revolution. Milk will begin to separate into curds and whey. Slowly pour off the whey through a cheesecloth lined colander, set over a bowl to drain. Let stand at room temperature until whey stops dripping from the sieve. Alternately, if you have ricotta baskets, you can use those to drain the curds. The ricotta should be covered with plastic wrap and stored in the refrigerator. It is best used within 2-3 days. This makes about 2 lbs
* I don’t throw the whey out…I use it. Mike and I use it in our smoothies and I give the dogs a bit of it in their kibble. It helps with a shiny coat. I can’t say the same for us humans.