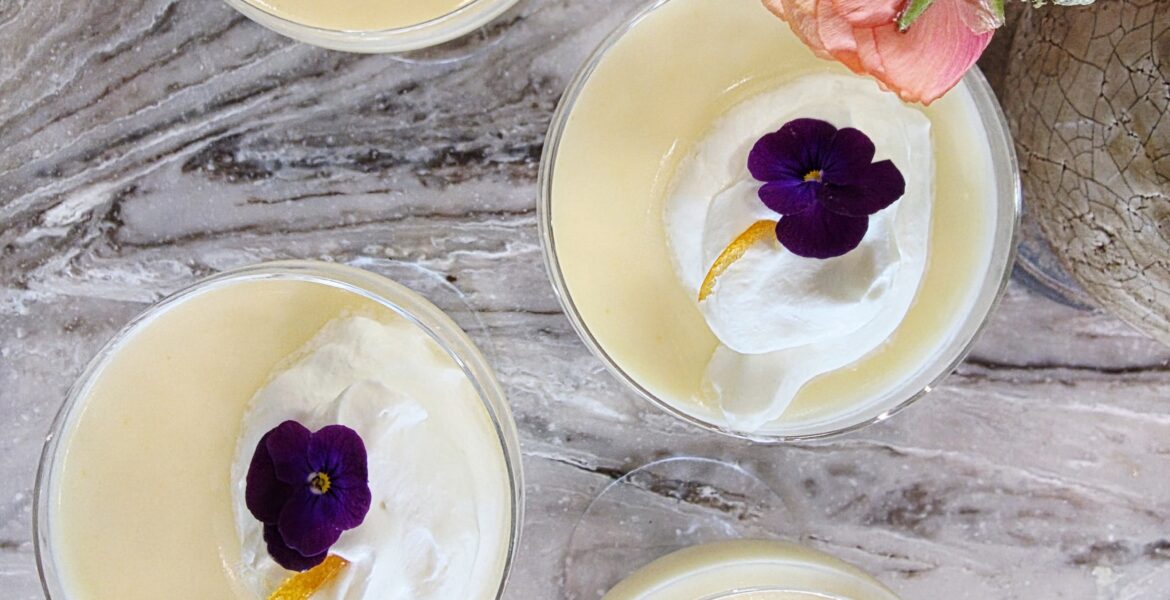
Lemon-Buttermilk Posset
On March 27, 2026 by Christy LarsenNo big story about why or how or who, but I needed a dessert by noon; at 9 am, I didn’t want to turn on the oven, and I wasn’t enthusiastic about anything ticking through my brain. We are an ingredient household, so I had options on hand. My single desire was to make something that matched the warm spring day on the horizon. When I am in a crunch like this, I must admit, I lean into the Brits….inspiration for days… when it comes to simple desserts.
Had I meringue on hand, I would have done an Eaton Mess, but I didn’t, so I went with Posset. It had been years (almost 20) since I last made one…I won’t make that mistake again.
Several weeks ago, a neighbor gave me a bag of lemons that are nearing their useful end. A half-gallon of buttermilk is gathering dust in the fridge door; I can’t even remember why I bought it in the first place. Combining the two in this custard-like treat gave the dessert a multi-layered tartness you wouldn’t get if you used only one or the other. A note: buttermilk doesn’t have the same reaction as heavy cream with heat and lemon–I urge that you don’t exceed the ratio I have used here.
Lemon-Buttermilk Posset
makes 4-6 servings2 cups heavy cream
1 cup buttermilk
3/4 cups granulated sugar
zest of two lemons
1/4 tsp kosher salt
2/3c+1 Tbs lemon juice
In a saucepan combine cream, buttermilk, sugar, lemon zest and salt. Bring to a simmer and let it vigorously simmer for at least 10 minutes. Allow it to reduce a bit, but don’t allow to caramelize. Remove from heat when you can see space between the “fill line” when you first put the pan on the heat, and the current top of the liquid. Stir in the lemon juice.
Give it another minute or two and pour into serving vessels. I like to use a champagne coupe..or pretty small cup/glass.
Refrigerate for a few hours. This is best served on the same day it is made.
Serve with sweetened whipped cream or complimentary jam.
Pumpkin Pots de Creme
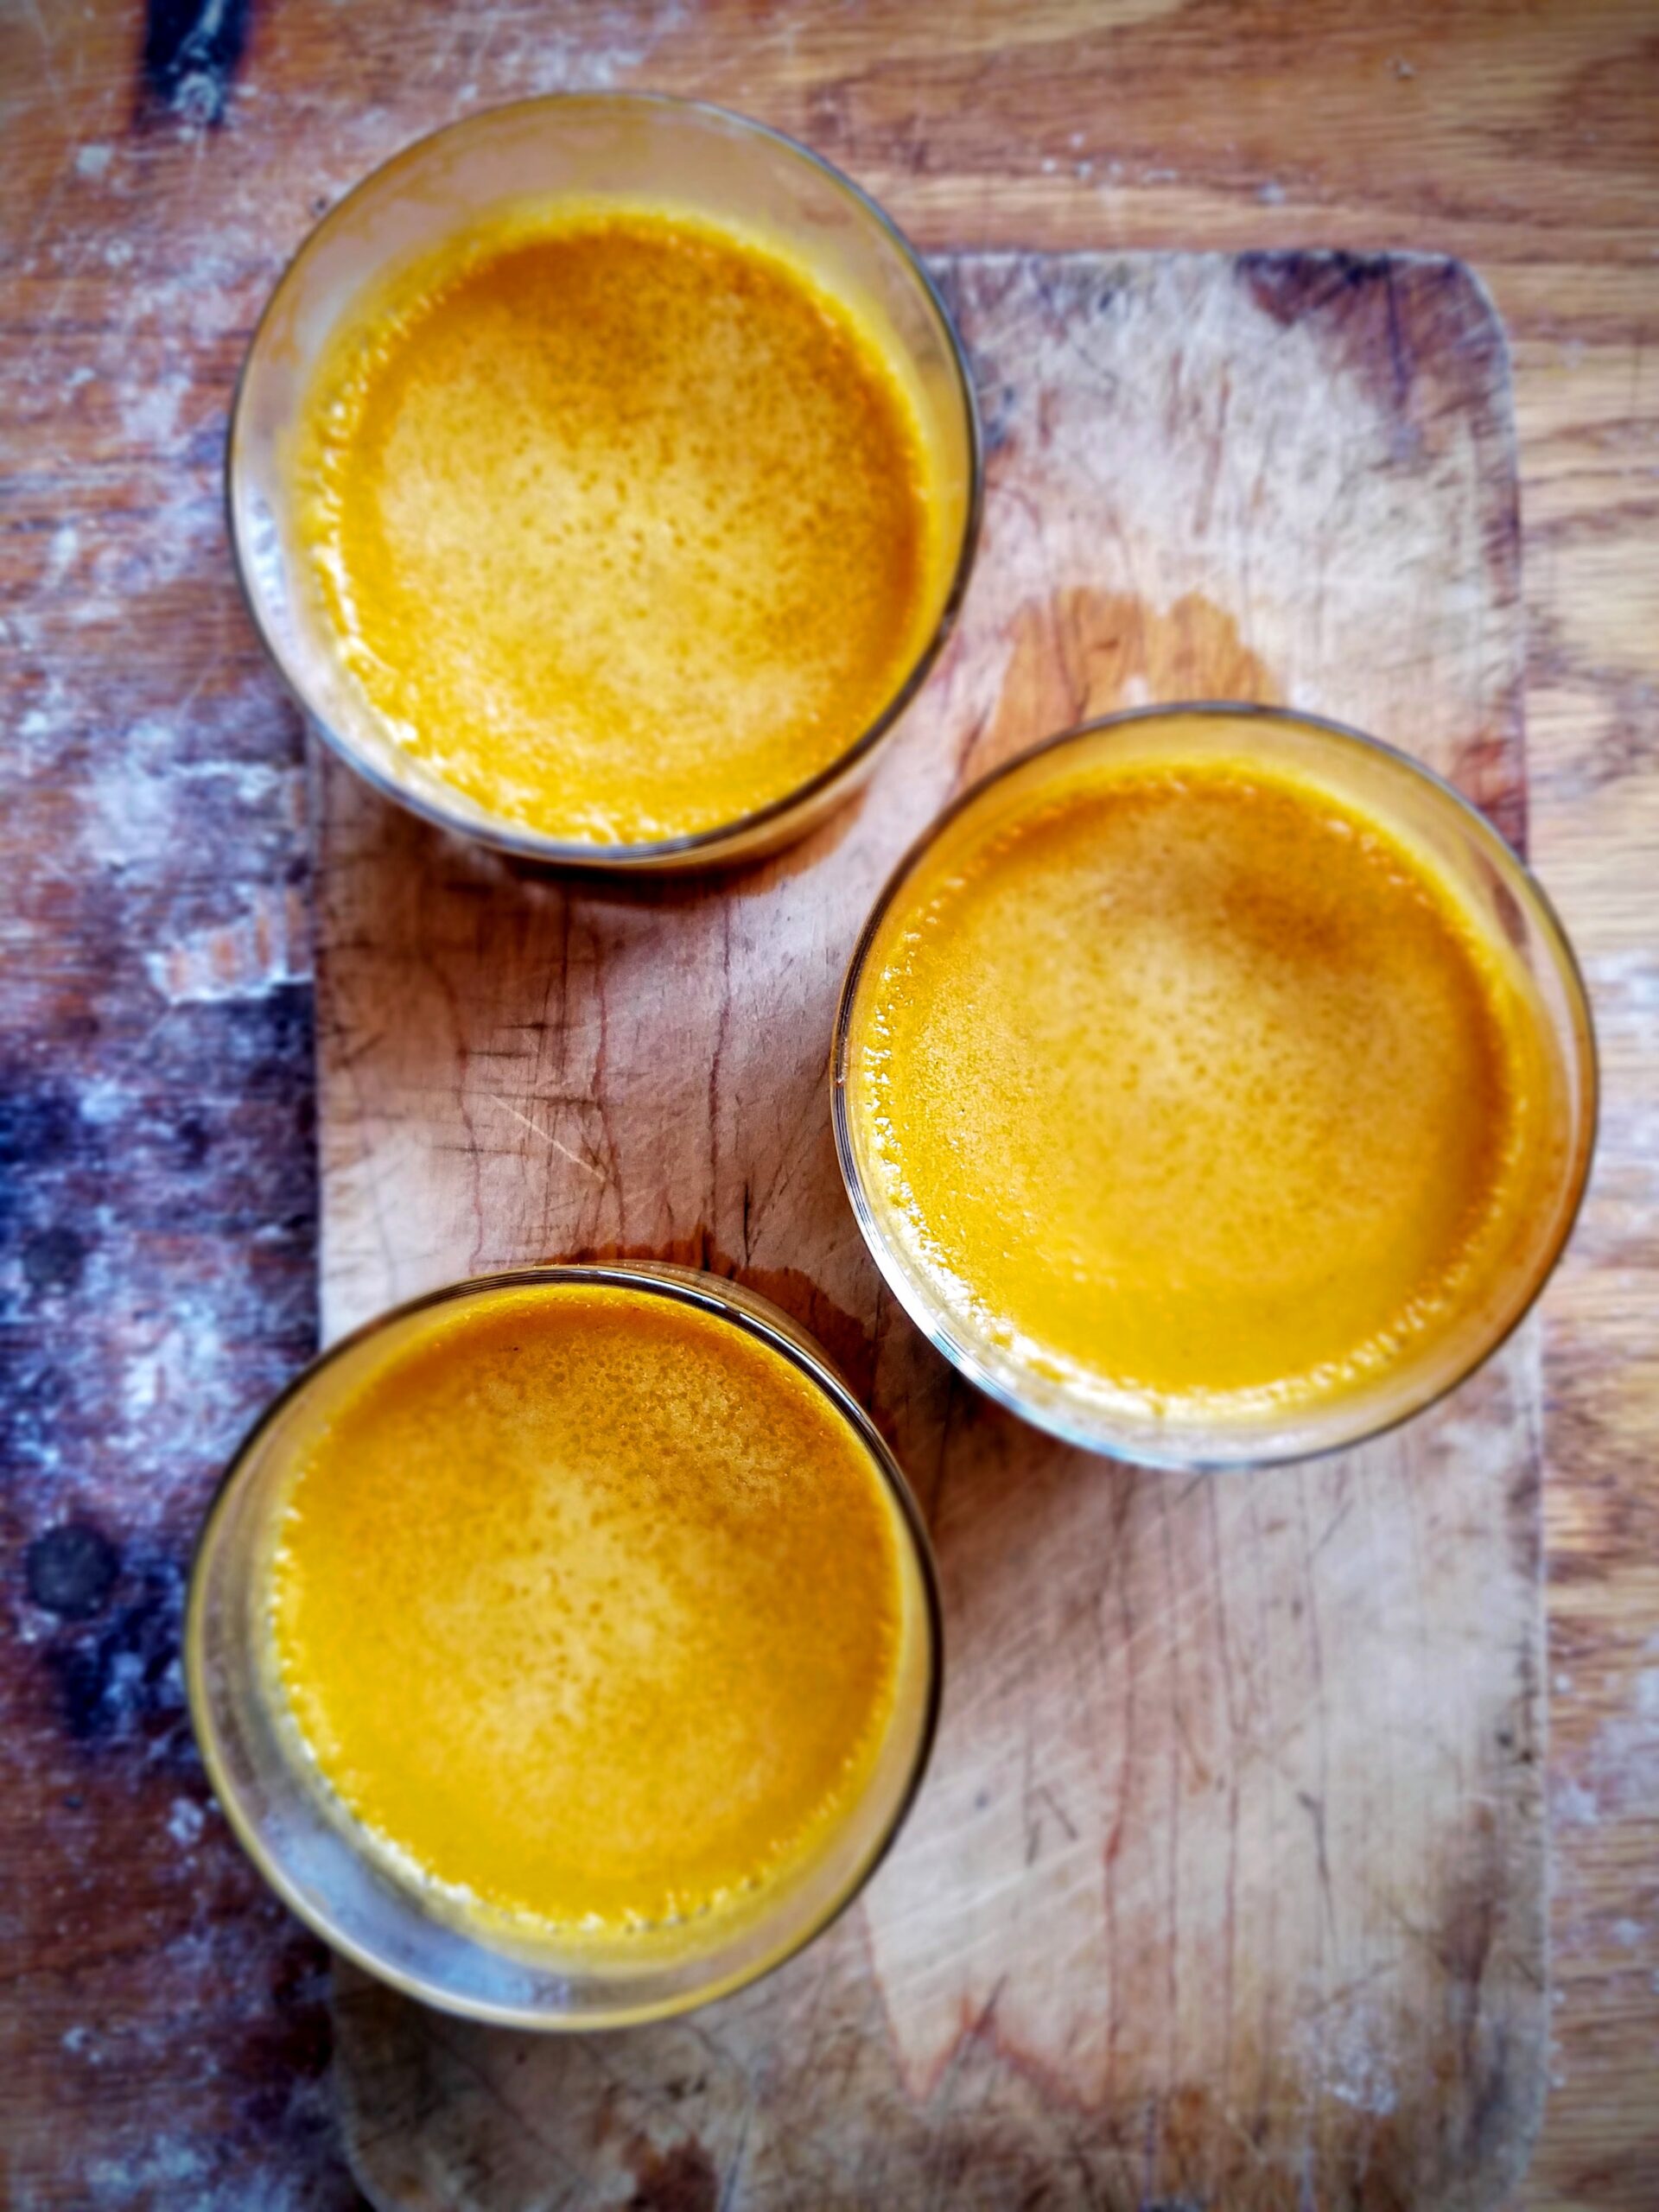
On September 11, 2016 by Christy LarsenI’m not much for the pumpkin spice hype that comes in play at the first sign of frost. I am however, a pumpkin fiend. I love it sweet, I love it savory. With butter, as butter, warm and spicy; it brings me joy. While we have ripe pumpkins coming off the vine this early September, I’m not quite ready to jump head first into pie mode. This time of year, when it is warm during the day, but the sunrise and set are accompanied by a slight chill, I make custard. Not quite a pudding, pots de creme are a perfect spotlight for a delicate blend of spices and rich pumpkin puree. Something quite important when making these….you must not overcook. Pull these out of the oven before they are fully set.
Pots de Creme
(makes 5-6)
1 cup pumpkin puree
5 egg yolks
1/2 cup + 2 Tbs dark brown sugar
1 cup heavy cream
1/2 cup whole milk {i use goat milk}
generous pinch kosher salt
1/4 tsp ground ginger
generous pinch cardamom, allspice, cinnamon, fresh nutmeg
whipped cream -for serving
If using fresh pumpkin puree, make sure it is very smooth. Set aside. Whisk {either by hand or with electric mixer} eggs and brown sugar until the sugar is completely melted and the eggs seem lighten in color and thicken a bit. Heat the milk, cream and salt in a saucepan until bubbles just start to form. Slowly whisk the hot milk into the egg until well incorporated. You are tempering the eggs with the hot milk. Whisk in the pumpkin puree and the spices. Run through a sieve into a spouted measuring cup. Use a spatula to scrape as many pumpkin solids as possible through the sieve. Give a good stir.
Pour into oven safe cups or small ramekins. This is meant to be served and eaten in small portions; think demitasse cups, tea cups, small bowls or ramekins. 4-6 ounces each.
Allow any air bubbles or foam to subside. Remove any remaining foam by skimming with a spoon.
Place in a cake pan or casserole dish. Place in an preheated 325F oven. Once in the oven, prepare a bain marie: pour enough hot water in the pan {careful to avoid getting water into the custard} to reach about halfway up the side of your custard cups. The bain marie will help to keep a constant temperature on the custard.
The length of time in the oven depends on the size of your baking vessel. Begin checking at 12 minutes. Tap the cup or bowl and look for gentle ripple (like that of a pebble in a pond). If you have a gentle ripple, then go ahead and remove from oven and allow to cool to warm in the water bath. If the custard isn’t quite done, continue to check every few minutes. If you check on them and they are completely firm, remove from the water bath immediately.
Do not put in the refrigerator hot, but place in the fridge once only slightly warm. Allow to chill completely and serve with a generous dollop of whipped cream
A properly cooked pots de creme is creamy, almost mousse like and silky. Once overcooked it can be a bit grainy and have an eggy flavor to it. Undercooked will result in a runny custard.
Fresh from the Field Pumpkin Pie
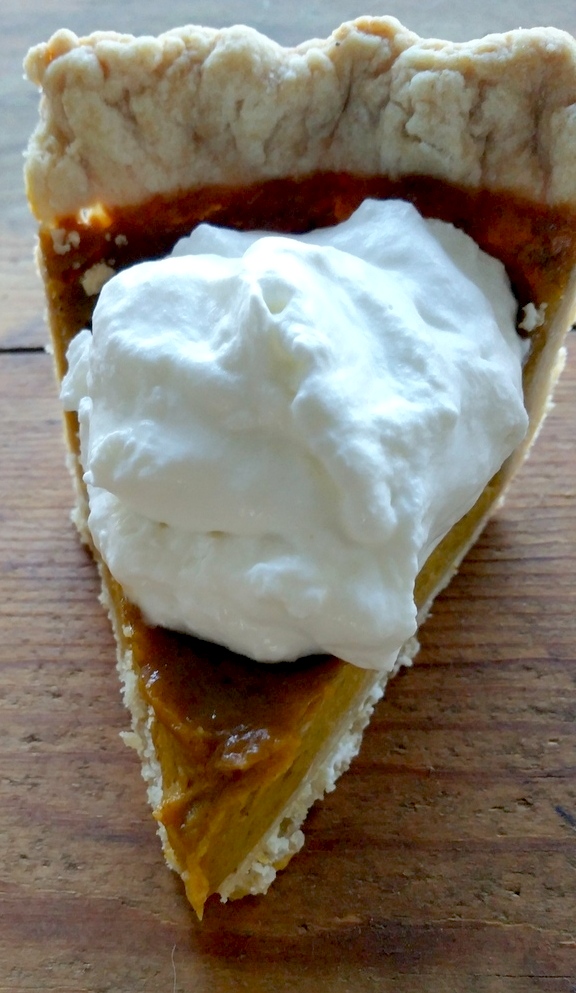
On November 3, 2015 by sixtyacrebakerPumpkin pie and I have made a bit of a journey together. Up until a decade or so ago, I used canned pumpkin and its accompanying recipe for my pie. It was good. Libby’s had a bit of a lock on the pumpkin pie market and deservedly so. Canned pumpkin, canned milk, sugar, eggs, spices. Easy as pie, right? It wasn’t until I started buying sugar pumpkins, at the farmer’s market, and subsequently growing my own,that I began making homemade pumpkin puree. The change has been slow, and deliberate. Moving from canned pumpkin to homegrown was a bit more daunting than ditching the canned milk. When we moved to the ranch we started growing some heirloom varieties of pumpkins. After a myriad of taste tests and bum to prove it, we’ve decided that the Jarrahdale pumpkin makes the best pie. Or should I say, my best pies are made with Jarrahdale pumpkins. The flesh is firm and a bit sweet after roasting and decidedly “pumpkinny”. When processed it is very smooth and makes an almost pudding like pie. Admittedly, they can be difficult to find..and this recipe works well with any (except jack-o-lantern type) pumpkins…but if you see one…grab it. They keep well, look eerie and taste amazing.
Pumpkin Pie
makes an 8 or 9 inch standard depth pie
1 recipe flaky pie crust (recipe follows)
2 cups fresh pumpkin puree (instructions follow)
2 whole large eggs
2 large egg yolks
1/2 cup whipping cream
3/4 cup dark brown sugar–gently packed (add a bit more if you like a sweeter pie
1/4 tsp salt
1 tsp cinnamon
1/2 tsp ground ginger
1/8 tsp ground cloves
1/8 tsp freshly ground nutmeg
1/8 tsp allspice
*note: you can add or eliminate any spices you wish. I only suggest that you don’t overdo the cinnamon. The flavor of fresh pumpkin is gentle, if you put too much cinnamon, you will kill the subtlety.
Preheat the oven to 375f.
Whisk all ingredients, except the eggs, together in a large bowl and taste for sweetness and spice. At this point you can add a bit more sugar (add 1 Tbs at a time) and spice. When you are happy with the flavor, whisk in the eggs and egg yolks and place the bowl in the refrigerator while you “blind bake” the crust. Be sure to bake only until the crust begins to look cooked, but not browned. You do not want to over bake, as you need to put it back in the oven once you fill with the pumpkin custard. Remove the crust from the oven, remove the weights and parchment paper, and immediately pour in the custard. Reduce the oven heat to 350f. Place the pie on a baking sheet and bake for approximately 40 minutes. It is important that you watch it. You do not want to overcook the custard. It is done if you tap the side of the pan and you get a slight jiggle/ripple in the middle of the pie (1 or 2″ from the center of the pie). Just as if you have skipped a small rock into a pond. If the ripple starts from the outer rim of the pie, it is not done. If it doesn’t ripple at all, pull it from the oven and get it on a cooling rack right away. Let cool at room temperature. Store in refrigerator.
Pie Crust
you can use a favorite recipe, or even a store bought crust (which simply isn’t as good, but I understand). This is a simple recipe that I use for a nice tasting and sturdy crust.
2 1/4 cups all purpose flour
3/4 tsp kosher salt
1 Tbs sugar
1/2 cup cold butter–cut into chunks
1/2 cup lard
5-6 Tbs of cold water + 1/2 tsp vinegar
In a large bowl mix together the dry ingredients. Add the butter and shortening all at once and “cut” into the pastry. I like to use my hands for this. I will work the mixture until the butter and shortening are incorporated into the flour in hazelnut size pieces. Add enough very cold water to bring the mixture together, but it should not be sticky. It should also not be dry. Handle the dough as minimally as possible, wrap in plastic wrap and refrigerate for at least 1 hour or overnight. If you are making the pastry well in advance (more than a day), I suggest wrapping it and freezing it. Raw dough will turn gray after a time in the refrigerator.
Fresh Pumpkin Puree
Do not use a pumpkin that you would use for carving. They can be stringy and don’t carry the flavor of sugar or (in this case) the jarrahdale pumpkin. Wash the pumpkin well, cut in half and remove all the seeds and stringy bits. Reserve the seeds and roast them for a treat. Place the pumpkins, cut side down on a lined baking sheet and place in a 350f oven until they are very soft. Let cool, remove skin run through a ricer, food mill, or immersion blender. For a silky smooth texture, process the “meat” of the pumpkin until it is no longer lumpy. I use a hand blender which works perfectly, but you can use a processor as well. Place puree in a cheese cloth lined colander and let drain 6 hours or overnight. You will need 2 cups for the pie recipe, but your pumpkin might yield more. You can freeze the extra at this point.

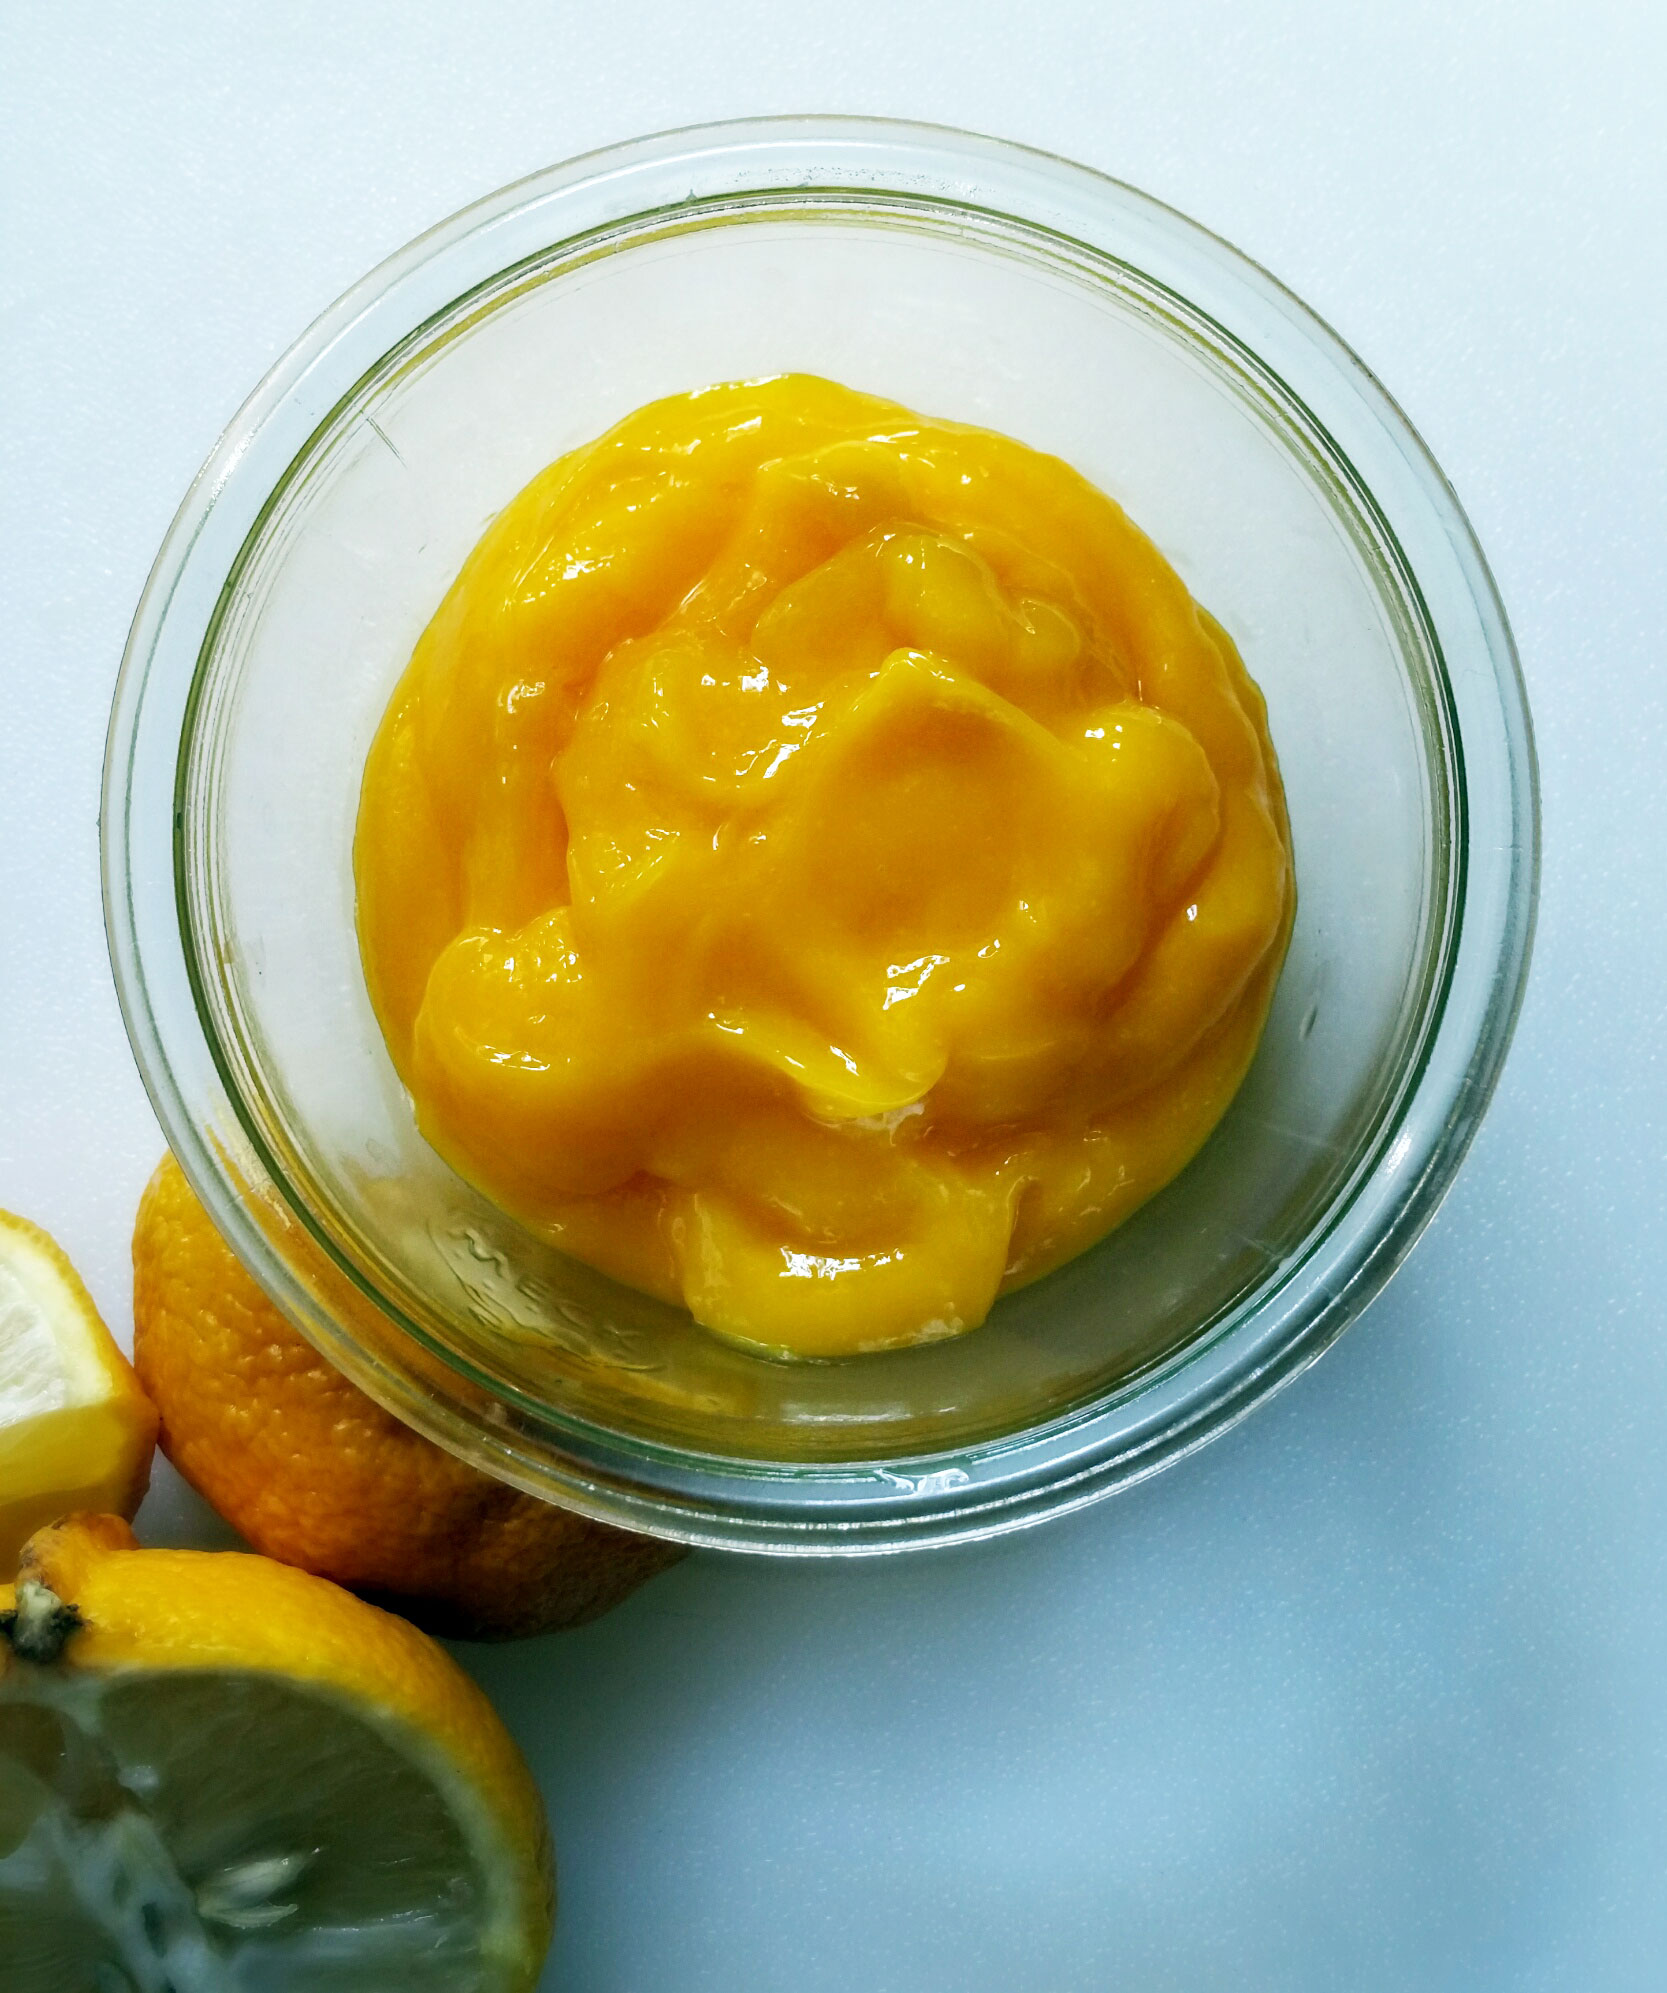
Lemon Curd
On March 30, 2015 by sixtyacrebakerI have been waxing lyrical about lemon curd for days. Finally, the desire had become so overwhelming, I took matters into my own hand. It was time. My counter top had become over-run with duck eggs, a basket of lemons was prepping for it siren song to the fruit fly migration, and I can only stand the thoughts in my head for so long. The hue of this curd is overwhelmingly beautiful and true. It is a foreshadow to the bright treat I love so much.
Lemon Curd
makes approx 3 1/2 cups
8 extra large egg yolks
1 cup granulated sugar
3/4-1 cup fresh lemon juice*
1 Tbs lemon zest
pinch kosher salt
1/2 cup unsalted butter-cut into pieces
Place the butter in a glass or ceramic bowl and set aside. Place egg yolks, sugar, lemon juice, lemon zest and salt in a med/large saucepan or high sided saute pan. Whisk to fully incorporate all ingredients. Place over low heat and stir continually with a spatula. Be mindful to scrape the sides and bottom of pan while stirring. Continue stirring until the mixture thickens enough to heavily coat the spatula, and you can easily trace a clear path through with your finger. Do not let the mixture simmer or boil, otherwise you will cook your egg yolks. Remove from heat and pour through a sieve directly into the bowl with the butter. Whisk until all of the butter is melted and incorporated into the curd. The sieve will catch any cooked particles and most of the zest. This will allow for a clear texture to your curd.
To cool, place the bowl of curd into a larger bowl of ice water (mostly ice) and stir until the temperature reduces to room temp. You may continue cooling to use immediately, or place a piece of plastic wrap directly onto the curd and allow to finish cooling in the refrigerator.
*I enjoy a very tart lemon curd as I mostly pair with sweet meringue, shortbread, or ice cream. If you like it a bit more tame, use 3/4 cup of lemon juice, if you are like me, use 1 cup.
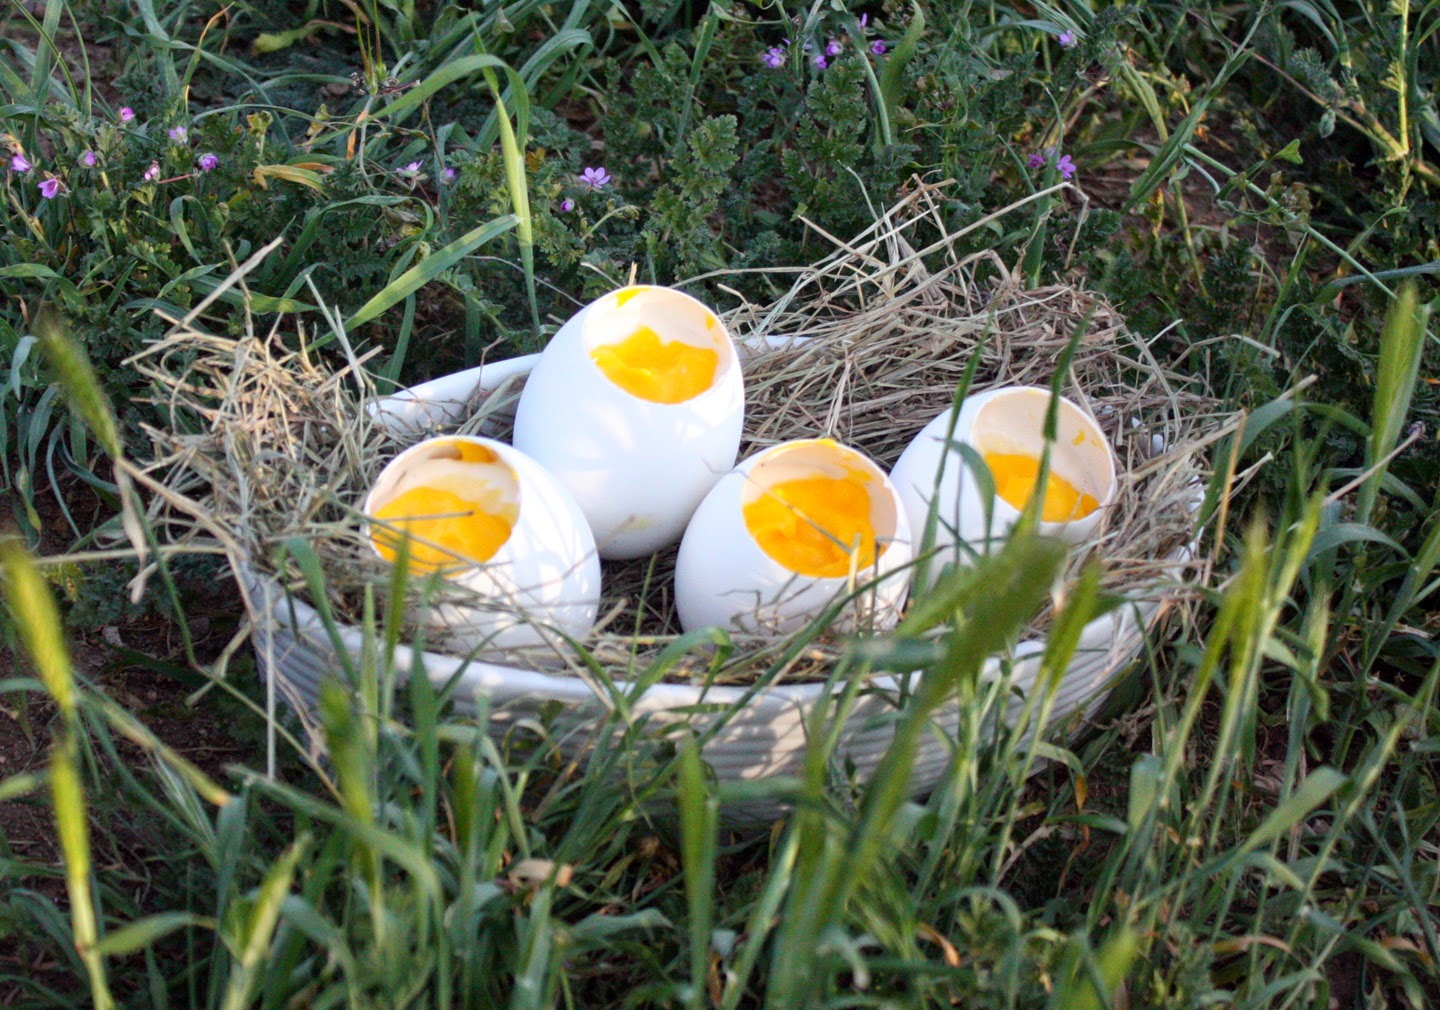
Sweet Eggs
On May 8, 2014 by sixtyacrebakerCome spring we bring it outside. Entertaining is a bit more relaxed and food becomes a bit less fussy, perhaps a tad more whimsical. Certainly, more seasonally driven. We keep chickens, ducks and geese; which means a generous supply of eggs. When putting together a weekend brunch, I love to serve sweet eggs. Very simple, and darling on display, these eggs are filled with vanilla yogurt and lemon curd.
Sweet Eggs
egg cups
emptied and cleaned goose, duck or extra large chicken eggs
-using an egg topper is by far the easiest way to get those perfect edges.
-while the eggs are uncooked, take the top off. separate the whites and the yolks as you empty the shell. use the yolks for your curd, the whites for another delicious recipe.
-you must be gentle when washing the shells, but you must be very thorough in the washing. there may be a layer of membrane attached to the interior of the shell. make sure you get that completely out. it comes out easier when you run water through it. once the membrane is cleared, use a good soap and hot water to get it completely cleaned out. let them air dry with good air-flow.
-you can either set the eggs in egg cups, or use the top inverted and glued to the bottom of the egg to create a stand. you may also just want to place in a small bowl, or in a large bowl on top of artificial grass (or if you have access, hay or straw)
plain or vanilla yogurt
vanilla extract-optional
brown or granulated sugar -optional
if you are using plain yogurt and wish to sweeten it up a bit (i recommend doing so, particularly if you have a nice tart lemon curd), add just a touch of sweetness with your sweetener of choice. i like brown sugar because it takes very little and adds a bit of a caramel flavor to the yogurt. start with 1 tsp per 2 cups and add more to taste. the same with the vanilla.
lemon curd
your favorite lemon curd recipe
-martha has a nice one HERE
-make the lemon curd as directed and let cool completely
to assemble
Place the yogurt and lemon curd in separate decorating bags (alternatively you can use a small spoon). layer directly into the shell starting with the yogurt. fill the shell approximately 1/3 full with the yogurt. add a thin (max 1/4″) layer of lemon curd. add more yogurt to almost reach the top of the shell, and top with more curd, placed to resemble an egg yolk.
serve with demi-tasse spoons.
you may also add gingersnap crumbles or graham cracker crumbles to the bottom for additional flavor and a bit of crunch. serving with a bit of granola is a nice compliment.
for something really fun, fashion sugar cookies into “toast soldiers” and pop them right in to look like a soft boiled egg and toast.
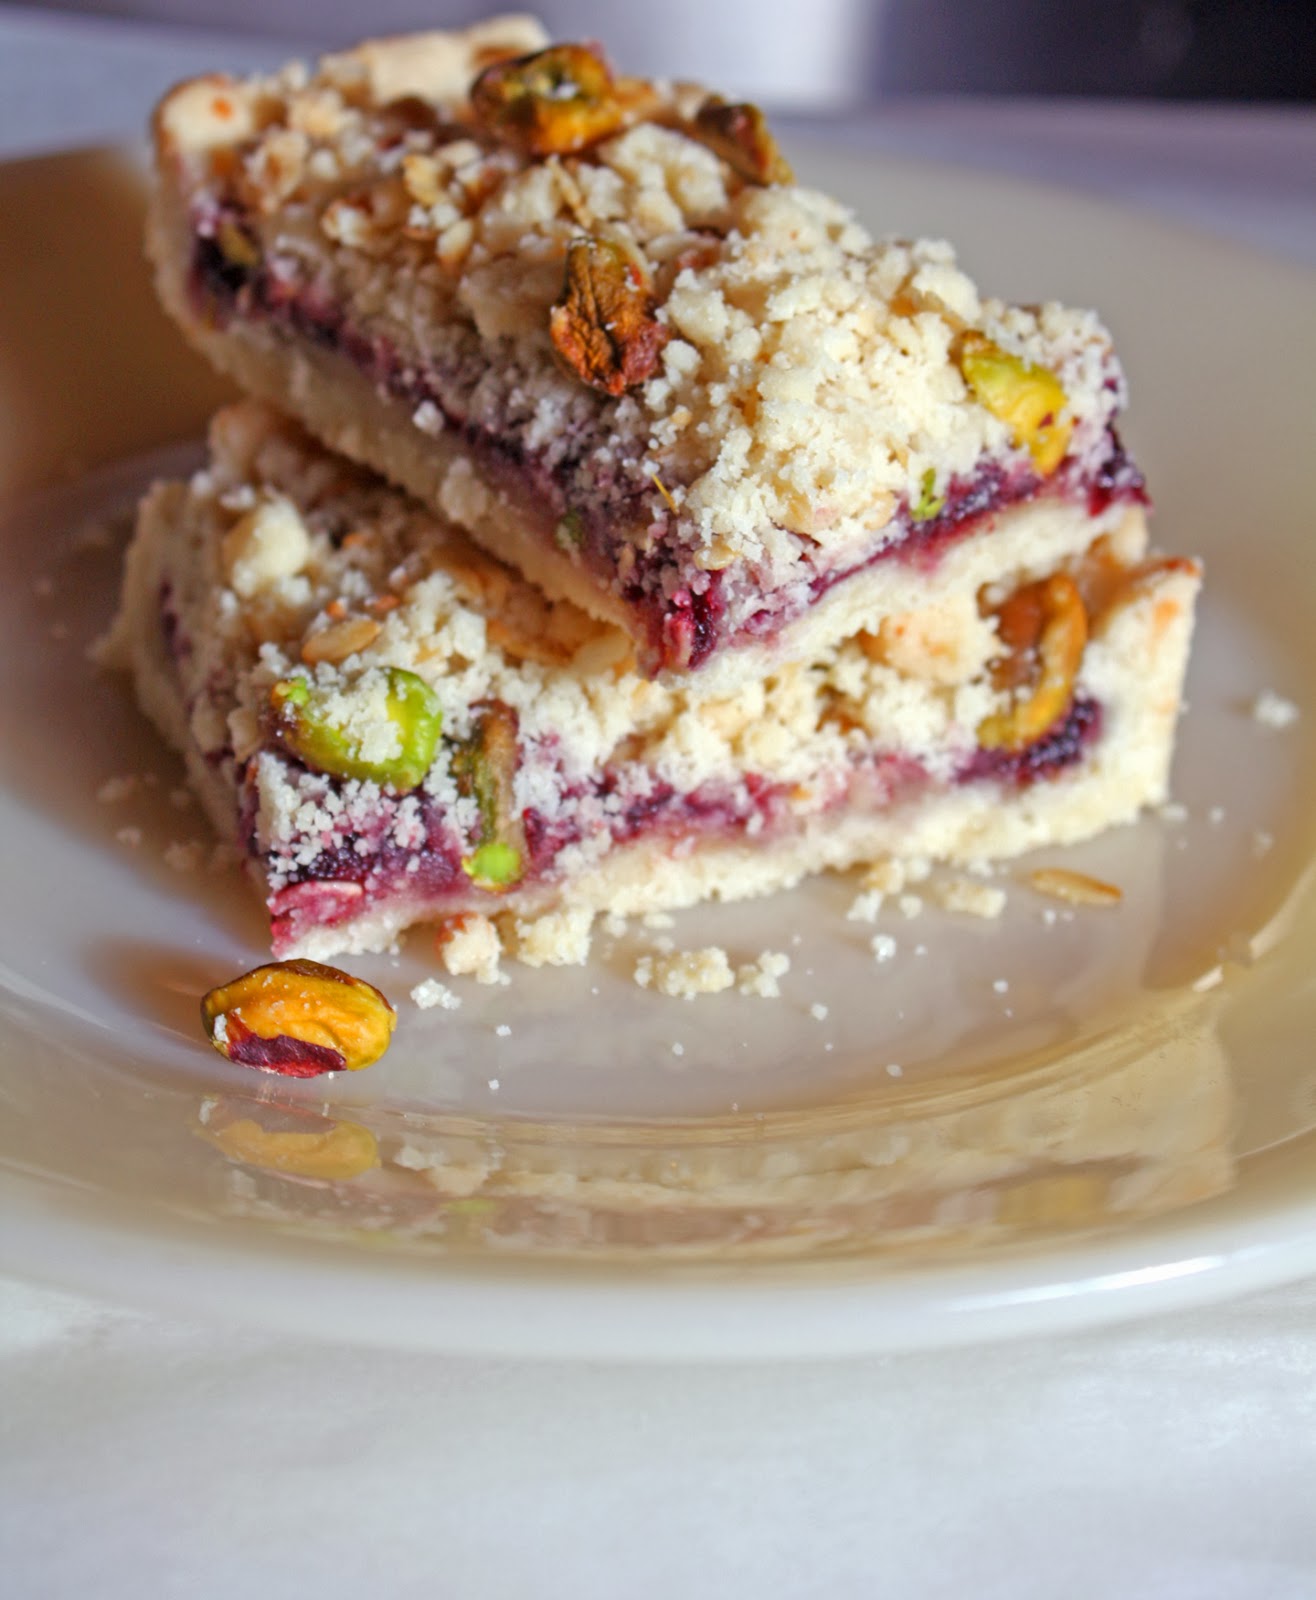
Jammy Almond Crumb Bars
On January 12, 2014 by sixtyacrebakerWe live in the country. Not the county of estates and tag sales; but the country of pastures and dairy sheep. So when someone stops by; we wave them in, take their coat and sit them down with a hot cup of coffee and a sweet.These bars are a twist on the common crumble bar. I use whatever jam i have on hand. {usually something not too sweet loaded with bits of fruit}
The twist comes in the form of almond paste. It finds its way into these cookies, at every bite.
Jammy Almond Crumb Bars
2 sticks unsalted butter–room temperature
3/4 cup granulated sugar
7 oz almond paste (divided)
2 1/2 cups all purpose flour
1/2 tsp kosher salt
3/4 cup high quality-not too sweet jam (ollalaberry, raspberry, blackberry, fruits of the forest, etc)
1/4 cup toasted pistachio nuts
Place sugar, flour and 1/3 of the almond paste in a bowl. By hand, work in the almond paste so that it is in small bits throughout the flour. Add the butter and work by hand until you get a crumble that will stick when pressed together.
Press about 2/3 of the dough into the bottom and up the sides of a 9″x9″ fluted tart pan*. Take remaining almond paste and lightly press a thin layer on top of the crust. You may not use all of the paste. spread evenly with jam.
Mix the pistachio nuts in with remaining dough. Evenly distribute remaining dough by crumbling on top of jam. (i like a thick layer of topping)
Bake at 350 for approximately 40-45 minutes. You want the crust and crumble to be slightly colored, but not over-browned.
*if you do not have a fluted tart pan, this works fine in a standard 9×9 cake pan, just be sure to bring the crust 1/4-1/2″ up the sides.
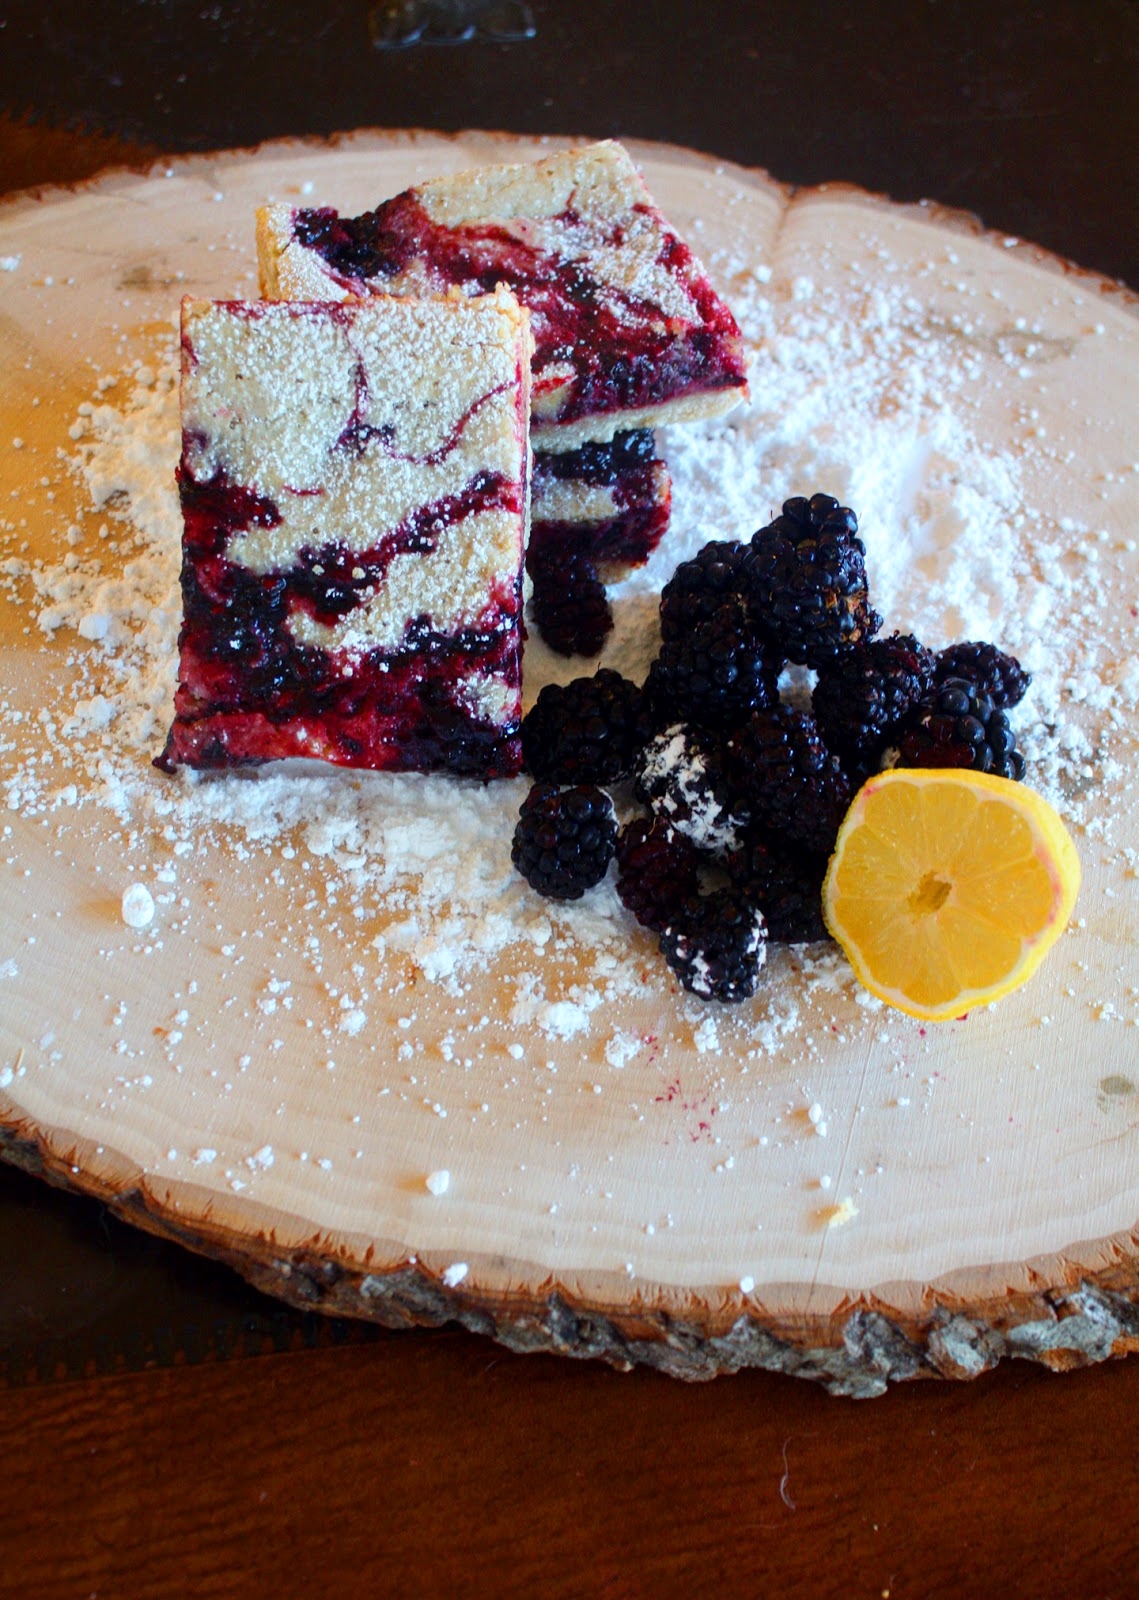
Browned Butter Berry Bars
On August 15, 2013 by sixtyacrebakerThis weekend past, we took a long drive with no real agenda. Except to explore. As we drove north i began to obsess. A cookbook was given to me about a year ago called Big Sur Bakery. While getting lost in its pages, I fell in love with the place, and began imagining each bite. While big sur is coastal, we were on an inland route a little jot west, wasn’t too far off course.
{it wasn’t like we had anywhere to be}
An hour, and ten white knuckles later, we arrived in Big Sur. Unfortunately, the bakery was hosting a wedding; which meant, it was closed. Double dip dang-nabbit ugh. Instead, we stopped at a half bad restaurant for nourishment not enjoyment planning our return. When we got home, I promptly made these. These are a variation of the brown butter rhubarb bars from The Big Sur Bakery Cookbook using berries we picked that morning.
Brown Butter Berry Bars
adapted from the big sur bakery cookbook
jam
2 cups blackberries and mulberries {or berries of your choice}
juice of 1/2 lemon
1 cup sugar
place all ingredients in a heavy bottomed saucepan. cook on low heat until it begins to bubble and thicken. watch closely and cook until it is thick and jammy. set aside to cool
crust
1 cup unsalted butter–melted
1/2 cup powdered sugar
1/2 tsp kosher salt
1 1/2 cups flour{whole wheat or all-purpose}
whisk together the flour, powdered sugar and salt. stir in butter. press into a 9″x 13″ pan. bake in a 375^ oven until it just begins to brown(15-18 minutes). remove from oven and allow to cool.
brown butter filling
3 large eggs
1 1/4 cup sugar
1/2 tsp salt
grated zest of 1 lemon
juice of 1/2 lemon
1/2 cup + 2 Tbs unsalted butter
3/4 cup + 2 Tbs flour {whole wheat or all purpose}
1 teaspoon vanilla
place the butter in a saucepan and cook on low heat until it becomes brown and nutty, careful not to burn. whisk together the eggs, sugar, salt, lemon zest, lemon juice, flour and vanilla. carefully stir in the browned butter.
to assemble
spread about half of the browned butter mixture on the prepared crust. dollop about 3/4 of the jam on top. spread the remaining browned butter filling and then dollop the remaining jam. bake for about 25 to 30 minutes, until the edges just begin to turn brown. do not overbake, (allowing the filling to souffle). allow to cool before cutting into bars.
delicious room temperature or directly from refrigerator.
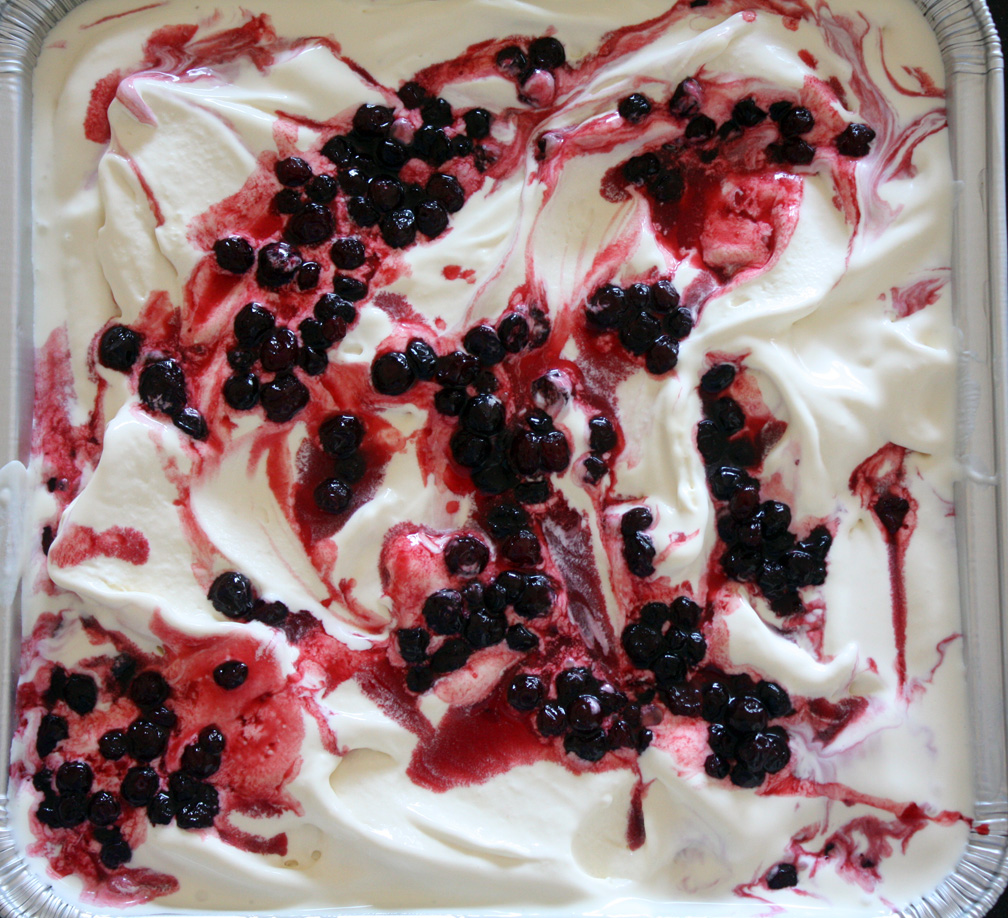
Huckleberry Ice Cream
On July 5, 2013 by sixtyacrebakerHuckleberries are hard to come by. Competing with bears after a long hilly hike, just ain’t my thing. Luckily, those whom are “into it” are willing to share; with one little caveat, my dealer, is 1200 miles away. Traveling for a case of berries. Now, that is my thing. Huckleberries are a bit like blueberries, with more punch of flavor. Sweet with a tinge of sour, no pucker. Just enough to wet your whistle. This gorgeous purple berry cuts rich vanilla ice cream perfectly.
Huckleberry Ice Cream
(vanilla base recipe adapted from David Lebovitz)
vanilla custard
1 cup whole milk
generous pinch kosher salt
3/4 cup granulated sugar
2 cups heavy cream
7 large egg yolks
4 tsp good vanilla extract
huckleberry swirl
1 1/2 cups huckleberries
1/2 cup granulated sugar
1 Tbs lemon juice
Heat whole milk with 1/2 cup of sugar, and kosher salt. Meanwhile whisk egg yolks with remaining 1/4 cup of sugar. Once milk comes to a simmer, slowly pour into the egg yolk mixture, whisking constantly. Quickly rinse the milk saucepan to remove any dried or burnt milk. Transfer warm egg mixture back into the saucepan and cook on low heat, constantly stirring with a spatula. Watch carefully, as to not overcook the eggs. Cook and stir just until the mixture coats the spatula (consistency of a light crepe batter). Remove from heat and run through a sieve into a clean bowl. Stir in heavy cream and vanilla. Place entire bowl into another bowl filled with ice and cool water. Stir until it is cooled to room temperature. Pour mixture into a covered container and refrigerate at least 4 hours, but preferably overnight.
make huckleberry swirl
In a small saucepan, place berries, sugar and lemon juice. cook until the berries throw off juice and all of the sugar has melted, then cook for about 10 minutes more..keep the heat low, you don’t want to burn the sugars. Mash the berries slightly (you will want some whole, some mashed). Allow to cool and refrigerate until ready to freeze the ice cream.
when ready to freeze
Place vanilla base into the bowl of your freezer. Freeze according to manufacturer’s directions. When your ice cream is finished…remove into your freezer container. As you scoop into your freezer container, layer with your huckleberry swirl. This will allow you to have a true swirl. If you put the huckleberry swirl into the mixer, it will completely mix in. Continue to layer adding as much huckleberries and juice as you wish.
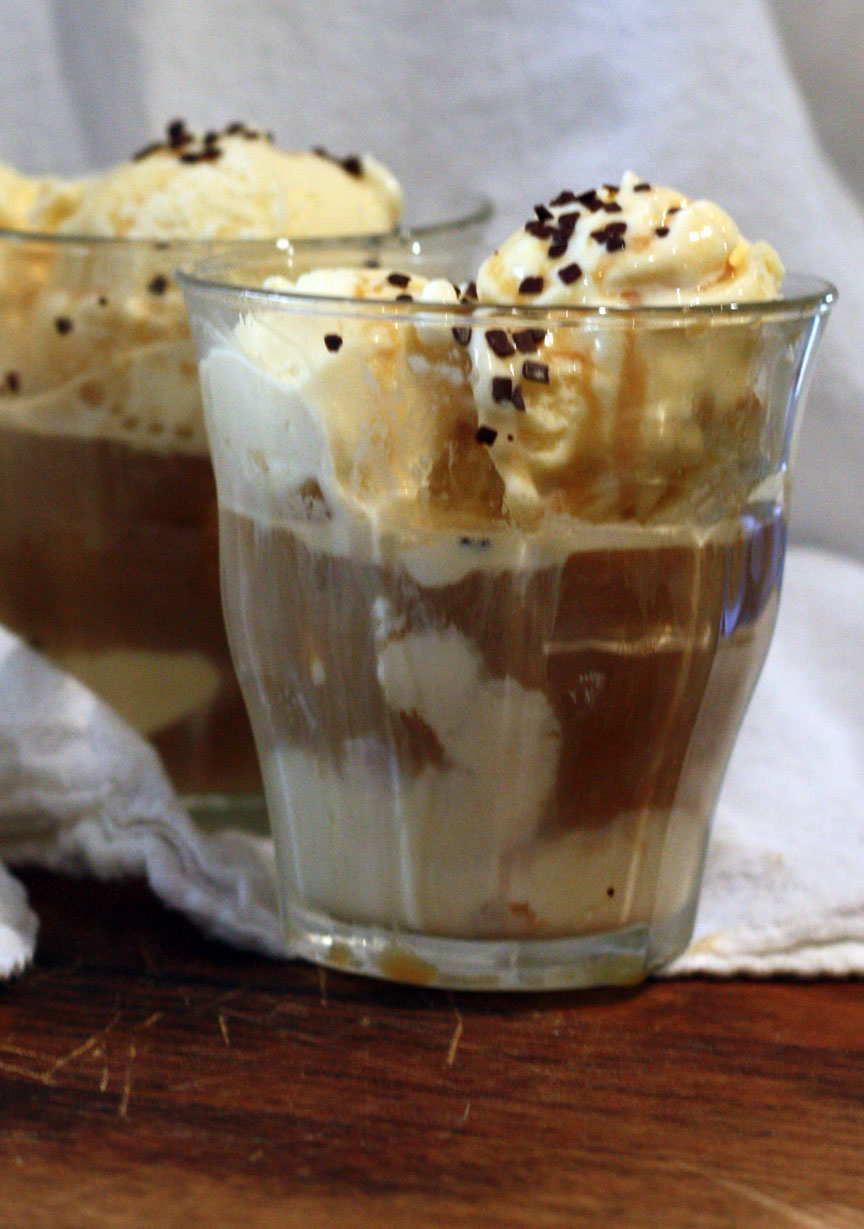
Affogato
On February 28, 2013 by sixtyacrebakerSometimes afternoons call for a snack; a pick me up that is both frozen and warm, and punched with caffeine. When the mood strikes, fix yourself one of these.
Affogato
vanilla ice cream
shot of espresso
This is not a sundae…nor it is meant to be a huge dessert. use a nice vanilla ice cream and give yourself a nice size scoop. While your shot of espresso is still warm (but not piping hot), pour over the ice cream. The espresso will melt the ice cream, so don’t linger too long….
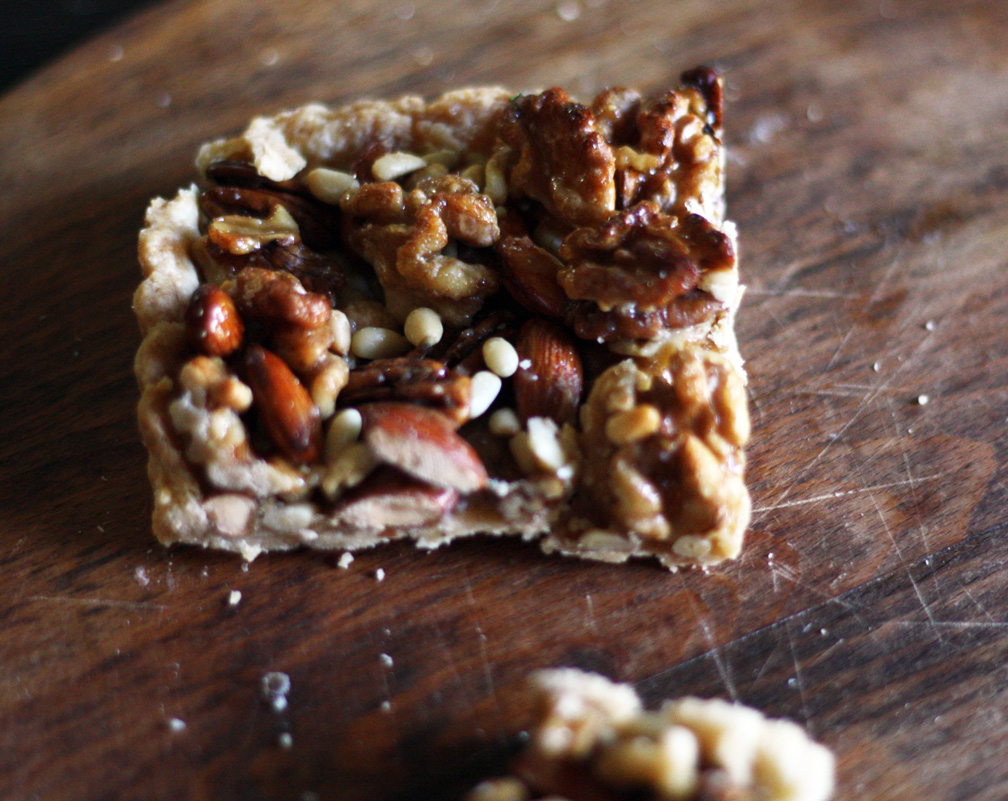
Simple Nut Tart
On November 10, 2012 by sixtyacrebakerDinner parties stump me sometimes. Being that I am trained in pastry, there is a certain expectation that dessert will be served. Andit will be from scratch. Normally not a problem, but i don’t always want to finish
with a substantial & heavy dessert. Sometimes a simple nut tart served with strong coffee and paired with a bowl of clementines, is just the trick.
Simple Nut Tart
1 pastry crust, pressed into an 8″ square tart tin–baked blind
1 cups walnut–toasted
1 1/2 cups pecans–toasted
1 cup almonds–toasted
1/2 cup pine nuts–toasted
1/2 cup dark brown sugar
1/4 cup granulated sugar
2 Tbs honey
1/2 tsp kosher salt
1/4 cup water
1 oz whiskey
preheat oven to 350. place all nuts in a large bowl and mix until well combined. put brown sugar, granulated sugar, honey salt and water in a heavy saucepan. stir well, place on medium heat and bring to a simmer. allow to boil for about 3 minutes. carefully add the whiskey and bring back to a boil. boil for 2 more minutes. the sugar should get a bit syrupy, but should not smoke or turn excessively dark. keep a constant eye on the sugar. remove the sugar from heat and tip in the nuts. stir well, giving each nut a coat of syrup. immediately tip into the baked crust, gently and spreading to cover the entire crust. pop into the oven for 5-7 minutes. remove from oven and allow to cool before serving.
variations
-add orange juice in place of some water in caramel; a pinch of orange zest & a sprinkle of cinnamon to the nuts
-the addition of fresh rosemary when stirring the nuts into the caramel (light hand) make for a beautiful winter tart
–drizzle with bittersweet chocolate or drench in dark ganache
-substitute vanilla for whiskey