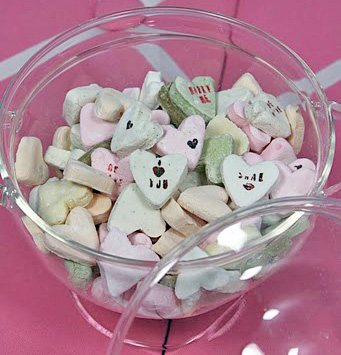
Homemade Conversation Hearts
On February 5, 2015 by sixtyacrebakerValentine’s day wouldn’t be complete without a conversation through candy hearts. I remember the days when hearts were carefully shared, making sure “i love you” didn’t get inadvertently passed, to a 4th grade crush. Also important: sharing only
the good flavors. Anyone would shudder to see the object of her affection, chewing up and spitting out her heart. Ten years old is too young to fully understand foreshadowing. I am confident any valentine would appreciate an “i love you” or three in flavors such as orancello, coconut, green tea, almond, anisette, coffee and vanilla bean. These are so much fun to make. I think a robin’s egg blue box full of “marry me” hearts would be a darling proposal. Or a love poem stamped out word by word, heart by heart, snaked down the dining room table, as a simple but thoughtful centerpiece. The possibilities are endless.
Just. Like. Love

Conversation Hearts
1/4 oz gelatin
1/2 cup water
2 tsp light corn syrup
2 lbs powdered sugar
cornstarch
flavorings
color
rubber stamp kit and/or food color pens
Place water in a bowl and sprinkle gelatin over. Let bloom. Add the corn syrup and gently cook in the microwave until the gelatin and corn syrup have melted. Do this in 20 second intervals. Mix the gelatin mixture into about 2/3rds of the powdered sugar. Knead with your hands, adding more powdered sugar as necessary until the dough is satiny and doesn’t stick to the counter. Divide the dough into 6-8 pieces, coloring and flavoring as desired. Keep tightly wrapped in plastic wrap, as this dough will dry out quickly. Keep some powdered sugar on hand, in case adding color and flavor makes the dough sticky.
Roll the dough out and cut with small heart cutter. Place on a cornstarch dusted sheet pan and let dry a minimum of 48 hours. When ready to decorate, use food color based pens, or brush food coloring directly onto a rubber stamp with the words spelled backwards. Press the heart onto the stamp and let dry about 15 minutes. You can also paint food coloring directly onto the heart as well.
{this is a post transcribed from my blog fudgeripple. the content exclusively belongs to me}
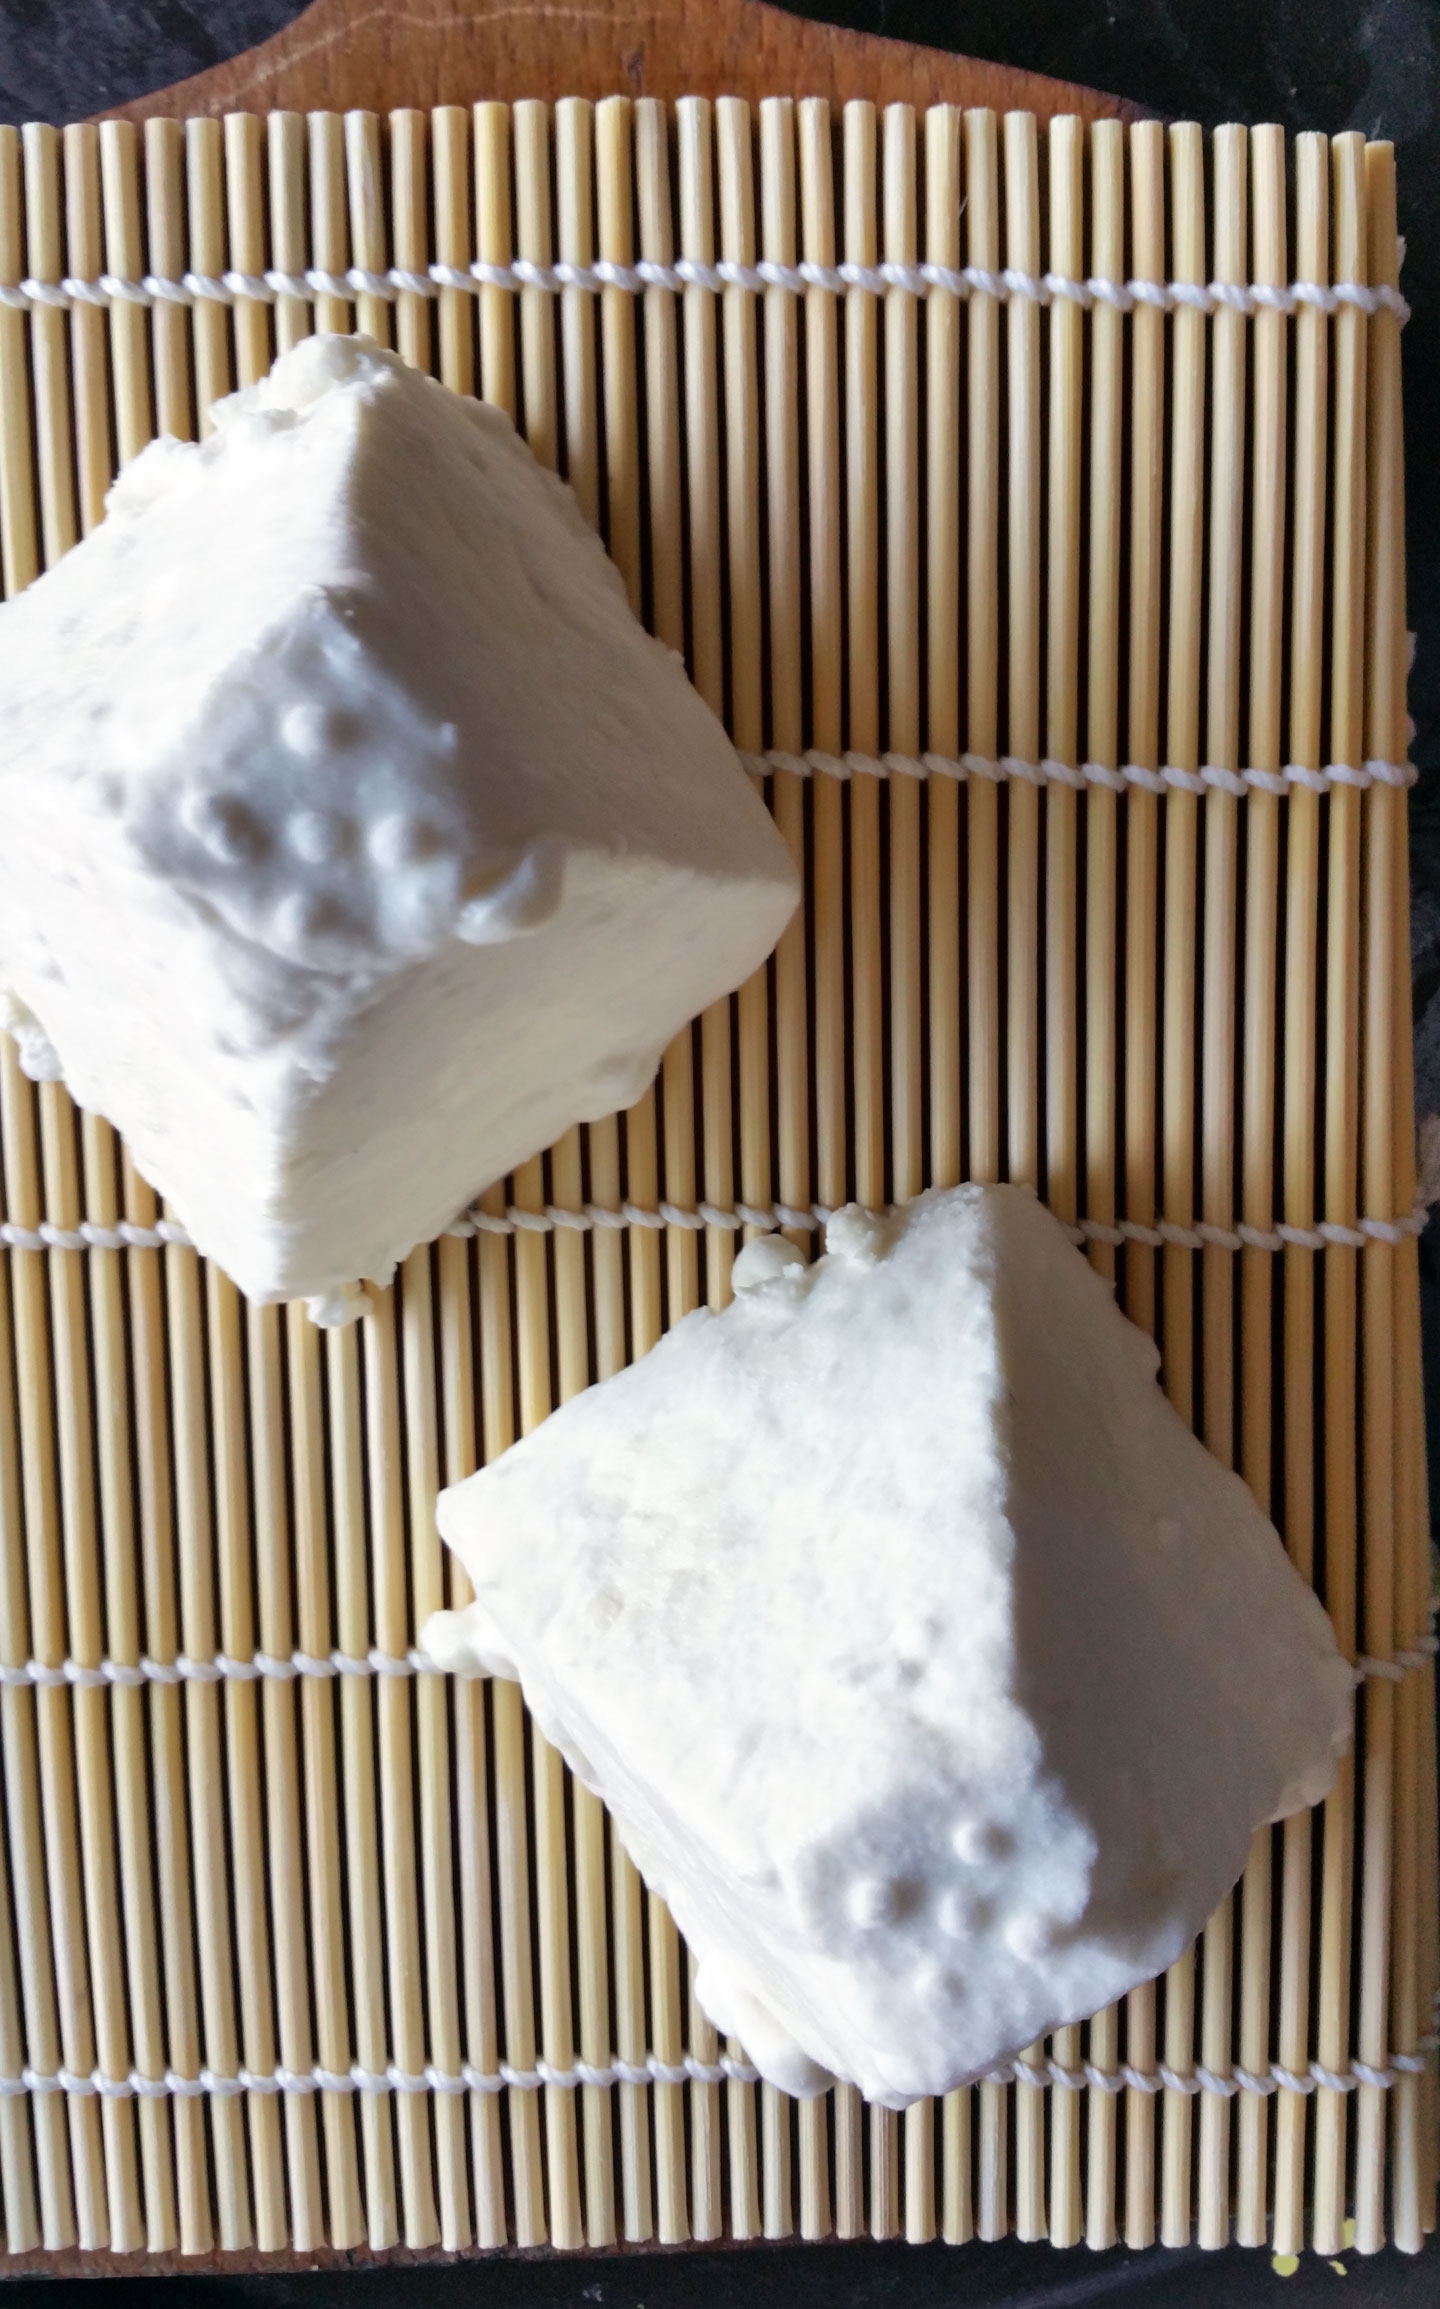
My Cheesy Manifesto
On January 15, 2015 by sixtyacrebakerThere is a huge difference between following a recipe and understanding why the recipe follows the path it does. Cheese making is a blend of science and art. I have been making cheese for quite sometime. I have success, and I have failure. The problem was that I didn’t really understand why; if following the same process time and time again, the results would prove different. The variables in cheese making are complex. There are ways to nurture the natural bacteria in milk and ways to try and beat them at their own game. But until I understood the difference between; morning milk and afternoon milk, winter milk and spring milk, high fat milk breeds and low fat milk breeds, raw and pasteurized milk, acceptable coliform and scary coliform, my experiments in cheese making would continue to be hit or miss. I took a short-course this past week that help me discern the difference. I came away with an understanding of the need to be flexible, while adhering to strict protocol. Sound confusing? Well that is because it kinda sorta is.
I’m going to be painfully honest. I don’t really even like cheese that much. As I write this, I am averting my eyes from the gaze of those words. I am ashamed. Let me clarify. I don’t hate cheese, I like it in small amounts and when it has good flavor. I’m into a good sharp cheddar, or truffled chevre, even a nice chunk of parmesan lights my world. However, I’m that girl that, when ordering french onion soup, asks them to go light (or not at all) on the gooey cheese top. I’m also the one that sneers at the over-cheesed pizza and grated cheese on a side salad. Rather humorous that I’m working so hard to get our goat herd up to level, so I can milk them to make cheese, no?
No.
I want to make good cheese. Cheese that makes its impression in small amounts. Cheese that you don’t have to eat an entire wheel of to realize you just ate cheese. Cheese from beautiful animals raised on quality grass and feed, with a nice life. I’d say happy. But I’m not sure how to measure happy in a ruminant. They aren’t miserable…that I know.
To make good cheese, so much has to happen even before the milk hits the creamery. Cheese making is the truth in “farm to fork” manufacturing. The most valuable thing I have learned, and it sounds really hippy dippy, is to let the milk tell me what kind of cheese to make. Yes, I can force and manipulate to get a facsimile of a type of cheese I like. That is the science. However, right now my plan is, to let the milk tell me what kind of cheese it should be. I’m going to sit with that for a while, as I make my plans for our little dairy business.
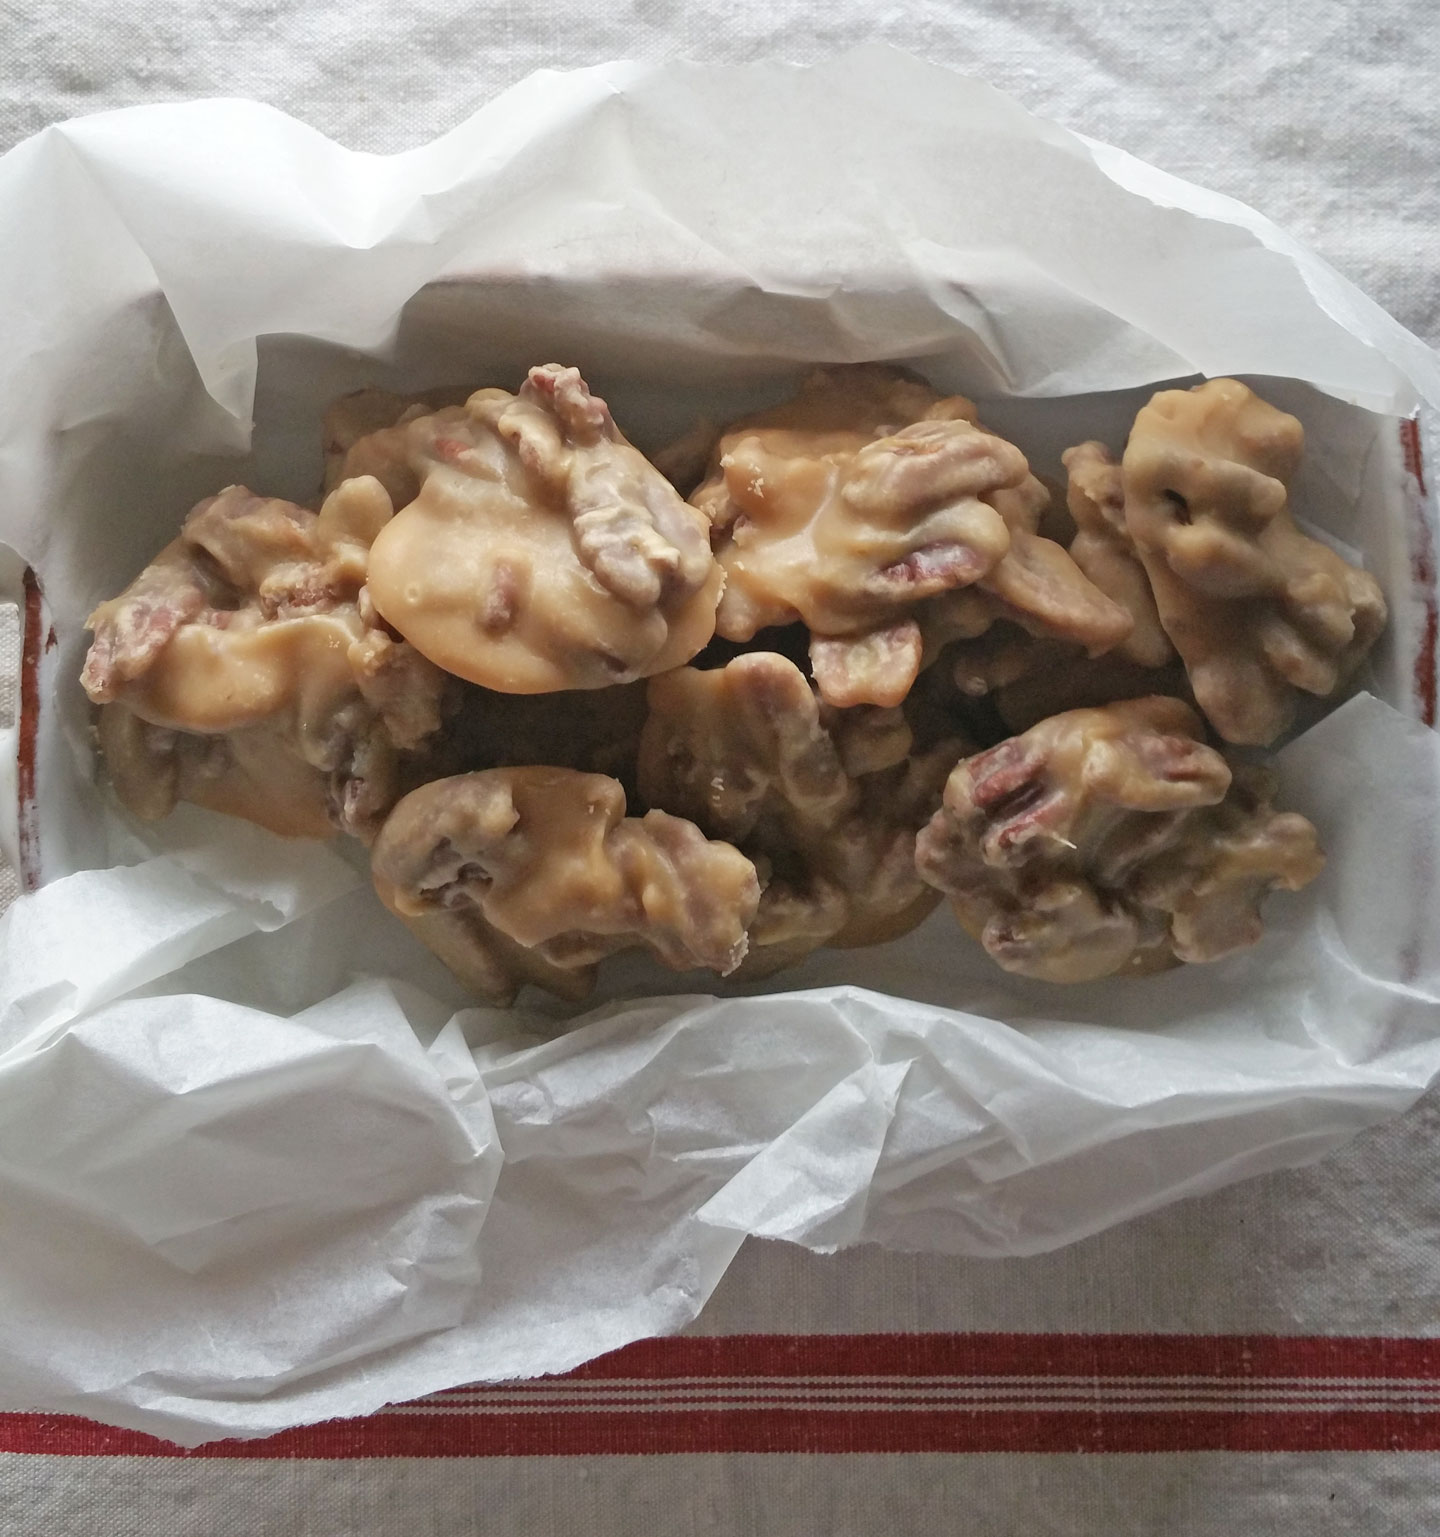
Pecan Pralines
On December 15, 2014 by sixtyacrebakerPRAWWWWWWlines. Say it with me, and then get in the kitchen and make some. You won’t be disappointed. I Guarantee It.
This recipe came from my love of the sweet confection. I have been obsessed with the treat since my first visit to New Orleans way back when Emeril had a last name. I printed this recipe and a story to go with it on my previous blog, but they are so good, I thought they warranted their own page on Sixty Acre Baker. They make a perfect holiday (or any time of year, really) gift.
Pecan Pralines
1 quart heavy cream
3 cups granulated sugar
generous pinch of kosher salt
1 1/2 lbs toasted pecans
1 Tbs+ 1 tsp lemon juice
1 Tbs unsalted butter
2 tsp vanilla
In a heavy bottomed pan, stir together the cream, sugar and salt. Place on low to med-low heat and pop in a candy thermometer. Cook until thermometer reaches 234 degrees F. The wait between 220 and 234 is lengthy..don’t be tempted to up the heat to make it happen faster. You can pretty much leave it alone until it reaches 220, at 220, stay in the kitchen checking on it frequently. When it hits 230, watch it and start stirring, it will start to change colors at this point and you want to make sure the bottom doesn’t burn. There will be brown bits, but just mix them in. Stir, stir, stir. When it hits 234, take the pot off the heat, remove the thermometer and add the lemon juice, vanilla, butter and pecans. Stir to incorporate, then pop the thermometer back in and bring the temp back to 234. It will go a bit faster this time, keep an eye on it and stir continually to prevent burning on the bottom. When it hits 234, spoon it out in dollops (i use a soup spoon),onto parchment lined cookie sheets, or aluminum foil that has been sprayed or greased lightly.There are a lot of pecans in this, so make sure you get a nice mix of the caramelly goodness. One batch will make about 50 moderately sized pralines. They will look like caramel until you cool them. As they cool and sit, they will begin to get a bit cloudy. That is a good thing. You are not looking for chewy here.
Let cool for a few hours. They will keep for quite a while if you keep them in an airtight container in a dry place. Please, do not put in the fridge.

After the Rain
On December 13, 2014 by sixtyacrebakerWe’ve been having a bit of weather here lately. We are in the Central Coast of California and have been in serious drought conditions. The recent rains are welcome, but challenging as well. We’ve had a lot of dirt, and now we have a lot of mud. Keeping the house clean is the least of my worries, but the biggest of my annoyances. We’ve outfitted a large canvas tent for our overnight guests. With the temps dropping, we recently installed a wood-stove to keep the tent warm and cozy. Last night, along with the rain, we had some pretty rough winds. They were so strong, they blew the cap off the wood-stove pipe and the tent fly. As a result the woodstove filled with water, and we had some moisture in the tent. All was easily remedied by draining out the water and starting a good hot fire. I may have taken a wee little afternoon nap; arising just in time for this beautiful scene.
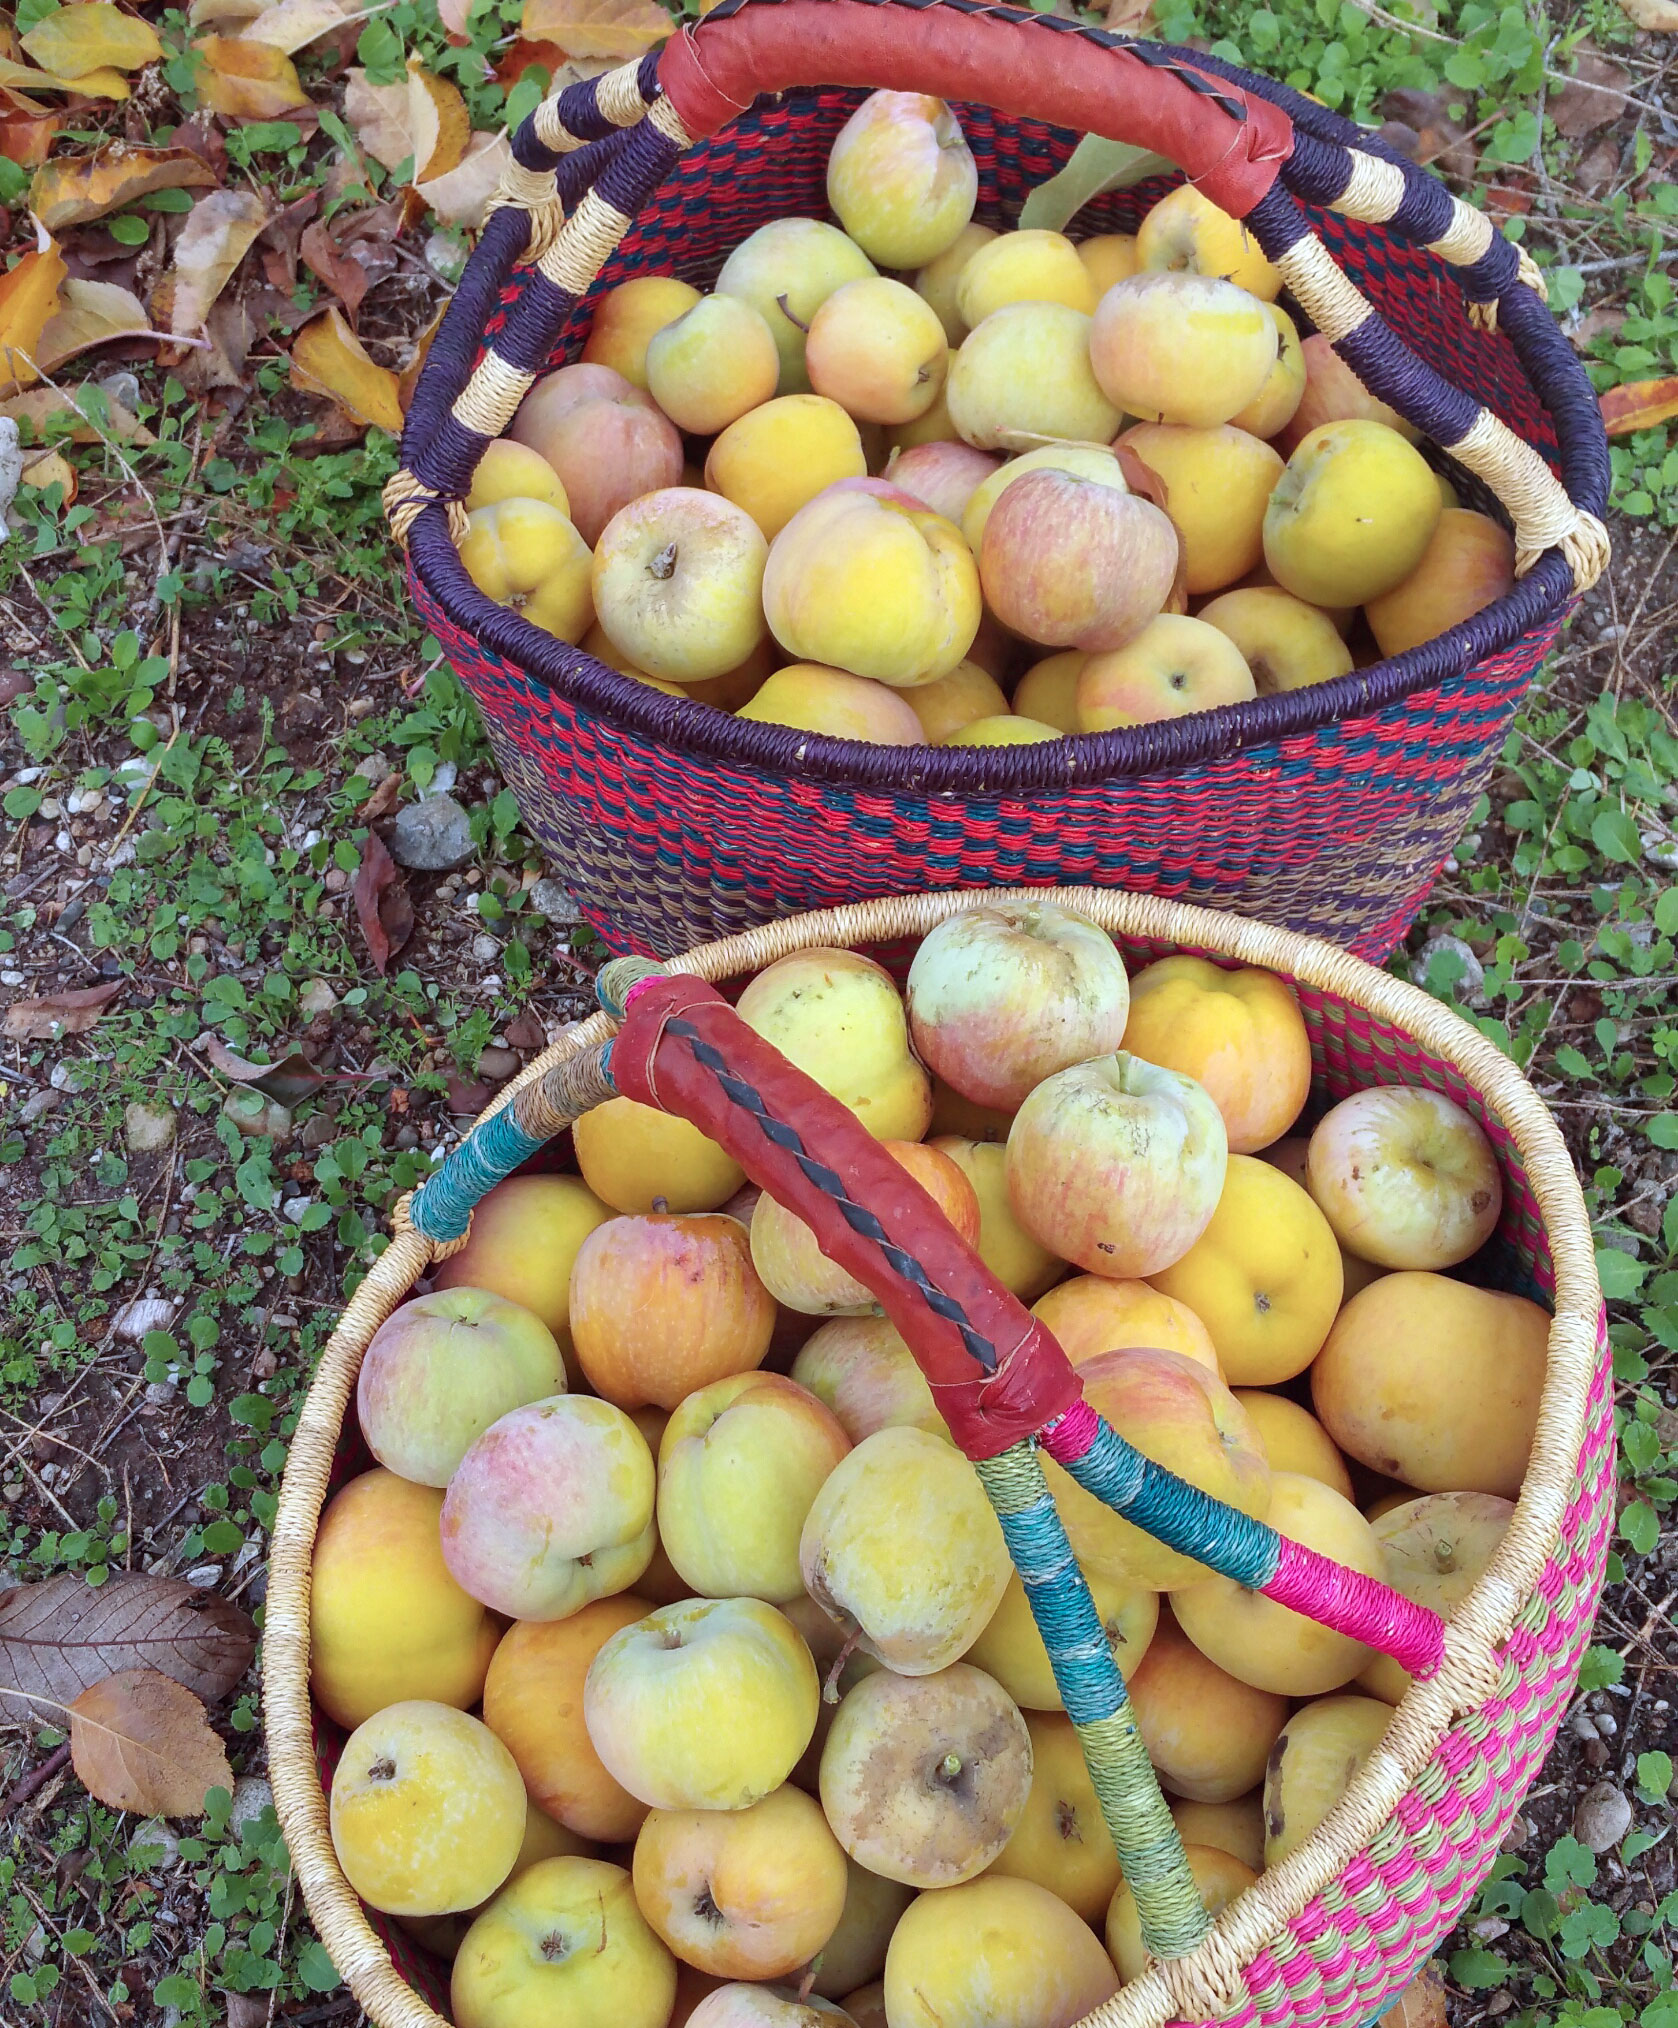
Apple Fritters
On December 7, 2014 by sixtyacrebakerMike planted 20 plus varieties of apples in our orchard. We have pie apples, sauce apples, snack apples, brandy apples and cider apples. To further the cause, our neighbor also grows a variety in her orchard. We are not starved for apples from late spring to early winter. Today, in the dense of early morning mist and chill, I picked the trees clean. Bushels and bushels of apples. A workout and a treat! These apples are slated for hard cider. I’m still gathering all of the supplies, but I will be pressing the apples this week, and starting the fermentation process straight away. I’ll keep you posted on the progress. With any luck it won’t end up like the root beer project of 2005. Spoiler alert, it ended with me in a delightfully rich, if not sticky, bath.
While you (and I) are waiting for the results of the cider…you may want to try making these delicious apple fritters.

Apple Fritters
for the apples
1 cup apples–cut in a 1/4″ dice
1 Tbs sugar
1 Tbs lemon juice
pinch cardamom
pinch nutmeg
pinch cinnamon
mix together in a bowl and let sit while you do your preparations
for the batter
1 cup apple cider
2 cups flour
1/2 cup sugar
1 tsp kosher salt
1 Tbs baking powder
1/2 tsp cinnamon
1/2 tsp nutmeg
1/3 cup milk
1 tsp vanilla
3 Tbs unsalted butter–melted
2 large eggs
oil for frying
Simmer the apple cider on the stove until it is reduced to 1/4 cup, and let cool. Heat your oil in a sturdy deep pot, to 360F. Your oil should be deep enough so the fritter can float, but you must also have at least 3″ between the top of the pot and the top of the oil. Meanwhile, place all your dry ingredients in a bowl and whisk to combine. Make a well in the center and pour in milk, vanilla, butter, cider and eggs. Slowly stir together, making sure all ingredients are incorporated, but do not beat. Stir in the apple and any juices that may have accumulated. you can make these small or big, the process is the same. Drop into hot oil and then using a spatula poke it a few times to flatten it a bit and give it some nooks and crannies. Fry until golden brown, then flip and continue until both sides are equally colored. Remove from oil and place on a cooling rack, placed over a sheet pan.
for the glaze
1 cup powdered sugar
2 Tbs (more or less) cider
Mix together in a shallow bowl. When the fritters are still warm, but not too hot to touch, dip in the glaze.
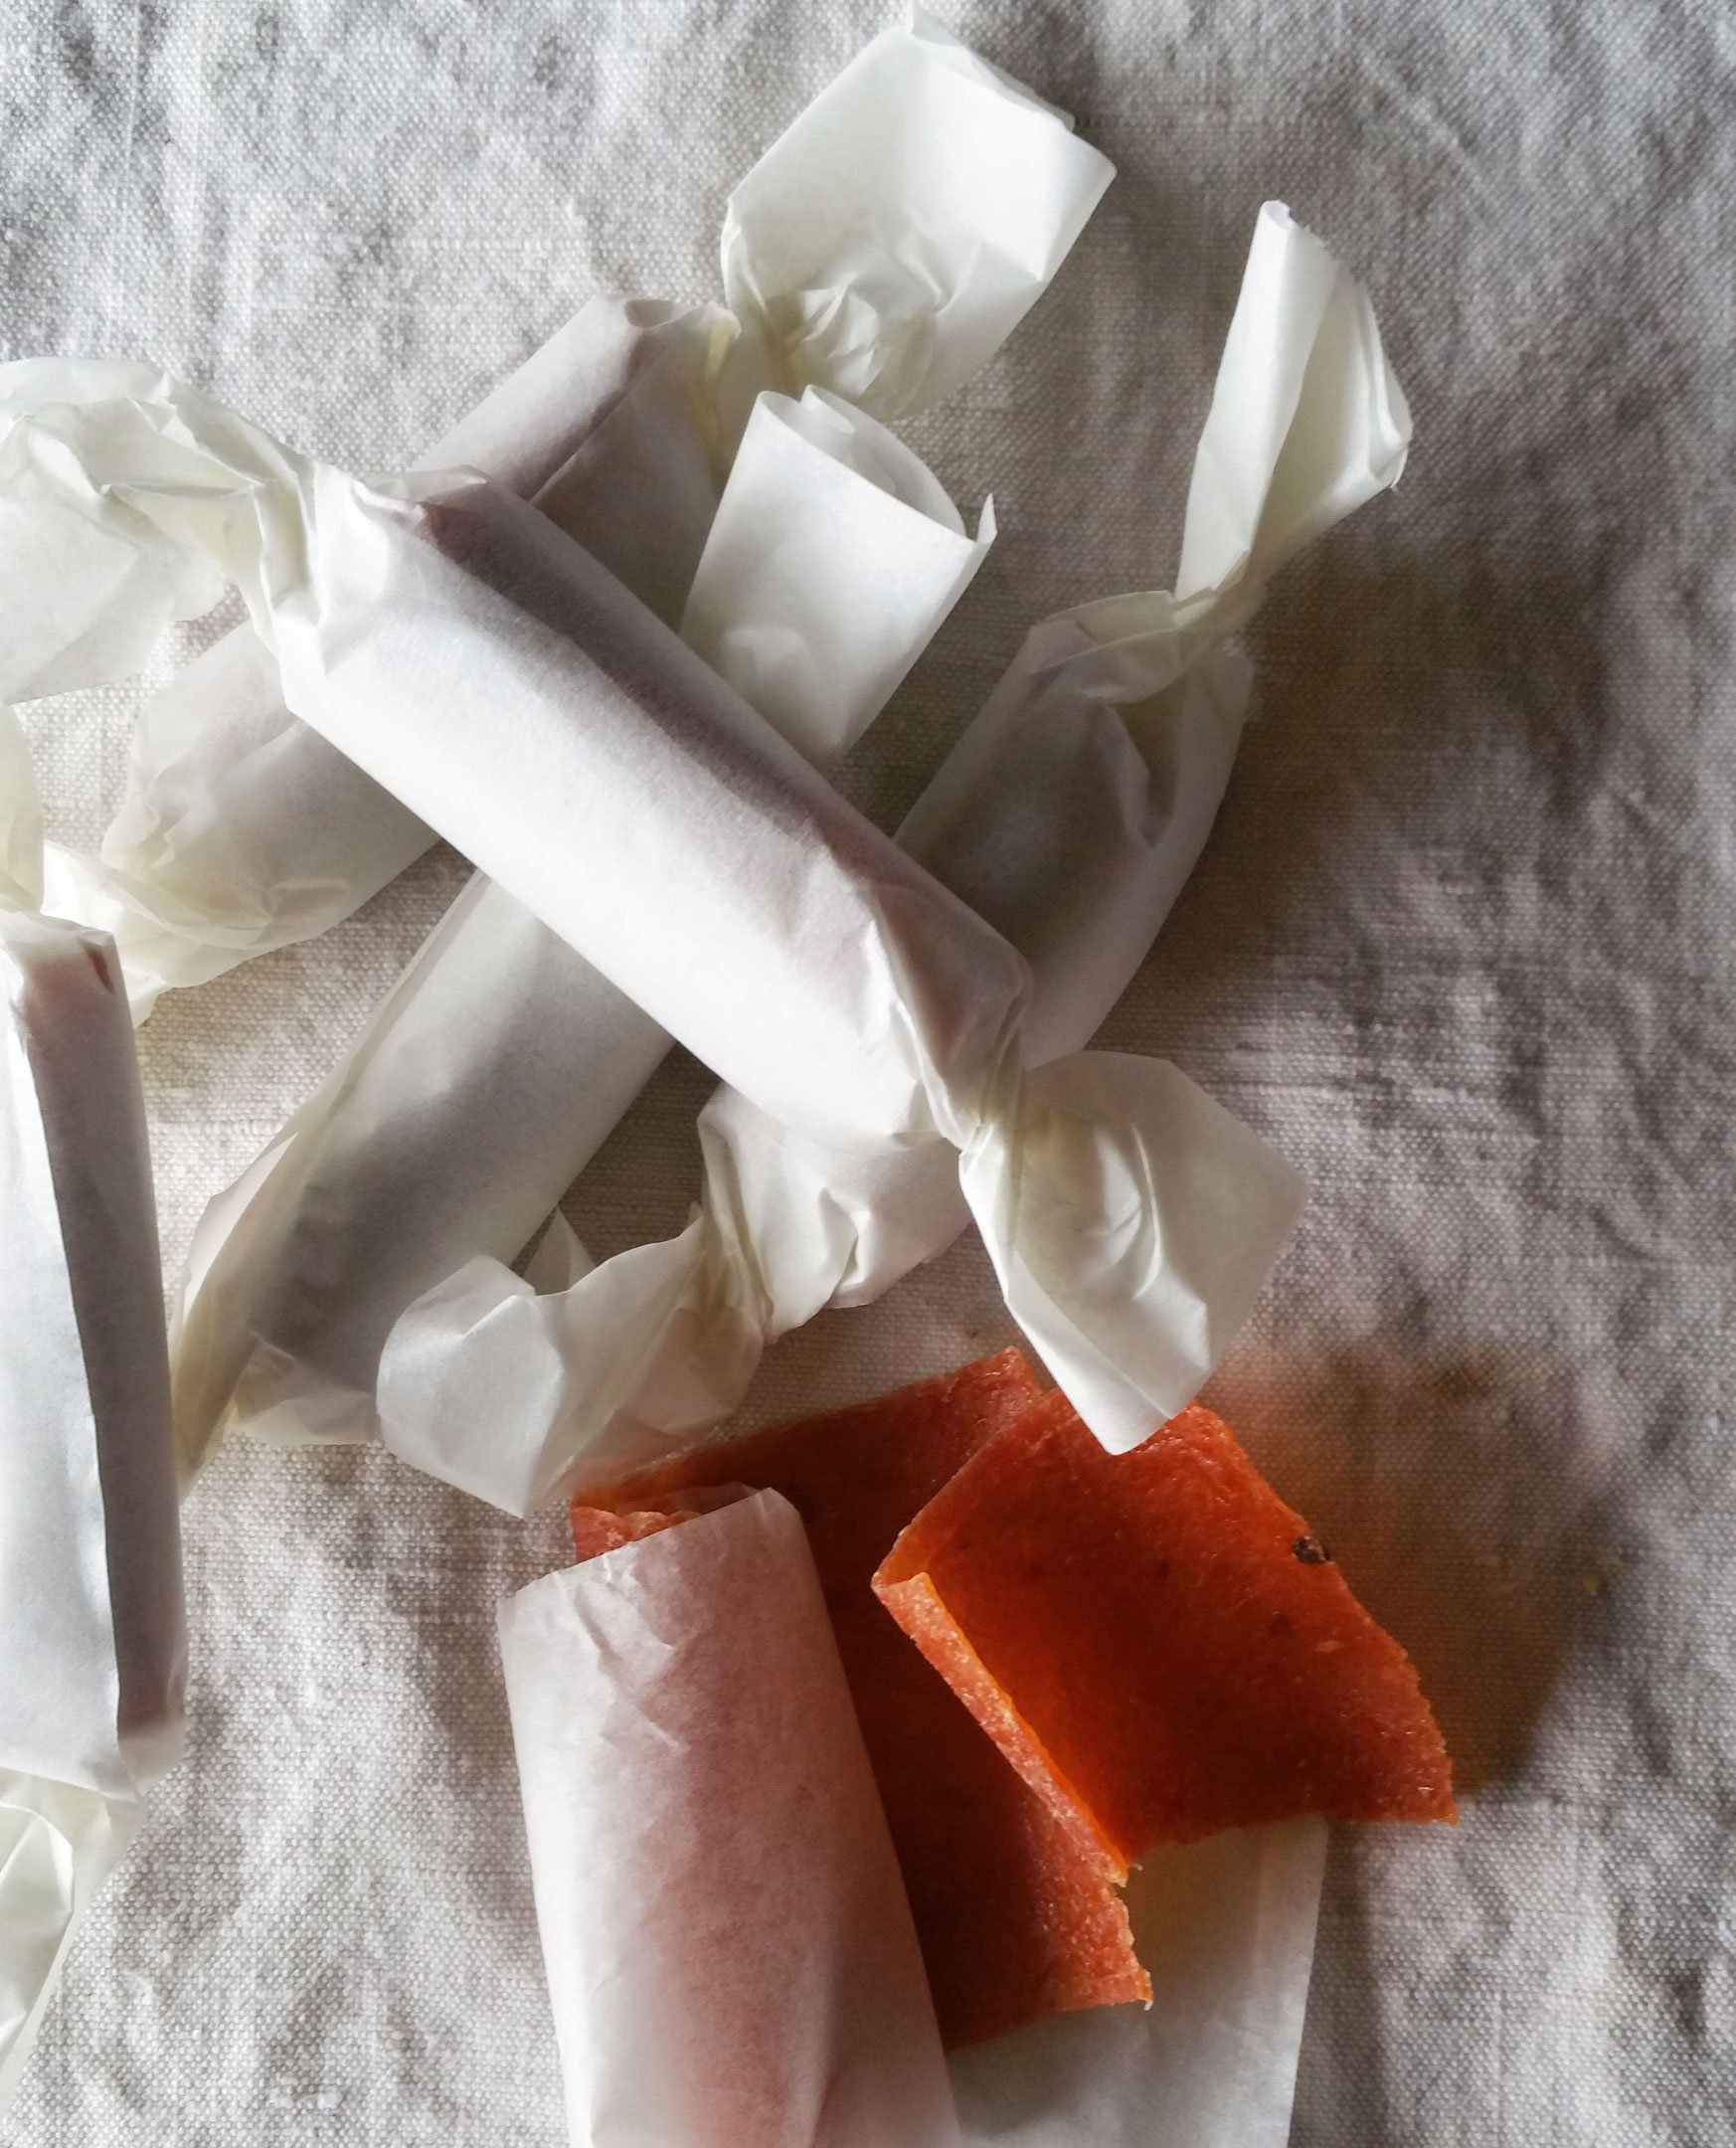
Quince Fruit Leather
On December 5, 2014 by sixtyacrebakerAs a kid, I brought a sack lunch to school every day…as did most of my classmates. What I would never find packed in my lunch were modern day snack foods. I was always trying to trade up for fruit roll-ups. Oh how I loved them. The whole thing…the sound the leather made while being ripped off its backing. Eating it piece by piece…or better yet…making a dense chewy mini roll-up which would burst with flavor at every gnash. Apricot was always my favorite. I would trade my best halloween candy for a roll of apricot.
I learned to make fruit leather in fancy french culinary school. It was a bit of a production; mostly because it was fancy culinary school. Making fruit leather is simple and easy, and extremely satisfying. I love it because it gives a use for the “dregs” from another product: the pulp from jelly making, juicing, and simple syrups. I made a lovely quince sorbet as a palate cleanser for our Thanksgiving dinner {recipe coming soon}. I boiled down the beautiful fruit and extracted a lovely pink elixir. At the end of it all, I was left with a bundle of fruit. It was a bit chunky, and was lacking sweetness. With just a little bit of flavor tweaking, and a good dry out in the dehydrator, I was able to make a roll-up that was better than the memory of my youth and cheaper than culinary school tuition. Once you have the method down, you can make leather with all your favorite flavors. You also will be glad to know that having a fancy dehydrator, while a great convenience, is not required to make this tasty treat.
Quince Fruit Leather
2-3 lbs quince
juice of 1/2 lemon
seeds from 3 cardamom pods
1″ ginger root, peeled and smashed
1/2 cup granulated sugar (optional: I find that it helps bring out the pink color of the quince when cooking)
piece of parchment paper
additional sweetener (sugar, brown sugar, honey, agave; your choice)
ground cardamom, ground ginger
Wash fruit well and scrub off all fuzz from exterior. Chop quince into chunks (about 2″ each). Place in a heavy bottom pot and cover with water. Add lemon juice, cardamom seeds, ginger root. Cut your parchment paper into a round large enough to cover your pot Cut a small hole in the middle of the parchment round for venting. Place the parchment snugly on top of the quince. The purpose of the parchment is to keep the fruit submerged under the liquid. Cook until the fruit is very soft and falling apart and the color has changed from yellow to pinkish. The longer you cook, the more color you will get from the fruit. Blend everything together using an immersion blender, blender, food processor or food mill. Drain using a cheesecloth lined sieve or jelly bag. If you don’t want to drain the liquid out, toss the whole mess back into the pot and cook off most of the liquid. You don’t want the mixture to be completely dry, but you don’t want it to be so liquidy that you can drink it. Whether you drain or don’t drain, place the mixture you will turn into leather back onto the pot and taste for sweetness and spice. Don’t over sweeten. You will be dehydrating, which will make the flavor extra bold. Add enough sweetness and spice to highlight the flavor. You may want to add a bit more lemon juice at this point as well. Just cook long enough for the sugar to melt into the mixture.
You can use the drained for cocktails, homemade sodas, sorbet, over fruit, soaked in pound cake…
Prepare your dehydrator or sheet pans. If you have a dehydrator, line the mesh sheets with plastic wrap. If using oven, line with silpat or heavy plastic wrap. Using an offset spatula spread an even 1/8″ thick layer of fruit paste onto your prepared surface. If using a dehydrator or oven use a setting of 135-140F. It can take anywhere from 6-12 hours. Start checking up on it at 6 hours. The paste should have lost its stickiness, but not be hard. If it is hard, while still warm, it will be fruit crackle when it cools (which is still edible and yummy). I like to turn the dehydrator off at maximum of 8 hours and let the leather sit for a few hours or overnight.
Store in an airtight container…or fancy wrap them like the gift they are.
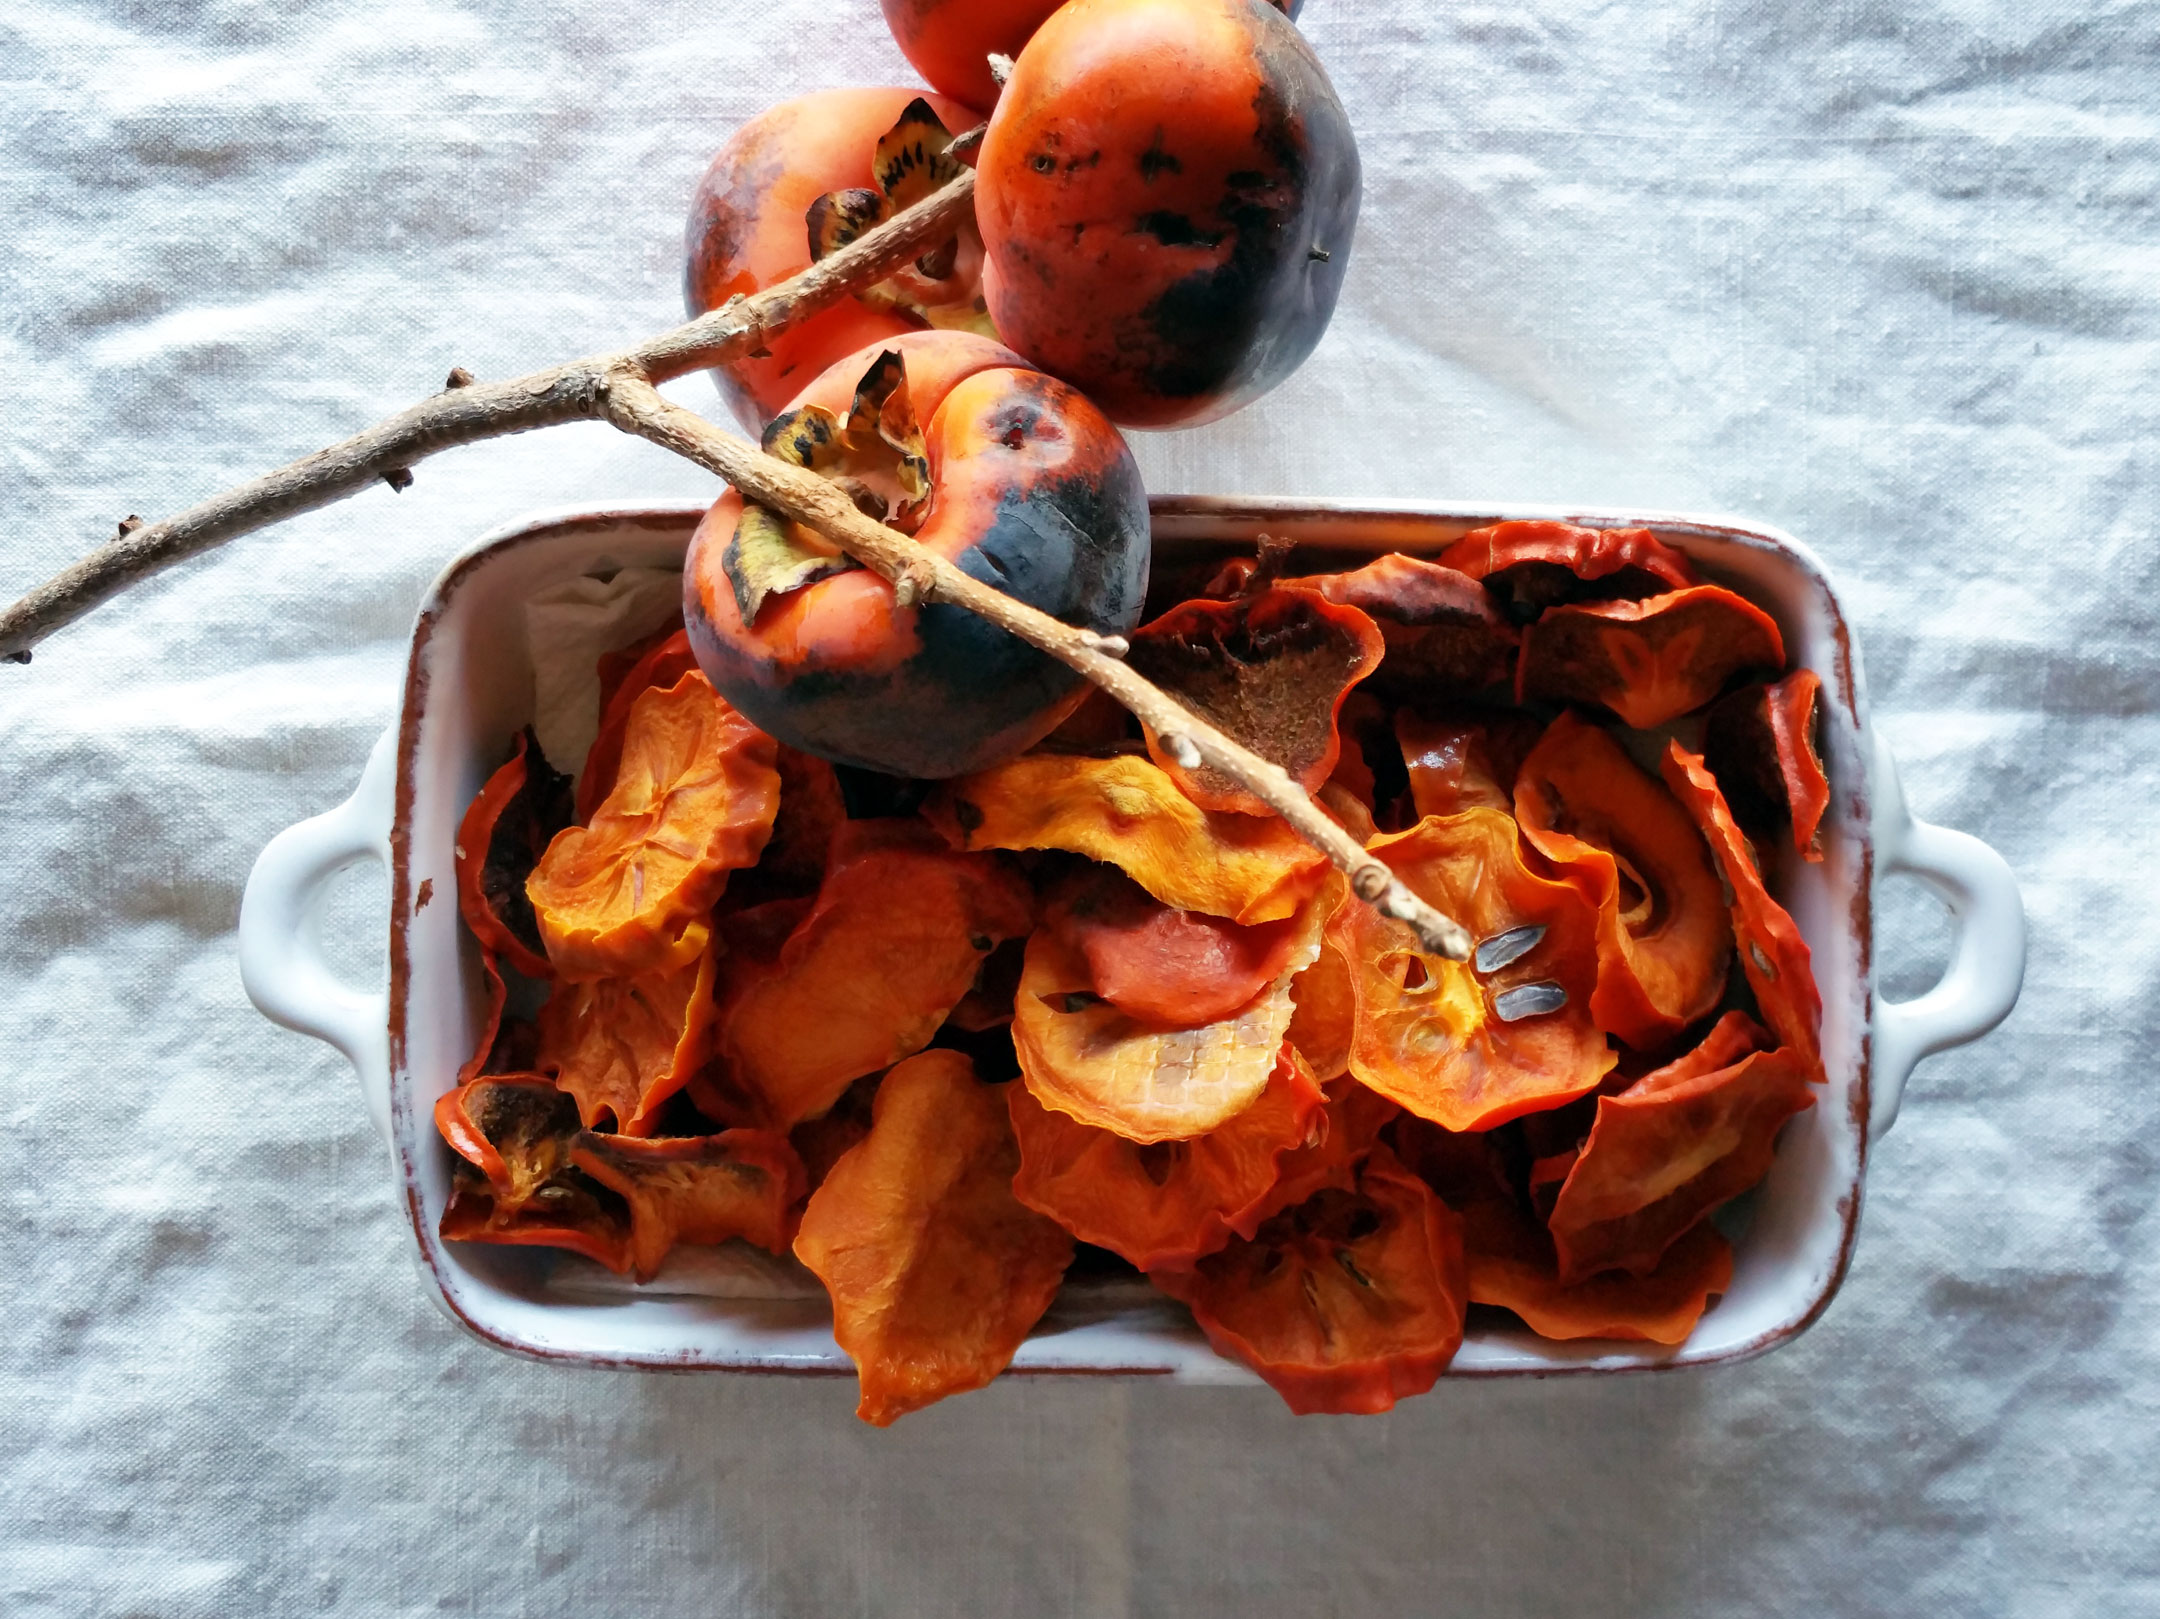
Dried Persimmons
On November 26, 2014 by sixtyacrebakerPersimmons seem to be a bit misunderstood. Some varieties need to ripen on the tree and be very soft, otherwise they are astringent, while others can remain very firm and be sweet. Personally, I prefer Fuyu persimmons. They do well in the area where we live, and grow abundantly through the fall. Firm and sweet, they are delicious off the tree, sliced in salads, frozen and enjoyed as an icy treat, and dehydrated into sticky sweet submission. To dry persimmons, you do not need a dehydrator, but it helps. If using a dehydrator, simply slice the persimmons in 1/4-1/2″ slices and set on the drying tray. Turn the heat of the machine to 130-135F for about 8 hours. Look at the fruit after about 6 hours to check on progress, they may be done. If not, check every hour until they are still a bit supple, but not wet. Leave to cool in the dehydrator for another 2 hours or so…or overnight.
If using oven: turn oven to lowest setting–preferably 130-135 if you can get it that low. Line your baking sheet with a silpat or parchment paper. Proceed as described above.
You may also choose to dry the persimmons whole. You can do that by tying baker’s twine, or other type of string to the stem of the persimmon. Tie one persimmon onto each end of the string. Prop a broomstick or other apparatus in a warm window sill. Hang the persimmon on the pole/broomstick/etc. The strings will hang over the middle with a persimmon on either side. After a day or two, give each persimmon a little massage, a gentle squeeze on all sides. Continue doing this each day until the persimmon has completely dried out and formed a bit of a sugary crust on the outside. This may take several weeks and is nearly impossible in damp conditions. If the fruit shows signs of mold, throw the fruit away.
Dried persimmon makes a wonderful sweet as candy snack. It is also great in granola, oatmeal, and trail mix. You can reconstitute with water for use in salads or tagines. Soak in wine and spices for a compote. The uses are almost endless
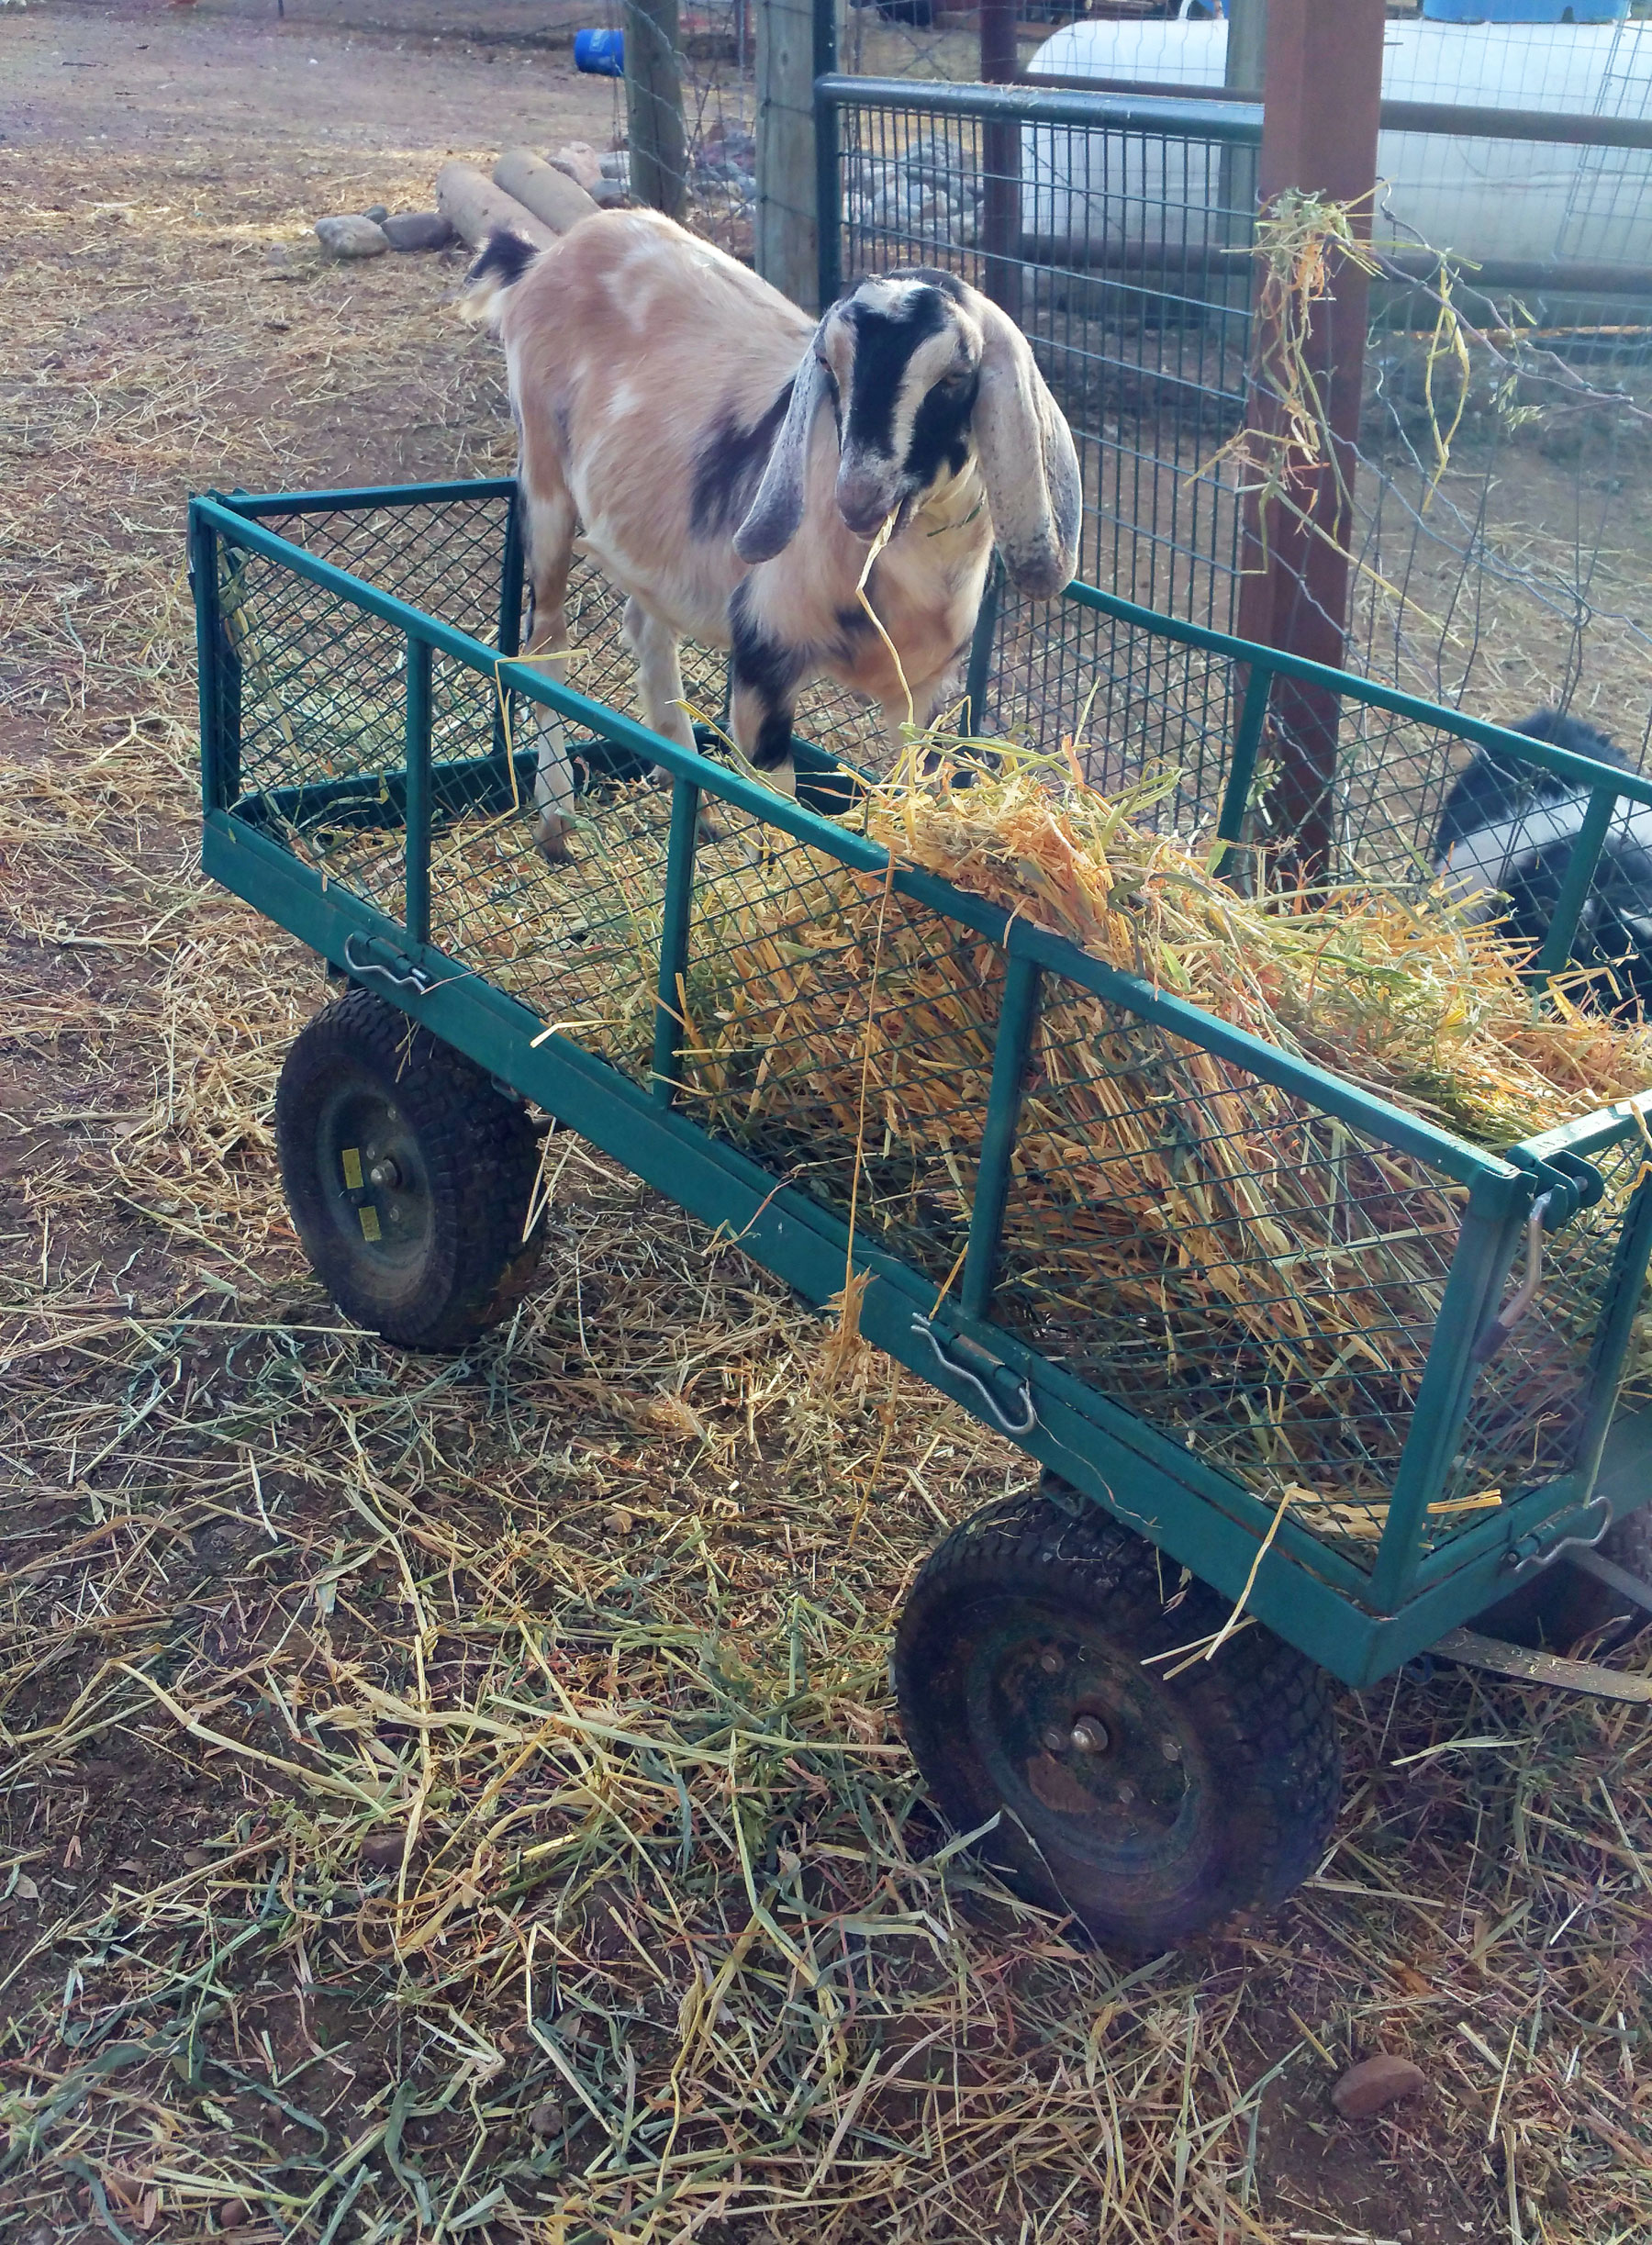
Pixie
On November 25, 2014 by sixtyacrebakerPixie is my pet. And when I say pet, I am talking in the context of favoritism. Although, some may argue that she is also our pet. Pixie was a preemie. Her dam was so confused about the whole situation that she actually dropped Pixie out while walking and basically never looked back. We tried to force a maternal instinct, but unfortunately because of her tiny size (less than 3lbs) we couldn’t take a chance that eventually her mom would start mothering. Pixie has a brother who was born first and bigger. He was able to get out of moms way when she rolled over, or mistakenly sat on him. Pixie just couldn’t do it. It took her a full two days to get her legs under her. Simply, she was weak and small and not going to make it. We put Pixie on a bottle and moved her into the house. She was on a every two hour feeding schedule, and lived in an beer case for the first week. She was my constant companion for the first month of her life…and I hers. As she grew stronger and bigger, we moved her in with the other goats during the day…in an attempt to socialize her. At 3 months old, we weaned her completely and put her with the herd.
She had a hard time making friends. Occasionally, we would see her play with the other doelings…but she didn’t have her mom to pal around with; while all the other kids have their mom. It was getting more and more noticeable that she wasn’t bonding with anyone, and her spirits began waning.
Seriously. I know it sounds odd, but it is true. Pixie was acting depressed. She no longer responded when we called her name, and recently she stopped eating. I was sure she was ill. I spent time with her each evening…sitting with her while she ate her dinner. But this past week she stopped coming to me. She would just stand in a corner and occasionally let out a sad cry. We’ve been so worried about her, fearing she was ill, and that we might lose her. Goats have a tendency to hide their illness until it is almost beyond repair. They are hearty, but fall quickly. A loss of Pixie would be difficult.
Mike suggested letting her roam about the yard with the dogs during the day. She was raised with the dogs in the house…so it was worth a shot. Maybe the dogs were her herd. First I let her out and had her follow me around for evening chores. She was like Eeyore. Her head was hung and she could barely handle the long walks between tasks. I was sure she was ill. Then, we let her in the yard first thing in the morning and had her wander about as she pleased. We took her temperature..normal, checked her for worms, no problem, and massaged her belly to give her rumen a kick-start. Signs were good that medically she was most likely okay. I gave her a double shot of a vitamin drench, and a handful of her favorite grain treat. And she sat in the yard barely able to lift her head.
A few hours passed and there was a noticeable change in her. She was on her feet and trying to devise a way to get on top of the hay pile. She was hungry and thirsty. When I walked the yard doing evening chores, she was at my side, skipping a bit. We let her sleep in the nursery with the baby lambs and their moms. The sheep are much less aggressive around food than the goats…and the lambs seemed to enjoy the prospect of having another playmate. Pixie found a peaceful spot to sleep and settled in for the night.
In the morning, as I was watching the sunrise through the bedroom window, I was startled by a tap at the patio door. Mike was already out doing morning feeding, and he had apparently let Pixie into the yard. She had happily bounded towards the house and was eager to say hi. We are so relieved, but still cautious.
She is eating well, jumping on tables and chairs and cars. She stops by the house occasionally to see what is going on and to grab a snack. She seems happy. The best part is, when we call her name, she calls us back. I am thankful that this story has a happy ending.
Although our animals all have a purpose on the ranch, and our goats are livestock, we care about them. They each have a distinct personality and respond to us differently. It is difficult not to get attached. Has heartbreaking as it is, I don’t want to be detached. I want to know all of our animals, and them to know us. I want their lives to be stress free and healthy. I am well aware that the day may come when we have to cull, harvest or slaughter our livestock. But until that day comes, they will have a good life. The best we can give them. Especially if they will end up on the table.
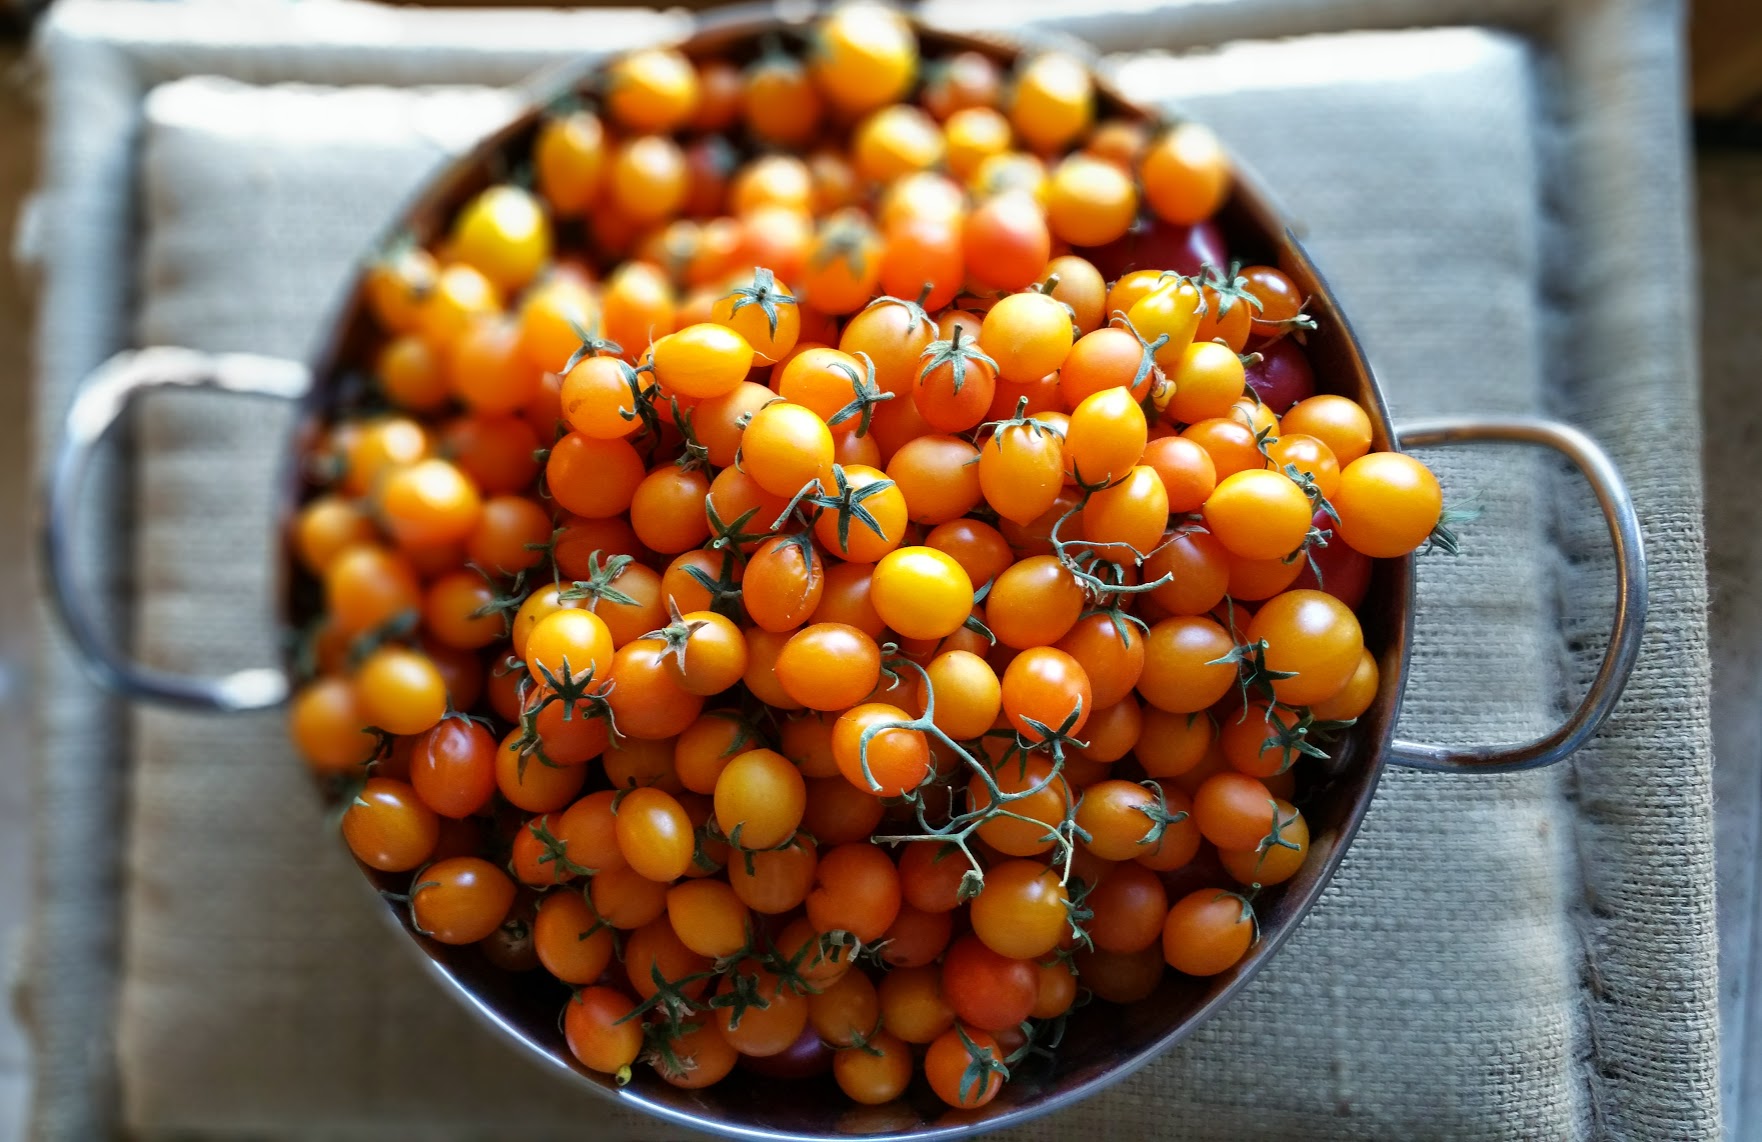
Tomatoes
On October 24, 2014 by sixtyacrebakerI have loads of these gorgeous, albeit small, tomatoes. My sink is a bath of hot soapy water, as I prepare jars for canning. My counter tops look as if a produce van exploded just outside the kitchen window. When it is all said and done, I will have plenty of jars for winter, as well as gifting. Question is…what shall I make? Tomato jam, sauce, chutney? So many possibilities. What I do know for sure is that I will be making a big jug of tomato infused vodka for the day after, the night before.
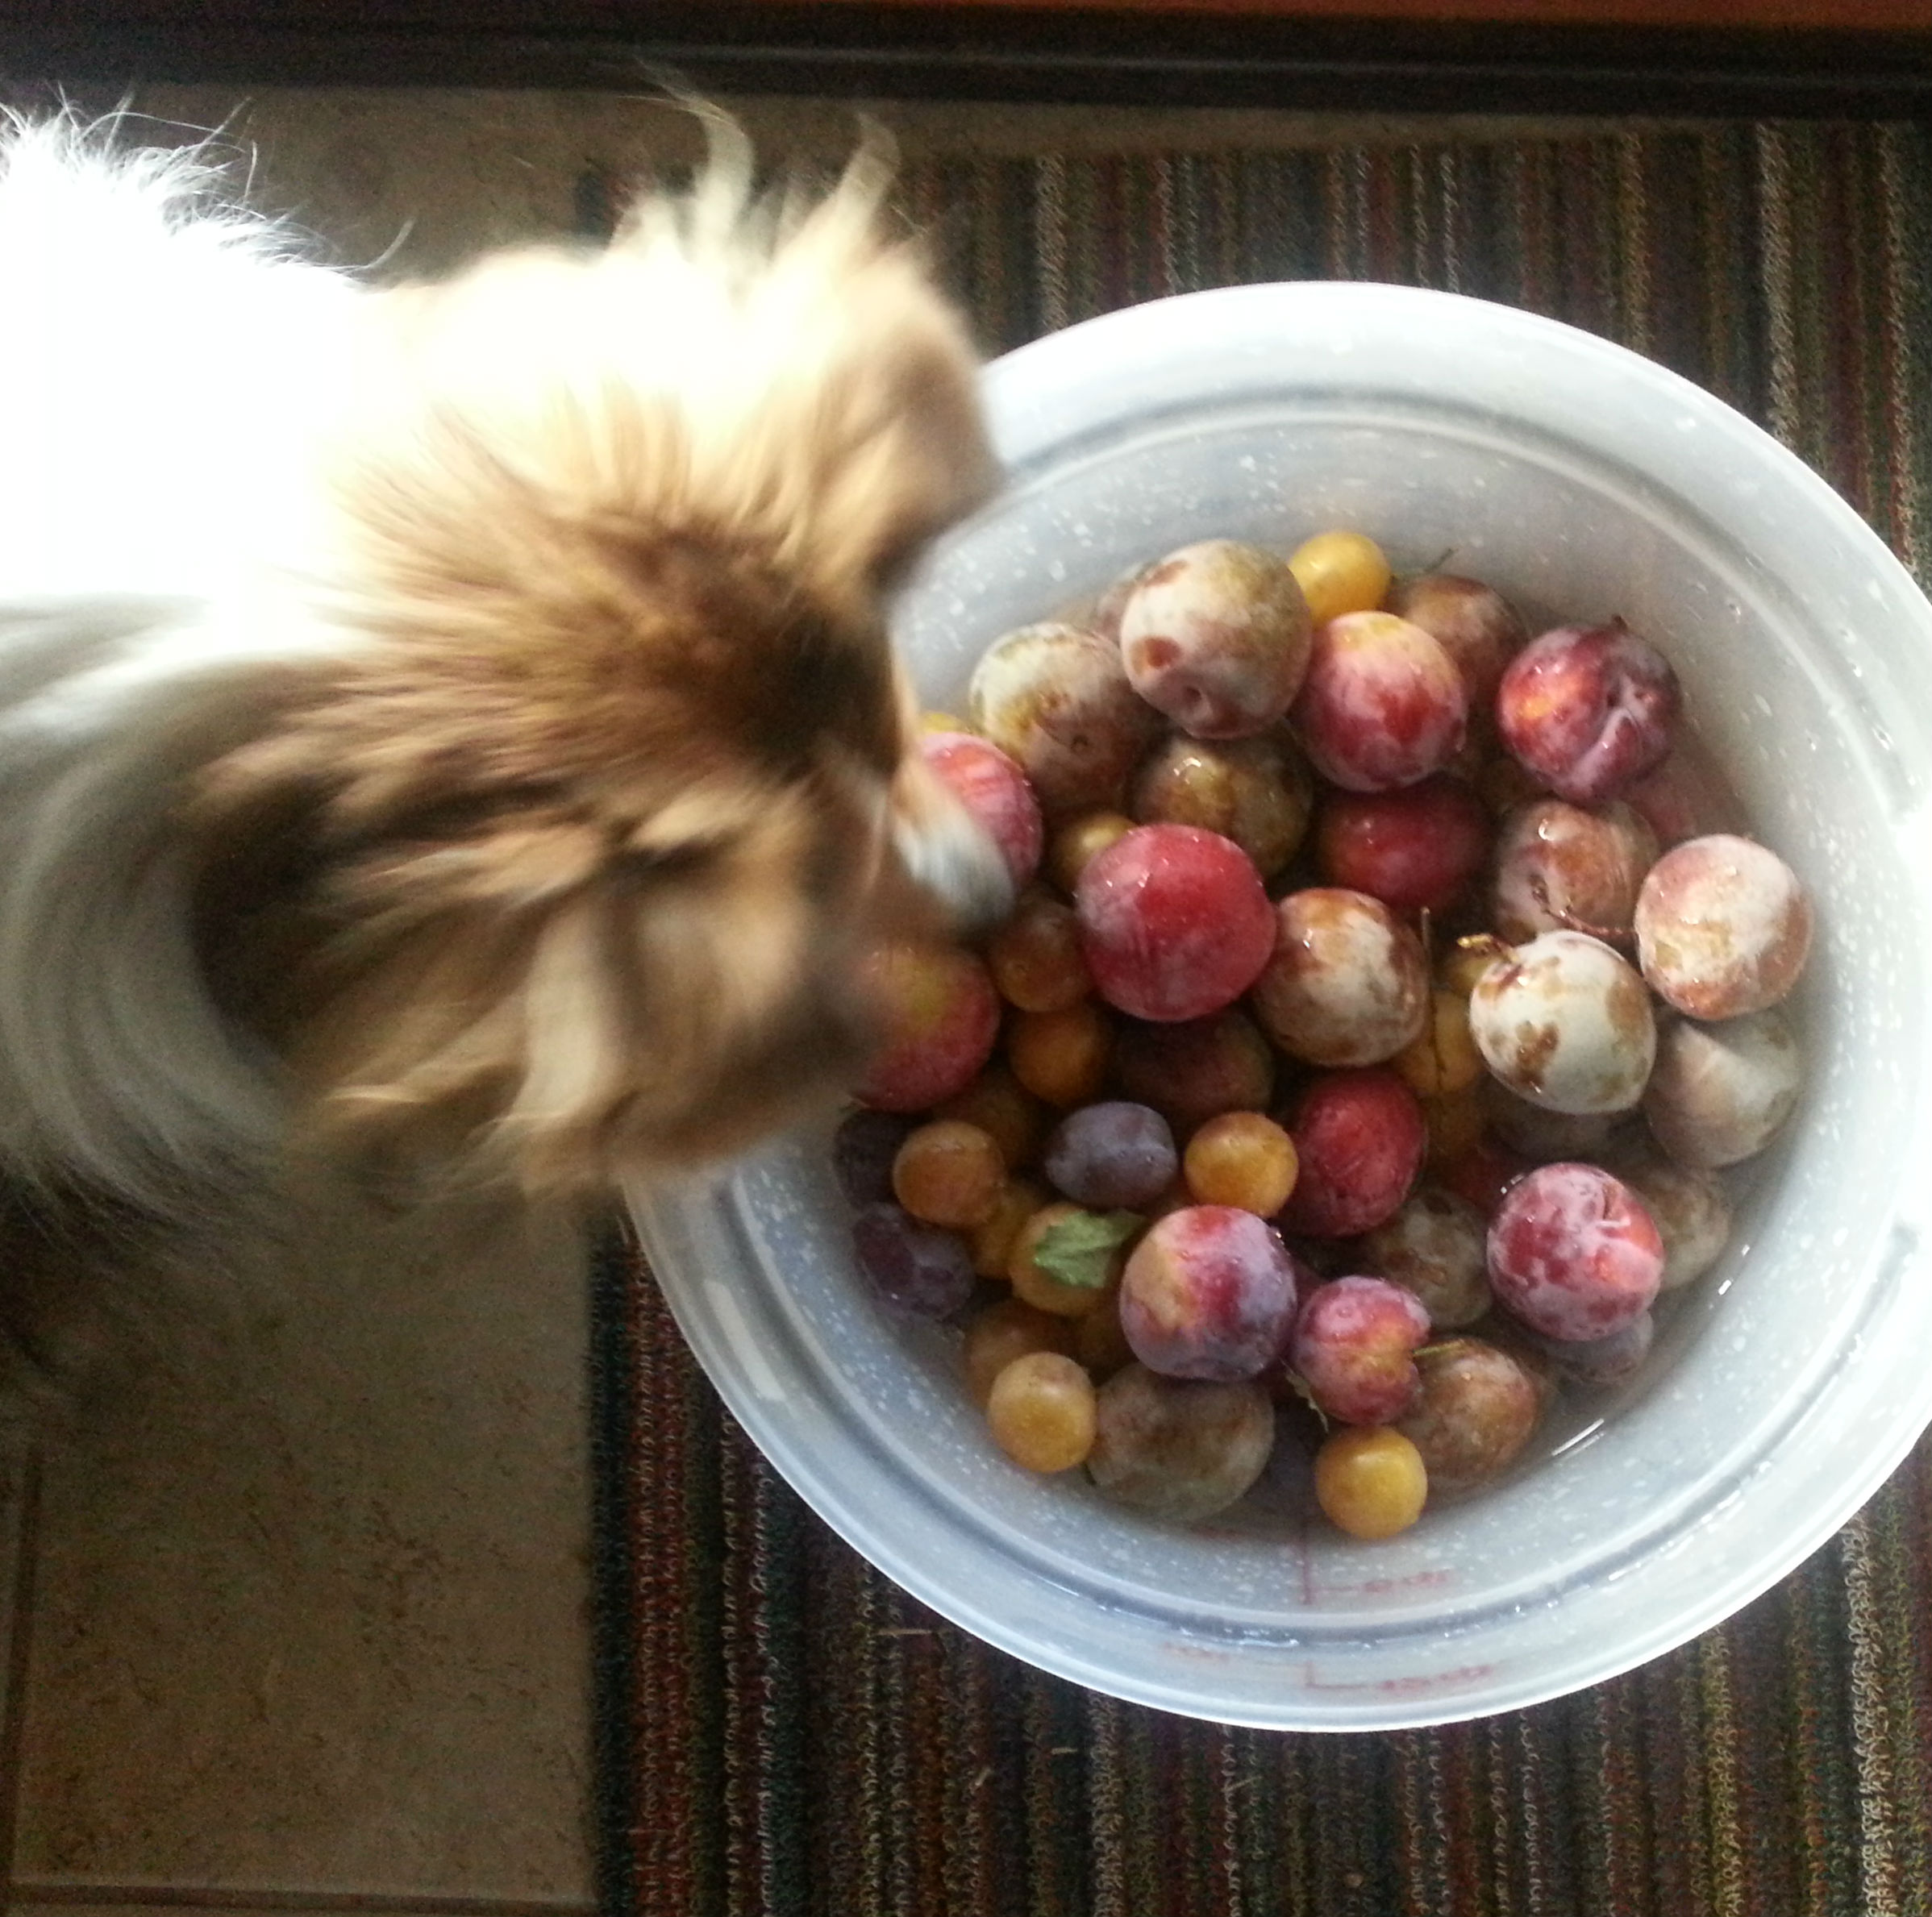
Plums
On September 27, 2014 by sixtyacrebakerThe weather is turning. This morning we picked the almost last bit of plums. Scout is a good early morning companion; she loves fruit as a treat. These bright little orbs, appear to her, to be a bucket of balls. She is very attentive her inspection flawless