Red Hot Apples
On January 30, 2019 by Christy LarsenMy husband has a
Some time ago we were eating lunch at
It so happens that I am a bit of a
I used standard poaching technique as you would do for pears. Instead of wine, spices, and zest, I used a bag of red-hots.
who knew?
After preparing the warm crimson bath, I thought to check the internet and there are quite a few recipes for cinnamon apples {many using red hots} so I figured I was on the right track.
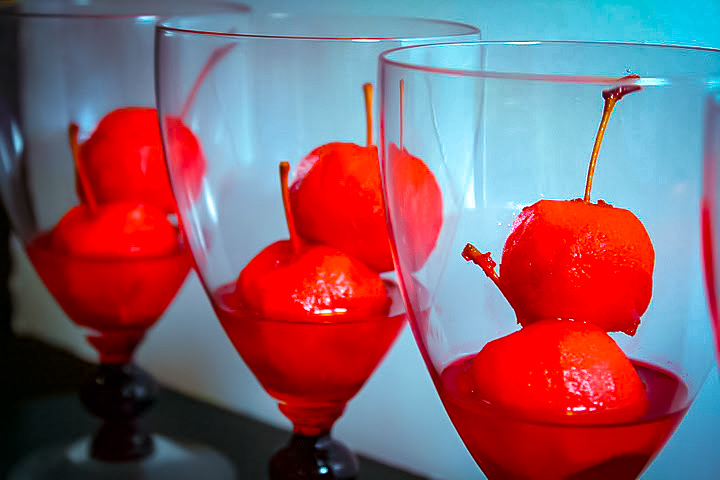
I imagine these would be beautiful canned in their own syrup, warmed over ice cream, or as an oversized “cherry” crowning a soft warm chocolate cake
Or you can enjoy as we do, one by one; the soft sourness of the crab apple paired with the sticky sweet of the red hot is a lovely combination.
red-hot apples
2 cups granulated sugar
2 cups water
1-14oz bag red hots
pinch of kosher salt
a dozen or so crab apples, peeled (you can core from the bottom if you like
Place the sugar, water, red hots and salt in a heavy pot. heat over medium heat, stirring occasionally to ensure the red hots melt properly (they tend to stick to the bottom of the pan). Once everything is melted, bring the mixture to a simmer and gently plop in the apples. Let simmer for about 15 minutes (these soften quickly, so pay attention). Remove apples and place in a shallow storage pan, cover with hot syrup. Let cool a bit, then store in the refrigerator.
*note…there is quite a bit of extra syrup when all is said and done. you can use it to make more apples, or you can put it in a jar and use it for cocktails.
ps. I took a few of these and put them in a pickling brine with mustard seed and star anise and they made a nice condiment for pork.

Boxing Day Pate {chicken liver pate}
On December 26, 2017 by Christy LarsenI’ve celebrated boxing day a few times. In my first experience of “celebrating”, while living in the UK, I found myself going from store to store in my village; finding locked door and closed signs. Even with mail delivery two times a day, I didn’t get the memo that commerce ends when Christmas celebrations begin.
Boxing day is a lovely tradition and much more meaningful than half-off sales and crowded malls.
This simple pate rounds out a simple buffet. Or if you fancy yourself a bit more posh, a nice glass of champs, a cool jar of caviar, and this on a silver tray would have the Queen bowing to you.
Chicken Liver Pate
1/4 cup shallots–finely diced
1/2 cup salt pork –diced
2 large garlic cloves–smashed but kept whole
2 Tbs olive oil
1 lb chicken livers–well trimmed
1 cup chicken broth
leaves from 1 sprig thyme
pinch black pepper
1 stick butter
3 generous tablespoons cognac
In a saute pan with non-sloping sides, heat the olive oil and toss in the garlic, the shallots and the salt pork. Cook on low until the shallots begin to soften. Wash and dry the livers. Toss them into the shallots and oil and let brown, but don’t cook all the way through. This will only take a few minutes. Toss in the thyme and black pepper, then pour in the chicken broth. Cover the pan and let cook until the liver is cooked through and everything else is softened. Remove from heat and immediately tip everything into a food processor. Add the butter in chunks and process until you have a nice thick paste. Pour through a fine sieve into a clean bowl. Stir in the cognac and then pour into ramekins or gifting jars. For a nice presentation, you can top with clarified butter and a fresh sprig of thyme.
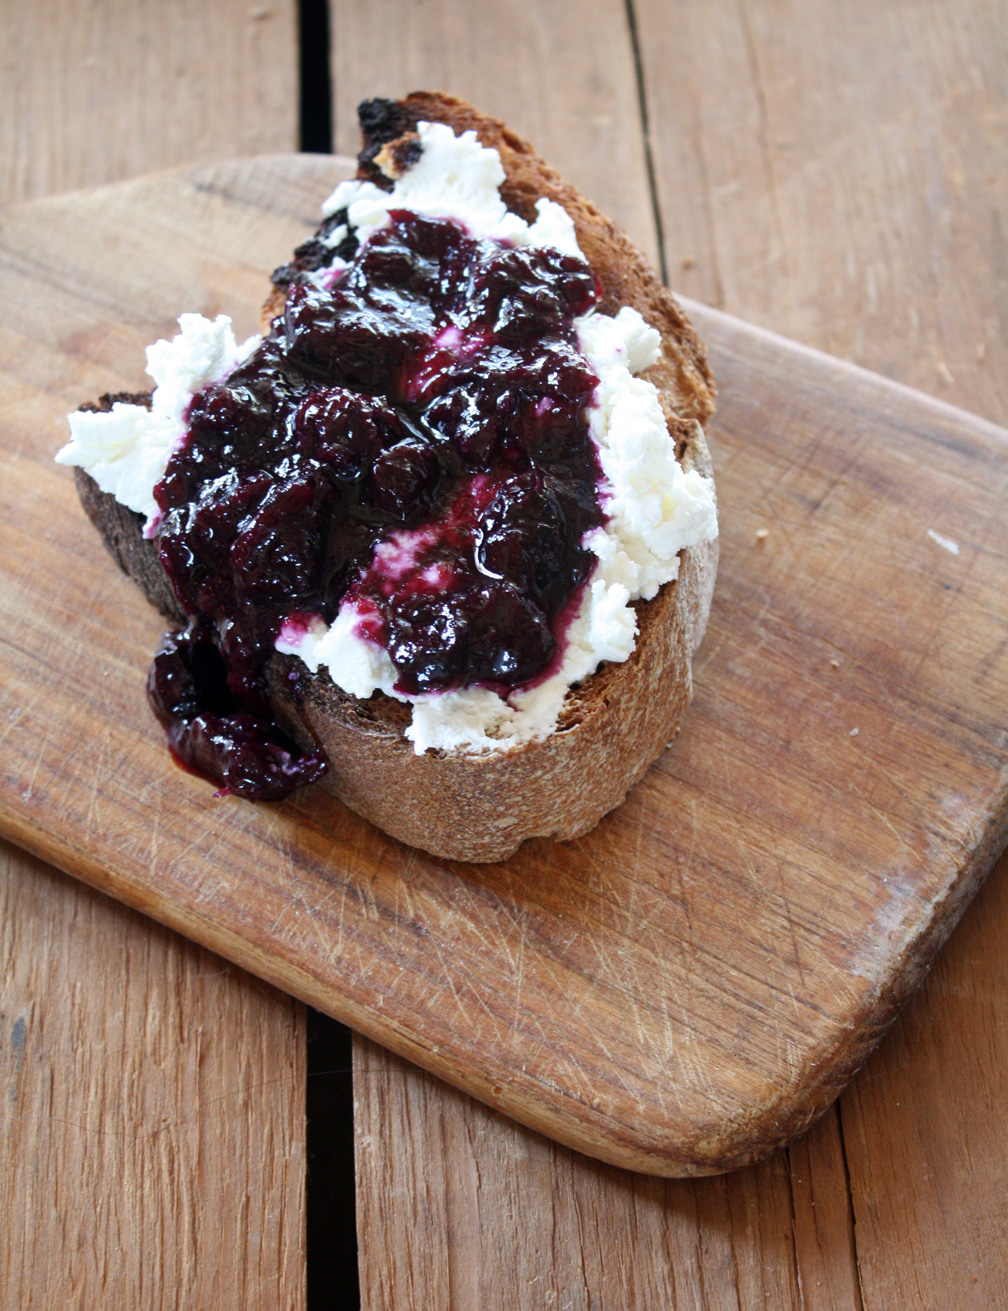
Blueberry Grapefruit Jam
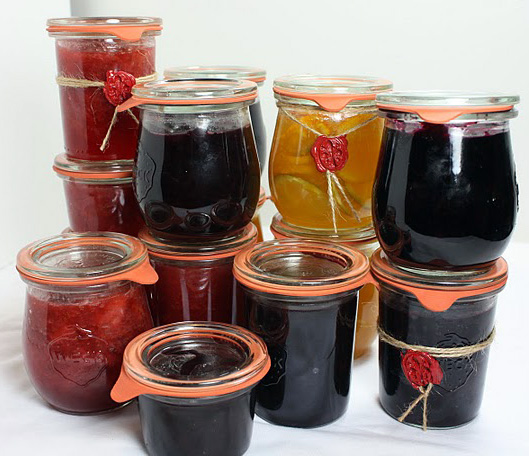
On October 8, 2015 by sixtyacrebakerI have a freezer full of summer fruits; gathered in their peak and frozen to preserve freshness. It is my own secret garden. This jam combines the summer goodness blueberries hold, with beautiful winter grapefruit. I love it spooned onto toast, but I also have been using it as topping for cheesecake, filling for my homemade pop tarts,and as a delicious swirl in my morning yogurt.
blueberry grapefruit jam
1 tsp grated fresh ginger
2 grapefruits–flesh only
12 cups blueberries–fresh or frozen
1 tsp cardamom
generous pinch salt
3 cups sugar
1 pouch pectin
Slightly mash the blueberries and place in a heavy pot. Add the sugar, salt, ginger, grapefruit segments and an juice you can capture, and cardamom. Bring to a boil, reduce heat and let simmer about 5 minutes. Increase heat and bring to a boil. Stir in the pectin and boil for a full 60 seconds. Turn off heat and place in sterilized jars. Process for long term storage. Use the ball canning guide for time and process </s[an>
Quince Fruit Leather
On December 5, 2014 by sixtyacrebakerAs a kid, I brought a sack lunch to school every day…as did most of my classmates. What I would never find packed in my lunch were modern day snack foods. I was always trying to trade up for fruit roll-ups. Oh how I loved them. The whole thing…the sound the leather made while being ripped off its backing. Eating it piece by piece…or better yet…making a dense chewy mini roll-up which would burst with flavor at every gnash. Apricot was always my favorite. I would trade my best halloween candy for a roll of apricot.
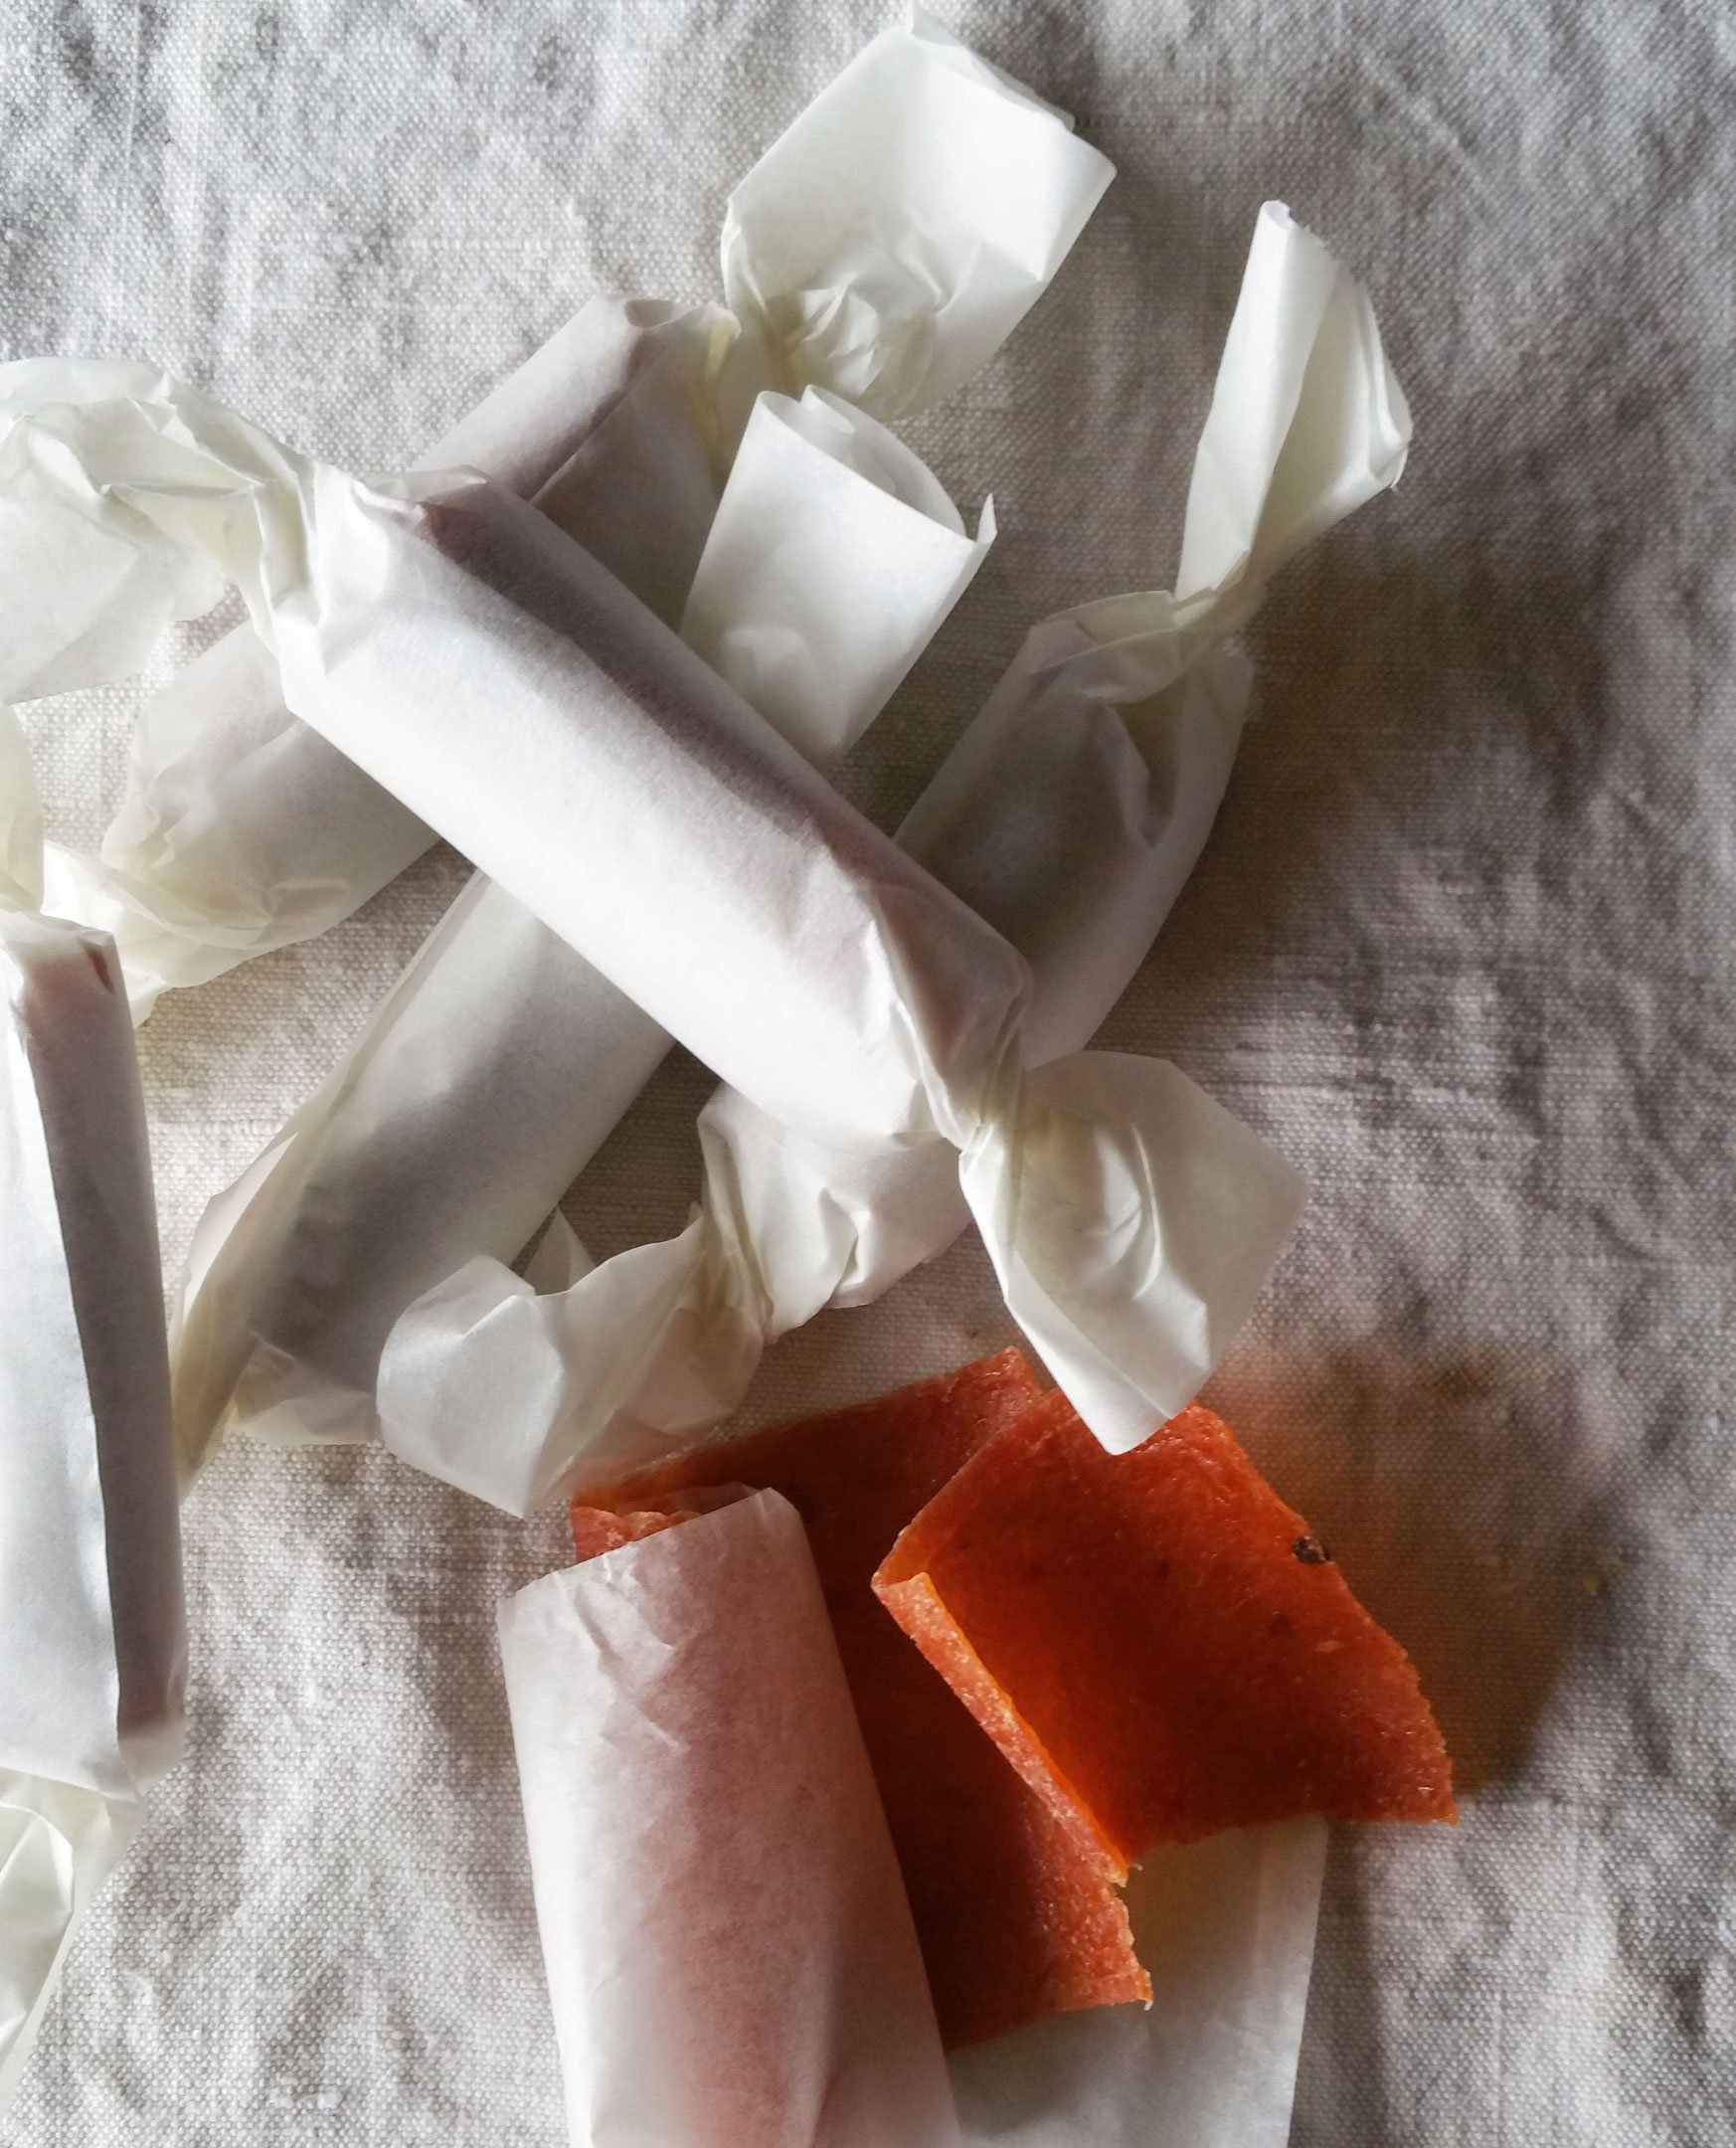
I learned to make fruit leather in fancy french culinary school. It was a bit of a production; mostly because it was fancy culinary school. Making fruit leather is simple and easy, and extremely satisfying. I love it because it gives a use for the “dregs” from another product: the pulp from jelly making, juicing, and simple syrups. I made a lovely quince sorbet as a palate cleanser for our Thanksgiving dinner {recipe coming soon}. I boiled down the beautiful fruit and extracted a lovely pink elixir. At the end of it all, I was left with a bundle of fruit. It was a bit chunky, and was lacking sweetness. With just a little bit of flavor tweaking, and a good dry out in the dehydrator, I was able to make a roll-up that was better than the memory of my youth and cheaper than culinary school tuition. Once you have the method down, you can make leather with all your favorite flavors. You also will be glad to know that having a fancy dehydrator, while a great convenience, is not required to make this tasty treat.
Quince Fruit Leather
2-3 lbs quince
juice of 1/2 lemon
seeds from 3 cardamom pods
1″ ginger root, peeled and smashed
1/2 cup granulated sugar (optional: I find that it helps bring out the pink color of the quince when cooking)
piece of parchment paper
additional sweetener (sugar, brown sugar, honey, agave; your choice)
ground cardamom, ground ginger
Wash fruit well and scrub off all fuzz from exterior. Chop quince into chunks (about 2″ each). Place in a heavy bottom pot and cover with water. Add lemon juice, cardamom seeds, ginger root. Cut your parchment paper into a round large enough to cover your pot Cut a small hole in the middle of the parchment round for venting. Place the parchment snugly on top of the quince. The purpose of the parchment is to keep the fruit submerged under the liquid. Cook until the fruit is very soft and falling apart and the color has changed from yellow to pinkish. The longer you cook, the more color you will get from the fruit. Blend everything together using an immersion blender, blender, food processor or food mill. Drain using a cheesecloth lined sieve or jelly bag. If you don’t want to drain the liquid out, toss the whole mess back into the pot and cook off most of the liquid. You don’t want the mixture to be completely dry, but you don’t want it to be so liquidy that you can drink it. Whether you drain or don’t drain, place the mixture you will turn into leather back onto the pot and taste for sweetness and spice. Don’t over sweeten. You will be dehydrating, which will make the flavor extra bold. Add enough sweetness and spice to highlight the flavor. You may want to add a bit more lemon juice at this point as well. Just cook long enough for the sugar to melt into the mixture.
You can use the drained for cocktails, homemade sodas, sorbet, over fruit, soaked in pound cake…
Prepare your dehydrator or sheet pans. If you have a dehydrator, line the mesh sheets with plastic wrap. If using oven, line with silpat or heavy plastic wrap. Using an offset spatula spread an even 1/8″ thick layer of fruit paste onto your prepared surface. If using a dehydrator or oven use a setting of 135-140F. It can take anywhere from 6-12 hours. Start checking up on it at 6 hours. The paste should have lost its stickiness, but not be hard. If it is hard, while still warm, it will be fruit crackle when it cools (which is still edible and yummy). I like to turn the dehydrator off at maximum of 8 hours and let the leather sit for a few hours or overnight.
Store in an airtight container…or fancy wrap them like the gift they are.
Dried Persimmons
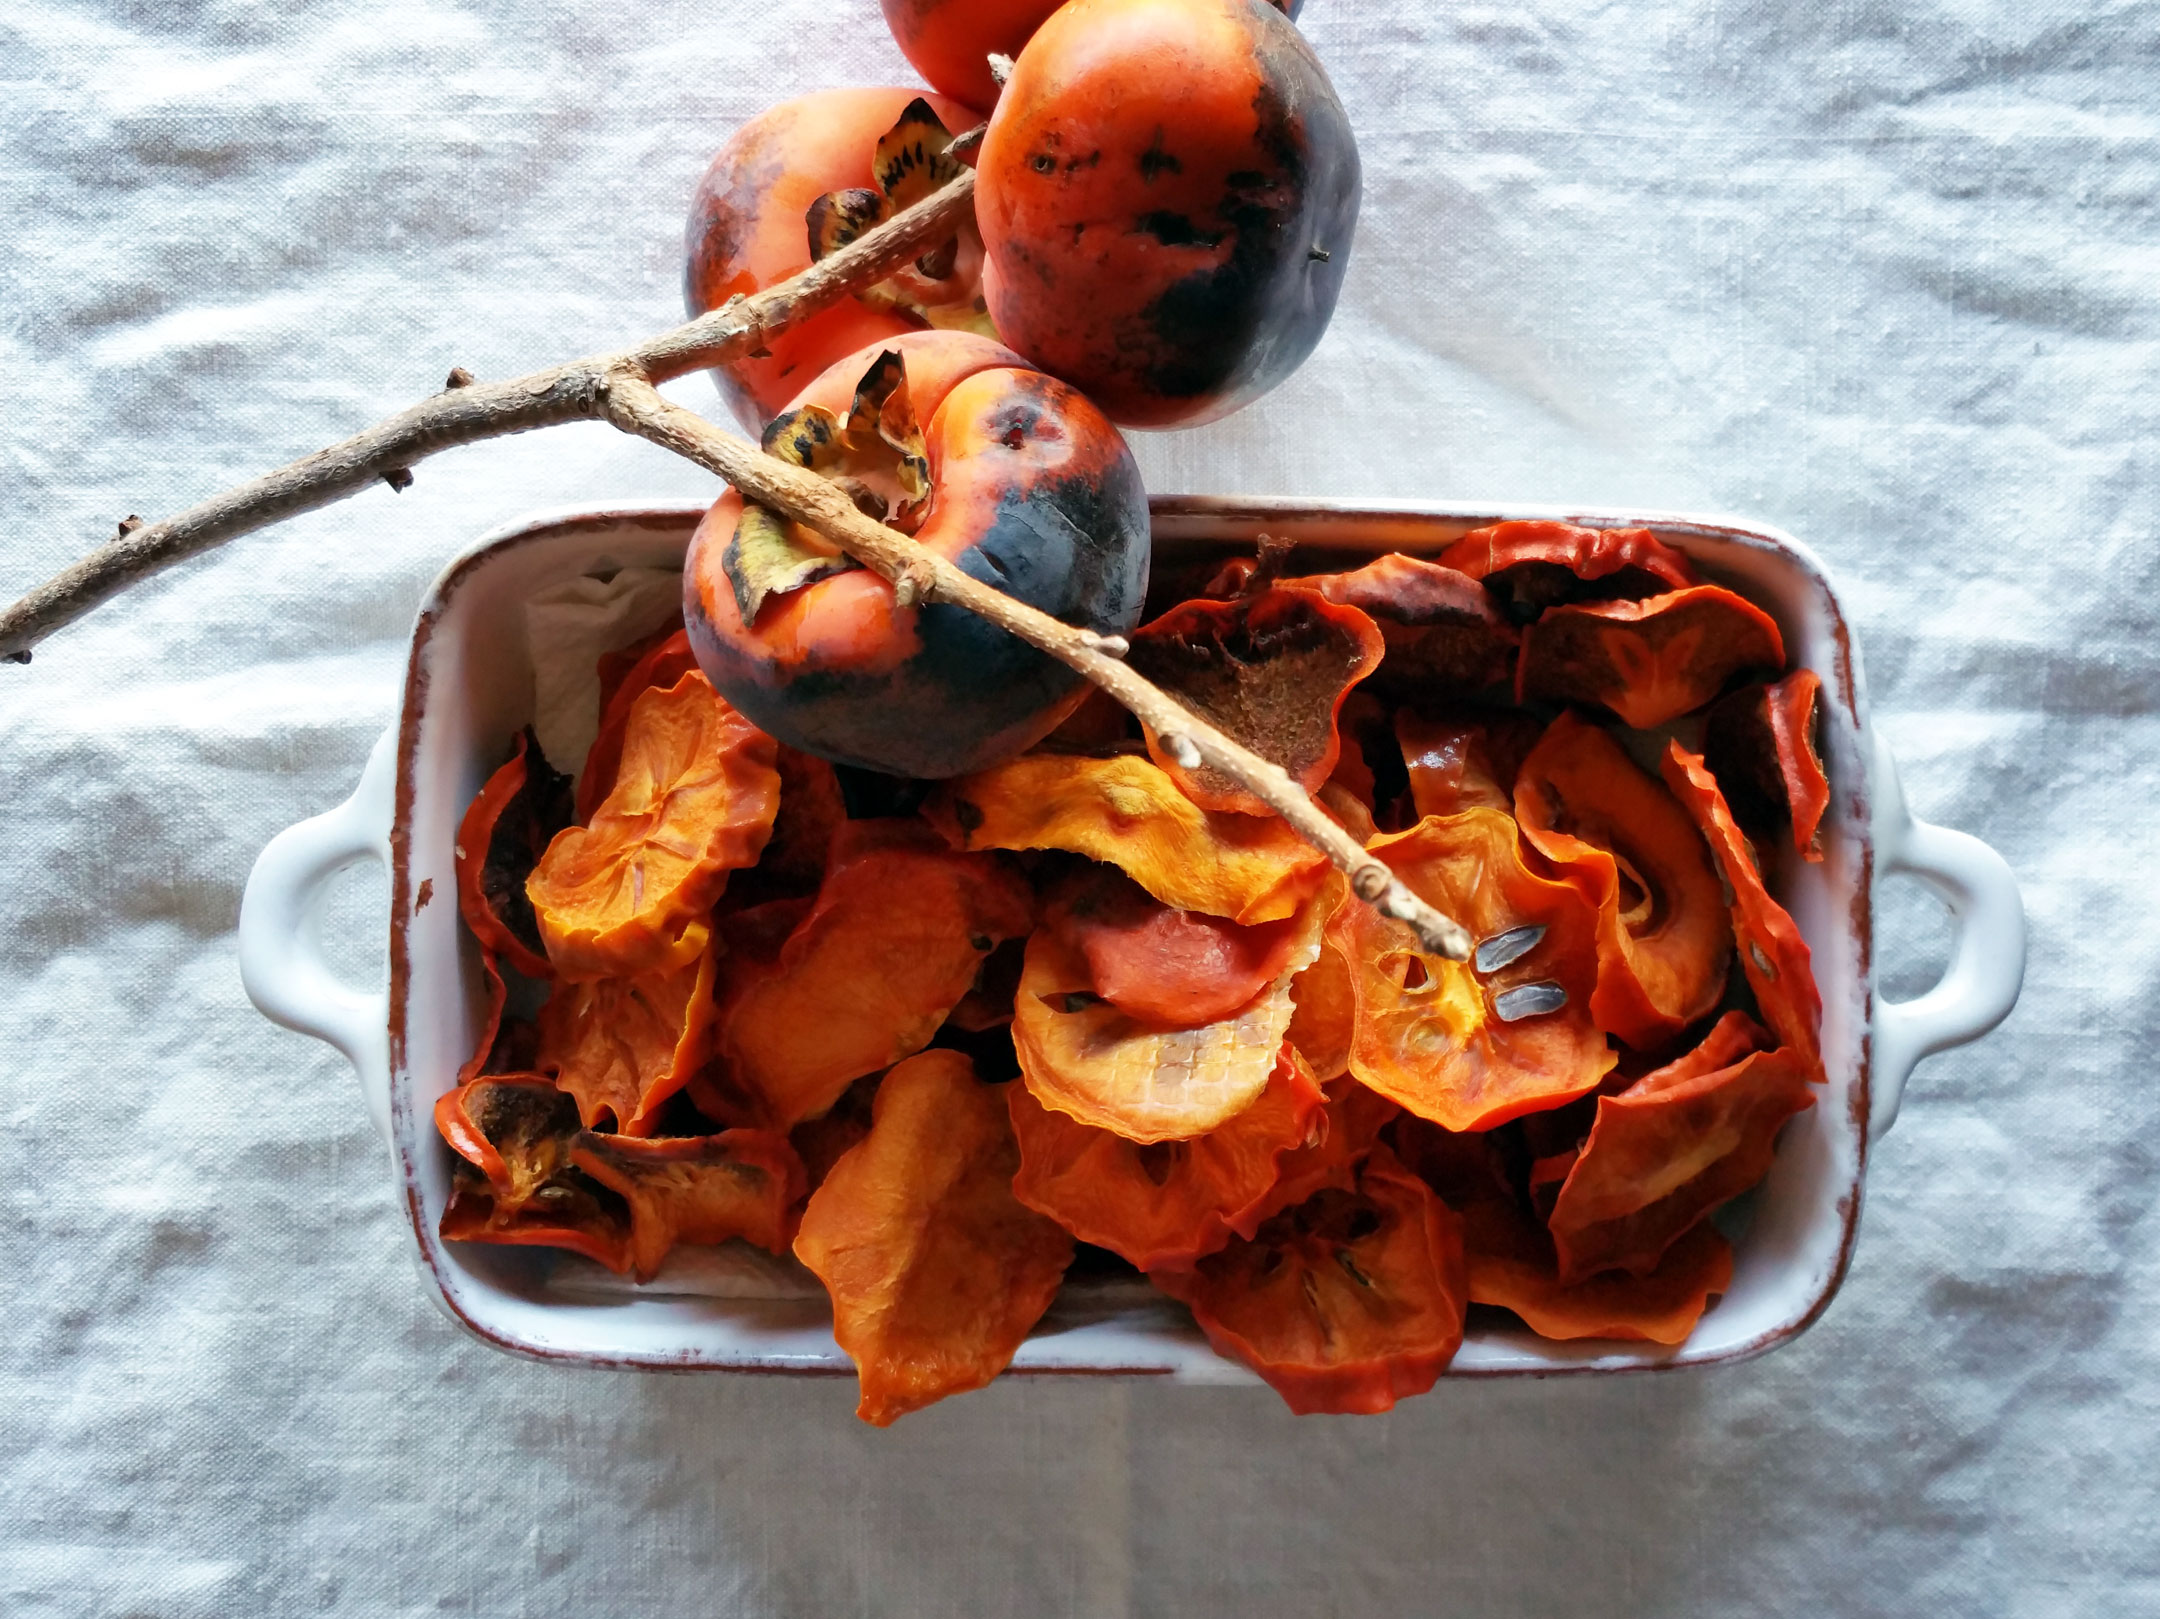
On November 26, 2014 by sixtyacrebakerPersimmons seem to be a bit misunderstood. Some varieties need to ripen on the tree and be very soft, otherwise they are astringent, while others can remain very firm and be sweet. Personally, I prefer Fuyu persimmons. They do well in the area where we live, and grow abundantly through the fall. Firm and sweet, they are delicious off the tree, sliced in salads, frozen and enjoyed as an icy treat, and dehydrated into sticky sweet submission. To dry persimmons, you do not need a dehydrator, but it helps. If using a dehydrator, simply slice the persimmons in 1/4-1/2″ slices and set on the drying tray. Turn the heat of the machine to 130-135F for about 8 hours. Look at the fruit after about 6 hours to check on progress, they may be done. If not, check every hour until they are still a bit supple, but not wet. Leave to cool in the dehydrator for another 2 hours or so…or overnight.
If using oven: turn oven to lowest setting–preferably 130-135 if you can get it that low. Line your baking sheet with a silpat or parchment paper. Proceed as described above.
You may also choose to dry the persimmons whole. You can do that by tying baker’s twine, or other type of string to the stem of the persimmon. Tie one persimmon onto each end of the string. Prop a broomstick or other apparatus in a warm window sill. Hang the persimmon on the pole/broomstick/etc. The strings will hang over the middle with a persimmon on either side. After a day or two, give each persimmon a little massage, a gentle squeeze on all sides. Continue doing this each day until the persimmon has completely dried out and formed a bit of a sugary crust on the outside. This may take several weeks and is nearly impossible in damp conditions. If the fruit shows signs of mold, throw the fruit away.
Dried persimmon makes a wonderful sweet as candy snack. It is also great in granola, oatmeal, and trail mix. You can reconstitute with water for use in salads or tagines. Soak in wine and spices for a compote. The uses are almost endless
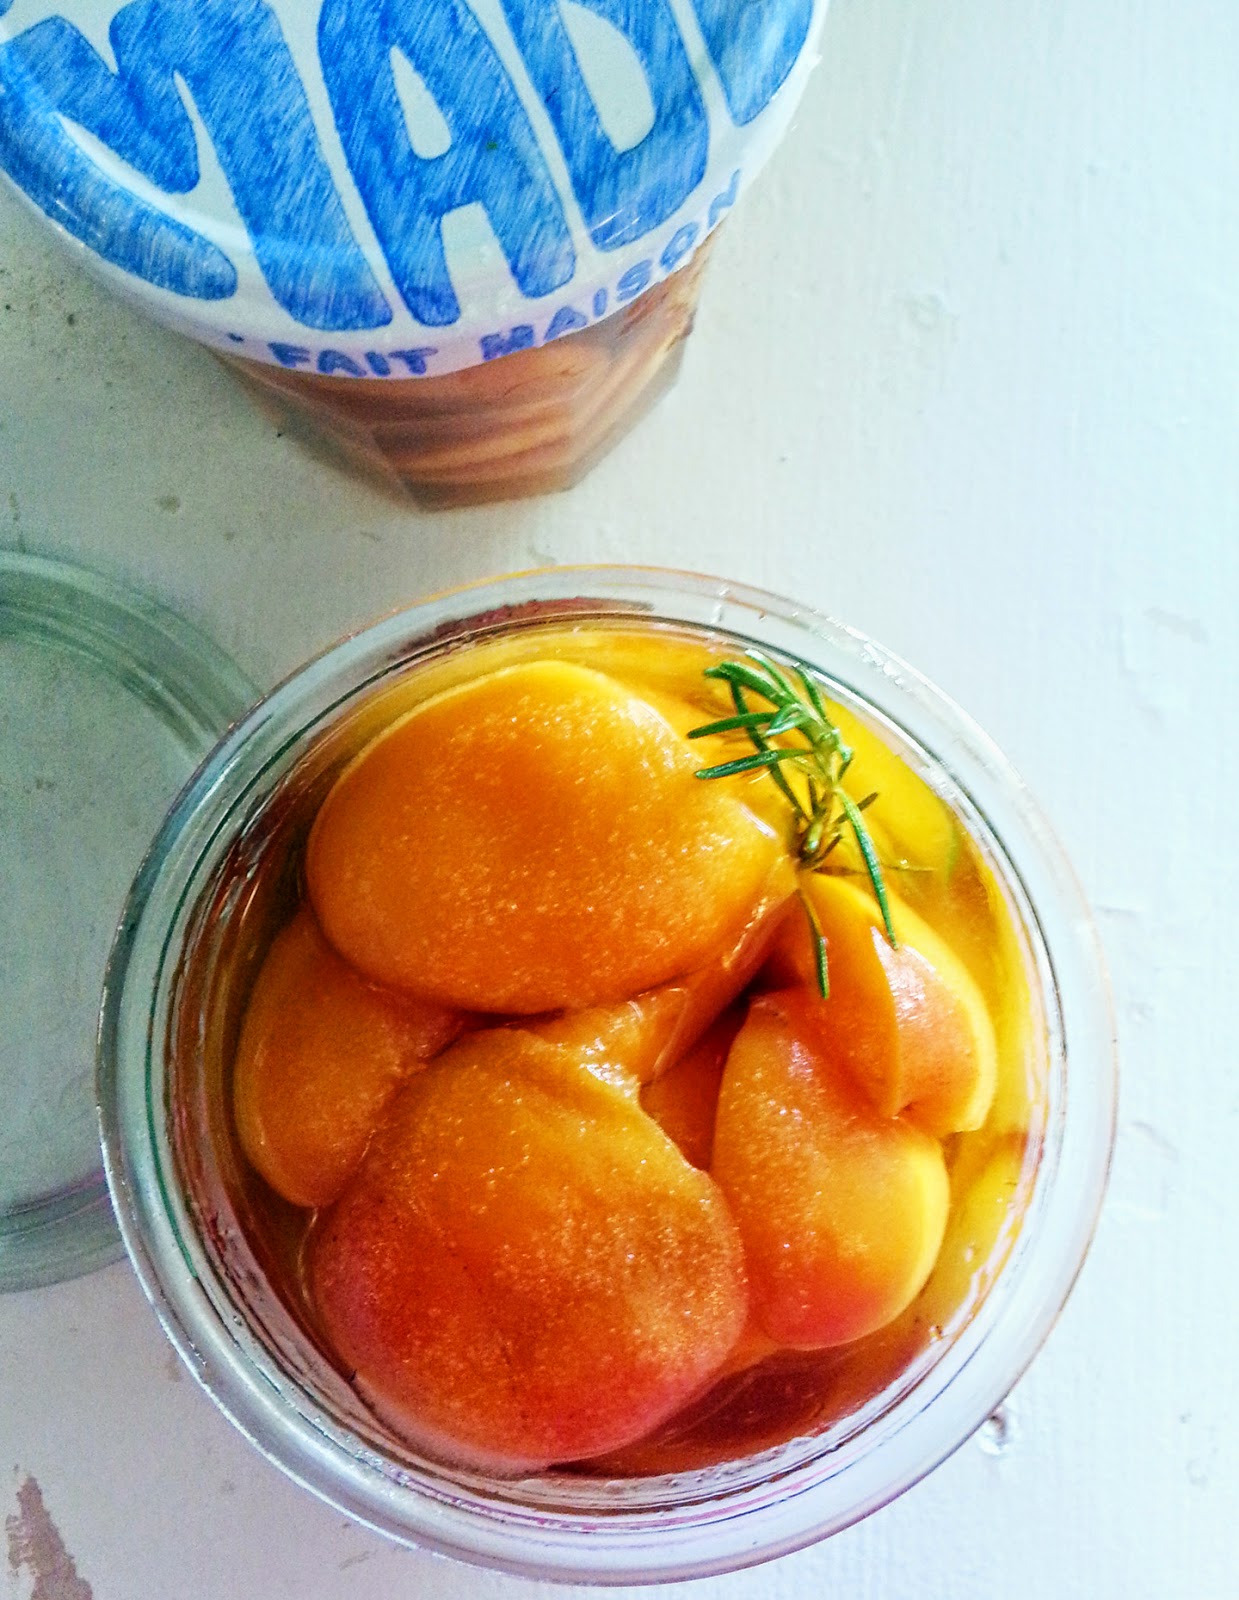
brandied apricots
On June 21, 2014 by sixtyacrebakerWe picked a bucket load of apricots the other day, and i have been working to preserve them for our winter larder. This year I have decided to brandy some. Which is a fancy way of saying,infusing with brandy. I’ve loaded my jars with freshly washed fruit (sliced in half and pitted), a sprinkle of sugar (about a tablespoon per jar),and poured on the brandy. In some i added a few extra bits, rosemary in one, cinnamon stick in another, vanilla bean in a third. There are so many lovely combinations to try. I am popping these onto a shelf, in a cool pantry. The fridge would be a great place too-if only i had room in the fridge
Blueberry-Rhubarb Margarita Jam
On June 16, 2013 by sixtyacrebakerWeekly, I drive past a blueberry farm. Most days, wishing for the season. Some days, mourning the end of summer. The day the open sign pops up, on our little stretch of highway, I stop in. I continue this routine, each week, until blueberries are no more. I hoard more berries than our small family can eat, out of hand. But not more than we can eat, prepared. I love to pair sweet blueberries with rhubarb from our garden for this delicious not too sweet jam.
Blueberry Rhubarb Margarita Jam
3 pints blueberries
8 oz rhubarb–chopped
2 cups granulated sugar
juice of 10 key limes
1/2 tsp kosher salt
1/4 tsp ginger
juice of 1/2 grapefruit (plus/minus)
1 oz tequila (can add up to 2 oz)
Dump blueberries rhubarb, sugar, key lime juice, salt and ginger into your jam pot. Cook on med-low heat, stirring occasionally, until you have a nice jam consistency (about 25-30 minutes). Taste for sweetness. Add at least 1/4 grapefruit juice to both adjust sweetness and for flavor. Cook for 5 more minutes and check again for sweetness. add more grapefruit if desired. pour in tequila and cook at least 5 minutes more. Test jam for firmness on a frozen plate. **i like my jam to be a bit runny. You do not need pectin for this jam to firm up. You can cook it to come out firmer, but be careful not to caramelize it. Place in sterilized jars and refrigerate or if you are a seasoned canner, process for longer storage.
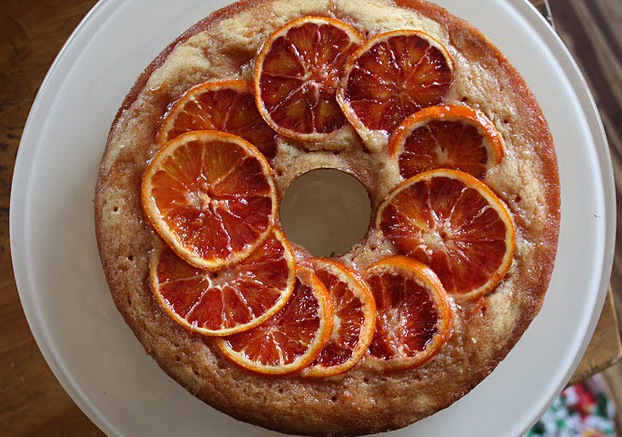
Sugared Orange Tea Cake
On April 20, 2011 by sixtyacrebakerHey. Remember those oranges that I sugared and canned? Remember how I promised to make lots of good things with them. Well, I don’t break a promise. So here is my first creation; a gorgeous and moist cake perfect with a cup of tea
Sugared Orange Tea Cake
1c + 2Tbs unsalted butter–room temp
2 cups all purpose flour
1 tsp baking powder
1/2 tsp kosher salt
1/2 cup dark brown sugar
1/2 cup granulated sugar
4 large eggs–room temperature
1 tsp vanilla
10-12 sugared oranges
orange syrup (from oranges)
Whisk together the flour, baking powder, salt and baking powder in a bowl. In a mixer fitted with a paddle attachment, beat the butter and sugars until light and fluffy. Add the eggs one by one mixing thoroughly after each one, careful to clean the sides of the bowl as you go. Add the vanilla and beat once again. Make sure the batter is thoroughly whipped before stirring in the dry ingredients. Once you add the dry ingredients, be careful not to over mix. Pour into prepared cake pan (greased and floured). Smooth the top and lay the oranges on top, overlapping a bit. Bake at 325 until a toothpick inserted in the center comes out clean, about 50 minutes. After cake is removed from the oven, but not yet cooled, pour a bit of the orange syrup on top, allowing it to completely soak in before adding more. Do not add more than 1/3 of a cup.
*you can add a bit of grand marnier to the syrup if you like. you can also make a nice icing of confectioner’s sugar with the orange syrup and drizzle for a lovely presentation.
allow to cool completely before removing from cake tin.

Salt Preserved Oranges
On March 4, 2011 by sixtyacrebakerI hadn’t yet been to Morocco when I first became seduced by tagine; meat braised into submission in the company of dried fruit, toasted nuts, exotic spices, and preserved citrus. Preserved lemon can be plucked off the shelf of your favorite fancy grocery. However preserved oranges are less likely to procured at your local. I have found preserved oranges offer a slightly sweeter note that couples well with headier spices like cinnamon, anise, nutmeg, and cardamom. Preserved oranges are easy to make at home and use few ingredients. Within 10 minutes you will be transported to a far away land full of culinary possibility.
Preserved Oranges
smallish thin rind oranges
kosher salt
pink peppercorns
star anise
bay leaf
Thoroughly wash and scrub the oranges removing stems. Cut into fourths without allowing the knife to cut all the way through. Cut approximately 2/3rds through the fruit. Generously salt the flesh of the orange Using a sterilized jar with proper fitting lid begin to press the oranges into the jar. Pour additional salt in between the layers of oranges. Periodically drop in peppercorns using no more than 10 in your entire jar. Continue doing this until the jar is well packed and full. Squeeze orange juice to fill in the gaps. Slide in a bay leaf and star anise. Add a bit more salt, then seal. Turn upside down on the shelf of the fridge overnight. The next day, turn it back right side up. If you see a gap, fill it with oranges, salt and orange juice. Close it up and place back in the refrigerator. Let “steep” for 4 weeks. These will keep for about 6 months. Rinse before using. Use as you would preserved lemons.